Table of Contents
Advertisement
Available languages
Available languages
Quick Links
Cat. No. / No de cat.
2982-20
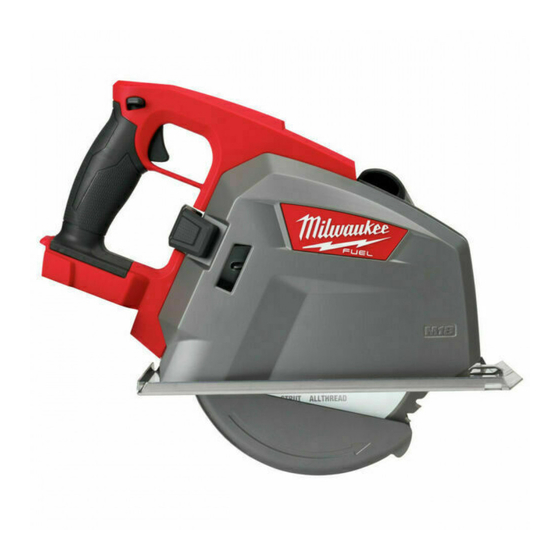
M18 FUEL™ 8" METAL CUTTING CIRCULAR SAW
SCIE CIRCULAIRE POUR MÉTAUX DE 203 mm (8") M18 FUEL™
SIERRA CIRCULAR DE CORTE PARA METAL DE 203 mm (8")
DE M18 FUEL™
WARNING
WARNING
AVERTISSEMENT
AVERTISSEMENT
comprendre le manuel.
comprendre le manuel.
ADVERTENCIA
ADVERTENCIA
To reduce the risk of injury, user must read and understand operator's manual.
To reduce the risk of injury, user must read and understand operator's manual.
Afin de réduire le risque de blessures, l'utilisateur doit lire et bien
Afin de réduire le risque de blessures, l'utilisateur doit lire et bien
Para reducir el riesgo de lesiones, el usuario debe leer y entender el manual.
Para reducir el riesgo de lesiones, el usuario debe leer y entender el manual.
OPERATOR'S MANUAL
MANUEL de L'UTILISATEUR
MANUAL del OPERADOR
Advertisement
Table of Contents

Related Manuals for Milwaukee M18 FUEL 2982-20


Summary of Contents for Milwaukee M18 FUEL 2982-20
- Page 1 OPERATOR'S MANUAL MANUEL de L'UTILISATEUR MANUAL del OPERADOR Cat. No. / No de cat. 2982-20 M18 FUEL™ 8" METAL CUTTING CIRCULAR SAW SCIE CIRCULAIRE POUR MÉTAUX DE 203 mm (8") M18 FUEL™ SIERRA CIRCULAR DE CORTE PARA METAL DE 203 mm (8") DE M18 FUEL™...
-
Page 2: General Power Tool Safety Warnings
GENERAL POWER TOOL • Do not overreach. Keep proper footing and balance at all times. This enables better control SAFETY WARNINGS of the power tool in unexpected situations. Read all safety warnings, instruc- WARNING • Dress properly. Do not wear loose clothing or tions, illustrations and specifica- jewelry. - Page 3 • Under abusive conditions, liquid may be ejected - If the blade becomes twisted or misaligned in the cut, from the battery; avoid contact. If contact acciden- the teeth at the back edge of the blade can dig into the tally occurs, flush with water.
-
Page 4: Functional Description
Do not use this tool if you do not understand these operating instructions or you feel the work is beyond your capability; contact Milwaukee Tool or a trained professional for additional information or training. -
Page 5: Specifications
1. Operating Temperature ......0°F to 125°F • If the guard still does not immediately spring back * See "Applications" for requirements when cutting thicker into place, contact a MILWAUKEE service facility materials. for repairs. ASSEMBLY... -
Page 6: Installing And Removing Blades
Installing and Removing Blades Adjusting Depth 1. Remove battery pack. To remove, turn 2. To adjust the depth of the cut, hold the saw by the counterclockwise handle and loosen the depth adjusting lever by pulling it up away from the shoe. Spindle lock button 1. -
Page 7: General Operation
OPERATION • Use extra caution when sawing into existing walls or other blind areas. The protruding blade To reduce the risk of injury, always WARNING may cut objects that can cause kickback. wear proper eye protection marked • Adjust the cutting depth to the thickness of the to comply with ANSI Z87.1. -
Page 8: Electric Brake
Chips, dirt, and debris can cause WARNING the lower guard to hang up at any time. Return the saw to a MILWAUKEE service facility for cleaning and testing. To reduce the risk of electric shock, This tool is intended for cutting unhardened ferrous WARNING metal and non-ferrous metal. -
Page 9: Troubleshooting
Contact a MILWAUKEE defects in material and workmanship. Subject to certain exceptions, service facility for all other repairs. MILWAUKEE will repair or replace any part on this power tool which, after examination, is determined by MILWAUKEE to be defective Maintaining Tool in material or workmanship for a period of five (5) years after the date of purchase unless otherwise noted. -
Page 10: Sécurité Électrique
Selon les conditions, porter aussi un masque anti- RÈGLES DE SÉCURITÉ GÉNÉRALES poussières, des bottes de sécurité antidérapantes, RELATIVES AUX OUTILS ÉLECTRIQUES un casque protecteur ou une protection auditive afin Lire toutes les consignes de réduire les blessures. AVERTISSEMENT de sécurité, consignes, •... -
Page 11: Utilisation Et Entretien De La Batterie
•Ajuster la profondeur de coupe selon l’épaisseur pour des applications pour lesquelles il n'est pas de la pièce à couper. Moins d’une dent complète des conçu peut être dangereux. dents de la lame doit être visible sous la pièce à couper. •... -
Page 12: Spécifications
; et causer un rebond. veuillez contacter Milwaukee Tool ou un professionnel •Redoubler de prudence lors du sciage dans des formé pour recevoir plus d’information ou formation. -
Page 13: Description Fonctionnelle
DESCRIPTION FONCTIONNELLE PICTOGRAPHIE Volts Courant direct Tours-minute á vide (RPM) UL Listing Mark pour Canada et États-unis MONTAGE DE L'OUTIL Ne recharger la batterie AVERTISSEMENT qu’avec le chargeur spéci- fié. Pour les instructions de charge spécifiques, lire le manuel d’utilisation fourni avec le chargeur et les batteries. - Page 14 • Si la garde ne revient immédiatement pas sur place, contacter un centre de service MILWAUKEE à des fins de réparation. Enlèvement et installation du conteneur d’éclats NE JAMAIS utiliser l’outil AVERTISSEMENT si les gardes et le conte- neur d’éclats ne sont pas installés.
- Page 15 MANIEMENT Ajustage de profondeur 1. Retirer le bloc-piles. Afin de minimiser le risque AVERTISSEMENT 2. Pour ajuster la profondeur de la coupe, tenir la scie de blessures, toujours par la poignée et desserrer le levier d’ajustage de porter la protection oculaire appropriée certifiée profondeur en le tirant du patin.
-
Page 16: Fonctionnement Général
à l’autre. Retourner la scie à un centre de service MILWAUKEE à des fins de nettoyage et de testage. Cet outil est conçu pour couper des métaux ferreux qui ne sont pas trempés et des métaux non ferreux. -
Page 17: Dépannage
Coupe de matériaux en angle Lorsqu’on coupe de matériaux en angle, incliner l’outil vers l'arrière afin d’éviter que la garde inférieure se pose sur l’angle. Technique correcte Technique incorrecte Coupe de matériaux fins, minces ou corrugués 1. En commençant à un coin, aligner la ligne de vi- Couper de matériaux fins, minces ou corrugués à... - Page 18 Il faudra retourner l’outil tions indiquent faire une telle chose. Pour toute électrique à un centre de service en usine MILWAUKEE ou à un poste d’entretien agréé MILWAUKEE, en port prépayé et assuré. Une copie autre réparation, contacter un centre de service...
-
Page 19: Seguridad En El Área De Trabajo
ADVERTENCIAS DE SEGURIDAD • Utilice equipo de protección personal. Siempre use protección para los ojos. El equipo de protec- GENERALES PARA LA ción, tal como una máscara contra polvo, calzado HERRAMIENTA ELÉCTRICA antideslizante, casco o protección auditiva, utilizado Lea todas las advertencias ADVERTENCIA para condiciones adecuadas disminuirá... -
Page 20: Mantenimiento
accidentes son ocasionados por herramientas REGLAS ESPECIFICAS DE eléctricas con mantenimiento deficiente. SEGURIDAD PARA • Mantenga las herramientas de corte afiladas y CORTAR METAL SIERRA limpias. Las herramientas de corte correctamente Procedimientos de corte mantenidas con bordes de corte afilados son menos •... - Page 21 Milwaukee Tool o con fricción excesiva, amarre de la hoja y contragolpe. un profesional capacitado para recibir capacitación •Las palancas de ajuste de la profundidad de la...
-
Page 22: Descripcion Funcional
DESCRIPCION FUNCIONAL PICTOGRAPHIE Volts Courant direct Tours-minute á vide (RPM) UL Listing Mark pour Canada et États-unis ESPECIFICACIONES Cat. No............2982-20 Volts.............. 18 CD Tipo de batería ..........M18™ Tipo de cargador ..........M18™ Tr/min. à vide ..........4 000 Tamaño de la hoja .......203 mm (8") Eje ............16 mm (5/8") Profundidad del corte ..0 a 65,1 mm (0 a 2-9/16") Capacidades... - Page 23 NOTA: No retire la brida de la hoja interna o la su lugar, contacte las instalaciones de servicio arandela. El diámetro mayor de la brida interna MILWAUKEE para su reparación. debe ver hacia la hoja. Retirar e instalar el contenedor de virutas 5.
- Page 24 Ajustar la profundidad OPERACION 1. Extraiga la batería. Con el fin de minimizar el ADVERTENCIA 2. Para ajustar la profundidad del corte, sostenga la riesgo de lesiones, siempre sierra por la empuñadura y afloje la profundidad utilice la protección de ojos adecuada indicada ajustando la palanca y jalándola hacia arriba, para cumplir con lo dispuesto en la norma ANSI alejada de la zapata.
-
Page 25: Operación General
Operación general •Mantenga un agarre firme con ambas manos sobre la sierra y coloque los brazos para resistir Siempre sujete la pieza de trabajo fijamente en las fuerzas de contragolpe. Posicione el cuerpo un caballete o banco de la sierra. Consulte las a cualquiera de los dos lados de la hoja, pero no “APLICACIONES”... -
Page 26: Freno Eléctrico
Si intenta cortar sin nivelar centro de servicio MILWAUKEE autorizado. El freno y darle un soporte correcto a la pieza de trabajo, la no es sustituto de la guarda y siempre debe esperar a hoja se podrá... -
Page 27: Resolución De Problemas
Usando la parte frontal de la zapata y la batería, a un centro de servicio MILWAUKEE. como punto de bisagra, descienda gradualmente Para reducir el riesgo de le-... - Page 28 Al devolver la herramienta Consulte la pestaña “Búsqueda de centro de servicio” en la sección de eléctrica a un centro de servicio de fábrica de MILWAUKEE o a una Partes y servicio del sitio web de MILWAUKEE en www.milwaukeetool.
Need help?
Do you have a question about the M18 FUEL 2982-20 and is the answer not in the manual?
Questions and answers