
Related Manuals for Milwaukee M18 FUEL 2736-20


Summary of Contents for Milwaukee M18 FUEL 2736-20
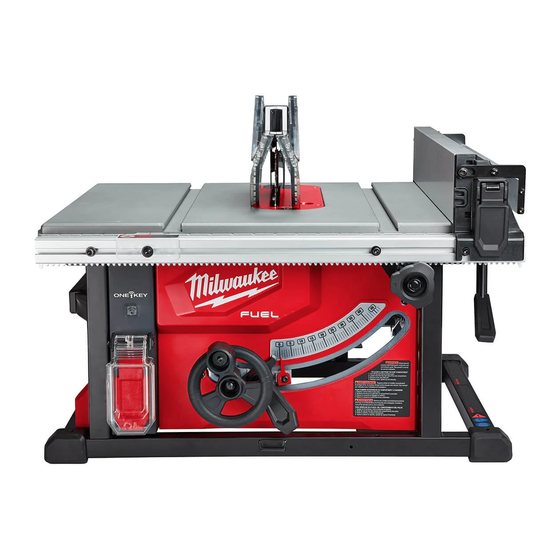
- Page 1 OPERATOR'S MANUAL Cat. No. 2736-20 M18™ FUEL™ 8 1/4" TABLE SAW W/ ONE-KEY™ WARNING To reduce the risk of injury, user must read and understand operator's manual.
-
Page 2: General Power Tool Safety Warnings
GENERAL POWER TOOL • turning the power tool on. A wrench or a key left SAFETY WARNINGS attached to a rotating part of the power tool may Read all safety warnings, instruc- WARNING • Do not overreach. Keep proper footing and tions provided with this power tool. - Page 3 • knife. For the riving knife to function properly, the saw blade diameter must match the appropriate that can make a connection from one terminal riving knife and the body of the saw blade must be to another. Shorting the battery terminals together thinner than the thickness of the riving knife and the cutting width of the saw blade must be wider than •...
- Page 4 Milwaukee Tool or a trained straight edge to guide it with a mitre gauge or along the fence. A warped, knotted, or twisted workpiece is unstable and causes misalignment of •...
-
Page 5: Specifications
SYMBOLOGY SPECIFICATIONS Cat. No............2736-20 Volts Volts Battery Type Direct Current Charger Type No Load Revolutions per Minute (RPM) Recommended Ambient Operating Temperature 0°F to 125°F No Load RPM 6300 Read operator’s manual Blade Arbor Blade Diameter Blade Tilt Miter gauge angle 60°... -
Page 6: Functional Description
FUNCTIONAL DESCRIPTION... -
Page 7: Removing/Inserting The Battery
Rip scale indicator WARNING recommended for this tool. Others Rip scale If any parts are damaged or missing, do not oper- Fence latch ate this tool until the parts are replaced. Use of this product with damaged or missing parts could result in serious personal injury. - Page 8 Selecting, Installing, and Changing Blades Match the arrow direction on the replacement saw WARNING The teeth should point toward the front of the table the speed of this tool. Failure to heed this warning could result in personal injury. WARNING the riving knife.
- Page 9 Changing the Riving Knife WARNING WARNING the riving knife. Match kerf width pawls onto the riving knife with guard when performing "through cutting" opera- tions. ailure to heed this warning could result in personal injury. Two riving knives are provided with the saw; the increasing the risk of serious personal injury.
-
Page 10: Transporting And Storing
To use the extending rip Using an Auxiliary Fence Use an auxiliary fence for cutting thin pieces of wood, Use the extending rip fence such as veneer panels, that could get pinched under to hold the edge of the work- piece when the fence is moved out past the end of Changing Blade Angle (Bevel) -
Page 11: Operation
ONE-KEY™ • Inspect the work for knots or nails before beginning ality for this tool, please reference the Quick • Start guide included with this product or go to • NOTE: High electronic discharge from the tool may • To avoid pinching the blade, support the work prop- •... -
Page 12: Cutting Aids
Clearing a Jam/Cleaning the Dust Chute How to Make a Jig (For rip cutting narrow workpiece) Turn OFF If ripping a narrow workpiece places the hands too close to the blade, it will be necessary to make and If unable to clear the Dust Chute To make a jig:... -
Page 13: Types Of Cuts
Types of Cuts WARNING the miter cut, the bevel cross cut, the bevel rip cut, the rear of the workpiece. If posi- cedures for making each kind of cut are given later warning can result in serious personal injury. Cross Cut - Straight, 90° cuts made across the grain of the into the cut at a 90°... - Page 14 Cutting Rules This table saw can perform a variety of cuts that are NOTE: The hand closest to the blade should be placed on the miter gauge lock knob and the hand to make any cuts not covered here unless you are farthest from the blade should be placed on the thoroughly familiar with the proper procedures and Turn OFF...
-
Page 15: Making A Compound (Bevel) Miter Cut
Making a Miter Cut Making a Bevel Rip Cut WARNING WARNING serious personal injury. of serious personal injury. Install feather board in the appropriate position for risk of serious personal injury. Set the blade to the correct depth for the work- Set the blade to the correct depth for the work- Position the rip fence the desired distance from Set the miter gauge to the desired angle and... -
Page 16: Making A Non-Through Cut
Making a Non-Through Cut the miter gauge and feed the workpiece into Non-through cuts can be made with the grain (rip- NOTE: The hand closest to the blade should be placed on the miter gauge lock knob a non-through cut is essential to cutting grooves, and the hand farthest from the blade should be is made without the riving knife with blade guard Turn OFF... - Page 17 Making a Dado Cut Rip fence Rip fence not Remount the rip Blades are sharp. Wear work gloves does not WARNING move Rails are dirty or making a dado cut. Cutting Replace or sharpen An optional dado throat plate is re- binds or quired for this procedure (For a com- plete listing of accessories, go online to...
-
Page 18: Maintenance
MILWAUKEE Re-measure and repeat until the throat plate is If the tool does not start or operate at full power with... - Page 19 3. Blade to Miter Slot Adjustment (Heeling) Pointer Set the blade angle (bevel) to 0° and lock into Screw 0° Cam Measure from front of blade to miter slot and back If the blade is not square to the miter slot, •...
- Page 20 Slide the fence over to touch blade and lock the Remove the anti-kickback pawls from the riving Place a speed square or straight edge against riv- riving knife are aligned when the speed square contacts the riving knife on BOTH sides, without The square should not mm hex wrench to loosen the bolt and slide the Measure from front of blade to fence and back...
-
Page 21: Internal Battery
To adjust: Internal Battery NOTE: Riving Knife Set Screws Riving Knife To reduce the risk of personal in- WARNING Screws jury and damage, never immerse Cleaning soap and a damp cloth to clean, since certain clean- ing agents and solvents are harmful to plastics and turpentine, lacquer thinner, paint thinner, chlorinated cleaning solvents, ammonia and household deter- Tighten or loosen the 3 riving knife set screws...
Need help?
Do you have a question about the M18 FUEL 2736-20 and is the answer not in the manual?
Questions and answers