
Subscribe to Our Youtube Channel
Related Manuals for Engl Midi Tube Preamp 580


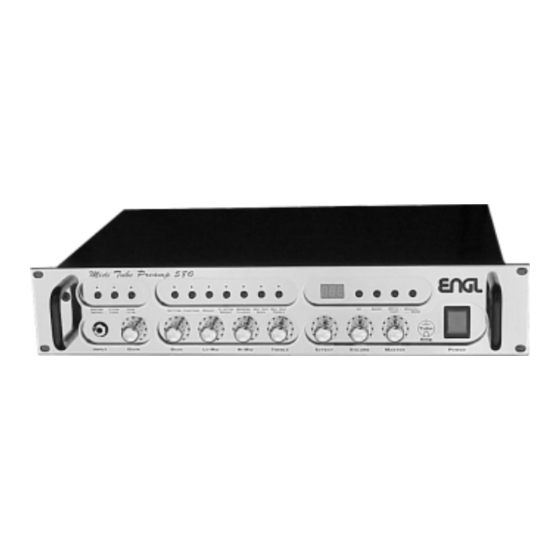
Summary of Contents for Engl Midi Tube Preamp 580
- Page 1 Tube Midi Tube Preamp 580 Programmable Guitar Tube Preamp Operator´s Manual Please, first read this manual carefully!
- Page 2 Tube Technology...
-
Page 3: Table Of Contents
Table of Contents Page Introduction Features and Functionality at a Glance 4 - 5 Front Panel Features Sound-Shaping Features: Knobs 6 - 7 Sound-Shaping Features: Buttons 8 - 10 Control Features 10 - 12 Combination Control Features 13 - 15 Rear Panel Features 16 - 19 Preset and MIDI Channel Array... -
Page 4: Introduction
Congratulations on your purchase of an MIDI Preamp E580! Marrying tried-and-true all-tube technology to state-of-the-art microchip-powered technology, this groundbreaking guitar preamp sets new standards with its sheer audio brilliance—tone, authenticity and sonic variety is what this baby is all about. Fully programmable control features and ten sound-shaping buttons put an arsenal of voicing tools at your fingertips. - Page 5 The ENGL team wishes you all the best—may you and your preamp enjoy an harmonically rich future together! Everyone at ENGL is convinced that this tube preamp's astonishing versatility and...
-
Page 6: Front Panel Features
Front Panel Features As you're reading these descriptions of the preamp's features, you'll gain a better understanding of the topic at hand if you unfold of the diagrams of the front and rear panels at the back of the manual and refer to them as we go! 1 INPUT Plug your electric guitar into this ¼"... - Page 7 CAUTION: Extremely high gain and volume settings in Lead mode can lead to high-level feedback. Avoid those dreaded feedback squeals, they can damage your hearing loss and speakers! 3 BASS As its name would indicate, this is the passive 4-way voicing section's Bass knob. It interacts with the other tone controls, and it is influenced by the Contour button's setting.
-
Page 8: Sound-Shaping Features: Buttons
Sound-shaping Features: Buttons The sound-shaping buttons' statuses may be programmed to MIDI presets 1 through 128, bank A and bank B. An LED located above every sound-shaping button indicates its current status. 11 PREAMP DEFEAT This is a bypass that cuts the preamp out of the signal chain when you press the button. - Page 9 15 CONTOUR This feature gives you another option for shaping predominantly mid-range frequencies. When it is off, the Lo Mid knob affects the 500 Hz range, when it is on, the knob affects the 300 Hz range. The LED lights up to indicate Contour is active.
-
Page 10: Control Features
21 STATUS DISPLAY These three seven-segment displays tell you which of the preamp's various operating modes are currently active. After you power the preamp up, the ENGL logo cycle through the display from right to left twice while the preamp carries out an internal system check. - Page 11 23 UP This button is incremental, meaning that it activates the next higher preset number every time you press it. If you're in a hurry or have a long way to go between numbers, hold the button down to scroll more swiftly through the presets.
- Page 12 25 WRITE/COPY This option lets you save a MIDI preset's edited settings (in this context, "edit" simply means changing settings). The system will select a Write operation whenever you edit a MIDI preset. You'll know that this is the case because when you rotate a knob or press a sound-shaping button, the corresponding LEDs flash.
-
Page 13: Combination Control Features
Combination Control Features This category comprises all control features that require two or three control buttons to be pressed simultaneously. Try to make a habit of pressing these buttons at precisely the same time, otherwise the function of whatever button you press first will be activated. - Page 14 MANUAL & WRITE in Manual mode: MIDI Channel Select mode. Press these two buttons simultaneously while the preamp is in Manual mode to activate MIDI Channel Select mode. This mode lets you determine the desired MIDI channel for the currently active bank. The display shows ch. (short for channel) briefly and then the MIDI channel, for example c01 or onl for OMNI.
- Page 15 The preamp quits the shadow preset automatically after approximately 6 seconds, and the system switches back to the MIDI preset. Note that you can't edit settings using the sound-shaping features or knobs while a shadow preset is active. DOWN & UP while a preset is activated: Locking and unlocking a MIDI preset Press these two buttons simultaneously while a MIDI preset is active for approximately three seconds to lock the preset.
-
Page 16: Rear Panel Features
Rear Panel Features Please unfold and refer to the diagrams of the front and rear panels at the back of the manual and refer to them as you read through the following explanations! 26 MAINS: Connect a mains cord here. CAUTION: Make sure you use an intact line cord with an grounded plug! Before you power the preamp up, ensure the voltage value printed beside the mains receptacle is the same as the current of the local power supply or wall outlet. - Page 17 32 & 33 LINE OUT BALANCED These are the frequency-corrected (compensated) and balanced right and left channel line outputs. Pin 2 and 3 of the XLR jack carry the signal, pin 1 = N.C. or ground depending on the position of the Ground switch (34). You can insert the signals routed through these outputs directly into a mixing console or recording gear equipped with balanced inputs.
- Page 18 CAUTION: Connect this port to the serial interface (Com port) of a compatible personal computer running a Windows* operating system only! NEVER connect the ENGL Custom Footswitch Z-5 or any other device to this port because this could damage the preamp's computer system! * Windows is a registered trademark of Microsoft Corporation.
-
Page 19: Preset And Midi Channel Array
ENGL MIDI foot controller Z-12) or data sent from or routed through another MIDI device. Switch no. 46 lets you activate the preamp's power supply if you have an ENGL MIDI foot controller connected to this port. CAUTION: Before you connect any other MIDI footswitches or MIDI effect devices, always make sure that switch no. - Page 20 127 (A), etc. <- DOWN 128 (A): MIDI preset 128 with the corresponding bank A shadow preset, selectable via UP/DOWN buttons on the preamp, MIDI commands, and via Remote Control Panel on a PC. WRITE and COPY (source & target) are possible. <- DOWN CA0-CA9: factory presets Clean 0 to 9, selectable via UP/DOWN buttons on the preamp and...
-
Page 21: Factory Presets
Plug in Les Paul. Select middle position. Welcome to blues bliss. Break out Kleenex. Wipe away tears of joy. CA9: Texas Flood Imagine what Stevie Ray would have sounded like over an ENGL amp. Or better yet, play some tough Texas-style stuff and hear for yourself. Cb0-Cb9: Crunch... - Page 22 Cb2: Turn The Page Anyone for a taste of that other Jimmy? Turn the page and let Zeppelin fly again. Cb3: Angus Finest Fiddle with the presence knob of your power amp, dial in that distinctive bite and sparkle, and you'll find yourself on the Highway To Hell—figuratively speaking of course.
- Page 23 LA5: Ancient Tube Lead Turn a non-master British stack up to 11 and stand back. Stand way back ... LA6: Paranoid The heavy metal mudslide that started an avalanche back in the early ´70s. LA7: Tokyo Women That would be Ritchie's fab tone for you. But don't take our word for it, dress up in best black get up and hear for yourself.
- Page 24 Try an arpeggio or two and revel in the power and definition ... The Making Of..Before we begin exploring the ENGL E 580 Preamp's world of sounds, allow us to share a few comments with you: 1. The preset names are merely signposts, they are there to give you a general idea of what each of these sonic configurations sound like.
-
Page 25: Step-By-Step Illustrated Handling Guide
Step-by-step Illustrated Handling Guide Explanations Control features: Take this to mean all the features used navigate and manage sounds rather than shape them: Specifically, that means the DOWN, UP, MANUAL and WRITE /COPY buttons as well as diverse combinations thereof. Some of these functions may also be executed via MIDI and the Remote Control Panel, for example selecting MIDI presets. -
Page 26: Switching The Device On
=> => etc. OWER After you power the preamp up, the ENGL logo cycles through display like a banner. The preamp switches to Manual mode following the system test. => The familiar sound-shaping features handle just like those on any non-programmable device. -
Page 27: Selecting Midi Presets, Factory Presets And A Midi Preset
2. Selecting MIDI presets, factory presets and Manual mode. <-> The preamp activates MIDI preset 1. -> => => => etc. The preamp rapidly scrolls through MIDI presets in ascending order. <-> ANUAL / <-> This activates Manual mode. <-> This activates factory preset Lb9. -
Page 28: Selecting Preset Bank A And B
3. Selecting preset bank A and B. & <-> => ANUAL <-> Press the two buttons simultaneously to activate preset bank B. This switching options also works when you have activated a preset. Here the preamp switches from bank A to bank B in Manual mode. The decimal point at the left appears in the display telling you that bank B is active. -
Page 29: Saving Settings To A Midi Preset
4. Saving settings to a MIDI preset. For purposes of this example, the preamp is in Manual mode. <-> This activates MIDI preset 1, bank A. => Adjust the preamp's sound-shaping features to taste, for example, select the Heavy Lead channel, dial in step 14 on the Gain knob and so forth. The LEDs for every knob and sound-shaping button that you adjusted will flash (MSF is active) indicating that a Write operation will be carried out as soon as you press the Write button. -
Page 30: Copying Settings From One Midi Preset To Another Midi Preset
5. Copying settings from one MIDI preset to another MIDI preset. For purposes of this example, the preamp is in Manual mode. -> => Select the desired preset as the source for the Copy operation. In this example it is preset 15, bank A. Read and heed: If you want to copy MIDI preset 15 as is, don't change any of the settings after you have dialed this preset up. -
Page 31: Copying Settings Of A Factory Preset To A Midi Preset
6. Copying settings from a factory preset to a MIDI preset. For purposes of this example, the preamp is in Manual mode. -> => Select the desired factory preset as the source for the Copy operation. In this example it is factory preset CA9. You can change the sound-shaping settings of a factory preset before you copy it. -
Page 32: Copying Manual Settings To A Midi Preset
7. Copying manual settings to a MIDI preset. For purposes of this example, the preamp is set to MIDI preset 29, bank B. <-> => ANUAL <-> This activates the Manual settings as your source. after approx. => 1 second After you have selected Manual, you can change the any sound-shaping settings as you see fit. -
Page 33: Locking A Midi Preset To Protect It Against Inadvertent Overwriting
8. Locking a MIDI preset to protect it against inadvertent overwriting. For purposes of this example, the preamp is set to MIDI preset 2, bank A. -> & <=> => Press the two buttons simultaneously and hold them down until the display stops flashing and preset 2 lights up continuously. -
Page 34: Selecting A Shadow Preset
10. Selecting a shadow preset. For purposes of this example, the preamp is set to MIDI preset 11, bank A. after approx. -> & <=> => 5 seconds ANUAL RITE <-> Press the two buttons simultaneously and hold them down until the all three decimal points start flashing. -
Page 35: Swaping The Settings (Data) Of A Shadow Presets With
11. Swaping the settings of a shadow preset with those of a MIDI preset. For purposes of this example, the preamp is set to MIDI preset 11, bank A. -> & <=> ANUAL RITE <-> Press the two buttons simultaneously and hold them down until the all three decimal points start flashing. -
Page 36: Selecting Midi Channels
12. Selecting MIDI channels. Activate this selection routine while the preamp is in Manual mode. Note: You must select the bank to which you want to assign a MIDI channel before you activate MIDI Channel Select mode. after approx. => <->... -
Page 37: Midi Volume Setup
13. MIDI Volume Setup. Activate this selection routine while the preamp is in Manual mode. after approx. <-> & => => 2 seconds Press the two buttons simultaneously. The preamp switches to MIDI Channel Select mode. After about two 2 seconds the display will indicate the current status of the MIDI volume remote control option. -
Page 38: Launching A Preamp Self-Test
14. Launching a preamp self-test. Activate this selection routine while the preamp is in Manual mode. -> & & => RITE Press and hold all three buttons simultaneously until the preamp switches to Unit Check mode. => etc. => On its own, the system will set all knobs to step 11 or 12 o'clock position. It then sweeps through the Gain control range automatically from step 1 to step 21. -
Page 39: Pc Software Remote Control Panel Features
Installation Insert the included 3 ½" diskette into your computer's 3 ½" disk drive. Launch Windows Explorer* and create a directory named "ENGL" or something similar on your hard disk (that is disk drive C). Copy the "Remote.exe" file from the diskette into this directory on the hard disk. - Page 40 The current setting is indicated above the given fader in steps. You can drag the fader to the desired value via mouse. Alternatively, you can click the button with the little arrow on it up or down to adjust the value step-by-step in the given direction.
- Page 41 (provided of course that the studio owner has the same impeccable taste as yours and an ENGL E580 preamp at hand). "File menu", Quit This command closes the Remote Control Panel and quits the applications.
-
Page 42: Glossary
STATUS DISPLAY in the Remote Control Panel This alphanumeric display shows the various currently active statuses of the preamp as well as some functions of the Panel. Preset number: Preset 001-128 Manual: Manual 000 Factory preset: Factory CA 0-9, Factory CB 0-9, Factory LA 0-9, Factory LB 0-9 Shadow preset: Shadow 001-128 Bank A and B: "A"... - Page 43 The pedal must be connected to a suitable MIDI foot board (for example, the ENGL Z-12-EXP) and it must be able to send MIDI data via MIDI controller number 7. You must enable this option in MIDI Volume setup before you can access and control the preamp's Master volume.
- Page 44 Multitasking: Several software-driven processes run interleaved to ensure system commands are executed at high-speed, which is a really complicated way of saying that multitasking is doing two or more things at once. The reason why this preamp's engine room is powered by multitasking-enabled processors is because its sophisticated circuitry is so demanding.
- Page 45 Remote Control Panel (RCP): This is a software interface that lets you control key functions and features of the preamp remotely. It runs on Windows* PC operating systems. Before you can use the Panel, you must connect the preamp to a serial interface of the PC (Com port) and of course launch the software on your PC.
-
Page 46: Troubleshooting
Troubleshooting The ENGL logo doesn't run through the display after you switch the preamp on. --> Is the preamp connected to the mains power supply? --> Is the preamp connected to the Com port of a PC and has the Remote Control Software been launched? Try switching the preamp off, starting the software on the PC and switching the preamp on again. -
Page 47: Handling And Care
A window appears on the RCP with the message Can not open Com Port. --> Is the preamp switched on? --> Is the preamp connected to the PC via a proper cord? --> Did you configure the right Com port? -->... -
Page 48: Technical Data
Technical Data Input sensitivity INPUT: -20 dB, nominal, max. 0 dB EFECT RETURN: -20 dB nominal, max 0 dB Output level SEND, level range: from -20 dB to -10 dB LINE OUT Level Lo: from 20 dB to max. -10 dB; Level Hi: from 0 dB to max. -
Page 49: System Information
Optocouplers: We poke and probe the optoelectronic components thoroughly before we install them in amps. In fact, at ENGL they are subjected to rigorous testing and selection routines developed specifically for this purpose. In the unlikely event that one of these optoelectronic components develops some kind of defect, your service center needs to know exactly which numbers are printed on that component. -
Page 50: Wiring Of Principal Connectors
Pin 2 - power supply approx.11 volts AC * * AC voltage is routed to pin 1 and 2 only when button 46 is set to ENGL MIDI Footcontroller. P.C. REMOTE CONTROL, D-Sub 9 connector Pin 3: Pin 2: Pin 7 Note: Pin 7 is labeled "RTS". -
Page 51: Block Diagram
Block Diagram SEND PREAMP INPUT (1) PREAMP (40) DEFEAT (11) DEFEAT (11) programmable Tube Preamp Circuit controls: switches: CLEAN/LEAD GAIN GAIN LO HI (AFC) BOTTOM BASS CONTOUR AUXILLARY LO MID BRIGHT INPUT (41) HI MID CL. ULTRA BRIGHT MODERN/CLASSIC TREBLE (ALC) FX LOOP RETURN... -
Page 52: Quick Reference On Control Features
Quick reference on Control Features: In the following, when you see a term in capital letters, that means we're referring to a button, i.e. MANUAL means the Manual button, and so forth. Selecting presets press UP once to go to the next higher preset, press DOWN once to go to the next lower preset, press and hold UP or DOWN to scroll swiftly through presets without switching the preamp to each preset... -
Page 53: The Making Of
A tall order indeed, but I had an ace in the hole—ENGL was the first to present the special technology that powers programmable tube amps. An astonished music world applauded ENGL's efforts way back in the early '80s, so we had a great deal of experience to draw on. -
Page 54: Note Pad For User Presets
User Presets Preset Bank Preset-name application cross out the unused Bank! - Page 55 User Presets Preset Bank Preset-name application...
- Page 56 FRONT PANEL 11 12 13 14 15 16 17 18 19 20 22 23 24 25 Midi Tube Preamp 580 REAMP LEAN LTRA ODERN ANUAL RITE OTTOM ONTOUR RIGHT EFEAT RIGHT LASSIC REBLE <-> Tube NPUT REBLE FFECT OLUME ASTER...
-
Page 57: Supplementary Information
Do not power up the preamp until after you have launched the Remote Control Panel Panel (RCP) on the PC!!! If the "ENGL" logo does not run through the display after you switch the preamp on, immediately switch the preamp off again and check the serial interface (Com port). - Page 58 Supplementary information for the ENGL MIDI Preamp 580's owner's manual Supplementary information on the Remote Control Panel, RCP (starting page 39): On the RCP, WRITE and COPY operations are carried out immediately after you activate the WRITE/COPY button. "Pro" appears just once for a brief moment in the display of the preamp to let you know that the given WRITE or COPY operation is being carried out.
- Page 59 Tube Technology Gerätebau GmbH Germany Internet: http://www.engl-amps.com Text, Design, Graphics, Photographies and Layout by Horst Langer, Amp Designer...
Need help?
Do you have a question about the Midi Tube Preamp 580 and is the answer not in the manual?
Questions and answers