Table of Contents
Advertisement
Advertisement
Table of Contents

Related Manuals for Pfaff Coverlock 4872


Summary of Contents for Pfaff Coverlock 4872
- Page 1 coverlock 4872 Service Manual Edition February 1999...
-
Page 2: Table Of Contents
Requirements for adjusting the coverlock 4872 ........ - Page 3 Setting the looper thread guides 26. Setting the looper thread guide of the lower and upperoveredge loopers ....51 27. Setting the looper thread guide of the two thread chainstitch looper .....52 LCD test mode, setting the thread tension and the synchronizer 28.
-
Page 4: Foreword
Foreword This service and repair manual is designed to help you carry out all repairs on the machine quickly and correctly. Adjustments should only be made if the settings deviate from the requirements described here. When checking or adjusting a machine, always proceed in the order described here. For easy reference every workstep is marked with a dot. -
Page 5: Notes On The Sewing Machine
6. To avoid the risk of electric shock, do not open the machine. There are no parts inside the machine which can be repaired by the operator. This is solely the responsibility of our qualified service staff. 7. Only original PFAFF parts are to be used. -
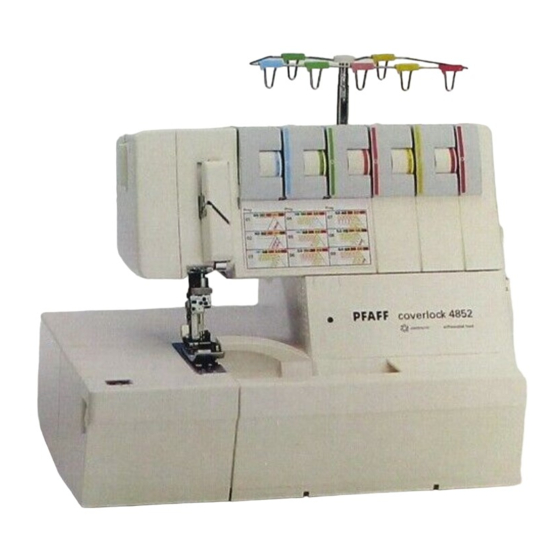
Page 6: Specifications Of The Coverlock 4872
Specifications of the coverlock 4872 Number of needles and threads: 2 needles, 5-, 4- or 3-thread 1 needle, 2- or 3-thread Needles: system ELx705, cat. no. 2002 thickness Nm 80/12, 90/14 Seam width: 1.4 mm – 9.0 mm Adjustable cut width: 2.5 mm... -
Page 7: Adjustment Gauge Of The Coverlock 4872
Adjustment gauge of the coverlock 4872 Order number: 29-924 993-82/032 = Needle bar height (12.0 mm) B = Presser foot height (4.7 mm) C = Clearance of upper overedge looper to left needle (6.0 mm) D = Clearance of lower overedge looper to left needle (2.8 mm) E = Height of lower overedge looper (65 mm) = Clearance of two thread chainstitch looper to needle “L2”... -
Page 8: Dismantling The Housing Of The Coverlock 4872
Dismantling the housing of the coverlock 4872 G Remove the mains plug from the machine. G Unscrew and remove the fastening screw 1 (fig. 1). G Remove the presser foot holder completely. G Remove the needles. G Remove the spool disc and the thread spool centering pieces (fig. 2). - Page 9 G The following parts are now removed to the right (fig. 4): 1. Stitch length adjustment knob 4 and the regulator wheel 5 for the differential feed 2. Presser foot 6 G Remove the covers 7 on the stand cover. G Unscrew and remove the fastening screws 8 on the stand cover.
- Page 10 G Turn the handwheel in the normal direction until the needle bar is at its highest position. G Push the looper cover as far as possible to the right and pull it down. G Unscrew and remove the three fastening screws 10 on the lower housing panel (fig. 5). G Remove the lower housing panel.
- Page 11 G Remove the seven cables “A” to “H” from the circuit board. Note: The cables “A” to “E” stem from the stepping motors for the thread tension barrels. The cable “F” is for the PCB/LCD power supply. The cable “G” is for the stepping motor circuit board.
- Page 12 G Unscrew and remove the four fastening screws 18 on the baseplate (fig. 9). G Remove the machine housing carefully from the baseplate. G Unscrew and remove the fastening screws 19. G Remove the swivel plate 20.
-
Page 13: Requirements For Adjusting The Coverlock 4872
Requirements for adjusting the coverlock 4872 Requirement: When the needle is at its lowest position, the lower overedge looper must be at the left point of reversal and the upper looper point, in the downward movement, approx. 5 mm below the needle plate. - Page 15 Setting: G If not set correctly, the screws of the eccentrics, of the retaining collar and of the counterweight will be loosened. G The parts must be set accordingly and the screws must be retightened. Position and function of the eccentrics 1.
- Page 16 Notes:...
-
Page 17: Needle Bar Height And Needle Penetration Points
Needle bar height and needle penetration points 1. Setting the needle bar height Requirement: The vertical clearance between the overedge needle “R1” and the top edge of the needle plate must be 12 mm when the needle bar 1 is at its upper dead center (fig. 1). Check: G Turn the handwheel in the normal direction until the needle bar 1 is at its upper dead center (u.d.c.). -
Page 19: Feeding System
Feeding system 2. Setting the main feed dog in the sewing direction with regard to the needle plate Requirement: When the stitch length is set to “4”, the main feed dog must be centered between the front and the back of the needle plate in the sewing direction (fig. -
Page 21: Setting The Feed Dog Height
3. Setting the feed dog height Requirement: The tips of the feed dog teeth, when they are at their highest operating position, must project 1.3 mm over the needle plate (fig. 7). Check: G Set the stitch length adjustment knob to “0.5”. G Set the regulator wheel for the differential feed to “1”. -
Page 22: Setting The Differential Feed Dog
4. Setting the differential feed dog Requirement: When the differential feed dog is at its highest operating position with setting “1” and with the stitch length set “0.5”, the clearance to the main feed dog should be 3.2 - 3.4 mm (fig. 8). Check: G Set the stitch length adjustment knob to “0.5”. -
Page 23: Setting The Main Feed-Dog Height
5. Setting the main feed-dog height Requirement: The main feed dog 9 and the differential feed dog 10 must be positioned at the same height (fig. 9). Check: G Set the stitch length adjustment knob to “0.5”. G Set the regulator wheel for the differential feed to “1”. G Turn the handwheel in the normal direction until the main feed dog, in its upward movement, is flush with the surface of the needle plate. -
Page 24: Setting The Presser Bar Height
6. Setting the presser bar height Requirement: With the presser bar lever raised, there must be a 4.7 mm gap between the needle plate and the bottom of the presser foot. Check: G With the presser bar lever raised, slide the adjustment gauge under the presser foot as in figure 10. G Check the height of the presser bar (measurement B). -
Page 25: Setting The Differential Feed
7. Setting the differential feed Requirement: Both feed dogs must have the same length of feeding movement, when the stitch length is set at “4” and the differential setting at “1” (fig. 11). Check: G Set the stitch length adjustment knob to “4”. G Set the regulator wheel for the differential feed to “1”. -
Page 27: Setting The Movement Of The Feed Dog Stroke And The Upper Blade
8. Setting the movement of the feed dog stroke and the upper blade Requirement: The movement of the feed dog stroke and the upper blade must be synchronized (fig. 12). Note: Before any adjustments can be made, the needle bar height and the feed dog height must be set correctly. -
Page 29: Setting The Feed Dog Movement
9. Setting the feed dog movement Method: When the rising needle leaves the fabric, the feed dog moves up above the needle plate. The raised feed dog pushes the fabric to the rear. After completing the feed movement the feed dog drops down below the needle plate surface and the needle penetrates the fabric. -
Page 31: Setting The Lower Overedge Looper
Setting the lower overedge looper 10. Setting the height of the lower overedge looper Requirement: The vertical clearance between the looper point and the looper drive shaft must be 65 mm (fig. 19). Note: The looper drive shaft must not have any axial play. Check: G Remove the housing as described in the adjustment and repair instructions. -
Page 33: Setting The Timing Of The Lower Overedge Looper
11. Setting the timing of the lower overedge looper Note: The timing of the lower overedge looper is set by turning the handwheel back and forth. This method guarantees a 100 % setting. This is very important for machines with double eccentric for the overedge and two thread chainstitch loo- pers. -
Page 35: Setting The Looper-To-Needle Clearance
12. Setting the looper-to-needle clearance Requirement: When the looper point is in the scarf of the needle while moving to the right, the looper-to-needle clearan- ce must be 0 - 0.05 mm (fig. 23). Note: A new needle system ELx705 Nm 90 must be used for the following steps. Check: G Remove the presser foot and the needle plate. -
Page 36: Setting The Lateral Clearance To The Left Needle
13. Setting the lateral clearance to the left needle Requirement: When the lower overedge looper 2 is at its left point of reversal, the gap to the needle “R1” must be 2.8 - 3.1 mm (fig. 24). Check: G Turn the handwheel in the normal direction until the looper is at its left point of reversal. G Check the clearance using the adjustment gauge (measurement D). -
Page 37: Setting The Upper Overedge Looper
Setting the upper overedge looper 14. Setting the lateral clearance to the left needle Requirement: When the upper overedge looper is at its left point of reversal, the clearance of looper point to the left needle must be 5.5 - 6.0 mm (fig. 25). Note: The rock shaft and its guide bushes must not have any axial play. -
Page 38: Setting The Timing Of The Upper Overedge Looper
15. Setting the timing of the upper overedge looper Requirement: When the two loopers overlap, as shown in figure 26, the clearance between the point of the upper looper 10 and the head of the lower looper 2 must be between 0.5 and 1.0 mm. Check: G Turn the handwheel in the normal direction until the upper looper 10, in its upward movement, is behind the lower looper 2. -
Page 39: Setting The Clearance Between The Upper And Lower Overedge Loopers
16. Setting the clearance between the upper and lower overedge loopers Requirement: When the two loopers overlap (fig. 28), the clearance between the point of the upper looper 10 and the back of the lower looper 2 must be between 0.05 and 0.2 mm. Check: G Turn the handwheel in the normal direction until the upper looper 10, in its upward movement, is behind the lower looper 2. -
Page 40: Setting The Two Thread Chainstitch Looper
Setting the two thread chainstitch looper 17. Setting the lateral clearance to the two thread chainstitch needle “L2” Requirement: When the two thread chainstitch looper 13 is at its right point of reversal, it should have a clearance of 1.6 mm to the needle “L2” (fig. 30). Check: G Turn the handwheel in the normal direction until the two thread chainstitch looper 13 is at its right point of reversal. -
Page 41: Setting The Looper-To-Needle Clearance
18. Setting the looper-to-needle clearance Requirement: When the looper point is in the scarf of the needle “L1” while moving to the left, the looper-to-needle clea- rance must be 0.05 – 0.1 mm (fig. 31). Check: G Turn the handwheel in the normal direction until the looper point of the two thread chainstitch looper 13 is exactly in the scarf of the needle “L0”... - Page 42 Movement...
-
Page 43: Setting The Ellipsoidal Movement
19. Setting the ellipsoidal movement Requirement: When the needle bar is at its lowest position, the two thread chainstitch looper must be at its right point of reversal, when moving to the right (fig. 33). Note: This adjustment must only be carried out if a compelling reason exists. Check: G Turn the handwheel in the normal direction until the two thread chainstitch looper is at its right point of reversal when moving to the right. - Page 44 Movement...
-
Page 45: Setting The Timing Of The Two Thread Chainstitch Looper
20. Setting the timing of the two thread chainstitch looper Requirement: When the two thread chainstitch looper 13 moves from its left point of reversal to the right and the looper eye has reached the needle center line “L0”, the needle and looper eye should be flush (fig. 37). Check: G Turn the handwheel in the normal direction until the needle bar is in its lowest position. -
Page 47: Setting The Needle Guards
Setting the needle guards 21. Setting the rear needle guard When the looper point of the lower overedge looper 2 is exactly at the center line of either needle “R1” or needle “R2” when moving to the right, the needles should have a clearance of 0 - 0.05 mm to the needle guard 18 (fig. -
Page 48: Setting The Needle Guard For The Cover Stitch Needles
22. Setting the needle guard for the cover stitch needles Requirement: When the looper point of the two thread chainstitch looper 13 is exactly at the needle center line of either the needle “L0” or “L2” when moving to the left, the needle should have a clearance of 0 - 0.05 mm to the front needle guard 20 (fig. -
Page 49: Setting The Upper Blade
Setting the upper blade 23. Setting the upper blade Requirement: When the upper blade 23 is at its lowest position, the upper and lower blades must overlap by 0.5 mm (fig. 42). Check: G Turn the handwheel in the normal direction until the upper blade 23 is at its lowest position. G Check the overlapping of the upper and lower blade. -
Page 50: Setting The Lower Blade Bracket And The Seam Width Adjusting Knob
24. Setting the lower blade bracket and the seam width adjusting knob Requirement: When the seam width adjusting knob 25 is set at the lowest number (fig. 43), the lower blade must have a clearance of 0.2 - 0.3 mm to the needle plate. The knob 26 of the upper blade must also have a clearance of 0.1 - 0.2 mm to the holder 27 (fig. -
Page 51: Setting The Chaining Finger
25. Setting the chaining finger Requirement: The chaining finger 29 must be parallel to the needle plate and its foremost point protrudes 0.5 - 1.0 mm over the needle plate finger (fig. 45). Check: G Carry out a visual check. Setting: G Slightly loosen the fastening screws 30 (fig. -
Page 52: Setting The Looper Thread Guides
Setting the looper thread guides 26. Setting the looper thread guide of the lower and upper overedge loopers Requirement: When the looper thread guide 33 is at its highest position, it must have a clearance of 47.3 mm to the bedplate (fig. -
Page 53: Setting The Looper Thread Guide Of The Two Thread Chainstitch Looper
27. Setting the looper thread guide of the two thread chainstitch looper Requirement: When the looper thread guide 35 is at its highest position, the needle in its downward movement must be positioned as shown in fig. 48. The looper thread guide 35 must also be set so that the upper and lower clearance of the looper thread guide 35 to the aperture on the housing are equal (fig. -
Page 55: Lcd Test Mode, Setting The Thread Tension And The Synchronizer
LCD test mode, setting the thread tension and the synchronizer 28. LCD test mode The test is carried out in a set sequence, which can not be changed. The program can be terminated by turning off the machine. 1. LCD test (visual check of the display) 2. - Page 56 Press key “1”; the stepping motors turn and go to their minimum position. The numbers “12” appear on the LCD (fig. 55). Thread tension values’ check: Check the thread tension values, which should be between 5 and 10 grams, using cotton thread size 50 (three-cord), as depicted in fig.
- Page 57 Press the key “1” once again. The display as seen in fig. 58 appears on the LCD. LCD check: Carry out a visual check for missing or incorrect symbols. Press the key “1” once again. The display as seen in fig. 59 appears on the LCD. LCD check: Carry out a visual check for missing or incorrect symbols.
- Page 58 Press the key “1” once again. The display as seen in fig. 62 appears on the LCD. LCD check: Carry out a visual check for missing or incorrect symbols. Press the key “1” once again. The display as seen in fig. 63 appears on the LCD. LCD check: Carry out a visual check for missing or incorrect symbols.
-
Page 59: Setting The Synchronizer
29. Setting the synchronizer Requirement: If the foot control is released, the needle bar must stop at its highest position and the upper overedge loo- per must have a clearance of 3.0 - 5.0 mm to the needle “R2” (fig. 66). Check: G Switch on the machine. -
Page 61: Setting The Background Lighting
30. Setting the background lighting Note: This adjustment must only be carried out if a compelling reason exists. Check: G Connect lead cord to the connecting bush of the coverlock and to the wall outlet. G Activate the master switch. G Carry out a visual check. -
Page 63: Safety Test
Safety test 31. Microswitch functional test A functional test of the microswitch is always to be carried out after any repairs. G Connect the foot control. G Turn on the master switch. G Open the looper cover or the swivel plate (fig. 68). G The electricity supply to the machine is interrupted. -
Page 65: Electrical Safety Test
32. Electrical safety test According to the German law on safe machine operation from the 24th June 1986, the VDE regulations are regarded as the official rules in electronics and are the basis for the regulations for testing electrical safety of technical devices. The required electrical tests are established in the regulations for repair, modification and testing of used electrical appliances (VDE 0701 edition 05.93) section 4. -
Page 66: Electrical Safety Test With Abb Metrawatt M 5013
33. Electrical safety test with ABB Metrawatt M 5013 I) Mains voltage test: Volt = V G For all following tests insert the plug of the ABB Metrawatt M 5013 in the grounded mains socket. G Set the switch for the measuring range at “250 V” (figure 70).If there is mains voltage present, the LCD display shows how much (230 V +/- 10%). -
Page 69: Measures To Be Taken In The Case Of Inadmissible Test Readings
34. Measures to be taken in the case of inadmissible test values If one of the 4 test functions is a failure, the ground mains socket is defective. Inform your landlord. If the current consumption deviates considerably from the indicated value, although the machine does not bind, the motor is defective and must be exchanged or repaired. - Page 70 PFAFF Gritznerstraße 11 76227 Karlsruhe Fernruf (0721) 40010 Technische Änderungen vorbehalten Fernschreiber 7825638 Subject to alterations in design Drahtwort Pfaffwerk Sous toute réserve de modifications techniques Telefax (0721) 4001513 Salvo modificaciones técniche Druckerei Gablenz GmbH Con riserva di modifiche tecniche Stettiner Straße 17...
Need help?
Do you have a question about the Coverlock 4872 and is the answer not in the manual?
Questions and answers