Table of Contents
Advertisement
Available languages
Available languages
Quick Links
G E B T P - 2 M i M a
IT
GONFIATORE ELETTRICO - 12V
EN
ELECTRIC INFLATOR – 12V
DE
ELEKTRISCHE PUMPE – 12V
FR
GONFLEUR ELECTRIQUE – 12V
ES
INFLADOR ELECTRICO – 12V
K6131230
S AVE THIS INSTR UCTION S M A N UA L F OR R EF E RE N CE
Rev 1
C O N SERVA RE QUE STE ISTRUZION I
D IE SE A N L EITUN G AU FB E WA HRE N
CO N SERVE R CE S IN STR UCTIO N S
GA RD ER E STAS IN STR UCCC IO NE S
1
Advertisement
Table of Contents

Related Manuals for SCOPREGA GE BTP-2 MiMa


Summary of Contents for SCOPREGA GE BTP-2 MiMa
- Page 1 G E B T P - 2 M i M a K6131230 GONFIATORE ELETTRICO - 12V C O N SERVA RE QUE STE ISTRUZION I ELECTRIC INFLATOR – 12V S AVE THIS INSTR UCTION S M A N UA L F OR R EF E RE N CE ELEKTRISCHE PUMPE –...
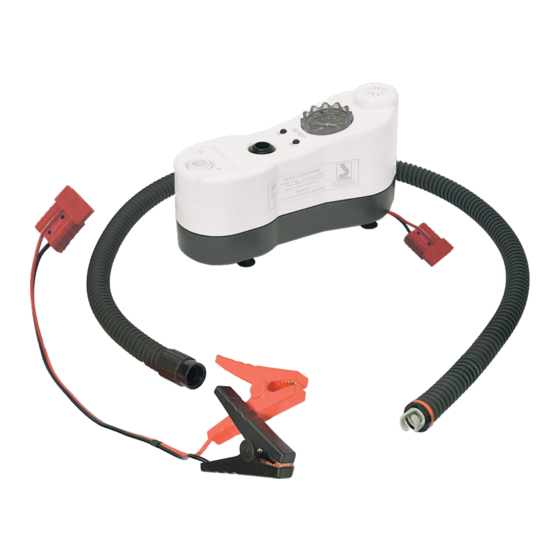
- Page 2 1. DESCRIZIONE FUNZIONALE 1. DESCRIZIONE FUNZIONALE 2. PREMESSA 3. AVVERTENZE PRELIMINARI 4. INTRODUZIONE 5. UTILIZZI CONSIGLIATI 6. DATI TECNICI 7. REGOLE DI SICUREZZA GENERALI Fig. 1 8. UTILIZZO E FUNZIONAMENTO 8.1 FUNZIONAMENTO E GONFIAGGIO 8.2 INDICATORE LUMINOSO STATO BATTERIA 8.3 FUNZIONAMENTO SGONFIAGGIO 1.
- Page 3 10. Non trasportare mai la pompa tramite il tubo o il cavo. Il GE BTP-2 MiMa rappresenta l’evoluzione di due gonfiatori come il GE BP1 e il GE BTP-1. 11. STARE ATTENTI.
-
Page 4: Utilizzo E Funzionamento
Non è stato premuto il tasto ON. Premere il tasto ON. Rivolgersi a un centro di L’apparato è danneggiato assistenza SCOPREGA. 8.2 INDICATORE LUMINOSO STATO BATTERIA Collegare il tubo dell’aria alla Il led posto sotto la ghiera del manometro definisce lo stato di carica della batteria. - Page 5 1. FUNCTIONAL DESCRIPTION 1. FUNCTIONAL DESCRIPTION 2. PREMISE 3. PRELIMINARY WARNINGS 4. INTRODUCTION 5. RECOMMENDED USES 6. TECHNICAL DATA 7. GENERAL SAFETY RULES Fig. 1 8. USE AND OPERATION 8.1 OPERATION AND INFLATION 8.2 BATTERY STATUS LIGHT 8.3 DEFLATION OPERATION 1.
-
Page 6: General Safety Rules
4. INTRODUCTION 10. Never transport the pump by the hose or cable. The GE BTP-2 MiMa represents the evolution of two inflators such as the GE BP1 and the GE BTP-1. 11. BE CAREFUL. It is suitable for many applications but is ideal for SUP, being able to reach 1.2 bar (18 psi) of Care must always be taken. -
Page 7: Troubleshooting
Protect from sand, keeping the inflator inside the supplied bag: the entry of sand into the does not start inflator can cause it to jam. The ON key has not been pressed. Press the ON key. Contact a SCOPREGA service The apparatus is damaged center. 8.2 BATTERY STATUS LIGHT Connect the air tube to the The LED under the gauge ring defines the battery charge status. - Page 8 1. FUNKTIONSBESCHREIBUNG 1. FUNKTIONSBESCHREIBUNG 2. PRÄMISSE 3. VORLÄUFIGE WARNUNGEN 4. EINLEITUNG 5. EMPFOHLENE ANWENDUNGEN 6. TECHNISCHE DATEN 7. ALLGEMEINE SICHERHEITSREGELN Fig. 1 8. VERWENDUNG UND BETRIEB 8.1 BETRIEB UND INFLATION 8.2 BATTERIESTATUSLEUCHTE 8.3 ABGABEBETRIEB 1. INFLATIONSSCHLAUCH 8.4 ZUBEHÖR 2. ENTLAGERUNG MUND (IN) 8.5 WARTUNG DES ANTI-SANDFILTERS GE BTP-2 3.
-
Page 9: Allgemeine Sicherheitsregeln
Sehr geehrter Kunde, herzlichen Glückwunsch zur Wahl von Scoprega. 6. TECHNISCHE DATEN Wir entwickeln und fertigen Produkte von höchster Qualität nach den Bedürfnissen unserer Kunden. Scoprega bietet auch die höchste Qualität in der AKTUELL SPANNUNG KAPAZITÄT Hilfeleistung. Unsere engagierten Büros garantieren im Bedarfsfall Beratung und... -
Page 10: Fehlerbehebung
Drücken Sie die EIN-Taste. Eindringen von Sand in den Inflator kann zu einem Stau führen. Wenden Sie sich an ein Das Gerät ist beschädigt SCOPREGA-Servicecenter. 8.2 BATTERIESTATUSLEUCHTE Verbinden Sie den Luftschlauch Die LED unter dem Messring zeigt den Ladezustand des Akkus an. - Page 11 1. MODE D’EMPLOI 1. MODE D’EMPLOI 2. PRÉMISSE 3. AVERTISSEMENTS PRÉLIMINAIRES 4. INTRODUCTION 5. UTILISATIONS RECOMMANDÉES 6. DONNÉES TECHNIQUES 7. RÈGLES GÉNÉRALES DE SÉCURITÉ Fig. 1 8. UTILISATION ET FONCTIONNEMENT 8.1 FONCTIONNEMENT ET GONFLAGE 8.2 VOYANT D’ÉTAT DE LA BATTERIE 8.3 OPÉRATION DE DÉGONFLAGE 1.
-
Page 12: Règles Générales De Sécurité
Cher client, félicitations pour avoir choisi Scoprega. 6. DONNÉES TECHNIQUES Nous concevons et fabriquons des produits de la plus haute qualité selon les besoins de nos clients. Scoprega offre également une assistance de la plus MAXIMUM COURANT TENSION CAPACITÉ... -
Page 13: Dépannage
Contactez un centre de service L’appareil est endommagé SCOPREGA. 8.2 VOYANT D’ÉTAT DE LA BATTERIE Connectez le tube d’air à la La LED située sous l’anneau de la jauge définit l’état de charge de la batterie. - Page 14 Í 1. DESCRIPCION FUNCIONAL 1. DESCRIPCION FUNCIONAL 2. PREMISA 3. ADVERTENCIAS PRELIMINARES 4. INTRODUCCIÓN 5. USOS RECOMENDADOS 6. DATOS TÉCNICOS 7. REGLAS GENERALES DE SEGURIDAD Fig. 1 8. USO Y FUNCIONAMIENTO 8.1 FUNCIONAMIENTO E INFLADO 8.2 LUZ DE ESTADO DE BATERÍA 8.3 OPERACIÓN DE DEFLACIÓN 1.
-
Page 15: Reglas Generales De Seguridad
Estimado cliente, felicitaciones por elegir Scoprega. 6. DATOS TÉCNICOS Diseñamos y fabricamos productos de la más alta calidad según las necesidades de nuestros clientes. Scoprega también ofrece la más alta CORRIENTE VOLTAJE CAPACIDAD calidad en asistencia. Nuestras oficinas dedicadas garantizan asesoramiento PRESIÓN... -
Page 16: Solución De Problemas
Póngase en contacto con un El aparato está dañado centro de servicio SCOPREGA. 8.2 LUZ DE ESTADO DE BATERÍA Conecte el tubo de aire a la El LED situado bajo el anillo del indicador indica el estado de carga de la batería.
Need help?
Do you have a question about the GE BTP-2 MiMa and is the answer not in the manual?
Questions and answers