Table of Contents
Advertisement
Quick Links
Advertisement
Table of Contents

Related Manuals for Canon Speedlite EL-5


Summary of Contents for Canon Speedlite EL-5
- Page 1 Advanced User Guide CT2-D256-A © CANON INC. 2022...
-
Page 2: Table Of Contents
Contents Introduction..........4 Supplemental Information. - Page 3 Radio Transmission Wireless Flash Photography....89 Radio Transmission Wireless Flash Photography..... . 90 Wireless Settings.
-
Page 4: Introduction
Introduction Designed for EOS cameras equipped with a multi-function shoe, the Canon EL-5 is an external Speedlite compatible with E-TTL II / E-TTL autoflash. In normal flash photography, it can be used as an on-camera flash attached to a multi-function shoe, and radio transmission wireless flash photography, it can be used as a sender or receiver. -
Page 5: Supplemental Information
Supplemental Information Check the following website for supplemental information about the Speedlite. https://cam.start.canon/H001/... -
Page 6: Compatible Accessories
Compatible Accessories Check the following website for the latest compatible cameras and accessories. https://cam.start.canon/H002/... -
Page 7: Instruction Manual
Instruction Manual The included Instruction Manual provides basic instructions on flash photography. Advanced User Guide Complete instructions are provided in this Advanced User Guide. For the latest Advanced User Guide, refer to the following website. https://cam.start.canon/A006/... -
Page 8: About This Guide
About This Guide Icons in This Guide Basic Assumptions Icons in This Guide Indicates the select dial. < > Indicates the duration (approx. 12 or 16 sec.) of the operation for the button you pressed, based on when you release the button. In reference to buttons or setting positions, the guide uses the same icons or display items found on the Speedlite. - Page 9 Basic Assumptions Instructions apply to the Speedlite and camera with the power on ( The icons used for buttons, dials, and symbols in the text match the icons found on the Speedlite and the camera. Functions can be set by pressing the joystick vertically or horizontally or turning < >...
-
Page 10: Safety Instructions
Safety Instructions Be sure to read these instructions in order to operate the product safely. Follow these instructions to prevent injury or harm to the operator of the product or others. WARNING: Denotes the risk of serious injury or death. Keep batteries out of the reach of children. - Page 11 Observe the following instructions when using a battery charger. • Periodically remove any dust buildup from the power plug and power outlet using a dry cloth. • Do not plug in or unplug the product with wet hands. • Do not use the product if the power plug is not fully inserted into the power outlet. •...
-
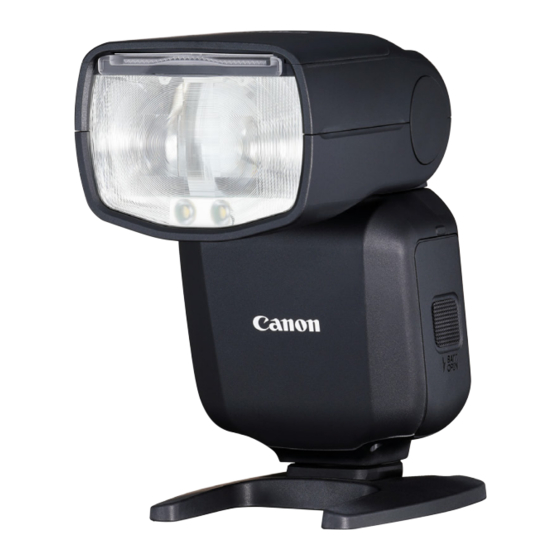
Page 12: Part Names
Part Names LCD Panel Battery Charger LC-E6 (Sold Separately) Battery Charger LC-E6E (Sold Separately) Included Accessories Catchlight panel (shown stowed) Wide panel (shown stowed) Flash head (light-emitting unit) Modeling lamp / AF-assist beam emitter Mounting foot Mounting foot locking pin Battery compartment cover Contacts Mounting foot cover... - Page 13 Note Not equipped with remote release terminal (release cable SR-N3 cannot be used). (10) (11) (12) (13)
- Page 14 < > Radio transmission confirmation lamp LCD panel < > Sub menu button < > LAMP button < > Undo button Mounting foot lock lever Lock-release button Bounce angle index Joystick < > Menu direct < > Flash mode < >...
- Page 15 LCD Panel E-TTL II / E-TTL autoflash ( (10) (11) (12) (13) (14)
- Page 16 < > Flash exposure compensation < > E-TTL II / E-TTL autoflash < > / < > / < > Custom flash mode* < > Standard < > Guide number priority < > Even coverage < > Bounce upward < >...
- Page 17 Manual flash ( < > Manual flash < > / < > / < > Custom flash mode* Manual flash output Manual flash level * 1: The flash mode is identified after the indicator for the current Custom flash mode. Note These are only examples of display.
- Page 18 Radio transmission wireless flash photography ( Sender unit (10) (11) < > Configured as a sender < > Configured as a sub-sender < > Radio transmission wireless Flash mode < > E-TTL II / E-TTL autoflash < > Manual flash <...
- Page 19 < > Receiver fully charged Firing group control Sender / receiver charge indicator < > Modeling lamp indicator Group firing mode* * 1: < > Group firing only Note < > is no longer displayed after senders and receivers in radio transmission wireless flash photography are fully charged.
- Page 20 Receiver unit < > Receiver < > Transmission channel Wireless radio ID < > Test flash < > Remote release < > Modeling flash < > Configured as a receiver...
- Page 21 Radio transmission: linked shooting ( < > Linked shooting < > / < > / < > Custom flash mode* < > Configured as a sender < > Configured as a receiver < > Release* * 1: The flash mode is identified after the indicator for the current Custom flash mode. * 2: <...
- Page 22 Battery Charger LC-E6 (Sold Separately) Charger for Battery Pack LP-EL. Battery slot Charge lamp Power plug...
- Page 23 Battery Charger LC-E6E (Sold Separately) Charger for the Battery Pack LP-EL. Charge lamp Battery pack slot Power cord Power cord socket...
- Page 24 Included Accessories Speedlite case (1) Mini stand storage pocket Mini stand (2) Mounting part Battery Pack LP-EL...
-
Page 25: Getting Started And Basic Operations
Getting Started and Basic Operations This chapter describes the preparations before starting flash photography and the basic shooting operations. Caution Precautions on continuous flash firing To avoid wearing out or damaging flash heads from overheating, do not fire the flash continuously at full output more than approx. 40 times. After firing continuously at full output this many times, stop using the Speedlite for at least 40 min. -
Page 26: Charging The Battery
Charging the Battery Remove the protective cover. Fully insert the battery into the charger. Do the opposite to remove the battery. - Page 27 Recharge the battery. For LC-E6 As shown by the arrow, flip out the battery charger's prongs and insert the prongs into a power outlet. For LC-E6E Connect the power cord to the charger and insert the plug into a power outlet.
- Page 28 For safety, charging in low temperatures (5–10°C/41–50°F) takes longer (up to approx. 4 hr.). The Speedlite does not come pre-charged. Charge before use. Charge on the day of use, or the day before. Batteries gradually lose their charge while in storage. After charging the battery, remove it and unplug the charger.
- Page 29 Note Battery storage Store in a cool, dry, and well-ventilated place. Even if the battery is removed, the trace amount of current that continues to flow internally may eventually lead to over-discharge and prevent further use despite charging. Before extended storage, charge the battery to approx. 50% about once a year.
-
Page 30: Inserting The Battery
Inserting the Battery Use Battery Pack LP-EL as the power source. Open the cover. Slide the battery compartment cover down to open it. Insert the battery. Insert the battery contacts-first, as shown by the marking. Close the cover. Close the battery compartment cover and slide it up until it clicks into place. - Page 31 * The Quick flash function enables flash photography before the flash is fully charged ( * Using a new, fully charged Battery Pack LP-EL * Based on Canon testing standards Caution After continuous flash firing, do not touch the flash head, battery, or near the battery compartment.
-
Page 32: Attaching And Detaching The Speedlite
Attaching and Detaching the Speedlite Attach the Speedlite. Remove the camera shoe cover and Speedlite mounting foot cover. Insert the Speedlite slowly, making sure the Speedlite mounting foot is aligned with the camera multi-function shoe. Insert the Speedlite mounting foot all the way into the hot shoe. Secure the Speedlite. - Page 33 Caution Be sure to turn off the Speedlite before attaching or detaching it. Forcing the Speedlite onto a camera without a multi-function shoe may damage it or the camera. Do not allow hard objects to touch the contacts. This may damage the camera. Do not touch the contacts with your fingers.
-
Page 34: Turning On The Power
Turning on the Power Quick Flash Auto Power Off Locking Flash Operations LCD Panel Illumination Turn the power switch to < >. Flash recharging begins. < > appears on the LCD panel during recharging. After flash recharging, it is no longer displayed, and the Speedlite beeps. Confirm that flash recharging is finished. - Page 35 Caution Test flash firing is not available while a camera's metering timer is active. Note Flash settings are retained even after the power is turned off. Beeping after flash recharging can be disabled in P.Fn-05. Quick Flash Quick flash enables flash photography even when the flash-ready lamp is still blinking in red (before fully charged).
- Page 36 Auto Power Off This feature conserves battery power by turning the Speedlite off automatically if it is left idle for approx. 90 sec. To restore power to the Speedlite, either press the camera shutter button halfway or press the test flash button (flash-ready lamp). Auto power off takes effect in approx.
- Page 37 Locking Flash Operations Button and dial operations of the Speedlite can be disabled by setting the power switch to < >. This can help prevent accidentally changing the Speedlite settings. < > is displayed on the LCD panel in response to button or dial operations. Note Even with the power switch set to <...
- Page 38 LCD Panel Illumination The LCD panel is illuminated for approx. 12 sec. ( ) in response to button or dial operations. For details on LCD panel illumination when the Speedlite is set as a sender in radio transmission wireless flash photography, see LCD Panel Illumination.
-
Page 39: Fully Automatic Flash Photography
Fully Automatic Flash Photography E-TTL II and E-TTL fully automatic flash shooting is available when the camera is set to < > (Program AE) or fully automatic shooting mode. Select < > with the joystick. Select < >. Press the joystick vertically or horizontally or turn < >... - Page 40 Take the picture. * This is an example of display when the camera is in < > (Program AE) mode. Confirm that the subject is within the effective flash range (1). Pressing the shutter button completely fires the flash and takes a picture.
-
Page 41: E-Ttl Ii / E-Ttl Autoflash, By Shooting Mode
E-TTL II / E-TTL Autoflash, by Shooting Mode Auto Zoom for Sensor Size Transmission of Color Temperature Information AF-Assist Beam E-TTL II or E-TTL autoflash suitable for the current shooting mode is used automatically – simply set the camera shooting mode to < >... - Page 42 Flash sync speed and aperture value, by shooting mode Shutter Speed Aperture Value Set automatically (1/X sec. to 1/60 sec.)* Set automatically Manually set (1/X sec. to 30 sec.) Set automatically Set manually Set automatically (1/X sec. to 1/60 sec.)* Set manually / automatically (at least 1/X sec.) Set manually / automatically Set manually (1/X sec.
- Page 43 Auto Zoom for Sensor Size The Speedlite automatically recognizes the image sensor size of the EOS Digital camera and sets optimal flash coverage for the effective shooting angle of view of the lens in a focal length range of 24–200 mm.
- Page 44 Transmission of Color Temperature Information This feature provides optimal white balance in flash photography by using color temperature information at the moment of firing, which is transmitted by the Speedlite to the EOS Digital camera. It is automatically enabled when camera white balance is set to < >, <...
- Page 45 AF-Assist Beam The Speedlite's built-in LED AF-assist beam automatically fires to assist with autofocusing in low-light scenes. As for compatible angles of view, the AF-assist beam is effective for lens focal lengths of 24 mm and longer, and the effective range is approx. 0.6–10 m (2.0–32.8 ft.) at the center of the AF area.
-
Page 46: Checking Battery Information
Checking Battery Information You can check the status of the battery in use. Press the < > button. Display the information screen. Press the joystick vertically or horizontally or turn < > to select < >, then push the joystick straight in. - Page 47 : Recharge performance good : Moderate : Battery replacement recommended Caution Using a genuine Canon Battery Pack LP-EL is recommended. Non-genuine batteries may not offer peak Speedlite performance, and they may lead to malfunctioning. Note If the message [Cannot communicate with battery Use this battery?] appears,...
-
Page 48: Advanced Flash Photography
Advanced Flash Photography This chapter describes advanced shooting methods using Speedlite features. Caution Features on pages with in the upper right are not available when the camera is in Full Auto or Basic Zone modes. All operations in this chapter are available with the camera shooting mode set to <... -
Page 49: Flash Exposure Compensation
Flash Exposure Compensation Flash output is adjustable. The amount of flash exposure compensation can be set in a range of ±3 stops, in 1/3-stop increments. Select < > with the joystick. - Page 50 Set the flash exposure compensation amount. Press the joystick horizontally or turn < > to set the amount of compensation, then push the joystick straight in. “0.3” represents 1/3 stop and “0.7,” 2/3 stop. To cancel flash exposure compensation, return the value to “±0.” After you set a new value, it will not change if you press the joystick vertically.
-
Page 51: Flash Exposure Bracketing
Flash Exposure Bracketing You can take three shots while automatically changing the flash output. This feature is referred to as flash exposure bracketing (FEB). The setting range is ±3 stops, in 1/3-stop increments. Select < > with the joystick. Press the joystick down to select FEB. - Page 52 Set the FEB level. Press the joystick horizontally or turn < > to set the FEB level, then push the joystick straight in. “0.3” represents 1/3 stop and “0.7,” 2/3 stop. When used with flash exposure compensation, FEB shooting is centered on your specified flash exposure compensation amount.
-
Page 53: Fe Lock
FE Lock Shooting with flash exposure (FE) locked provides suitable flash exposure over your specified area of the subject. With < > displayed on the LCD panel, press the camera's < > (AE lock) button. Focus on the subject. Press the < >... -
Page 54: High-Speed Sync
High-Speed Sync High-speed sync enables flash photography at even higher shutter speeds than the maximum flash sync shutter speed. This is effective when shooting with an open aperture in < > (aperture-priority AE) mode to blur the background behind subjects outdoors in daylight, for example. - Page 55 Select < >. Press the joystick horizontally or turn < > to select < >, then push the joystick straight in. Before shooting, confirm that < > appears in the viewfinder. Caution With high-speed sync, the faster the shutter speed, the lower the guide number. You can check the effective flash range on the LCD panel.
-
Page 56: Second-Curtain Sync
Second-Curtain Sync Using second-curtain sync at low shutter speeds enables natural shots of subject motion trails, such as car lights. The flash fires immediately before the camera finishes shooting (before the shutter closes). Push the joystick straight in. Select the item shown in (1). Press the joystick vertically or horizontally or turn <... - Page 57 Note Second-curtain sync works well in < > (Bulb) shooting mode. The Speedlite fires twice in < > flash mode. The first firing, which does not indicate malfunctioning, is preflash to determine flash output. To return to normal flash firing, select < >...
-
Page 58: Bounce
Bounce < > Close-Range Flash Photography Catchlight Shooting Pointing the flash head at a ceiling or wall to use the light reflected from it can soften subject shadows, enabling more natural-looking shots. This shooting method is referred to as bounce flash photography. Setting the orientation of the flash head You can turn or tilt the flash head as shown. - Page 59 < > Close-Range Flash Photography You can shoot subjects at a close range of approx. 0.5–2 m (1.6–6.6 ft.) by tilting the flash head down 7°. Tilting the flash head down by 7° changes the display to < >. Note The following screen appears when the flash head is tilted down.
- Page 60 Catchlight Shooting Using the catchlight panel when shooting a portrait enables you to capture reflected light in a person's eyes and create a more vivid expression. Tilt the flash head up 90°. Pull up the wide panel. Lift the tab in the middle of the wide panel. The white catchlight panel comes out with it.
- Page 61 Caution Position the flash head toward the front and 90° up. When the flash head is rotated to the left or right, the catchlight is not very effective. To effectively obtain the catchlight in a person's eyes, shoot within approx. 1.5 m / 4.9 ft.
-
Page 62: Flash Coverage Setting
Flash Coverage Setting Wide Panel Flash coverage can be set automatically or manually. Set to < > (Auto) for automatic adjustment of flash coverage to suit the focal length (shooting angle of view) of the attached lens and the size of the image sensor ( ). - Page 63 Set the flash coverage. Press the joystick vertically or horizontally or turn < > to select the flash coverage, then push the joystick straight in. To set automatically, select < >, and to set manually, select a value (focal length in mm). Note Flash coverage that you set manually should match or exceed the shooting angle of view, to avoid vignetting.
- Page 64 Wide Panel The built-in wide panel enables flash photography covering the angle of view of an ultra wide-angle lens with a focal length of 14 mm. Pull out the wide panel. Pull out the tab in the middle of the wide panel. The white catchlight panel comes out with it.
- Page 65 Note Flash coverage is set automatically when the wide panel is used. It cannot be changed manually.
-
Page 66: Manual Flash
Manual Flash Setting Manual Flash Output from FE Memory Metered Manual Flash Exposure Flash output can be set in a range of 1/1024 to full output (1/1), in 1/3-stop increments. By using a commercially available flash meter, you can determine the flash output required for suitable exposure. - Page 67 Select < > with the joystick. Set the flash output. Press the joystick horizontally or turn < > to set the flash output, then push the joystick straight in. The approximate shooting distance (1) and the aperture value (2) are displayed when you press the camera shutter button halfway.
- Page 68 Setting Manual Flash Output from FE Memory The flash output level used when shooting in < > flash mode can be applied as the level for < > flash mode. Set up the FE memory function. In the personal functions, set P.Fn-04 < >...
- Page 69 Set the flash mode to < >. Select < > with the joystick. Press the joystick vertically or horizontally or turn < > to select < >, then push the joystick straight in. Check the flash output. Confirm that the subject is within the effective flash range (1).
- Page 70 Caution Before firing with the Speedlite set to < >, make sure the flash-ready lamp is red (fully charged). If you adjust the ISO speed, aperture value, or other settings that involve flash output (such as light intensity or flash zoom) after shooting with the Speedlite set to <...
- Page 71 Metered Manual Flash Exposure Using a camera compatible with metered manual flash, you can set the flash exposure level manually before shooting. This is effective in close-range flash photography. Use a standard 18% gray reflector (commercially available) and shoot as follows. Configure the camera and Speedlite settings.
- Page 72 Set the flash exposure level. Adjust the Speedlite's manual flash output to align the flash exposure level with the standard exposure index. Take the picture. Remove the gray reflector and take the picture. Note Refer to camera instruction manuals for details on cameras that are compatible with metered manual flash.
-
Page 73: Stroboscopic Flash
Stroboscopic Flash Calculating the Shutter Speed Using stroboscopic flash at low shutter speeds enables you to capture continuous movement in a single shot, as in sequential photography. For stroboscopic flash, set the flash output, flash count, and flash frequency (flash count per second, equivalent to Hz). - Page 74 Push the joystick straight in, then select an item. Press the joystick vertically or horizontally or turn the < > to select the flash frequency (1), flash count (2), or flash output (3), then push the joystick straight in. Set the value. Press the joystick horizontally or turn <...
- Page 75 Calculating the Shutter Speed To ensure that the shutter remains open until all stroboscopic firing is finished, calculate a shutter speed to set on the camera as follows. Flash count ÷ flash frequency = shutter speed For example, when flash count is set to 10 (times) and flash frequency to 5 (Hz), set the shutter speed to at least 2 sec.
- Page 76 Maximum continuous flash count Maximum flash count is as follows when the flash count is indicated as “----” (bar display). Flash Output / 6–7 8–9 1/16 1/32 1/64 1/128 1/256 1/512 1/1024 Flash Output / 12–14 15–19 20–50 60–199 250–500 1/16 1/32 1/64...
-
Page 77: Modeling Lamp
Modeling Lamp Pressing the < > button illuminates the modeling lamp for 5 min. To turn it off, press the button again. This is useful for checking subject shadows created by the Speedlite. Pressing the camera shutter button completely turns off the modeling lamp. Caution Avoid looking directly at the modeling lamp at close range, which may cause visual impairment. -
Page 78: Modeling Flash
Modeling Flash The flash fires continuously for approx. 1 sec. in response to pressing the DOF preview button on the camera when cameras other than models in the EOS R or EOS M series are used as a sender with the EL-5 as a receiver. This feature is referred to as modeling flash. It is useful for checking subject shadows created by the Speedlite, as well as the balance of lighting in wireless flash photography ( Press the depth-of-field preview button on the camera. -
Page 79: Clearing Speedlite Settings
Clearing Speedlite Settings You can restore default settings for Speedlite shooting functions, wireless shooting, and Custom flash modes. Press the < > button. Select < >. Press the joystick vertically or horizontally or turn < > to select < >, then push the joystick straight in. - Page 80 Clear the settings. Press the joystick horizontally or turn < > to select < >, then push the joystick straight in. The Speedlite settings are cleared, preparing it for normal flash photography in < > flash mode. Note Clearing the settings does not clear the radio channel or wireless radio ID for wireless flash photography, Custom/Personal Functions (C.Fn/P.Fn) settings, or Custom flash mode settings (except settings for auto updating and camera mode linkage).
-
Page 81: Setting Flash Functions From The Camera
Setting Flash Functions from the Camera This chapter describes how to configure flash functions from the camera menu. Caution Operations described in this chapter are not available when the camera is in Full Auto or Basic Zone modes. Set the camera's shooting mode to < >, <... -
Page 82: Flash Control From The Camera Menu
Flash Control from the Camera Menu Flash Function Settings Settings Available on the Flash Function Settings Screen Flash C.Fn Settings You can set flash functions and Custom Functions from the camera menu. If Custom Functions on the Speedlite are not displayed on the camera, try updating the camera firmware, or set them from the Speedlite. - Page 83 Flash Function Settings Set the function. The setting screen and items displayed vary depending on the camera. Select an item and set the function. Example of display...
- Page 84 Settings Available on the Flash Function Settings Screen On the camera's [Flash function settings] or [External flash func. setting] screen, you can configure settings for normal flash photography or radio transmission wireless flash photography. Main functions you can configure are as follows. Available settings vary depending on flash mode, wireless function settings, and other conditions.
- Page 85 Contin flash ctrl Set to [E-TTL each shot] to perform flash metering for each shot. Set to [E-TTL 1st shot] to perform flash metering for only the first shot before continuous shooting. The flash output level for the first shot is applied to all subsequent shots. Useful when prioritizing continuous shooting speed without recomposing shots.
- Page 86 Caution [Flash zoom] (flash coverage) is not available when flash coverage is automatically set, as when the wide panel is used. Note Flash exposure compensation cannot be performed from the camera when it is set on the Speedlite. If both are set at the same time, the Speedlite setting takes precedence.
- Page 87 Flash C.Fn Settings You can set Custom Functions for the Speedlite from the camera menu. The information displayed varies depending on the Speedlite used. For details on Custom Functions, see Customization with Custom Functions. Select [Flash C.Fn settings]. Select [Flash C.Fn settings] or [External flash C.Fn setting]. Set the Custom Function.
- Page 88 Caution Personal Functions (P.Fn) cannot be set or collectively cleared from the camera menu screen. Set them on the Speedlite.
-
Page 89: Radio Transmission Wireless Flash Photography
Radio Transmission Wireless Flash Photography This chapter describes radio transmission wireless flash photography using sender and receiver functionality. For details on Speedlites compatible with this wireless flash photography, refer to the Supplemental Information ( Caution Operations described in this chapter are not available when the camera is in Full Auto or Basic Zone modes. -
Page 90: Radio Transmission Wireless Flash Photography
Restrictions for Specific Cameras Shooting with wireless lighting from multiple flash units is as easy as normal E-TTL II / E-TTL autoflash shooting when you use Canon Speedlites supporting radio transmission wireless flash photography. The system is designed so that the settings of the EL-5 (sender) are automatically applied to wirelessly controlled Speedlites (receivers). - Page 91 Positioning and Range Autoflash with one receiver ( EL-5 EL-5 (3) Transmission range: Approx. 30 m / 98.4 ft.
- Page 92 Autoflash with groups of receivers ( E-TTL II / E-TTL autoflash photography is possible with two or three receiver groups, and the flash ratio (proportion of flash output) can be adjusted as needed. (1) 2 groups (A, B) (2) 3 groups (A, B, C) Caution Take a few test shots in advance, and test flash firing ( Transmission range may be shorter depending on factors such as Speedlite...
- Page 93 Shooting in a different flash mode for each group ( * This is only one example of flash mode settings. (1) E-TTL II (2) E-TTL II (3) Manual flash (4) Ceiling (5) Manual flash (6) Manual flash...
- Page 94 Group Control Firing group A You can add receivers when more light or sophisticated lighting is needed. For added receivers, simply specify the firing group (A, B, or C) that you want to be brighter. For example, when three receivers are set to firing group < >, they are all controlled as a single, high-output Speedlite in group A.
- Page 95 Restrictions for Specific Cameras Using a Speedlite other than the EL-5 as the sender may limit the functions available in radio transmission wireless flash photography. For details on available functions, refer to the instruction manual of the Speedlite used as the sender.
-
Page 96: Wireless Settings
Wireless Settings Setting as Sender Setting as Receiver Setting the Transmission Channel / Wireless Radio ID < > Lamp and Connection Indicator Sender Flash Firing On / Off Modeling Lamp Wireless On / Off Set the sender and receiver for radio transmission wireless flash photography with E-TTL II / E-TTL autoflash as follows. - Page 97 Select the firing method. Push the joystick straight in. Press the joystick vertically or horizontally or turn < > to select item (1), then push the joystick straight in. Press the joystick horizontally or turn < > to choose from < >, <...
- Page 98 Setting as Receiver Set to < >. Configure this setting on Speedlites to use as receivers. Select < > just as you set up the sender. Caution Before normal flash photography, select < > to clear the wireless (sender/receiver) settings.
- Page 99 Setting the Transmission Channel / Wireless Radio ID Set the sender's transmission channel and wireless radio ID as follows. Set the same channel and ID for both the sender and receivers. For receiver instructions, refer to the instruction manual of Speedlites equipped with radio transmission wireless receiver functionality.
- Page 100 Set a transmission channel. Press the joystick vertically or horizontally or turn < > to choose from < > or channels 1–15, then push the joystick straight in. Select item (2). Select the ID item just as you set the transmission channel, then push the joystick straight in.
- Page 101 Set the wireless radio ID. Press the joystick horizontally or turn < > to select the position (digit) to set, then push the joystick straight in. Press the joystick vertically or turn < > to select a number in the range 0–9, then push the joystick straight in.
- Page 102 Scanning and setting sender transmission channels You can scan radio signal conditions and then set the sender transmission channel automatically or manually. Setting the channel to [AUTO] will automatically reset the Speedlite to the channel with the strongest signal. When setting the channel manually, you can review scan results as you reset it.
- Page 103 Scanning when currently set to a channel (1–15) Press the < > button. Run the scan. • Press the joystick vertically or horizontally or turn < > to select < >, then push the joystick straight in. • Select < >.
- Page 104 Set the channel. • Press the joystick horizontally or turn < > to choose a channel in the range of 1–15. • Push the joystick straight in to set the channel.
- Page 105 < > Lamp and Connection Indicator You can determine the connection status from the state of the < > lamp or the icon on the LCD panel. Status Description Action Connected – Not connected Check the channel and ID Too many units Do not exceed 16 senders and receivers, combined Error Restart the senders and receivers...
- Page 106 Sender Flash Firing On / Off You can set whether the sender fires along with the receivers it controls wirelessly. When sender flash firing is enabled, the sender fires as firing group A. Push the joystick straight in. Select the item shown in (1). Press the joystick vertically or horizontally or turn <...
- Page 107 Note Disabling sender flash firing expands the available flash output range from 1/1024 to 1/8192.
- Page 108 Modeling Lamp Wireless On / Off The modeling lamp of connected sender/receiver units turns on and off in response to pressing the sender < > button when the EL-5 is a sender or receiver. This way, you can check subject shadows created by multiple Speedlites simply by operating the sender.
-
Page 109: Autoflash With One Receiver
Autoflash with One Receiver LCD Panel Illumination Flash Photography Applying Wireless Features Using Multiple Senders This section describes basic fully automatic wireless shooting with an EL-5 attached to the camera as a sender and an EL-5 set as a receiver. Set up a unit as the sender. - Page 110 Set up a unit as the receiver. Set the EL-5 for wireless control by the sender as the receiver ( You can also use other Speedlites equipped with radio transmission wireless receiver functionality. Check the channel and ID. Set the same transmission channel and wireless radio ID on senders and receivers, if they are different ( Position the camera and other Speedlite.
- Page 111 Set the flash mode to < >. Press the joystick vertically or horizontally or turn < > to select < >, then push the joystick straight in. The receiver is automatically set to < > during shooting, as controlled by the sender. Confirm that firing group control is set to <...
- Page 112 Check the connection and make sure the flash units are charged. Confirm that the < > lamp is lit in green. Confirm that the sender and receiver flash-ready lamps are lit. The sender beeps after all Speedlites have been recharged when P.Fn-05 is set to [0] ( Confirm that the <...
- Page 113 Check operation. Press the sender test flash button. The Speedlites fire. If it does not fire, confirm that it is within transmission range ( Take the picture. Just as in normal flash photography, shoot after configuring the camera. Caution Radio transmission is not possible unless the < >...
- Page 114 LCD Panel Illumination In wireless flash photography, the sender LCD panel is on or off depending on whether senders and receivers (firing groups) are charged. The sender LCD panel is lit when the sender and receiver are not fully charged. LCD panel illumination turns off approx.
- Page 115 You can also set flash exposure compensation and flash coverage manually on each receiver. With an EL-5 set as sender, wireless second-curtain sync shooting is possible with other Canon Speedlites set as receivers. For details on compatible Speedlites, refer to the Supplemental Information (...
- Page 116 Using Multiple Senders Multiple devices can be set as senders. Wireless flash photography under the same lighting arrangement (with the same receivers) is also possible using other cameras, by switching the camera that the sender is attached to. < > is displayed on the LCD panel when multiple senders are used. Caution <...
-
Page 117: Autoflash With Two Receiver Groups
Autoflash with Two Receiver Groups Receivers can be divided into firing groups A and B, and you can adjust the lighting balance (flash ratio) between them. Exposure is automatically controlled, so that the groups' combined output provides standard exposure. Push the joystick straight in. Complete these settings on each receiver. - Page 118 Set the receiver firing group in (1). Select either < > or < > for the firing group. Set one receiver to < > and another to < >. Set the sender firing group in (2). Complete steps 3–5 on the sender. Press the joystick vertically or horizontally or turn <...
- Page 119 Set the A:B flash ratio. Push the joystick straight in to select the item shown in the figure. Press the joystick horizontally or turn < > to set the A:B flash ratio, then push the joystick straight in.
- Page 120 Check the connection and make sure the flash units are charged. Confirm that the < > lamp is lit in green. Confirm that the sender and receiver flash-ready lamps are lit. The sender beeps after all Speedlites have been recharged when P.Fn-05 is set to [0] ( Make sure <...
-
Page 121: Autoflash With Three Receiver Groups
Autoflash with Three Receiver Groups Once firing groups A and B have been set up, you can fire with multiple Speedlites by adding group C. For an overview of flash control, see Group Control. Group C is useful when you want to eliminate shadows in the background behind subjects. Push the joystick straight in. - Page 122 Select the item shown in (1). Press the joystick vertically or horizontally or turn < > to select the item, then push the joystick straight in. Set to < >. Press the joystick horizontally or turn < > to select < >, then push the joystick straight in.
- Page 123 Set the A:B flash ratio. Push the joystick straight in to select the item shown in the figure. Press the joystick horizontally or turn < > to set the A:B flash ratio, then push the joystick straight in. Set the flash exposure compensation amount for firing group C. Push the joystick straight in to select the item shown in the figure.
- Page 124 Check the connection and make sure the flash units are charged. Confirm that the < > lamp is lit in green. Confirm that the sender and receiver flash-ready lamps are lit. The sender beeps after all Speedlites have been recharged when P.Fn-05 is set to [0] ( Make sure <...
- Page 125 Check operation. Press the test flash button on the sender. The Speedlites fire. If they do not fire, confirm that they are within transmission range ( Take the picture. Just as in normal flash photography, shoot after configuring the camera. Caution Radio transmission is not possible when <...
-
Page 126: Wireless Multiple-Flash Photography With Flash Ratio
Wireless Multiple-Flash Photography with Flash Ratio This section describes wireless multiple-flash shooting in manual flash mode. For each firing group, you can set flash output in a range from full 1/1 output to 1/1024 output, in 1/3-stop increments. All settings are configured on the sender. Select <... - Page 127 Select the item shown in (1). Press the joystick vertically or horizontally or turn < > to select the item, then push the joystick straight in. Configure the firing group setting. Press the joystick horizontally or turn < > to select a firing option from the following.
- Page 128 Select a firing group. If you selected < > or < > in step 5, push the joystick straight in, then press it vertically or horizontally or turn < > to select a group to set the flash output for. Set the flash output.
- Page 129 Note When < > is set, set A, B, or C as the firing group for receivers. They will not fire when set to D or E. To fire multiple receivers at the same flash output, select < > in step 2.
-
Page 130: Shooting In Group-Specific Flash Modes
Shooting in Group-Specific Flash Modes (1) Ceiling For up to five groups (A–E), you can shoot with each group set to a specific flash mode. Available flash modes include (1) E-TTL II / E-TTL autoflash, (2) manual flash, and (3) auto external flash metering. - Page 131 Set the flash mode to < >. Press the joystick vertically or horizontally or turn < > to select < >, then push the joystick straight in. The receiver flash mode is set automatically during shooting, as controlled by the sender. Set the firing groups of the receivers.
- Page 132 Configure each firing group. On the sender, set the flash mode of each firing group. Push the joystick straight in. Press the joystick vertically or horizontally or turn < > to select a firing group, then push the joystick straight in. Setting the flash mode Press the joystick vertically or horizontally or turn <...
- Page 133 Setting the flash output and flash exposure compensation amount Press the joystick vertically or horizontally or turn < > to select the item, then push the joystick straight in. Press the joystick horizontally or turn < > to set the flash output or flash exposure compensation amount, then push the joystick straight For <...
- Page 134 Before shooting, confirm that flash recharging is finished. When < > is displayed, you can determine which firing groups are not fully charged from the icons. For example, the icon shown in (1) indicates that firing group < > is fully charged. <...
-
Page 135: Firing Test Flash/Modeling Flash From Receivers
Firing Test Flash/Modeling Flash from Receivers Test flash or modeling flash ( ) can be fired in radio transmission wireless flash photography from EL-5 Speedlites set as receivers. Push the joystick straight in. Fire the flash. [Test flash firing] Press the joystick vertically or horizontally or turn < >... - Page 136 Caution For precautions on modeling flash, see Modeling Flash. Note When there are multiple senders ( ), the firing signal is transmitted to the main sender.
-
Page 137: Remote Release From Receivers
Remote Release from Receivers EL-5 Speedlites set as receivers can be used to shoot remotely in radio transmission wireless flash photography, enabling remote control shooting. Push the joystick straight in. Take the picture. Press the joystick vertically or horizontally or turn < >... - Page 138 Note The camera shoots in single shooting mode regardless of the current drive mode setting. When there are multiple senders ( ), the firing signal is transmitted to the main sender. < > is displayed on the sender LCD panel during remote release from receivers.
-
Page 139: Linked Shooting
Linked Shooting Linked shooting is supported, which automatically releases the shutters of receiver cameras when the sender fires. You can perform linked shooting with up to 16 sender and receiver cameras in all. This is useful when shooting a subject from multiple angles at the same time. For linked shooting, attach Speedlites or Speedlite Transmitters that support radio transmission wireless flash photography to the cameras. - Page 140 Before following these steps, attach a Speedlite or transmitter to all cameras you will use in linked shooting. For instructions on setting up other devices, refer to the instruction manuals of the devices. Select < > with the joystick. Set to < >.
- Page 141 Set as a sender or receiver. Press the joystick vertically or horizontally or turn < > to select < > or < >, then push the joystick straight Push the joystick straight in. Select the item shown in (1). Press the joystick vertically or horizontally or turn < >...
- Page 142 Set the flash mode. Press the joystick vertically or horizontally or turn < > to select the flash mode, then push the joystick straight in. Descriptions next to < >–< > vary depending on the registered settings. For details on Custom flash modes, see Custom Flash Modes.
- Page 143 Take the picture. Before shooting, confirm that the sender's < > lamp is lit in green. Shooting with the sender camera automatically activates shooting by receiver cameras. < > appears on the LCD panel of receivers that were used in linked shooting. Note To cancel linked shooting, change the setting in step 2 to <...
- Page 144 Caution Consider setting the lens focus mode switch to < > on receiver cameras and focusing manually before linked shooting. Receiver cameras cannot shoot in linked shooting unless they can focus on subjects with AF. Flash can be fired in linked shooting when P.Fn-02 is set to [1] ( ), but if multiple Speedlites fire together, it may prevent suitable exposure or cause uneven exposure.
-
Page 145: Customizing The Speedlite
Customizing the Speedlite This chapter describes how to customize the Speedlite with Custom/Personal Functions (C.Fn/P.Fn). Caution Operations described in this chapter are not available when the Speedlite is attached to a camera in Full Auto or Basic Zone modes. Set the camera's shooting mode to <... -
Page 146: Setting Custom And Personal Functions
Setting Custom and Personal Functions : Custom Functions : Personal Functions Custom Function List Personal Function List Clearing All Custom/Personal Functions You can customize Speedlite functions to suit your shooting preferences. The functions for this purpose are called Custom Functions and Personal Functions. Personal Functions also enable customization specifically for the EL-5. - Page 147 : Custom Functions Press the < > button. Display the Custom Functions screen. Press the joystick vertically or horizontally or turn < > to select < >, then push the joystick straight in. The Custom Functions screen is displayed.
- Page 148 Select an item to set. Press the joystick horizontally or turn < > to select the item (number) to set. Change the setting. Push the joystick straight in. Press the joystick vertically or turn < > to select an option, then push the joystick straight in.
- Page 149 : Personal Functions Press the < > button. Display the Personal Functions screen. Select < > as in step 2 for Custom Functions, then push the joystick straight in. Set the function. Set Personal Functions as in steps 3–4 for Custom Functions.
- Page 150 Custom Function List Number Item C.Fn-00 Distance indicator display < > C.Fn-01 Auto power off < > C.Fn-03 FEB auto cancel < > C.Fn-04 FEB sequence < > C.Fn-08 AF-assist beam firing < > C.Fn-10 Receiver auto power off timer <...
- Page 151 Personal Function List Number Item P.Fn-01 Quick flash < > P.Fn-02 Flash firing during linked shooting < > P.Fn-03 Change settings with dial < > P.Fn-04 FE memory < > P.Fn-05 Beeping < > P.Fn-06 Modeling lamp (brightness) < > P.Fn-07 Modeling lamp period of illumination <...
- Page 152 Clearing All Custom/Personal Functions Select < > or < > on the screen shown above, then select < > to clear all custom functions or personal functions. Caution Clearing all Custom Functions will not clear C.Fn-00. Note You can also set or clear Speedlite Custom Functions from the camera menu ( All Custom/Personal Functions registered in <...
-
Page 153: Customization With Custom Functions
Customization with Custom Functions C.Fn-00: (Distance indicator display) You can select meters or feet for the distance indicator display on the LCD panel. 0: m (Meters (m)) 1: ft (Feet (ft)) Note The right end of the effective flash range on the LCD panel changes to < > when the effective flash distance exceeds 18 m / 60 ft. - Page 154 C.Fn-04: (FEB sequence) You can change the FEB shooting sequence. 0: Standard exposure, –: Negative compensation (darker), and +: Positive compensation (brighter). 0: 0 → – → + 1: – → 0 → + C.Fn-08: (AF-assist beam firing) 0: ON (Enabled) 1: OFF (Disabled) Disables the Speedlite's AF-assist beam.
- Page 155 C.Fn-13: (Flash exposure compensation setting) (button + dial) (Direct setting with dial) You can turn < > to set the amount of flash exposure compensation or the flash output directly, without first selecting < > with the joystick. C.Fn-18: (Modeling lamp activation) You can select how the modeling lamp is activated.
- Page 156 C.Fn-22: (LCD panel illumination) The LCD panel is illuminated in response to button or dial operations. You can change this illumination setting. 0: 12 sec. (illuminated for 12 sec.) 1: OFF (Disable panel illumination) 2: ON (stays on)
-
Page 157: Customization With Personal Functions
Customization with Personal Functions P.Fn-01: (Quick flash) You can set whether to fire the flash (Quick flash) when the flash-ready lamp is still blinking in red (before fully charged), so there is less time to wait for recharging. 0: ON (Enabled) 1: OFF (Disabled) Caution Using Quick flash in continuous shooting (... - Page 158 P.Fn-03: (Change settings with dial) You can select whether to allow direct configuration of the kinds of functions shown in the lower figure simply by turning < > on screens such as this one that are accessed by pushing the joystick straight in. 0: OFF (Disabled) Normal method of operation.
- Page 159 P.Fn-04: (FE memory) You can select whether to update, based on ETTL flash output, the flash output maintained in manual mode. 0: OFF 1: ON 2: ON / Note Setting P.Fn-04 to [2] limits the modes available to < > and < >...
- Page 160 P.Fn-06: (Modeling lamp (brightness)) You can set the brightness of the modeling lamp. Turn < > to select an option, then push the joystick straight in. (1) Selected cursor position (2) Default indicator : Press the joystick horizontally or turn < >...
- Page 161 P.Fn-08: (Joystick customization) You can assign frequently used functions to vertical or horizontal joystick positions. This simplifies access to the setting screen – just press the joystick in the direction that the function is assigned to. To select a direction for the setting, press the joystick horizontally, and to select the function to assign, press it vertically.
-
Page 162: Custom Flash Modes
Custom Flash Modes Registering Custom Flash Modes Canceling Automatic Updating Clearing Registered Custom Flash Modes Linking with Camera Shooting Modes The Speedlite can be used with settings for flash modes and wireless functions that you register in advance. Note Initially, Custom flash modes are as follows. •... - Page 163 Set the flash mode. Press the joystick vertically or horizontally or turn < > to select < >, < >, or < >, then push the joystick straight in. Descriptions next to < >–< > vary depending on the registered settings.
- Page 164 Registering Custom Flash Modes You can register current Speedlite settings such as general flash functions, Custom functions (except C.Fn-00) ( ), and Personal functions ( ) as Custom flash modes assigned to < >–< > modes. Press the < > button. Select <...
- Page 165 Register the desired items. Press the joystick horizontally or turn < > to select < >, then push the joystick straight in.
- Page 166 Canceling Automatic Updating If you change a setting while shooting in Custom flash mode, the mode can be automatically updated with the new setting. By default, this feature is enabled (< >). Press the < > button. Select < >. Press the joystick vertically or horizontally or turn <...
- Page 167 Select < >. Press the joystick vertically or turn < > to select < >, then push the joystick straight in. Display then changes to < >.
- Page 168 Clearing Registered Custom Flash Modes On the screen of step 3 in Registering Custom Flash Modes, select the Custom flash mode to clear (< >, < >, or < >). General flash functions, Custom functions (except C.Fn-00) ( ), and Personal functions ( ) are cleared.
- Page 169 Linking with Camera Shooting Modes Custom flash modes can be used in conjunction with Custom shooting modes on a camera. For camera instructions, refer to the camera instruction manual. Available flash modes vary depending on the camera shooting mode. [E-TTL II flash metering], [Manual flash], and [MULTI flash (stroboscopic)] are available in <...
- Page 170 Select < >. Press the joystick vertically or horizontally or turn < > to select < >, then push the joystick straight in. Select < >. Press the joystick vertically or turn < > to select < >, then push the joystick straight in. Display then changes to <...
- Page 171 Note Custom flash modes are only linked to camera modes when the Speedlite is used with cameras that have Custom shooting modes. Custom shooting and flash modes with the same number are linked. When used with cameras without Custom shooting mode < >, the Speedlite's Custom flash mode <...
-
Page 172: Reference
Reference This chapter describes the flash system and includes frequently asked questions. • Flash Firing Restriction Due to Temperature Increase • Troubleshooting Guide • Specifications • Accessories... -
Page 173: Flash Firing Restriction Due To Temperature Increase
Flash Firing Restriction Due to Temperature Increase Temperature Increase Warning Continuous Flash Count and Rest Time Repeated use of continuous, stroboscopic, or modeling flash at short intervals may increase the temperature of the flash head, battery, and areas near the battery compartment. Repeated flash firing gradually increases the firing interval, up to approx. - Page 174 Modeling lamp temperature increase warning The following warning appears when the modeling lamp becomes hot. To clear warning, push the joystick straight in, or press the < > button. The modeling lamp may dim or turn off if the ambient temperature around it becomes too high.
- Page 175 Modeling flash ( Stroboscopic flash ( Varies depending on firing conditions * As measured in manual flash mode according to Canon testing standards. * Using a new, fully charged Battery Pack LP-EL * 1: When using the wide panel Caution Do not touch the flash head, battery, or near the battery compartment after continuous flash firing.
- Page 176 Caution Do not open or close the battery compartment cover while flash firing is restricted. This will cancel the flash firing restriction, which is potentially very dangerous. The firing interval becomes longer as the flash head becomes hotter, even if no level 1 warning is displayed.
-
Page 177: Troubleshooting Guide
(1) there is a problem with the battery charger or battery, or (2) communication with a non-Canon battery has failed. In the case of (1), unplug the charger, reinsert the battery pack, and wait 2–3 minutes before plugging the charger in again. - Page 178 [Cannot communicate with battery Use this battery?] appears. The battery pack may be damaged. If so, purchase a replacement. For safety, consider using a genuine Canon Battery Pack LP-EL. As a safety mechanism, flash recharging will take longer if you continue using an unresponsive battery pack.
- Page 179 Normal flash photography The power does not turn on. Make sure the battery compartment cover is closed ( Replace the battery with a new one. The Speedlite does not fire. Insert the mounting foot all the way into the camera hot shoe and slide the lock lever right to secure the Speedlite to the camera ( If <...
- Page 180 The modeling lamp does not light up. Stop using the Speedlite for 40 min. if the modeling lamp goes off. If the problem persists, contact a Canon Service Center. Flash output from the AF-assist beam cannot be adjusted. Flash output is fixed for the EOS R3, EOS R7, and EOS R10. For other cameras with a...
- Page 181 Radio transmission wireless flash photography Receivers do not fire or unexpectedly fire at full output. Set the sender to < > and receivers to < > ( Use the same settings for transmission channels and wireless radio IDs on the sender and receivers ( Make sure receivers are within transmission range of the sender ( Run a transmission channel scan and set the channel with the strongest signal (...
- Page 182 Linked shooting Standard exposure is not provided, or exposure is uneven. Firing multiple Speedlites together in linked shooting may prevent suitable exposure or cause uneven exposure. Consider firing only one Speedlite or using a self-timer to fire multiple units at different times.
-
Page 183: Specifications
Shoe-mount E-TTL II/E-TTL autoflash Speedlite Compatible EOS cameras with a multi-function shoe and firmware compatible with EL-5 cameras * For details, refer to the Canon website ( Flash head Normal flash guide number Maximum guide number (at approx. ISO 100) - Page 184 Manual flash guide number Maximum guide number (at approx. ISO 100) Flash coverage Flash output Unit 14 mm* 24 mm 28 mm 35 mm 50 mm 70 mm 80 mm 105 mm 135 mm 200 mm 14.8 28.7 30.0 36.0 42.7 47.1 49.1...
- Page 185 Bounce direction Bounce angle (approx.) 45° 60° 75° 90° 120° 0° Down 7° Bounce angle Left 60° 75° 90° 120° 150° 180° 0° Right 60° 75° 90° 120° 150° 180° Normal flash Flash output Flash duration (approx., sec.) Flash output Flash duration (approx., sec.) 1/710 1/64...
- Page 186 Exposure control Flash modes and available functions Flash mode Flash exposure compensation FE lock Radio transmission wireless E-TTL II/E-TTL autoflash* ○ ○ ○ ○ Manual flash ○ Flash modes Stroboscopic flash ○ (exposure control modes) ○ ○ ○ Group firing* ○* Custom flash mode Following the registered flash mode...
- Page 187 Quick flash Recharge time Battery Pack LP-EL 0.1–1.2 sec. 0.1–1.0 sec. * Using a new, fully charged Battery Pack LP-EL * Based on Canon testing standards Normal flash (fully Quick flash Charging in progress charged) Flash-ready lamp Lit in red...
- Page 188 AF-assist beam The LED AF-assist beam is not used under these conditions - Lens attached: Set to < > mode - Camera: Set to [Servo AF], [AF-assist beam firing] set to [Disable] • Light emitted Visible light (from white LEDs) •...
- Page 189 Wireless functions via radio transmission Supported Sender * Secondary and additional units serve as sub-senders and display a “SUB SENDER” icon Wireless settings * Receivers cannot remotely control sub-senders Receiver Supported Standards compliance IEEE 802.15.4, ARIB STD-T66 Primary modulation: OQPSK Communication method Secondary modulation: DS-SS Transmission frequency...
- Page 190 Approx. 350–2,450 Maximum flash * Using a new, fully charged Battery Pack LP-EL count * Based on Canon testing standards Radio Approx. 17 hr. continuously transmission * Time until the Speedlite turns off while connected wirelessly via radio transmission...
- Page 191 All specifications above are based on Canon's testing standards. Product specifications and external appearance are subject to change without notice.
-
Page 192: Accessories
Because this product is designed for optimal performance with genuine Canon accessories, use with genuine accessories is recommended. Note that Canon shall not be liable for any damages resulting from accidents, such as malfunction or fire, that occur due to battery leakage or explosion or other problems from non-genuine Canon accessories.
Need help?
Do you have a question about the Speedlite EL-5 and is the answer not in the manual?
Questions and answers