Table of Contents
Advertisement
Advertisement
Table of Contents

Related Manuals for ICANCLAVE STE-23-D


Summary of Contents for ICANCLAVE STE-23-D
- Page 1 STEAM STERILIZERS Instructions Manual For Model: STE-23-D...
- Page 3 If this picture appears on the screen when power on or E88 appears on the report, please call your dealer or local service maintenance. Your steam sterilizer needs a regular maintenance. Instructions Manual Icanclave STE-23-D Ningbo Ican Machines Co., Ltd. No. 77 Yunlin East Road, Gulin Town, Ningbo, China.
-
Page 4: Table Of Contents
Table of Contents 1. General ..............................1.1 Scope of manual ............................1.2 Intended use ............................. 1.3 General Safety Instructions ........................1 1.4 Standards and directives .......................... 1.5 Symbols ..............................2. Description of the autoclave ........ -
Page 5: General
Instructions Manual 1. General 1.1 Scope of Manual This manual contains information concerning the installation, operation and maintenance of the steam sterilizers. To ensure proper performance of the autoclave, the instructions given in this manual should be thoroughly understood and followed. Keep the manual near to the sterilization in a readily accessible location for future reference. -
Page 6: Description Of The Autoclave
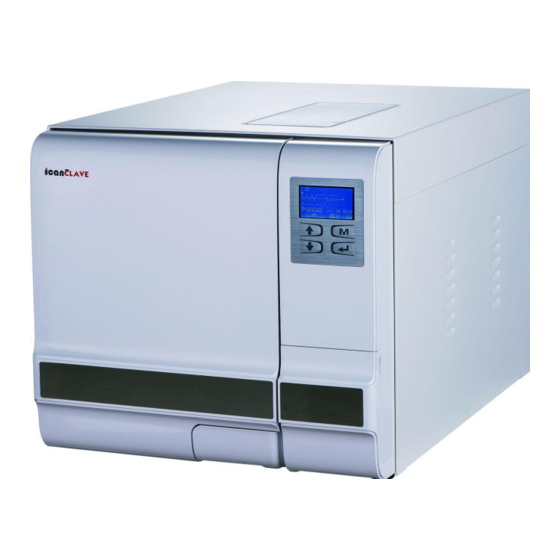
Instructions Manual 2. Description of the sterilizer 2.1 Sterilizer views 1. Door 8. LCD 15. Safety valve 2. Seal 9. Control Panel 16. Circuit breaker 3. Door lock 10. Printer (Optional) 17. Power socket 4. Door handle 11. USB port 18. -
Page 7: Technical Specifications
Instructions Manual 2.3 Technical specifications Item Parameter Chamber φ247mm x 450mm Rated Voltage 220-240 VAC; 50 Hz Circuit breaker F16A/400V Nominal power 1750VA Sterilization temperature 121°C /134°C Approx 2.5 L (Water at level Max) Capacity of the distilled water tank Approx 0.5 L (Water at level Min) Operation temperature 5°C-40°C... -
Page 8: Installation
Instructions Manual 3. Installation 3.1 General conditions Position the device on a plane surface with minimum capacity 60 kgs. The sterilizer should be placed on a level worktable. Improper water level in the chamber could cause a sterilizer malfunction. Leave at least 10cm between the device rear part and the wall. The clearance required to open the door is 40cm. Position the autoclave at such a height as to make it possible for the operator to check the whole sterilization chamber and carry out the normal cleaning operations. -
Page 9: Basic Set
Instructions Manual 4.1 Basic Set The “Basic Set” Menu permits to set the following options: Program *Date *Time *Language Basic Set Select the “Basic Set” from the main menu and Tap button. Report Select the item by taping the button. The unit you selected will be lighted. Adjust the value by Taping button. -
Page 10: Operation
Instructions Manual *Wrap the samples one by one or, if more tools have to be set in the same bag, verify that these are made of the same material. *Don’t use metallic clips, pins or other, as this jeopardizes the maintenance of the autoclave. *Don’t overload the trays over the stated limit (see appendix 2). -
Page 11: Manual Abort The Program
Instructions Manual 5.5 Manual abort of the program It is possible to interrupt a started cycle prematurely. If you need to interrupt a cycle and remove the items urgently, you may hold the button for 3 seconds during the drying time to skip the dry cycle. If you interrupt a cycle before it reaches the “Drying”... -
Page 12: Printer
Instructions Manual The middle four numbers represent cycle number. The last two numbers represent error code. E.g. 00:no error;01: error E01 5.8 Printer (Optional) If installed you can see the Icon in the screen stop flashing (see Installation), at the end of each cycle The printer (Optional) will produce a report of the cycle that just ended. - Page 13 Instructions Manual ================================ ======================= Program: WRAPPED Program:Vacuum test Temperature: 134C Tp:1℃ Pressure: 206.0 kPa P1:-75.0kPa Drying Time: 08Min P2:-74.0kPa Holding Time: 4.0Min rate of pressure rise:0.10 -------------------------------- Start Time:08:22 Time Temp. Pressure End Time:09:01 Start 12:28:17 089.0C Date:2017-07-19 12:31:32 087.1C -075.0kPa Test Value:Success 12:33:43 110.2C 052.0kPa SN:E00001...
-
Page 14: Advance Settings
Instructions Manual 6. Advance setting The advance setting interface permits to set the following Options: *Parameter: Permits to change the time of Holding time and Drying time. *Unit: Permits to change the unit of measure temperature and pressure. *Preheat: This option allows you to maintain the required temperature in the sterilization chamber and the steam generator to start a new cycle immediately for the next 60 minutes so to run a new cycles should expect preheating time from 3 to 5 minutes upon start. -
Page 15: Maintenance
Instructions Manual 7.Maintenance To assure proper operation and maximum autoclave life, carefully follow all recommendations for periodic maintenance. One of the MOST important steps you can take to prevent problems with your sterilizer is to use ONLY distilled water. Frequency Number of cycles Maintenance operation Clean the door seal... -
Page 16: Replacement Of The Door Seal
Instructions Manual Open the door. Insert the spanner tool in the gap beneath the plastic cover; use the spanner to grip the adjusting nut. Turn the nut counter clockwise as the figure below. This will tighten the sealing plate. Turn the nut until the sealing plate is tight. If the door knob is too tight, you may also turn the nut clockwise to loosen it. -
Page 17: Error Codes
Instructions Manual 8.Error codes Code Description Proposed solution Steam generator temperature sensor Power off & run a new cycle error Contact your supplier if error persists. Power off & run a new cycle Inner temperature sensor error Contact your supplier if error persists. Temperature sensor of the chamber Carefully ensure that the chamber wall is heated and wall error... -
Page 18: Transportation And Storage
Instructions Manual 9. Transportation and storage 9.1 Switch off the sterilizer before transportation or storage. 9.2 Pull out the plug. Let the machine cool down. 9.3 Drain the distilled water tank and the used water tank. Condition for transport and storage Temperature: -20°C ~ +50°C Relative humidity: ≤... -
Page 19: Appendix 1 - Water Properties / Characteristics
Instructions Manual Appendix 1 Water properties / Characteristics Description Feed water Condensate Evaporate residue ≤ 10mg/ I ≤ 1.0mg/kg Silicium oxide sio2 ≤ 1mg/ I ≤ 1.0mg/kg Iron ≤ 0.2mg/ I ≤ 0.1mg/kg Cadmiun ≤ 0.005mg/ I ≤ 0.05mg/kg Lead ≤... -
Page 20: Appendix 2 - Diagrams Of The Sterilization Programs
Instructions Manual Appendix 2 Diagrams of the sterilization programs Programs Type 25-45 SOLID 5.00 1.50 Unwrapped solid material 30-60 35-60 5.00 1.50 Unwrapped solid material WRAPPED Single-wrapped solid or hollow 35-65 4.00 1.20 material 1.25 0.40 Unwrapped porous material 45-65 1.10 0.30 Single-wrapped porous material... - Page 21 Instructions Manual Solid Wrapped Pressure(kPa) Pressure(kPa) Textile Prion Time(min) Time(min) B&D Test Liquid Pressure(kPa) Pressure(kPa) HELIX Test Time(min) Time(min) Vacuum Test Pressure(kPa) Drying Pressure(kPa) Time(min) Time(min)
-
Page 22: Appendix 3 - Wiring Diagram
Instructions Manual Appendix 3 Wiring diagram Chamber heater Steam heater Thermal protector Chamber heater Steam heater Water pump Vacuum pump Printer Port USB drive Tank Min. Level Public Tank Max. Level Used water tank Printer power Door locking Door lock switch power Door close switch Display screen... -
Page 23: Appendix 4 - Hydraulic Diagram
Instructions Manual Appendix 4 Hydraulic diagram Air filter Pressure sensor Safety valve Test Chamber Condenser Port Water pump Distilled water tank Vacuum pump Used water tank V1: Vacuum pump valve V2: Air filter valve V3: Water pump valve V4: Water release valve V5: Vacuum pump start valve...
Need help?
Do you have a question about the STE-23-D and is the answer not in the manual?
Questions and answers
What is the solution to a persistent 13 error
For a persistent E13 error (Vacuum failed) on the ICANCLAVE STE-23-D, the solution is to power off the device and run a new cycle. If the error persists, contact your supplier.
This answer is automatically generated
How can we solve Error 13
Error 13 on the ICANCLAVE STE-23-D indicates a vacuum failure. To resolve this issue, power off the sterilizer and run a new cycle. If the error persists, contact your supplier for further assistance.
This answer is automatically generated
How i can resolve E24?
To resolve the E24 error on the ICANCLAVE STE-23-D:
1. Check for leaks in the system.
2. If a leak is found, inspect and correct it (e.g., check the door seal).
3. If the chamber is hot, let it cool down.
4. After cooling, switch off the device.
5. Switch on the device again and retry the operation.
If the error persists, contact your supplier.
This answer is automatically generated