Table of Contents
Advertisement
Advertisement
Table of Contents

Related Manuals for ICANCLAVE STE-18-D Pro


Summary of Contents for ICANCLAVE STE-18-D Pro
- Page 1 Instructions Manual For Models: STE-18-D Pro STE-23-D Pro...
- Page 2 Prior to operating this instrument, please read the operations manual carefully and follow all installation instructions. Ningbo Ican Machines Co., Ltd. European Representative: No. 77 Yunlin East Road, Gulin Town, Icanclave Europe S.L Ningbo, China. Juan Ramon Jimenez 6 www.icanclave.com Quart de Poblet, Valencia, Spain.
-
Page 4: Table Of Contents
Content 1. General 4 Scope of manual 4 Intended use 4 General safety instructions 4 Standards and directives 5 Symbols 2. Description of the sterilizer 5 Control panel 6 Sterilizer views 7 Technical specification 7 Packing content 3. Installation 7 General conditions 8 Power supply connection 8 Location requirements 4. -
Page 5: Scope Of Manual
Scope of Manual This manual contains information concerning the installation, operation and maintenance of the steam sterilizers. To ensure proper performance of the sterilizer, the instructions given in this manual should be thoroughly understood and followed. Keep the manual near the sterilizer in an accessible location for future reference. Intended Use The steam sterilizer described in this manual is intended for the sterilization in all medical, dental, beauty, vet and tattoo fields of the following types of instrument loads:... -
Page 6: Symbols
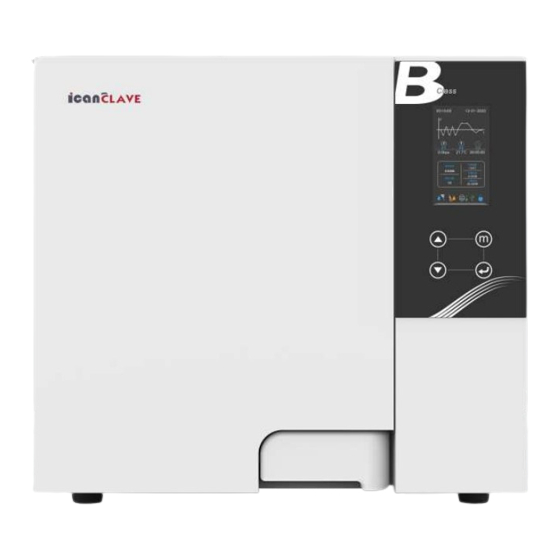
Symbols For safe operation, please pay close attention to the alert symbols below which can be found on the sterilizer and throughout this manual. Important information (Caution) Hot surface Ground connection 2 Description of the sterilizer Screen and Control panel Time Date Process curve... -
Page 7: Sterilizer Views
Sterilizer views 1. Door 9. Touch pad 17. Power socket 2. Door seal ring 10. Printer 18. Steam vent 3. Door lock 11. USB port 19. Condenser vent 4. Door handle 12. Main switch 20. Bacterial filter 5. Chamber 13. Distilled water tank 21. -
Page 8: Technical Specification
Technical specifications Model STE-18-D Pro STE-23-D Pro Chamber (mm) 250 x 350 250 x 450 Overall dimensions (mm) 490(W)*455(H)*600(D) 490(W)*455(H)*690(D) Net Weight (kg) Nominal power (VA) 1750 1750 Rated Voltage 220-240V / 110-120V ; 50/60 Hz Sterilization temperatures 121°C/134°C Capacity of the distilled 2.5 L (Water at level Max.) Approx. -
Page 9: Power Supply Connection
Do not install the device near washing basins, taps, etc. where it is likely to be splashed. Do not lean on the door when it is opened. Do not place trays, papers, fluid containers or other objects on the sterilizer. Power supply connection Check the label on the back panel of sterilizer to verify the voltage rating for the unit. -
Page 10: Preparation Of The Sterilization Materials
Drain the distilled water tank Attach the drain hose on a fitting connection located on the front of the sterilizer. Pull the connector to start the draining. Attention: The capacity of the distilled water tank is approximately 2.5 liters. Drain the used water tank Attach the drain hose on a quick fitting connection located inside the service door at the left. -
Page 11: Basic Set
Basic Set The “Basic Set” menu permits to set the following options: *Date *Time *Language Select the “Basic Set” from the main menu by pressing button. Select the item by pressing button. The unit you selected will be lighted. Adjust the value by pressing buttons. - Page 12 Select “Unit” from the menu by pressing button. Select the parameter by pressing button. Adjust it by pressing Press button to save and back. Preheat When this mode is activated, the chamber and steam generator start to warm until it reaches the minimum temperature to begin a sterilization cycle, this helps to reduce the total cycle time and the drying efficiency.
-
Page 13: Operation
Water quality (optional) If your sterilizer is equipped with a water quality sensor and you want to deactivate it, select “Water quality” from the menu by pressing button. Adjust it by pressing Press button to save and back. Last Error In order to help the technical assistance process, the most relevant information corresponding to the last error can be... -
Page 14: Select The Program
Load After selecting program, the materials to be sterilized can now be placed on the tray and placed inside the chamber by the tray handle. After the instruments are loaded, you may close the door. Select the program Enter to the main menu by pressing button, Select “Program”. -
Page 15: End Of Cycle
End of the cycle Once the cycle is completed, “End” will appear at the end of the graphic, the printer will print out and the digital report saved in the USB memory is these are connected. Caution: Always use the tray handle to load or unload the tray into the sterilizer. -
Page 16: Test Program
Select “Delay start”. Select the program by pressing then press to confirm. Select the parameter by pressing button. Adjust it by pressing Press button to save and back. Test Programs Helix Test Put the Helix test device into the chamber, then close the door. Select “Program”... -
Page 17: Descale
Select “Program” from the main menu by pressing to enter in the menu, then select “Vacuum test”. to start the cycle. After closing the door, press The stage, conditions and the status of the cycle will appear on the display. The sterilizers will perform the program automatically. - Page 18 Print report (Optional) Internal Memory In this menu you can get the information of all the cycles stored in the internal memory of the sterilizer. Select “Report” from the main menu and press button, you will see the list of records. Select the record by pressing button.
-
Page 19: Print Labels (Optional)
Print labels (Optional) Select “labels”, it will show cycle numbers. Select the cycle number, press button to print the labels. 6 Maintenance To ensure proper operation and maximum steam sterilizer life, carefully follow all recommendations for periodic maintenance. One of the most important steps you can take to prevent problems with your sterilizer is to use only distilled water. -
Page 20: Door Adjustment
Clean chamber, door seal ring, trays, and tray rack. Remove the trays and tray rack from the chamber. Clean trays, rack and inside of the chamber with mild soap. Rinse the trays, rack and inside of the chamber with a smooth cloth and distilled water. Examine door seal for possible damage. -
Page 21: Troubleshooting
1. Press the included 2. Turn the drain valve 3. Push and turn the drain hose on to the drain valve clockwise to drain the valve anticlockwise to be firmly. tank. back after draining the tank. 7 Troubleshooting Code Description Proposed solution Steam generator temperature Power off &... -
Page 22: Transportation And Storage
Power off and contact your supplier if error The pressure is overload. persists. Power off & run a new cycle Vacuum failed. Contact your supplier if error persists. Power off & run a new cycle Inner temperature sensor error #2* Contact your supplier if error persists. -
Page 23: Water Properties/Characteristics
Water properties / Characteristics Description Feed water Condensate ≤ 10mg/ I ≤ 1.0mg/kg Evaporate residue ≤ 1mg/ I ≤ 1.0mg/kg Silicium oxide sio2 ≤ 0.2mg/ I ≤ 0.1mg/kg Iron ≤ 0.005mg/ I ≤ 0.05mg/kg Cadmiun ≤ 0.05mg/ I ≤ 0.1mg/kg Lead ≤... -
Page 24: Diagrams Of The Sterilization Programs
Appendix 2 Diagrams of the sterilization programs STE-18-D Pro Programs Type Solid 134 12-30 Unwrapped solid material 4.50 1.20 Unwrapped solid material 4.50 1.20 Wrapped 30-49 Single-wrapped solid or hollow 4.00 1.10 material Unwrapped solid material 4.50 1.20 Wrapped 38~54 Single-wrapped solid or hollow 4.00... - Page 25 Appendix 3 Diagrams of the sterilization programs STE-23-D Pro Programs Type Solid 134 15-30 Unwrapped solid material 5.00 1.50 Unwrapped solid material 5.00 1.50 Wrapped 38-57 Single-wrapped solid or hollow 4.50 1.20 material Unwrapped solid material 5.00 1.50 Wrapped 46~62 Single-wrapped solid or hollow 4.50 1.20...
Need help?
Do you have a question about the STE-18-D Pro and is the answer not in the manual?
Questions and answers
E24 code E 24