
Subscribe to Our Youtube Channel
Related Manuals for Avision FF-0803S


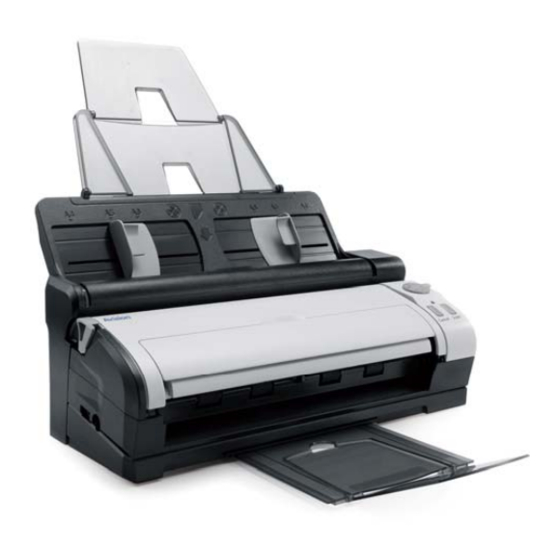
Summary of Contents for Avision FF-0803S
- Page 1 Sh e e dfe d Sca n n e r Use r ’s M a n u a l Regulat ory m odel: FF- 0803S Avision I n c.
- Page 2 The inform at ion cont ained in t his docum ent is subj ect t o change wit hout not ice. Avision m akes no warrant y of any kind wit h regard t o t his m at erial, including, but not lim it ed t o, t he im plied warrant ies of fit ness for a part icular purpose.
- Page 3 FCC Ra dio Fr e qu e n cy I n t e r fe r e n ce St a t e m e n t This product has been t est ed and found t o com ply wit h t he lim it s for a class B digit al device, pursuant t o Part 15 of t he FCC rules.
- Page 4 . ® As an ENERGY STAR Part ner, Avision I nc. has det erm ined t hat t his product m eet s t he ENERGY STAR guidelines for energy efficiency.
- Page 5 Syst e m Re qu ir e m e n t s I BM com pat ible PC 586, Pent ium or higher Microsoft Windows 2000, Windows XP, Windows Vist a, Windows 7 USB port 2.0 ( com pat ible wit h USB 1.1) At least 100 MB of free hard disk space ( 500 MB is recom m ended) At least 128 MB of syst em m em ory ( 512 MB of RAM is...
-
Page 6: Table Of Contents
Ta ble of Con t e n t s I n t r odu ct ion ..........1 - 1 Sca n n e r I n st a lla t ion ........2 - 1 Disassem bly and I nst allat ion of t he Scan Module ............ - Page 7 Ca r e a n d M a in t e n a n ce ....... 7 - 1 Cleaning t he Scanner Glass ......7- 1 Cleaning t he rollers and ADF pad ....7- 3 Replacing t he ADF Roller ......7- 6 Replacing t he ADF pad m odule ....
-
Page 8: I N T R Odu Ct Ion
1 . I n t r odu ct ion Congrat ulat ions on your purchase of t he color im age scanner. Wit h t his scanner, you can quickly scan docum ent s t o increase product ivit y. Before you inst all and operat e t he new scanner, please t ake a few m inut es t o read t hrough t his m anual. - Page 9 Scanner m ain unit Quick guide/ CD USB cable USB power cable Power adapt er N ot e : 1. Only use t he AC adapt er ( HEG42- 240100- 7L by HI TRON / DA- 24C24 by ADP) included in t he m achine. Using ot her AC adapt ers m ay dam age t he m achine and void t he warrant y.
-
Page 10: Sca N N E R I N St A Lla T Ion
Sca n n e r I n st a lla t ion Pr e ca u t ion s Keep t he scanner out of direct sunlight . Direct exposure t o t he sun or excessive heat m ay cause dam age t o t he unit . -
Page 11: Disassem Bly And I Nst Allat Ion Of T He Scan Module
2 .1 D isa sse m bly a n d I n st a lla t ion of t h e Sca n M odu le The scan m odule is det achable from t he aut om at ic docum ent feeder. - Page 12 I n st a lla t ion St e ps Align t he scan m odule t o t he docum ent feeder and insert it on t he docum ent feeder. I f it has been insert ed successfully, a snap in sound could be heard.
-
Page 13: I Nst Alling T He Scanner Driver And Cables
2 .2 I n st a llin g t h e Sca n n e r D r ive r a n d Ca ble s N ot e : The Windows syst em CD m ay be required when inst alling on som e PC’s. - Page 14 ( 2 ) Su pplyin g t h e pow e r fr om a com pu t e r via a USB pow e r ca ble Plug t he cir cle e n d of t he USB cable for power int o t he power j ack of your scanner.
- Page 15 2 .2 .2 Tu r n in g on t h e Sca n n e r Turn t he knob on t he scanner clockwise t o m ake t he blue point er point s t o any num ber t o t urn on t he scanner. The green LED will be on.
- Page 16 2 .2 .3 Tu r n in g off t h e Sca n n e r To t urn off t he scanner, t urn t he knob t o m ake t he blue point er point s t o t he power off m ark ( ) as indicat ed below.
- Page 17 Con t e n t s on t h e in st a lla t ion gr a ph ic: • I n st a ll Bu t t on M a n a ge r : To use t he but t ons on t he scanner, you need t o inst all But t on Manager.
- Page 18 2 .2 .5 Con n e ct in g t o Com pu t e r Connect t he squ a r e e n d of t he USB cable t o t he USB port of your scanner. Connect t he r e ct a n gle e n d t o t he USB port of your com put er.
-
Page 19: Com Ple T In G You R Fir St Sca N
3 . Com ple t in g You r Fir st Sca n 3 .1 Pla cin g You r D ocu m e n t 3 .1 .1 N ot ice on Usin g t h e AD F Before using t he ADF, please m ake sure t hat your paper m eet s t he following specificat ions: •... - Page 20 3 .1 .2 Loa din g Pa pe r t o t h e D ocu m e n t Fe e de r Pull out t he out put t ray beneat h t he bot t om of t he scanner as indicat ed below.
- Page 21 Load your one side docum ent ( s) t o t he docum ent feeder wit h t he t op of t he page point ing t o t he feeder. • The docum ent feeder can hold up t o 20 sheet s ( at Xerox 4024 20 lb.
- Page 22 3 .1 .3 Loa din g A Sin gle Pa ge Th r ou gh t h e Fr on t I n pu t Tr a y Open t he cover of t he front input t ray. Load your singe- page docum ent t o t he front input t ray wit h t he t op of t he page point ing t o t he front input t ray.
- Page 23 Cent er your docum ent wit h t he paper size m arks. 3 .1 .4 Usin g t h e Fu n ct ion of “Ej e ct Pa pe r Opposit e ” The scanner is designed wit h t he advanced “ ej ect paper opposit e”...
- Page 24 The following pict ure shows t he posit ion of t he scanned paper aft er choosing “ ej ect paper opposit e”...
-
Page 25: Verifying Your Scanner I Nst Allat Ion
Ve r ifyin g You r Sca n n e r I n st a lla t ion To verify if your scanner inst allat ion is correct , Avision provides you a useful t est program called Avision Capt ure Tool. Wit h t his t ool, you can perform sim ple scans and view t he capt ured im ages. - Page 26 Act ual Page Size Save File Pat h File Form at Scan Set up Choose your desired file form at from t he File Form at drop down list box. ( Default is BMP, ot her choice includes TI FF, GI F, and JPEG.) Type your desired folder nam e and file nam e in t he File Pat h box.
- Page 27 I m age Select ion From t he I m age Select ion Box, choose your desired im age t ype for your scanned im age. ( Default is Front B&W) I f you have a duplex scanner, choose Front and Rear t o scan bot h sides of your docum ent .
- Page 28 St at us Bar Fit Page View Thum bnail View 11. You can view t he scanned im age in Fit Page ( ) or Act ual Size ( 100% ) but t on ( ) from t he Viewing t oolbars at t he right side.
-
Page 29: A Glance Of T He Scanner Propert Ies Dialog Box3
3 .2 A Gla n ce of t h e Sca n n e r Pr ope r t ie s D ia log Box 1 . Ta b Opt ion s Choice: I m age, Com pression, Color Dropout , Paper, Opt ions, Set t ings, I nform at ion. -
Page 30: Usin G T H E Sca N N E R Pr Ope R T Ie S D Ia Log Box
4 . Usin g t h e Sca n n e r Pr ope r t ie s D ia log Box The Scanner Propert ies dialog box allows you t o configure t he scanner’s set t ings. I t consist s of several t abbed windows each of which will be described in t his chapt er. -
Page 31: But T Ons On T He Scanner Propert Ies Dialog Box
4 .1 Bu t t on s on t h e Sca n n e r Pr ope r t ie s D ia log Box Th e bu t t on s on t h e Sca n n e r Pr ope r t ie s dia log box Bu t t on s D e scr ipt ion D e fa u lt s... - Page 32 The following t able shows t he default set t ings: Ta b n a m e D e fa u lt se t t in gs I m a ge I m age:Front B&W Binarizat ion:Dynam ic Threshold Resolut ion:200 dpi I nvert :Blank on Whit e Scan Source:Aut o Docum ent Feeder Threshold:None...
-
Page 33: The I M Age Tab
4 .2 Th e I m a ge Ta b The I m age t ab allows you t o choose t he front side and ( or) t he rear side of your docum ent , t he t ype of im age, and t o set several basic scan set t ings. - Page 34 4 .2 .1 Th e I m a ge Se le ct ion Box The I m age Select ion box includes t he im age t ype and docum ent side opt ion. I f you wish t o scan bot h t he front side and t he rear side of your color docum ent , you can check bot h Front Color and Rear Color at t he...
- Page 35 Exam ple 2:Scanning a t wo- sided color docum ent , one in B&W( Drop Blue Color:Threshold:10, Background:79) , t he ot her in color Side/ I m age Select ion Rear Front I m a ge D e scr ipt ion Type Color Choose Color if you wish t o scan a color...
- Page 36 Fr on t / Re a r Au t o Color D e t e ct ion : Click t o aut om at ically det ect and scan t he front or t he rear page of your color docum ent in color im age m ode. I f your docum ent is in colors, t he scanner will aut om at ically scan t he docum ent int o a color im age.
- Page 37 4 .2 .2 Ot h e r I m a ge Opt ion s This is t he process of convert ing a Bin a r iza t ion grayscale or color im age t o a bi- t onal im age.
- Page 38 Fix e d Pr oce ssin g: Used for black- and- whit e and ot her high cont rast docum ent s. A single level is set t o det erm ine t he black- and- whit e t ransit ion. The t hreshold is program m able over t he ent ire densit y range.
- Page 39 Er r or D iffu sion I m a ge 4-10...
- Page 40 Th r e sh old Used t o convert a grayscale im age t o a bi- t onal im age. The value ranges from 0 t o 255. A low t hreshold value produces a light er im age, and can be used t o subdue backgrounds and subt le, unneeded inform at ion.
- Page 41 Gr a y D ocu m e n t Type : Ch oice : N or m a l, Ph ot o, D ocu m e n t Three opt ions of docum ent t ype are provided when you choose Gray as t he im age t ype for your scanned docum ent .
- Page 42 N or m a l Ph ot o D ocu m e n t ( Th r e sh old: 2 3 0 ) N or m a l Ph ot o D ocu m e n t ( Th r e sh old: 2 3 0 ) 4-13...
- Page 43 Adj ust s t he light ness or darkness of an Br igh t n e ss im age. The higher t he value, t he bright er t he im age. Drag t he slider t o t he right or left t o increase or decrease t he bright ness.
- Page 44 Re solu t ion A good cont rol of t he resolut ion result s a good det ail of an im age t hat scans. The resolut ion is m easured by dot s per inch ( dpi) . Norm ally, t he great er t he dpi num ber, t he higher t he resolut ion and t he im age file size.
- Page 45 I n ve r t Reverses t he bright ness and t he colors in t he im age. The default set t ing is Black on a Whit e background. Reverse m ode is Whit e on a Black background.
- Page 46 Sca n Ch oice : Sou r ce Au t o D ocu m e n t Fe e de r : Used t o scan m ult iple pages. Fla t be d: Used t o scan a single page. For exam ple, pages from newspaper clipping, paper wit h wrinkles or curls.
- Page 47 Color The purpose of Color Mat ching is get t ing t he M a t ch in g accurat e color. This opt ion uses t he default param et ers ( I CC profile) t o adj ust t he colors of t he im age.
- Page 48 4 .2 .4 Sca n n in g gr a ysca le im a ge s The following opt ions are available for scanning gray im ages. Bright ness Cont rast Resolut ion I nvert 4 .2 .5 Sca n n in g B& W im a ge s The following opt ions are available for scanning B&W im ages.
- Page 49 4 .2 .6 Edit in g Pr ofile s The Scanner Propert ies dialog box allows you t o change and save your frequent ly used scan set t ings int o a profile. You can edit t hese profiles by renam ing or delet ing t hem . To a dd a n e w pr ofile , Cust om ize your set t ings.
- Page 50 To loa d a pr ofile , From t he I m age t ab dialog box, choose your favorable profile from t he “ Profiles” dropdown list box. Your favorable profile will be im m ediat ely loaded and displayed on Scanner Propert ies dialog box.
- Page 51 To r e n a m e a pr ofile , From t he I m age t ab dialog box, click “ Profiles” t o prom pt t he Edit Your Profile dialog box. Choose t he profile you want t o renam e from t he dropdown list box and t hen click t he Renam e but t on.
-
Page 52: The Com Pression Tab
4 .3 Th e Com pr e ssion Ta b The Com pression t ab allows you t o com press your scanned im age and choose t he level of com pression. Bi- t onal im ages are norm ally com pressed using CCI TT st andard called Group 4 ( G4) . - Page 53 Th e Com pr e ssion t a b dia log box 4-24...
-
Page 54: The Color Dropout Tab
4 .4 Th e Color D r opou t Ta b 4 .4 .1 Color D r opou t Se le ct ion Color Dropout t ab allows you t o drop eit her of t he red, blue, or green color in your scanned im age. - Page 55 Th e Color D r opou t dia log box 4-26...
- Page 56 4 .4 .2 Ot h e r Color D r opou t Opt ion s Adva n ce d Pr oce ssin g provides t wo opt ions t hat can adj ust your scanned im age in t he best opt im al result . Filt e r This value is used t o det erm ine t he color Th r e sh old...
- Page 57 Re m ove Blu e , Th r e sh old: 2 0 , Ba ck gr ou n d: 2 5 5 Re m ove Blu e , Th r e sh old: 2 0 , Ba ck gr ou n d Le ve l: 2 1 0 4-28...
-
Page 58: The Paper Tab
4 .5 Th e Pa pe r Ta b The Paper t ab allows you t o define values relat ing t o im age out put ( i.e., Aut o Crop or not , Scan Area, OverScan, Mult i- Feed Det ect ion) . - Page 59 4 .5 .1 Cr oppin g Cropping allows you t o capt ure a port ion of t he docum ent being scanned. Ch oice : Au t om a t ic, Fix e d t o Tr a n spor t , EOP ( En d of Pa ge ) D e t e ct ion . Opt ion s D e scr ipt ion Au t om a t ic...
- Page 60 The following opt ions are only available when Fix e d t o Tr a n spor t is select ed. X- Offse t — t he dist ance from t he left end of t he scanner t o t he left edge of t he scanning area. Y- Offse t —...
- Page 61 4 .5 .2 Ot h e r Pa pe r Se le ct ion D e sk e w Use t his opt ion t o aut om at ically deskew a docum ent . Not e: I f t he skew angle is t oo great , som e of t he im age m ay be cut off.
- Page 62 Choose “ Unknown Lengt h” if you have a bat ch of long page docum ent wit h unknown lengt h. Choose “ Ent er Lengt h” t o ent er t he lengt h and widt h of your docum ent s or your desired scan size on docum ent s.
- Page 63 N ot e : Wit hin t he specified t im eout period, if you load your docum ent t o t he feeder, t he scanner st art s scanning aut om at ically. I f your scanner has a flat bed opt ion and you place your paper on t he flat bed, aft er t he t im eout period, you need t o click t he Scan but t on on t he TWAI N user int erface t o st art scanning.
-
Page 64: The Mult I- Feed Det Ect Ion Tab
4 .6 Th e M u lt i- Fe e d D e t e ct ion Ta b M u lt i- Fe e d D e t e ct ion Mult i- Feed Det ect ion allows you t o det ect overlapped docum ent t hat go t hrough t he aut o docum ent feeder. - Page 65 Addit ion a l Le n gt h D e t e ct ion Addit ional Lengt h Det ect ion allows you t o define t he lengt h of docum ent being m ult i- fed. This value indicat es t he addit ional lengt h exceeding your scan area.
- Page 66 By Le n gt h + Posit ion : When a m ult i- feed is det ect ed for t he first t im e, t he scanner m em orizes t he lengt h and posit ion of t he paper at t ached t o t he docum ent .
- Page 67 D e t e ct ion Ar e a This opt ion allows you t o specify a m ult i- feed det ect ion area. To specify a m ult i- feed det ect ion area, Choose D isa ble from t he I nt elligent Mode. The Det ect ion Area will be enabled.
- Page 68 Det ect ion Area: Out side t he Range, Box, Top: 3” , Bot t om : 7” 4-39...
- Page 69 Ult r a son ic D e t e ct ion Ult rasonic Det ect ion allows you t o set overlapped docum ent by det ect ing paper t hickness bet ween docum ent s. Not e: The availabilit y of t he funct ion varies based on t ype of scanner. There are t wo opt ions available if Mult i- Feed is det ect ed.
- Page 70 Cle a r t h e M u lt i- Fe d Pa pe r : Choice: Manual, Aut o I f Aut o is select ed, once m ult i- feed is det ect ed and scanning operat ion is st opped, t he scanner will aut om at ically clear t he t ransport of t he m ult i- fed paper.
- Page 71 H ow t o a dd t h e sou n d a la r m : 1. Click t he Browse but t on on t he right side of t he speaker icon. The Open dialog box appears. 2.
- Page 72 4 .6 .1 Re la t ive t o D ocu m e n t Re la t ive t o D ocu m e n t : ( used for bat ches of sam e- sized docum ent s) This opt ion allows you t o crop different areas on your docum ent s and deliver t hese im ages in B&W, Gray, or Color separat ely.
- Page 73 Click t he Preview t ab t o display t he Preview window. A black rect angular box appears t o indicat e t he m ax. scan size your have j ust select ed. The I m age The select ed Select ion im age A black...
- Page 74 A Cross Sign Relat ive Area Check t he B&W im age from t he I m age Select ion box t o scan t he ent ire docum ent . Click t he Scan but t on t o st art scanning t he docum ent in t wo im age t ypes and sizes.
-
Page 75: The Preview Tab
4 .7 Th e Pr e vie w Ta b The Preview t ab allows you t o preview ( a low- resolut ion scan) your im age before final scan. This preview im age let s you allocat e your scan area. You can choose your scan area by t he “... -
Page 76: The Opt Ions Tab
4 .8 Th e Opt ion s Ta b The Opt ions t ab allows you t o set following addit ional im age processing set t ings. Th e Opt ion t a b dia log box 4-47... - Page 77 Flip Side Select “ fanfold” t o rot at e t he im age Rot a t ion of t he reverse side t o 180 degrees. This is applied t o double- sided docum ent which are viewed in port rait are som et im e fed int o t he scanner in landscape or vice versa.
- Page 78 Rot a t e I m a ge Choose t he rot at ion angle from t he drop down list if you wish t o rot at e your scanned im age. Ch oice : N on e , 9 0 ° CW ( clock w ise ) , 9 0 °...
- Page 79 Bla n k Pa ge Check if you wish t o rem ove t he blank page Re m ova l and m ove t he slider t o t he left or right t o your desired t hreshold. Edge Check Whit e or Black if you wish t o add whit e or Fill...
- Page 80 I m a ge Check t he Mirror box if you wish t o reverse t he right Con t r ol and left side of your im age. Opt ion Or igin a l Th e M ir r or Effe ct 4-51...
- Page 81 D e spe ck le Occasionally sm all dot s or specks appear in t he background of a scanned im age. Rem ove unwant ed speckles provides a cleaner im age for OCR ( Opt ical Charact er Recognit ion) processing, and also helps t o reduce com pressed file size.
- Page 82 N ot e : • The funct ion is current ly available for Black and Whit e im age only. • To scan at rat ed speed, it is recom m ended t o set t he noise radius up t o 10 pixels. 4-53...
- Page 83 Background This opt ion allows you t o set your scan Set t ing background. Ch oice : W h it e Ba ck gr ou n d, Bla ck Ba ck gr ou n d. Whit e Background Black Background 4-54...
-
Page 84: The Set T Ing Tab
4 .9 Th e Se t t in g Ta b The Set t ing t ab allows you t o set t he following set t ings: Th e Se t t in g t a b dia log box En e r gy Sa vin g Check t he En a ble En e r gy Sa ve r box Con t r ol... - Page 85 Ca ch e M ode : N on e , Pa ge N u m be r , M e m or y Size . This opt ion allows you t o assign a specified m em ory size from t he available RAM t o process t he im age dat a.
- Page 86 Sh ow Sca n n in g Check and t he scanning progress bar Pr ogr e ss will be shown during scanning. Sh ow W a r n in g Check t o show t he warning m essages M e ssa ge such as “...
-
Page 87: The I M Print Er Tab
4 .1 0 Th e I m pr in t e r Ta b The I m print er t ab allows you t o print alphanum eric charact ers, dat e, t im e, docum ent count and cust om m essage on your scanned im age if digit al im print er is select ed or at t he back of your docum ent if ext ernal im print er is select ed. - Page 88 Con t e n t s Pr in t All Check Pr in t All t o aut om at ically print t he t ext at all pages of your docum ent s. Uncheck Pr in t All t o print t he t ext for t he first page of your docum ent s only.
- Page 89 St r in g Ch oice : N or m a l, Rot a t e d ( 1 8 0 de gr e e s) Or ie n t a t ion D e la y Choose t he posit ion of t he print st ring. Move t he slider from 1 t o 5000.
-
Page 90: The I Nform At Ion Tab
4 .1 1 Th e I n for m a t ion Ta b The I nform at ion t ab displays t he following syst em and scanner inform at ion. Th e I n for m a t ion t a b dia log box Th e “Re por t ”... - Page 91 Th e “Re se t Pa d Cou n t ” bu t t on 」: Aft er scanning approxim at ely 50,000 pages ( t he num ber varies based on t ype of scanner) t hrough t he Aut o Docum ent Feeder ( ADF) , t he ADF pad m ay be worn out and you m ay experience problem s wit h docum ent feeding.
-
Page 92: Th E I Si S I N T E R Fa Ce Ope R A T Ion
5 . Th e I SI S I n t e r fa ce Ope r a t ion The I SI S driver operat ion m et hod is sim ilar t o t he TWAI N’s funct ions on t he I SI S int erface screen is briefly described as below: M ode : Select one of scan m odes, including B&W, gray, color opt ions. -
Page 93: Usin G Th E Bu T T On
6 . Usin g Th e Bu t t on The convenient but t ons and knob on t he scanner is shown as below:... -
Page 94: I Nst Alling But T On Manager
6 .1 I n st a llin g Bu t t on M a n a ge r To use t he but t ons on t he scanner, you need t o inst all t he But t on Manager. To ensure t he But t on Manager work properly, please FI RST inst all But t on Manager before inst alling t he scanner driver. - Page 95 The But t on Panel shows t he first five scanning but t ons. Right - click t he but t on ( funct ion) you wish t o check. The But t on Propert ies window appears. Click t o select opt ions or set t ing.
-
Page 96: Scanning From One Touch Of T He But T Ons
6 .3 Sca n n in g Fr om On e Tou ch of t h e Bu t t on s 1. Adj ust t he paper guide for t he widt h of paper and load t he docum ent wit h t heir t ops int o t he input t ray. -
Page 97: Ca R E A N D M A In T E N A N Ce
7 . Ca r e a n d M a in t e n a n ce 7 .1 Cle a n in g t h e Sca n n e r Gla ss Bot h st rips of glass in t he scanner should be cleaned periodically. - Page 98 Scanner glass 3. Close t he front door.
-
Page 99: Cleaning T He Rollers And Adf Pad
7 .2 Cle a n in g t h e r olle r s a n d AD F pa d From t im e t o t im e t he pad assem bly and feeding rollers m ay becom e cont am inat ed wit h ink, t oner part icles or paper dust . - Page 100 Rollers Sensor 3. Close t he scanner front door. To cle a n t h e AD F r olle r a n d pa d a sse m bly, Pull t he release knob t o open t he front door.
- Page 101 Knob Press down t he docum ent feeder. Press down t wo lat ches on t he back of t he aut om at ic docum ent feeder t o open t he rear cover.
-
Page 102: Replacing T He Adf Roller
Clean t he ADF roller and ADF pad by using a soft and lint - free clot h wet wit h som e isopropyl alcohol ( 95% ) . When cleaning t he ADF pad, avoid t ouching t he m et al part . 7 .3 Re pla cin g t h e AD F Rolle r Replace t he ADF roller under t he following condit ions:... - Page 103 You experience repeat ed docum ent j am s and cleaning t he ADF roller did not help. As a guideline, replace t he roller aft er about 100,000 scans. You m ay check t he scan count wit h t he I nfo t ab on t he scanner’s TWAI N user int erface.
- Page 104 3. Rem ove t he roller.
- Page 105 I n st a lla t ion St e ps: I nsert right end of t he roller int o t he roller groove. Move t he knob of t he roller forward as indicat ed. I f successfully insert ed, a snap in sound could be heard.
- Page 106 Close t he rear cover by pushing t wo lat ches t o it s original posit ions. 7-10...
-
Page 107: Replacing T He Adf Pad M Odule
7 .4 Re pla cin g t h e AD F pa d m odu le Replace t he ADF pad assem bly under t he following condit ions: You experience repeat ed docum ent j am s and cleaning t he ADF pad did not help. - Page 108 Press down t he docum ent feeder. Press down t wo lat ches on t he back of t he aut om at ic docum ent feeder t o open t he rear cover. 7-12...
- Page 109 Use your fingers t o hold and press t wo sides of t he pad assem bly t o rem ove t he pad assem bly. I n st a lla t ion St e ps: Follow t he reverse order of t he disassem bling st eps t o inst all t he ADF pad.
-
Page 110: Tr Ou Ble Sh Oot In G
8 . Tr ou ble sh oot in g 8 .1 Cle a r in g a Pa pe r Ja m I n t he event of a paper j am , follow t he procedures below t o rem ove t he paper: 1. - Page 111 2. Press down t wo lat ches in t he back of t he aut om at ic docum ent feeder t o open t he rear cover. 3. Carefully pull t he paper out of t he docum ent feeder.
-
Page 112: Frequent Ly Asked Quest Ions
8 .2 Fr e qu e n t ly Ask e d Qu e st ion s Qu e st ion : The scanned im age always com es out t o be t oo dark. An sw e r : 1) Use your applicat ion t o m odify t he Gam m a set t ing t o 2.2 and 1.8 for your print er and m onit or respect ively. -
Page 113: Technical Service
FAX: + 886 ( 3) 577- 7017 E- MAI L: service@avision.com .t w Web Sit e: ht t p: / / www.avision.com .t w US a n d Ca n a da Ar e a Avision La bs, I n c. -
Page 114: Spe Cifica T Ion S
9 . Spe cifica t ion s All spe cifica t ion s a r e su bj e ct t o ch a n ge w it h ou t n ot ice . Model Num ber FF- 0803S Scanner Type Sheet - fed, duplex scanner Opt ical Resolut ion... -
Page 115: I N De X
I n de x 4 - 3 0 D e sk e w , A D ocu m e n t Type Norm al, Phot o, Docum ent , 4- 11 Addit ional Lengt h Det ect ion, E B 4 - 4 4 Edge Fill, Ej e ct Pa pe r Opposit e , 4 - 4 8... - Page 116 O 4 - 4 2 Rot a t e I m a ge , S 4 - 3 1 Ove r Sca n , R 4 - 3 0 Sca n Ar e a , Re se t Pa d Cou n t , 4 - 5 0 U...
Need help?
Do you have a question about the FF-0803S and is the answer not in the manual?
Questions and answers