
Related Manuals for Avision ScanQ FF-1302S


Summary of Contents for Avision ScanQ FF-1302S
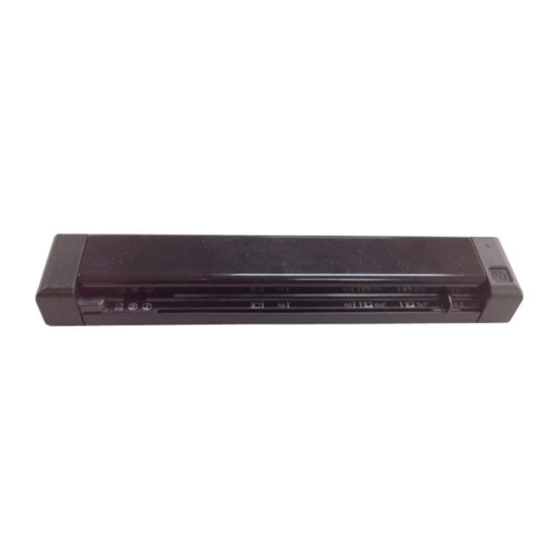
- Page 1 ScanQ Mobile Scanner User’s Manual Regulatory model: FF-1302S Avision Inc. manual-en-250-0794-E-SQ-v200...
- Page 2 Warranty The information contained in this document is subject to change without notice. Avision makes no warranty of any kind with regard to this material, including, but not limited to, the implied warranties of fitness for a particular purpose. Avision shall not be liable for errors contained herein or for incidental or consequential damages in connection with the furnishing, performance, or use of this material.
- Page 3 Restriction of the use of certain hazardous substances (RoHS) Directive 2011/65/EU CE compliance of this product is valid if powered with the correct CE-marked AC adapter provided by Avision. This product satisfies the Class B limits of EN55022, EN55024, safety requirements of EN 60950 and ROHS requirements of EN50581.
- Page 4 Warning and Precautions of the lithium-ion battery Warning: Danger warning to prevent the possibility of the battery from leaking, heating, explosion, please observe the following precautions: • Don’t immerse the battery in water and seawater. Please put it in cool and dry environment if no using.
- Page 5 User’s Manual Caution: • Risk of explosion if battery is replaced by an incorrect type. Dispose the battery according to local regulations. • Never place batteries or devices on or in heating devices, such as microwave ovens, stoves, or radiators. Batteries may explode when overheated or its performance will be degenerate and its service life will be decreased.
-
Page 6: Table Of Contents
Table of Contents Overview ................1-1 Introduction..................1-1 Package contents................1-1 Top view ..................1-2 Rear view ..................1-3 Scanner overview ................1-4 Installation ................ 2-1 Precautions..................2-1 Remove the protective tape .............. 2-1 Install the battery ................2-1 Charge the battery................2-2 2.4.1 Via the USB cable .............. -
Page 7: Overview
Scan printed photos, cards, documents, and other items quickly and easily using your Avision Personal Scanner! No computer is necessary to scan – just choose your resolution and then feed your item into the scanner to create a JPG image file. You can store the scanned images on the scanner’s built-in disk (automatic if no memory card is inserted), or... -
Page 8: Top View
Note: 1. Only use the USB power adapter DSC-5CU-05 050100 by DVE/Li-ion Battery NP45 made by APACK/CA NP45 made by City Bright included in the product. Using other USB power adapters may damage the machine and void the warranty. 2. Please unpack the packing carefully, and check the contents against the checklist. If any items are missing or damaged, please contact your dealer immediately. -
Page 9: Rear View
User’s Manual Rear view Item Name Description Memory Insert a memory card for increased storage card slot capacity. Micro USB Connect to a USB power adapter or a computer port via a micro USB cable. -
Page 10: Scanner Overview
Scanner overview Name Description Color Mode All scans are in color mode. The scan resolution is measured in DPI (dots per inch). The higher the DPI, the more details on the original are captured by the scanner, producing a higher quality scanned image; however, a higher DPI also results in a larger image size and occupies more storage space. - Page 11 User’s Manual The Power button indicates the scanner status by displaying either a solid or flashing color, depending on the action, as specified below. When the Power button is dark, the scanner has been powered off. LED Light Meaning Green Ready to scan at 300 DPI (default when Solid powered on)
- Page 12 Built-in: The scanner’s built-in disk has approximately 128MB of memory that can be used to store images. If a memory card is not inserted, scanned files will automatically be stored on the built-in disk until it is recognized as full (i.e., less than 2MB remaining for the 300 DPI setting, less than 5MB remaining for the 600 DPI setting, and less than 15MB remaining for the 1200 DPI setting).
- Page 13 User’s Manual Inserting a memory card before scanning is recommended for large scanning projects so that you don’t have to stop at frequent intervals to move the scanned files from the built-in disk to a memory card or to a folder on your computer. Do not remove the memory card or disconnect the power supply while a scan is in process.
-
Page 14: Installation
User’s Manual Installation 2.1 Precautions Keep the product out of direct sunlight. Direct exposure to the sun or excessive heat may cause damage to the unit. Do not install the product in a humid or dusty place. Place the product securely on an even, flat surface. Tilted or uneven surfaces may cause mechanical or paper-feeding problems. -
Page 15: Charge The Battery
Load the battery with the text side facing up into the battery container. Make sure the battery is loaded with the correct polarity. Note the copper strips on the battery should be touching the copper strips on the device. Note: Please use only the supplied battery. Insert the battery cover. -
Page 16: Via The Usb Power Adapter
User’s Manual 2.4.2 Via the USB power adapter Turn off the scanner. Connect the micro USB connector to the USB port of the scanner. Connect the other USB connector to the USB port of the USB Power Adapter. USB Power Adapter Important: Do not turn on the scanner power when charging the battery. -
Page 17: Operation
User’s Manual Operation 3.1 Suitable and unsuitable original types Suitable Original The scanner is designed to obtain the best scanning results with the following types of originals: Photos and documents (3”x5”, 4”x6”, 5”x7”, 8.5”x14”) (76 x 127mm, 102 x 152 mm, 127 x 177 mm, 216 x 356 mm) Business cards [standard 3.5”x 2”... -
Page 18: Power On The Scanner
3.2 Power on the scanner Press the Power button to power on the scanner. After powering on, the blue LED light flashes first and then the Power button displays as solid green. The solid green also indicates the default resolution to be 300 dpi. To change the resolution, press the Power button repeatedly until your desired resolution is shown with the corresponding LED light. -
Page 19: Change Your File Format
User’s Manual (Each scanned image is given a file name with the prefix IMG followed by a 4- digit sequential number in the order the images are stored. For example, IMG_0001.jpg, IMG_0002.jpg, etc.) Note: • Do not remove the memory card while the indicators are blinking. •... -
Page 20: Scan Dark Pictures
3.5 Scan dark pictures The scanner has a built-in cropping function that automatically detects and crops dark edges and dark areas against the cropping baseline background during the scan process. To prevent poor cropping, align the original straight against the left edge of the feeder slot and ensure there is adequate space behind the feeder for the originals to completely feed through. -
Page 21: Power Off The Scanner
User’s Manual 3.6 Power off the scanner When your scanning is finished, press the Power button for 3 seconds to turn scanner OFF. The blue LED flashes twice and then the Power LED light goes off. When the scanner is left idle for 3 minutes, the default Power Save mode automatically powers off the scanner. -
Page 22: Connect With Macintosh Computer
Click the Removable Disk and you will find a folder of “DCIM” is created and all the PDF files will be stored in the subfolder of “200DOC” and the JPEG files in the subfolder of “100PHOTO”. File name starts from IMG_0001.pdf or IMG_0001.jpg. 3.7.3 Connect with Macintosh computer When the computer recognizes the scanner built-in disk or inserted memory card, the volume icon appears on the desktop. - Page 23 User’s Manual Disconnect the Scanner from a Macintosh Click and drag the volume icon on the desktop to Trash. Click the eject button next to the volume name in the Finder’s window. Disconnect the scanner from your computer.
-
Page 24: Maintenance
User’s Manual Maintenance 4.1 Clear paper jams To clear a jam from the feeder, press and hold the Power button for 3 seconds to power off, then press quickly to power on again. The jammed photo will be fed through automatically. If the item is still jammed, follow these steps to remove the item: Open the cover by holding the scanner with one thumb placing on the feeder and another thumb placing on the cover. -
Page 25: Calibrate The Scanner
4.2 Calibrate the scanner Calibrate only if the scanned image looks fuzzy, the color looks abnormal (e.g., darker than normal), after more than 8,000 scans, or the scanner has been stored without use for a long time. The calibration process resets the Contact Image Sensor to resume its color and sharpness precision. - Page 26 User’s Manual Press and hold the Power button briefly; If you press the Power button for 3 seconds or more, the scanner will power off and you will need to restart the process. a) Hold the edges of the calibration sheet (included) and insert it with the text face up and the white area feeding first to the feeder of the scanner as shown.
-
Page 27: Clean The Scanner
4.3 Clean the scanner In order to maintain the scanned image quality and prevent dust accumulation, it is recommended that you clean the scanner (outer casing and feed rollers) approximately every 200 scans, or if vertical lines or stripes appear on the scanned image. Use only the recommended and supplied tools to clean the scanner. -
Page 28: Troubleshooting
User’s Manual Troubleshooting Before contacting our Customer Support, you may wish to find the answers to the questions below: Frequently asked questions and answers Q: Why does not my scanner turn on? A: Ensure the micro USB cable is securely connected to the scanner and to either the USB slot in your computer or a USB power adapter connected to an electrical outlet. - Page 29 Q: How can I tell if the scanned image is saved in PDF file format? A: If the blue LED light is lit, this indicates the scanned images will be stored in PDF file format. (After turn on the scanner, press the Power button for three times, the blue LED light will be lit.) Q:...
- Page 30 User’s Manual Q: What should I do if the status indicator blinks rapidly and no scan is possible? A: Check the following: Is the scanner’s built-in disk full? Connect the scanner to a computer to move or delete files. The scanner recognizes the built-in disk as “full” and the Power button blinks when it has less than 2MB remaining for 300 DPI setting, less than 5MB for 600 DPI setting, and less than 15MB for 1200 DPI setting).
- Page 31 A: Yes. Please follow these steps to set a real-time clock for the device: Open your browser and type Avision’s web site (http://www.avision.com) at the URL address. On the Product or Support page, select this mobile scanner and then download a time.txt file for the device.
-
Page 32: Technical Service
User’s Manual Technical service Before contact Avision, please prepare the following information: Scanner serial & revision number (located on the bottom of the scanner); Hardware configuration (e.g., your host CPU type, RAM size, free disk space, display card, interface card);... -
Page 33: Specifications
User’s Manual Specifications Specifications are subject to change without notice. Item Description Regulatory Model Number FF-1302S Image Technology Contact Image Sensor (CIS) Max. Document Size 8.5” x 14” (216 x 356 mm) for 600/1200 dpi 8.5” x 36” (216 x 914 mm) for 300 dpi Auto power off 3 minutes Interface...
Need help?
Do you have a question about the ScanQ FF-1302S and is the answer not in the manual?
Questions and answers