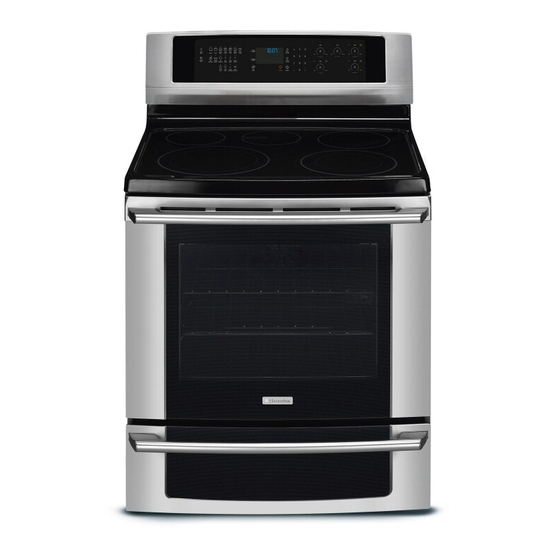
Electrolux EI30EF55GS Use And Care Manual
30" electric freestanding range with iq-touch™ controls
Hide thumbs
Also See for EI30EF55GS:
- Use and care manual (68 pages) ,
- Service manual (47 pages) ,
- Installation instructions manual (13 pages)
Table of Contents
Advertisement
.................................................................. ..................................................................
EN ELECTRIC RANGE
FR CUISINÈRE ÉLECTRIQUE
SP ESTUFA ELÉCTRICA
316471300 Rev C December 2011
USE AND CARE GUIDE
GUIDE D'UTILISATION ET D'ENTRETIEN
GUIA DE USO Y CUIDADO
Advertisement
Table of Contents

Related Manuals for Electrolux EI30EF55GS


Summary of Contents for Electrolux EI30EF55GS
- Page 1 ..EN ELECTRIC RANGE FR CUISINÈRE ÉLECTRIQUE SP ESTUFA ELÉCTRICA 316471300 Rev C December 2011 USE AND CARE GUIDE GUIDE D'UTILISATION ET D'ENTRETIEN GUIA DE USO Y CUIDADO...
-
Page 2: Table Of Contents
Warranty ... 59 ©2011 Electrolux Home Products, Inc. Please read & save this guide Thank you for choosing Electrolux, the new premium brand in home appliances. This Use & Care Guide is part of our commitment to customer satisfaction and product quality throughout the service life of your new appliance. -
Page 3: Important Safety Instructions
Important Safety Instructions Important safety instructions Recognize safety symbols, words and labels Safety items throughout this manual are labeled with a WARNING or CAUTION based on the risk type as described below: This symbol alerts you to situations that may cause serious body harm, death or property damage. - Page 4 Important Safety Instructions Important safety instructions • Protective liners—Do not use aluminum foil to line the oven bottom, except as suggested in the manual. Improper installation of these liners may result in a risk of electrical shock, or fire. • Storage in or on Appliance—Flammable materials should not be stored in an oven, lower oven drawer, near surface units or in the storage drawer.
- Page 5 Important Safety Instructions Important safety instructions • Glazed cooking utensils—Only certain types of glass, glass/ceramic, ceramic, earthenware, or other glazed utensils are suitable for cook top service without breaking due to the sudden change in temperature. Check the manufacturer’s recommendations for cook top use. •...
-
Page 6: Features
Features Perfect Set™ oven features & options 1. Luxury-Lighting™ interior oven lights -pg 11- 2. Control lock -pg 11- 3. Standard cooking • Bake -pg 21- • Broil -pg 24- • Perfect-Convect • Perfect-Convect • Perfect-Convect • Keep warm -pg 31- •... - Page 7 Perfect Set™ oven control display & keys 13. Oven key pads • Sure-2-fit™ Upper oven • Warmer oven 14. User preferences -pg 41-46- The following options are available under User Preferences: • Clock setting -pg 10 & 41- • Clock display setting -pg 41- •...
- Page 8 Features Perfect Set™ cooktop control display Cooktop controls - pg 15-18 - 19. Left rear 6 in. single radiant element (1200W) 20. Warming zone 6 in. element (100W) 21. Right rear 5/7 in. expandable radiant element (750/1800W) 22. Left front 9/12 in. expandable radiant element (1700/2700W) 23.
-
Page 9: Features
Perfect Set™ range features Your electric range features include: 1. Perfect Set™ glass control panel. 2. Perfect Set™ electronic oven & surface controls & timers. 3. Sure-2-fit™ cobalt blue self-cleaning upper oven interior. 4. Self-clean oven door latch. 5. Automatic interior oven door light switch. 6. -
Page 10: Getting Started
Getting Started Setting clock at power up You will be prompted to enter the time of day in the event of a power failure or when you first provide electric power to your appliance. • When your appliance is first powered up, 12:00 will flash in the display. -
Page 11: Changing Settings
Changing settings Software controls the upper and lower ovens so that both may be set to operate at the same time with unique settings. It is very important to understand that before setting or modifying either oven, you must first select which oven you desire to set or modify. -
Page 12: Settings For Best Results
Setting for Best Results Upper oven racks Types of oven racks Your appliance is equipped with 3 styles of interior oven racks; 1 offset oven rack, 1 handle oven rack and 1 fully extendable Luxury-Glide™ oven racks. offset oven rack Fig. -
Page 13: Settings For Best Results
Upper oven racks Always use potholders or oven mitts when removing food or adjusting the oven racks. Wait until the oven has completely cooled if possible. Oven racks may be HOT and may cause burns. Removing and replacing oven racks (not illustrated) •... -
Page 14: Surface Cooking
Surface Cooking Cookware Using proper cookware The size and type of cookware used will influence the setting needed for best cooking results. Cookware should have flat bottoms that make good contact with the entire surface heating element. Check for flatness by rotating a ruler across the bottom of the cookware. -
Page 15: Setting Surface Controls
How the cooktop works About the ceramic glass cooktop The ceramic cooktop has radiant surface elements located below the surface of the glass. The design of the ceramic cooktop outlines the area of the surface element underneath. Make sure the diameter of the pan matches the diameter of the element outline on the cooktop. -
Page 16: Setting Cooktop Controls
Setting Surface Controls Setting the Perfect-Set™ cooktop The cooktop controls provide 5 digital display windows to help set power levels for the cooking zones located on the cooktop. These settings work the same way as traditional knob settings except the settings are made using a touch sensitive panel and show settings using LED style displays. - Page 17 Setting the Perfect-Set™ cooktop Setting cooktop elements • Touch the ON OFF key to activate the desired heating zone. • If the heating zone has more than one element diameter size available, press the desired element ring size symbol. • Press the desired power level key once (hi+, med or lo-) for quick automatic settings or for more precise level settings use the hi+ or lo- keys.
-
Page 18: Setting Warmer Zone
Setting Surface Controls About the warming zone Use the warming zone -Fig. 1- to keep hot cooked foods warm such as; vegetables, gravies, casseroles, soups, stews, breads, pastries and oven-safe dinner plates. DO NOT heat cold food using the warming zone. Use only plates, cookware and utensils recommended for oven and ceramic cooktop use. -
Page 19: Display Abbreviations
About the warming zone Setting the warming zone • Touch the ON OFF key to activate the warming zone. • Press the desired power level key once (hi+, med or lo-) for the quick automatic settings or for more precise level settings use the hi+ or lo- keys. -
Page 20: Setting Oven Controls
Setting Oven Controls About rapid preheat Use the rapid preheat option on single rack baking to quickly bring the upper oven to baking temperature. The rapid preheat option may be set with the following cooking features: • Bake • Conv bake •... -
Page 21: Bake
About baking in upper oven Use the bake feature to cook most food items that require normal cooking temperatures. Bake may be set with the following options: • Rapid preheat • Cook time • Cook time with end time The following temperature settings apply to the bake feature: •... -
Page 22: Using Cook Time
Setting Oven Controls Using cook time in upper oven Adding a cook time when baking is beneficial when a recipe requires a specific temperature and period of time to cook. Following the recipe cook time helps insure the best possible results. Cook time may be set with the following features: •... -
Page 23: Using Cook Time With End Time
Using cook time with end time in upper oven Adding a cook time along with a specific end time gives the same benefits as the cook time option in addition to controlling exactly when the cooking process will begin and end. Cook time and end time may be set with the following features: •... -
Page 24: Setting Broil
Setting Oven Controls Broiling in upper oven Use the broil feature to cook meats that require direct exposure to radiant heat for optimum browning results. This cooking feature is only available in the upper oven. Use the conv broil feature to cook thicker cuts of meats that require direct exposure to radiant heat and the convection fan for optimum browning results -p. -
Page 25: Broil
Setting broil The broil pan insert (if equipped) contains slots that allows grease from the meat to drain into the broil pan. Place prepared meat on broil pan insert and then place onto broiler pan as shown -Fig. 3-. Recommended broiling times Use the broiling table -Fig. -
Page 26: Setting Convection Bake
Setting Oven Controls About convection bake Convection bake is part of the Perfect-Convect³™ system. Convection bake uses a fan to circulate the oven heat evenly and continuously. The improved heat distribution allows for even cooking with excellent results. Multiple rack cooking may slightly increase cook times for some foods, but the overall result is time saved. -
Page 27: Using Convection Convert
Using convection convert The conv convert option allows you to convert any normal baking recipe using the convection bake feature. The control uses the normal recipe settings and adjusts to a lower temperature for convection baking. Conv convert must be used with CONV BAKE feature. -
Page 28: Setting Convection Roast
Setting Oven Controls About convection roast How convection roast works Convection roast is part of the Perfect-Convect³™ system. Convection roast combines a cook cycle with the convection fan and element to rapidly roast meats and poultry. Heated air circulates around the meat from all sides, sealing in juices and flavors. -
Page 29: Convection Roast
Roasting recommendations Roasting rack instructions (some models) When preparing meats for convection roasting, you may use the broiler pan, insert and the roasting rack supplied with your appliance. The broiler pan will catch grease spills and the insert will help prevent grease splatters. -
Page 30: Setting Convection Broil
Setting Oven Controls About convection broiling Convection broiling is part of the Perfect-Convect³™ system. Use the conv broil feature to cook thicker cuts of meats that require direct exposure to radiant heat and the convection fan for optimum browning results. This cooking feature is only available for the upper oven. -
Page 31: Setting Keep Warm
About keep warm Use the keep warm feature to keep hot foods warm. Keep warm may be set with the following options: • Cook time • Cook time with end time The following temperature settings apply to the keep warm feature: •... -
Page 32: Setting Slow Cook
Setting Oven Controls About slow cook The slow cook feature may be used to cook foods more slowly at lower oven temperatures. The cooking results will be like that of a Slow Cooker or Crock-Pot. This feature is ideal for roasting beef, pork &... -
Page 33: Dehydrate
About dehydrate The dehydrate feature dries with heat from the convection element. The heat is circulated throughout the oven by the convection fan. Use dehydrate to dry and/or preserve foods such as fruits, vegetables, herbs and very thin slices of meat. -
Page 34: Bread Proof
Setting Oven Controls About bread proof The bread proof feature maintains a warm environment useful for rising yeast-leavened products. Bread proof may be set in the upper oven only. Bread proof may be set in conjunction with the following feature: •... -
Page 35: Saving & Recalling My Favorite Recipes
About my favorite You may store up to 2 of your most frequently used heat settings and cooking times, for setting or recalling. The favorite key will allow you to store a cooking feature, oven set temperature and a cook time for either the upper oven or warmer oven. -
Page 36: Sabbath Mode
Setting Oven Controls Sabbath mode For further assistance, guidelines for proper usage and a complete list of models with the Sabbath feature, please vist the web at http:\\www.star-k.org. This appliance provides special settings for use when observing the Jewish Sabbath/Holidays. This mode will turn off all audible tones or visual display changes normally provided by the oven control. -
Page 37: Setting Sabbath Mode
Setting Sabbath mode The example below shows setting the oven to observe the Sabbath (and Jewish holidays). Example Step 1. Press UPPER OVEN 2. Press BAKE Be sure to make any additional oven, drawer or cooktop settings or changes before going to step 3. 3. -
Page 38: Setting Warmer Oven Controls
Setting Warmer Oven Controls Warmer oven features The lower warmer oven is ideal for warming foods such as pizza, casseroles, baked potatoes and frozen convenience foods. Use the keep warm feature to keep hot cooked foods at serving temperature. The warmer oven may also be used to warm dinner plates. -
Page 39: Setting Warmer Oven Controls
Setting Warmer Oven Controls About keep warm in the warmer oven Use the keep warm feature to keep cooked foods warm. When using keep warm always start with hot food. Do not heat cold food. Keep warm may be set with the following options: •... -
Page 40: Setting Warmer Oven Controls
Setting Warmer Oven Controls Setting keep warm in the warmer oven See example below to set keep warm for the warmer oven to start at 190°F / 88°C: Step 1. Press WARMER OVEN 2. Press KEEP WARM 3. Use +hi to increase the temp. -
Page 41: Setting Your Preferences
Perfect Set™ user preferences key controls options for preferences. The display will show a digital abbreviation and a value for every preference each time a key is pressed one at a time. Please read the following instructions before changing the user preferences functions: •... -
Page 42: Setting 12 Or 24 Hour Mode (Clo)
Setting Your Preferences Setting 12 or 24 hour mode The clock display mode allows you to choose between 12 and 24 hour mode. The factory preset clock display mode is 12 hour. See the example below to change the default mode to 24 hour. -
Page 43: Setting 12Hr Energy Saving Mode (Es)
Setting 12hr energy saving mode (ES) The oven control has a factory preset built-in 12 hour energy saving feature that will shut off the appliance if the oven has been heating for more than 11 hours and 59 minutes. The oven can be programmed to override this feature for continuous baking. -
Page 44: Adjusting Oven Temperature (Upo)
Setting Your Preferences Adjusting oven temperature User programmable offset (UPO) Your appliance has been factory calibrated and tested to ensure an accurate baking temperature. For the first few uses, follow your recipe times and temperature recommendations carefully. If you feel your oven is too hot or too cool from your baking experience, the oven temperature may be adjusted to your liking. -
Page 45: Factory Default Reset (Rst)
Factory default reset (RST) You may choose to restore your factory settings. This will erase all settings or favorites that you have saved. See the example below reset your control. Example Step 1. Press and continue to press USER PREF until you reach the factory default reset mode. -
Page 46: Setting Your Preferences
Setting Your Preferences User preferences chart The following chart will help you navigate through the user preferences. Preference Setting clock Clock display 12 or 24 hour mode F° or C° 12hr energy save mode Audio mode * UPO upper oven Reset to factory pre-sets * Audio mode provides 6 possible settings. -
Page 47: Self-Clean
Before starting self-clean A self-cleaning oven automatically cleans with high temperatures that are well above those used for normal cooking. The self-clean feature eliminates soils completely or reduces them to a fine powdered ash that you can later easily wipe away with a damp cloth. -
Page 48: Setting Self-Clean
Self-Clean Setting self-clean The clean feature provides 3 different choices for self-cleaning the upper oven. Set the clean for lite (2 hrs), med (3 hrs) or heavy soils (4 hrs). The example below shows setting the upper oven for self-clean to begin immediately using a medium (3 hour) setting: Step 1. -
Page 49: Care & Cleaning
Surface Type • Painted body parts • Painted decorative trim • Aluminum, plastic or vinyl trim • Control panel • Control keypad • Decorative trim (some models) • Door liner & body parts • Warmer Oven porcelain enamel parts • Porcelain enamel broiler pan and insert (some models) •... -
Page 50: Care And Cleaning
Care and Cleaning Cleaning Recommendations Surface Type Cleaning Recommendation • Oven racks Oven racks must be removed from oven interior. Do not clean in self-clean cycle. Clean by using a mild, abrasive cleaner following manufacturer's instructions. Rinse with clean water and dry. •... -
Page 51: Cooktop Maintenance
Cooktop maintenance Consistent and proper cleaning is essential to maintaining your ceramic glass cooktop. Prior to using your cooktop for the first time, apply some of the cooktop cleaner supplied with your new appliance. Buff with a nonabrasive cloth or no-scratch cleaning pad. -
Page 52: Cooktop Cleaning
Care and Cleaning Cooktop cleaning Plastic or foods with a high sugar content: These types of soils need be removed immediately if spilled or melted onto the ceramic cooktop surface. Permanent damage (such as pitting of the cooktop surface) may occur if not removed immediately. -
Page 53: The Oven Door With Luxury-Hold™ Hinges
The oven door with Luxury- Hold™ hinges To prevent possible burns, do not attempt to remove the oven door until the oven has completely cooled. IMPORTANT The oven door is heavy. Be careful when removing and lifting the door. Do not lift the oven door by the handle. - Page 54 Care and Cleaning The oven door with Luxury- Hold™ hinges To replace the Lift-Off oven door 1. Firmly grasp the oven door along both sides just below the door handle. When positioning the door hinge arms with the door hinge slots in the oven frame, you may wish to use your knee to stabilize the door before attempting to insert the door hinge arms in the hinge slots -Fig.
-
Page 55: Special Door Care Instructions
Special door care instructions IMPORTANT Most oven doors contain glass that can break. Read the following recommendations: • Do not close the oven door until all the interior oven racks are fully inserted and retracted to the back of the oven. •... -
Page 56: Solutions To Common Problems
Solutions to Common Problems Before you call for service, review the following list. It may save you time & expense. The list includes common occurrences that are not the result of defective workmanship or materials in this appliance. Problem Appliance is not level Cannot move appliance easily. - Page 57 Solutions to Common Problems Problem Oven smokes excessively during broiling Flames inside oven or smoking from oven vent Oven control panel beeps & displays any F code error (for example F10, F11, F13, F14, F15, F20, F23, F25, F30, F31 or F90) Oven control panel beeps &...
- Page 58 Solutions to Common Problems Problem Scratches or abrasions on cooktop surface Metal marks on the cooktop Brown streaks or specks on cooktop surface Areas of discoloration with metallic sheen Poor baking results Questions or for service call: Before you call Solution •...
-
Page 59: Major Appliance Warranty Information
Major Appliance Warranty Information Your appliance is covered by a one year limited warranty. For one year from your original date of purchase, Electrolux will repair or replace any parts of this appliance that prove to be defective in materials or workmanship when such appliance is installed, used, and maintained in accordance with the provided instructions. - Page 60 www.electrolux-store.com...
Need help?
Do you have a question about the EI30EF55GS and is the answer not in the manual?
Questions and answers