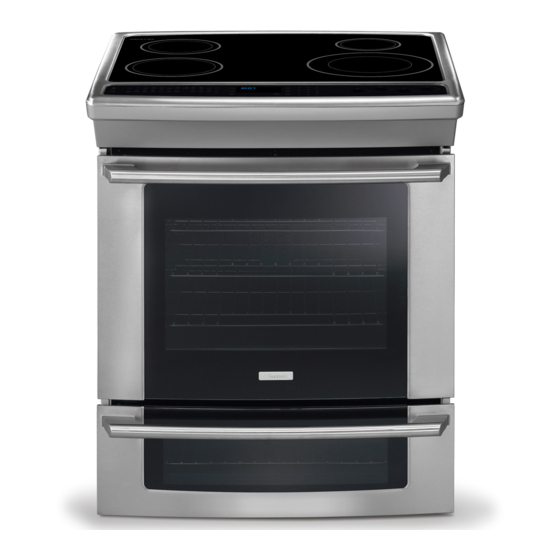
Electrolux EW30IS65JSD Installation Instructions Manual
Electric slide-in range
Hide thumbs
Also See for EW30IS65JSD:
- Use & care manual (60 pages) ,
- Installation instructions manual (36 pages)
Table of Contents
Advertisement
Quick Links
United States
IMPORTANT: SAVE FOR LOCAL ELECTRICAL INSPECTOR'S USE.
READ AND SAVE THESE INSTRUCTIONS FOR FUTURE REFERENCE.
flammable vapors and liquids in the vicinity of this or any other appliance.
Table of Contents
Important Safety Instructions ................................... 2
Cutout Dimensions ...............................................3-4
To Avoid Breakage ................................................... 5
Factory Connected Power Supply Cord .................... 6
Power Supply Kit ...................................................... 6
Access to Terminal Block & Grounding Strap ............ 6
Serial Plate Location ................................................. 6
Important Notes to the Installer
1. Read all instructions contained in these installation
instructions before installing range.
2. Remove all packing material from the oven and
the drawer compartments before connecting the
electrical supply to the range.
3. Observe all governing codes and ordinances.
4. Be sure to leave these instructions with the
consumer.
Printed in Canada
INSTALLATION INSTRUCTIONS
30" ELECTRIC SLIDE-IN RANGE
INSTALLATION AND SERVICE MUST BE PERFORMED BY A
QUALIFIED INSTALLER.
FOR YOUR SAFETY: Do not store or use gasoline or other
Electrical Connection to the Range ........................7-8
Cabinet Construction ............................................... 9
Range Installation .................................................. 10
Leveling the range ................................................. 11
Check Operation .................................................... 11
Anti-Tip Brackets Installation .................................. 12
Important Note to the Consumer
Keep these instructions with your owner's guide for
future reference.
Canada
P/N 318201626 (1212) Rev. C
English - pages 1-12
Español - páginas 13-24
Français - pages 25-36
Advertisement
Table of Contents

Summary of Contents for Electrolux EW30IS65JSD
-
Page 1: Table Of Contents
INSTALLATION INSTRUCTIONS 30" ELECTRIC SLIDE-IN RANGE INSTALLATION AND SERVICE MUST BE PERFORMED BY A United States Canada QUALIFIED INSTALLER. IMPORTANT: SAVE FOR LOCAL ELECTRICAL INSPECTOR'S USE. READ AND SAVE THESE INSTRUCTIONS FOR FUTURE REFERENCE. FOR YOUR SAFETY: Do not store or use gasoline or other flammable vapors and liquids in the vicinity of this or any other appliance. -
Page 2: Important Safety Instructions
30" ELECTRIC SLIDE-IN RANGE INSTALLATION INSTRUCTIONS IMPORTANT SAFETY INSTRUCTIONS This manual contains important safety symbols and instructions. Please pay attention to these symbols and follow all instructions given. This symbol will help alert you to situations that may cause serious bodily harm, death or property damage. -
Page 3: Cutout Dimensions
30" ELECTRIC SLIDE-IN RANGE INSTALLATION INSTRUCTIONS Product Dimensions Do not install the unit in the cabinet before reading next two pages. Side Panel A. HEIGHT C. COOKTOP D. TOTAL DEPTH TO FRONT B. WIDTH WIDTH (Under Cooktop) OF RANGE 35 3/4" (90,8 cm) 30"... - Page 4 30" ELECTRIC SLIDE-IN RANGE INSTALLATION INSTRUCTIONS Cabinet Dimensions 30" Min. (76,2 cm) Min. 13" (33 cm) Countertop 30" Min. (see Note 3) hatched surfaces (76,2 cm) Min. (See Note 3) should be flat & 1 ½" Max. Shave Raised 18" Min. leveled.
-
Page 5: To Avoid Breakage
30" ELECTRIC SLIDE-IN RANGE INSTALLATION INSTRUCTIONS To avoid breakage: Do NOT handle or manipulate the unit by the cooktop. The counter-top around the cut-out should be flat and leveled (see hatched area on illustration 1). Before installing the unit, measure the heights of the two (2) cabinet sides (H1-4), front and back (see illustration 1) from the floor to the top of the counter. -
Page 6: Factory Connected Power Supply Cord
30" ELECTRIC SLIDE-IN RANGE INSTALLATION INSTRUCTIONS Factory Connected Power Supply Cord (Canada only) Electrical Shock Hazard This range is equipped with a factory-connected power • Electrical ground is required on this appliance. cord (see Figure 1). Cord must be connected to a •... -
Page 7: Electrical Connection To The Range
30" ELECTRIC SLIDE-IN RANGE INSTALLATION INSTRUCTIONS Four Conductor Wire Connection to Range Electrical Connection to the Range Where local codes does NOT permit connection of the (U.S.A.) frame grounding conductor to the neutral wire of the copper power supply cord (see Figure 4): Three Conductor Wire Connection to Range 1. - Page 8 30" ELECTRIC SLIDE-IN RANGE INSTALLATION INSTRUCTIONS Direct Electrical Connection to the Circuit Where local codes DO NOT permit connecting the appliance-grounding conductor to the neutral Breaker, Fuse Box or Junction Box (white) wire, or if connecting to 4-wire electrical If the appliance is connected directly to the circuit system (see Figure 6): breaker, fuse box or junction box, use flexible, armored 1.
-
Page 9: Cabinet Construction
30" ELECTRIC SLIDE-IN RANGE INSTALLATION INSTRUCTIONS Cabinet Construction To eliminate the risk of burns or ¾” (1.9 cm) Min. fire by reaching over heated surface units, do not Cutout have cabinet storage space above the range. If there Width is cabinet storage space above range, reduce risk by 31½”... -
Page 10: Range Installation
30" ELECTRIC SLIDE-IN RANGE INSTALLATION INSTRUCTIONS Range Installation Important Note: Door removal is not a requirement for Position range in front of the cabinet opening. installation of the range, but is an added convenience. Refer to the Use and Care Guide for oven door removal Make sure that the underside of the cooktop clears instructions. -
Page 11: Leveling The Range
30" ELECTRIC SLIDE-IN RANGE INSTALLATION INSTRUCTIONS Leveling the Range Check Operation Refer to the Use and Care Manual packaged with Level the range after installation in the cutout the range for operating instructions and for care and opening. cleaning of your range. 1. -
Page 12: Anti-Tip Brackets Installation
30" ELECTRIC SLIDE-IN RANGE INSTALLATION INSTRUCTIONS 1. Draw a center line (CL) on the floor where the range Anti-Tip Brackets Installation should be installed. Also draw a line on the floor at the range back position if there is no wall. To reduce the risk of tipping of the range, the range must be secured to the floor by properly 2.


Need help?
Do you have a question about the EW30IS65JSD and is the answer not in the manual?
Questions and answers