
Related Manuals for Shimadzu CBM-40 CL

Summary of Contents for Shimadzu CBM-40 CL
- Page 1 228-97201A Jun. 2022 System Controller for Shimadzu Liquid Chromatograph CBM-40 CL Instruction Manual Read this manual thoroughly before you use the product. Keep this manual for future reference.
- Page 2 This page is intentionally left blank.
- Page 3 Shimadzu representative to request a replacement. • To ensure safe operation, read all Safety Instructions before using the product. • To ensure safe operation, contact your Shimadzu representative if product installation, adjustment, re-installation (after the product is moved), or repair is required.
-
Page 4: Introduction
Shimadzu Corporation. • Illustrations in the instruction manual may differ from the products you use. • Nexera and LabSolutions are trademarks of Shimadzu Corporation. Windows is a registered trademark of Microsoft Corporation in the United States and/or other countries. -
Page 5: Operating Nexera Cl System
Electromagnetic Compatibility Electromagnetic Compatibility Descriptions in this section apply only to the following models: • 228-65502-55 CBM-40 CL This product complies with European standard EN61326, class B for electromagnetic interference (Emissions) and industrial electromagnetic environment (Immunity). n EN55011 Emissions (Electromagnetic Interference)... -
Page 6: Table Of Contents
3.3.3 Simple Device Monitoring Area Device Monitor Screen ..............3.4.1 Executing Analysis Status Screen ......... 3.4.2 [Device Configuration] Screen Group Management Screen ..............3.5.1 Change the System Name ......3.5.2 Move the System to Another Group CBM-40 CL... - Page 7 GxP Enhancement Function ............4.3.1 Set Up GxP Enhancement Function Maintenance Periodic Inspection ..........Cleaning the Exterior ..................5.2.1 Usual cleaning ........5.2.2 Decontamination cleaning Technical Environment Setting List ........Information Error Type ............Specifications ............ Index ............CBM-40 CL...
- Page 8 This page is intentionally left blank.
-
Page 9: Overview
Overview This instrument is a system controller for a Shimadzu liquid chromatograph. The system controller builds a system by connecting the solvent delivery unit, the autosampler, the column oven, the detector, etc., and performs analysis operations by controlling gradients, sample injection, data collection, etc. for each unit according to the analysis conditions of LabSolutions (chromatography data system). -
Page 10: Component Parts
This equipment consists of the following parts: Check the contents and quantity when unpacking. Part Name Part No. Q'ty Remark - - CBM-40 CL Main body - Safety Guideline (Booklet) 228-97195 Instruction Manual/ Nexera CL Series System - 228-97193-41 Guide... -
Page 11: Optional Parts
Remote Cable 228-28253-91 "4.1 External Input/Output Terminal" P.48 Optical connectors can be added with this Optical Connector 228-70481-41 option. It can be mounted on CBM-40 CL and Expansion Board expands from standard 8ch to 12ch. CBM-40 CL... -
Page 12: Parts Identification And Function
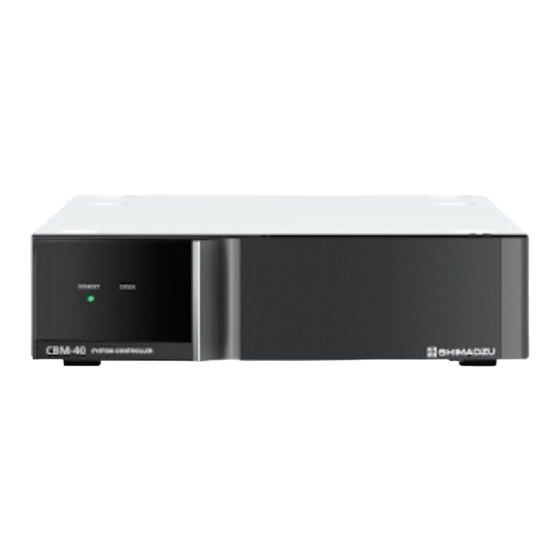
Parts Identification and Function Front There is no power button on the CBM-40 CL. Of the connected pumps, turn on/off the system power with the power button of the pump that has the lowest address number. Name Description [CONNECT] Lamp It lights up when connected to the workstation. -
Page 13: Back
2.2 Back Back CBM-40 CL... - Page 14 "4.1 External Input/Output Terminal" P.48 [OPTION] Connector Not used. [AC REMOTE] Connector Not used in CL model. [AC IN] Connector It is a terminal for connecting the power cord. Switch ON/OFF the main power supply of the Main Power Switch equipment. CBM-40 CL...
-
Page 15: Bottom
2.3 Bottom Bottom Name Description When a leakage occurs in the unit located on top of the CBM-40 CL, the liquid is discharged from this drain port. Drain Port Please connect the drain adapter according to the system guide. CBM-40 CL... -
Page 16: Connect To The Web Screen (Windows)
Web Screen CBM-40 CL can be connected to the Web screen from the Web browser of the PC connected to the network. Web screen provides analysis monitoring, system controller environment settings etc. • On the Web screen, only two ovens are displayed (Oven C, D can not be displayed). - Page 17 Click [Add] and confirm that the URL of this device is displayed on [Web sites]. Set the security level. On the Security tab, click Custom Level. Set the items in [Setting] as follows Item Configuration [ActiveX controls and plug-ins] - [Run ActiveX controls and Enable plug-ins] CBM-40 CL...
-
Page 18: Display Web Screen
• When printing the contents of the Web screen, check [Page Setup] - [Print Background and Color Image] in the [File] menu. 3.1.3 Display Web Screen Enter the following URL in the browser. http://(IP address of this device)/html/ Connect to the Web Screen (iPad) This section explains operation with an iPad. CBM-40 CL... -
Page 19: Ipad Specification
In that case, turn off the automatic lock function by the following procedure. Click the setting icon from the iPad's home screen. Select "General" on the setting screen. Select "Auto lock" in General setting. In the automatic lock setting screen, select "OFF". CBM-40 CL... - Page 20 Select "Clear cache" in Safari setting. A confirmation dialog will be displayed, so select "delete". n Update Screen Button Please do not press the update button in the address bar. An error may occur or screen design may be lost. CBM-40 CL...
- Page 21 × Configuration Monitor Perform Analysis Method Screen Area Other than those 〇 〇 above 〇 〇 Chromatogram Monitor Area 〇 〇 Device Configuration Tab 〇 〇 Display/Execute System Check System Check 〇 Screen Save System Check Result × CBM-40 CL...
-
Page 22: Group Monitor Screen
[System Check] Tab Not used in CL model. Maintenance items of each system are [Maintenance] Tab P.18 displayed. [Simplified Device The monitor content of the currently P.20 Monitor] Area selected LC system is displayed. CBM-40 CL... -
Page 23: Hplc Explorer Area
Systems not registered in the group will be displayed (Group) together under this tree. Display the systems not registered in the group. Click the icon to display the login screen of the Unregistered System [Group Administration] screen, please register the system into the group. CBM-40 CL... - Page 24 3 Web Screen Name Description It is another group. Clicking the icon or group name switches the display Other Group of the web screen to the contents of the selected group. CBM-40 CL...
-
Page 25: Status Summary Area
The result of the system check is displayed. Maintenance Displays maintenance information. Make a note of the information about the system and Memo keep it. It is displayed when notes are empty. It is displayed when there is a memo. CBM-40 CL... - Page 26 It is the judgment result for the replacement guide value. It is displayed when it is within the replacement guide value. It is displayed when it exceeds the replacement guide value. It is displayed when a device without maintenance ― information is connected. CBM-40 CL...
- Page 27 3.3 Group Monitor Screen Name Description Present/ It is the current value and replacement guide value. Recommendation Date Last Replaced It is the date when consumables were last changed. CBM-40 CL...
-
Page 28: Simple Device Monitoring Area
It displays the chromatogram of the detector and the pressure of the pump. Chromatogram The chromatogram to be displayed is selected from Display Area the detector pull-down menu in the [Device Monitor] area. CBM-40 CL... -
Page 29: Device Monitor Screen
3.4 Device Monitor Screen Device Monitor Screen Name Description Ref. Configuration Tab Displays the [Device Configuration] screen. P.30 Analysis Tab Displays the Execute Analysis screen. P.22 Utility Button Displays the [Utility] screen. P.41 Administrator Button Displays the [Group Management] screen. P.32 CBM-40 CL... -
Page 30: Executing Analysis Status Screen
Displays the status of the current system. ― Sequence Area When analyzing, analysis sequence is also displayed. Method Area Displays the current method. P.23 Chromatographic Monitor Displays the chromatogram. Other monitor P.28 Area values of each device are also displayed. CBM-40 CL... - Page 31 Display the contents of the sequence file. Start Time It is the time when analysis started. Scheduled End Time The scheduled end time of the running sequence. n Method Area Name Description Ref. Displays the filename of the method being ― Current Method executed. CBM-40 CL...
- Page 32 The ON / OFF status of the column oven is Display displayed. OVEN Operation is not possible. Displays the setting parameters of each Basic Monitor P.25 device. [system controller] icons can be opened on Component Icons P.26 the dedicated screen. CBM-40 CL...
- Page 33 Display the main setting parameters. (The display content varies depending on the type of detector Detector connected.) The detected value is displayed. (The display content varies depending on the type of detector connected.) Fraction Not used in CL model. Collector CBM-40 CL...
- Page 34 6 A to 10 A series. After the login screen is displayed, the [System Controller] screen will be displayed. On that screen the System Controller environment parameter of the system controller can Icon be set. "System Controller Screen" P.27 CBM-40 CL...
- Page 35 3.4 Device Monitor Screen System Controller Screen The environment parameters of the system controller can be set on this screen. For details of each parameter, see ."6.1 Environment Setting List" P.56 CBM-40 CL...
- Page 36 Set pump pressure display and upper and Display Setting Button lower limit values. Zoom in Button Expand the vertical axis of the chromatogram. Zoom out Button Reduce the vertical axis of the chromatogram. Initialize Button Restore display of shifted and scaled chromatogram. CBM-40 CL...
- Page 37 Cancel Button Cancel the setting and close the screen. OK Button Reflect the settings and close the screen. [Instrument] Tab The monitor value of each device is displayed. The contents displayed depend on the connected device and type. CBM-40 CL...
-
Page 38: Device Configuration] Screen
"local". Control from the workstation and system controller is invalid. Displays the operation mode of pump and Operation Mode autosampler. Configure link mode. Unit Configuration It can not be set when a workstation is connected. CBM-40 CL... - Page 39 3.4 Device Monitor Screen Name Description The pumping mode and autosampler use mode are Operation Mode displayed. CBM-40 CL...
-
Page 40: Group Management Screen
[System Administration] Click the tab to display the [System Administration] screen. This is a screen for setting system information within the group. It is a logout button. Click this button to close the group management screen. CBM-40 CL... - Page 41 Systems that are powered off are also deleted from the table, but will be automatically re-registered when the power of the system is turned on. Update the device information table to the latest information. CBM-40 CL...
- Page 42 (For future expansion and not used) Master System It is fixed with "None". Enter the usage purpose etc. of this system. Up to 10 About This System characters can be entered with double-byte characters. (30 characters for single-byte characters) CBM-40 CL...
- Page 43 If "IP Address Setting", "IP Address", "Subnet Mask" and "Default Gateway" are changed, please restart the system controller. n Advanced Setting Screen Name Description Gateway Enter the default gateway. Select the transmission speed of Ethernet from the Ethernet Mode pull-down menu. CBM-40 CL...
-
Page 44: Change The System Name
If the [Change system name] button is already enabled, start with step 4. Click [Apply]. Log out will be done automatically. Log in again to the "Group management" screen and click the "System Administration" tab. The [System Administration] screen appears. CBM-40 CL... - Page 45 Input is up to 15 single-byte characters. Available characters are alphanumeric single byte characters and "-" (half size minus), "_" (half size underscore). Click [OK]. Click [Apply]. Changes will be reflected and log out will be done automatically. CBM-40 CL...
-
Page 46: Move The System To Another Group
Select the system to move from the pull-down menu in the "System to edit" field. Select the destination group from the pull-down menu in the [Group] field. Click [Apply]. Changes will be reflected and log out will be done automatically. CBM-40 CL... -
Page 47: Create A New Group
Click the [Create Group] button. The following screen will be displayed. Enter a new group name. Input is up to 15 single-byte characters. Available characters are alphanumeric single byte characters and "-" (half size minus), "_" (half size underscore). Click [OK]. CBM-40 CL... - Page 48 3 Web Screen Click [Apply]. Changes will be reflected and log out will be done automatically. CBM-40 CL...
-
Page 49: Utility Screen
The utility screen is displayed by clicking (Utility button) at the top of the device monitor screen. On this screen, system parameters (environment settings, methods, sequences) can be saved to a PC. And later, these parameters can be read from a PC. CBM-40 CL... -
Page 50: Store System Parameters Collectively On The Pc
In the unlikely event that the dialog "Please select the application to open the file" appears, click [Cancel] to close it. Click [Save]. The following screen will be displayed. CBM-40 CL... - Page 51 3.6 Utility Screen Select the location to save and enter the file name. Click [Save]. The file is saved in the selected location. CBM-40 CL...
-
Page 52: Load System Parameters That Were Saved At Once
The system parameters (environment setting, method, sequence) saved can be loaded all at once from the PC. Click [Load All Parameters]. The password entry screen will be displayed. Enter the user's password and click on [OK]. The [Load All Parameters] screen is displayed. CBM-40 CL... - Page 53 Click on the file to be read and click on [Open]. • Only files with extension ".mem" can be read. The selected file name is displayed in the [File Name] field on the [Load All Parameters] screen. Click [OK]. The following screen will be displayed. Click [OK]. CBM-40 CL...
- Page 54 3 Web Screen Click [Close] on the Utility screen. The [Utility] screen closes. Exit the browser and restart the system controller. CBM-40 CL...
-
Page 55: Initialize Device Parameters
"2.2 Back" P.5 Click [Initialize All Parameters]. The password entry screen will be displayed. Enter the user's password and click on [OK]. Initialization is performed and the following screen is displayed. Exit the browser and restart the system controller. CBM-40 CL... -
Page 56: Applied Operation
Not used in CL model. Input Terminal General Purpose Input Not used in CL model. Terminal General Send signals such as "Error output" and "Start signal" to Purpose other devices. OUT1~2 Output "6.1 Environment Setting List" P.56 Terminal CBM-40 CL... -
Page 57: Connect The Event Cable
In addition to the event cable which is an optional item, it is possible to substitute the cable of AWG 28 to 20. To avoid disconnection of cables, a stranded cable is recommended. CBM-40 CL... -
Page 58: Network Settings
Connect the system controller and the pump of Nexera CL series by use of an optical link cable. Set the following items on [CBM PARAMETER] screen of the device. • IP ADDRESS • SUBNET MASK • DEFAULT GATEWAY Reboot with the main power switch on the back of the system controller. CBM-40 CL... -
Page 59: When Setting From The Web Screen
4.2 Network Settings 4.2.2 When Setting From the Web Screen The following explains the case of network setting from web screen with CBM-40 CL etc. This way is available when the IP address of the system controller is known. If the set values such as IP address are not known at all, it is necessary to return to the factory default state with the INIT button on the back of the system controller. - Page 60 Set the IP address and subnet mask on the [Device Management] tab and set the default gateway on the [Advanced Setting] screen. "System Administration Screen" P.34 On the [Group Information] tab, set the group name and system name. "3.5.1 Change the System Name" P.36 CBM-40 CL...
-
Page 61: Gxp Enhancement Function
Please contact our sales office or distributor 4.3.1 Set Up GxP Enhancement Function The ON/OFF setting of the GxP enhancement function is performed by the field engineer at the time of equipment installation. To enable the GxP function, please contact the field engineer. CBM-40 CL... -
Page 62: Maintenance
Maintenance Never remove the main body cover. If repairing that removes the main body cover is necessary, please contact our sales office or designated Shimadzu representative. When replacing components, the parts described in "1.2 Component Parts" P.2 should be used. -
Page 63: Cleaning The Exterior
The gas sensor may defect volatile gas generated from organic solvent. Clean with a cloth soaked in Aqueous ethanol solution (80%) or aqueous sodium hypochlorite solution (0.05%) and wrung tightly. Do not leave metal surfaces wet. This can cause rusting and discoloration. CBM-40 CL... -
Page 64: Technical Information
Relay 2 Error Close the contact when an error occurs. Event Follow [Event 1] and [Event 2] of method Event parameters. Close the contact in case of Ready or Ready Pause. Event In 1 Not used in CL model. CBM-40 CL... -
Page 65: Error Type
Level 1 Both the column oven and the pump turn "OFF". It is a hardware issue. Please turn off the main power switch of the equipment and Fatal Error contact our sales office/distributor or our designated service representative. CBM-40 CL... -
Page 66: Specifications
External Start Terminal (Man.Inj) x 1 Option Connector x 1 AC Remote Connector x 1 Installation category Ⅱ, pollution degree 2, altitude 2000 m or less Installation Environment (IEC) Install indoors. 3 :Not used in CL model. 4: Not used. CBM-40 CL... - Page 67 Nexera Series Maximum Number of Unit Nexera X3 Nexera XR Connectable Units (130MPa) (70MPa) LC-40D X3 CL Pump LC-40D XR CL LC-40B X3 CL Autosampler SIL-40C X3 CL SIL-40C XR CL Column Oven CTO-40C CL Detector SPD-40 CL CBM-40 CL...
- Page 68 Group Information Screen Group Monitor Screen GxP Enhancement Function HPLC Explorer Area [INIT] Switch Initialize All Parameters Internet Explorer IP ADDRESS 50, 52 iPad Link Check Load All Parameters Main Power Switch Optional Parts OUT1~2 [REMOTE] Connector Safari CBM-40 CL...
Need help?
Do you have a question about the CBM-40 CL and is the answer not in the manual?
Questions and answers