Table of Contents
Advertisement
Quick Links
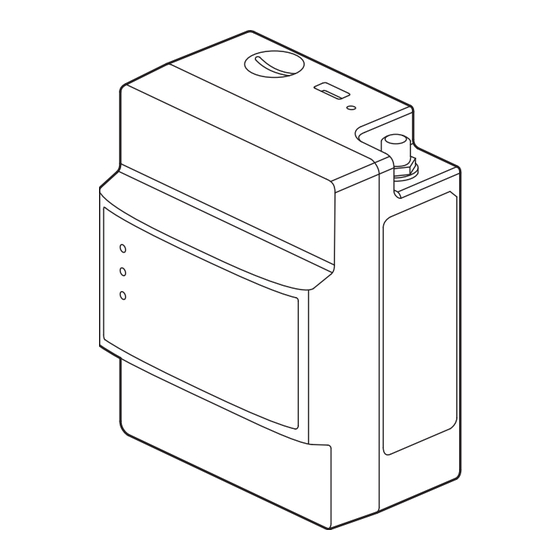
DC1
Overview • Übersicht • Aperçu général • Overzicht
WARNING • WARNUNG • AVERTISSEMENT • WAARSCHUWING
► Read and follow the safety and working instructions in the inverter manual before
connecting the DC1 to the inverter!
► Lesen und befolgen Sie die Sicherheits- und Arbeitanweisungen im Handbuch des
Wechselrichters, bevor Sie den DC1 an den Wechselrichter anschließen!
► Avant de connecter le DC1 à l'onduleur, lisez et suivez les consignes de sécurité et les
instructions du manuel de l'onduleur !
► Lees en volg de veiligheids- en werkinstructies in het handboek van de omvormer voordat
u de DC1 op de omvormer aansluit!
Scope of delivery • Lieferumfang • Livraision • Leveringsomvang
A
B
C
1x
1x
2x
Mounting • Montage
1.
F
E
E
RS485 + 12 VDC (Connection to the inverter • Verbindung zum Wechselrichter • Raccordement à l'onduleur • Aanslui-
ting op de omvormer)
CAT5 / CAT6
Ø 7 ... 10 mm; 0,25 ... 1,5 mm
2
Shielded twisted-pair cable
Verdrilltes und geschirmtes Kabel
Fils torsadés et blindés
Getwiste en afgeschermde kabel
8
0,3 ... 0,5 mm
2
Variant A (recommended): Use the 12 V connection on the RS485 terminal block of the inverter's communi-
cation card (see inverter installation instructions). Power is then supplied via the RS485 cable.
Variant B: Connect the power supply to the Micro-USB connector of the DC1.
Variante A (empfohlen): Verwenden Sie den 12-V-Anschluss am RS485-Klemmenblock der Kommunika-
tionskarte des Wechselrichters (siehe Installationsanleitung des Wechselrichters). Die Spannungsversorgung
erfolgt dann über das RS485-Kabel.
Variante B: Verbinden Sie die Stromversorgung mit dem Micro-USB-Anschluss des DC1.
© Copyright – Delta Electronics (Netherlands) B.V. – All rights reserved. All information and specifications can be modified without prior notice. DC1 Data Collector QIG EU V4 EN DE FR NL 2023-01-04.
Authorized representative for this product in the EU: Delta Electronics (Netherlands) B.V. • Zandsteen 15 • 2132 MZ Hoofddorp • Netherlands
Data Collector • Datenkollektor
Collecteur de données • Datacollector
D
E
3x
F
1x
1x
2.
A
F
DC1 Data collector • DC1 Datenkollektor
DC1 Collecteur de données • DC1 Datacollector
3
1
15
13
11
9
7
5
4
2
16
14
12
10
8
6
..
: not used • nicht benutzt • non utilisé • niet gebruikt
5
16
Quick Installation Guide • Installationskurzanleitung
Guide d'installation rapide • Beknopte installatiehandleiding
LED
1
System Ready
Inverter Communication
2
3
Internet Communication
1
2
3
Extension port
Ethernet
3.
A
C
Inverter • Wechselrichter • Onduleur • Omvormer
D
Power - GND
1
Power - +
2
RS485-1 - B
3
RS485-1 - A
4
Variante A (recommandée) : Utilisez la connexion 12 V sur le bornier RS485 de la carte de communication
de l'onduleur (voir instructions d'installation de l'onduleur). L'alimentation est ensuite au travers du câble
RS485.
Variante B : Branchez une alimentation externe au connecteur Micro-USB du DC1.
Variant A (aanbevolen): Gebruik de 12V-aansluiting op het RS485-klemmenblok van de communicatie-
kaart van de omvormer (zie installatiehandleiding van de omvormer). De stroom wordt dan geleverd via de
RS485-kabel.
Variant B: Sluit de vvoeding aan op de Micro-USB-connector van de DC1.
Reset
Power Micro-USB
Micro SD
A
D
USB
RS485
4.
F
Kommunikationskort
Tarjeta de comunicación
Scheda di comunicazione
Karta komunikacyjna
EU
B
Wi-Fi
Advertisement
Table of Contents

Summary of Contents for Delta DC1
- Page 1 Variant B: Sluit de vvoeding aan op de Micro-USB-connector van de DC1. © Copyright – Delta Electronics (Netherlands) B.V. – All rights reserved. All information and specifications can be modified without prior notice. DC1 Data Collector QIG EU V4 EN DE FR NL 2023-01-04.
- Page 2 © Copyright – Delta Electronics (Netherlands) B.V. – All rights reserved. All information and specifications can be modified without prior notice. DC1 Data Collector QIG EU V4 EN DE FR NL 2023-01-04. ments fournis avec cet appareil.


Need help?
Do you have a question about the DC1 and is the answer not in the manual?
Questions and answers