Table of Contents

Advertisement

Quick Links

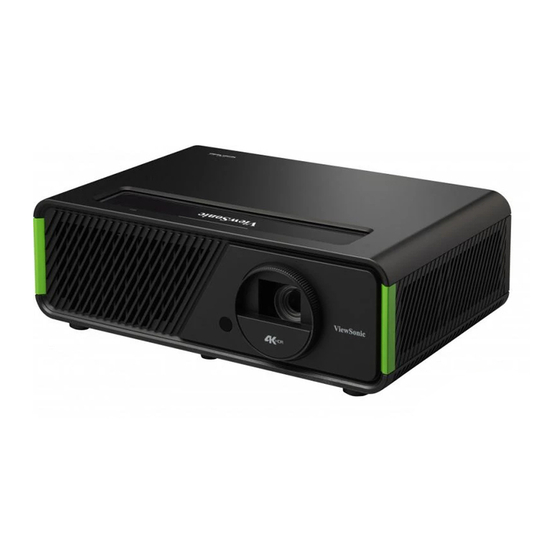
X1-4K/X2-4K
Projector
User Guide
IMPORTANT: Please read this User Guide to obtain important information on installing and using your product
in a safe manner, as well as registering your product for future service. Warranty information contained in this
User Guide will describe your limited coverage from ViewSonic Corporation, which is also found on our web site at
http://www.viewsonic.com in English, or in specific languages using the Regional selection box in the upper right
corner of our website. "Antes de operar su equipo lea cu idadosamente las instrucciones en este manual"
Model No. VS19300/ VS19302
Model Name: X1-4K/X2-4K

Advertisement

Table of Contents
loading

Summary of Contents for ViewSonic X1-4K

  • Page 1 Warranty information contained in this User Guide will describe your limited coverage from ViewSonic Corporation, which is also found on our web site at http://www.viewsonic.com in English, or in specific languages using the Regional selection box in the upper right corner of our website.
  • Page 2 As a world-leading provider of visual solutions, ViewSonic® is dedicated to exceeding the world’s expectations for technological evolution, innovation, and simplicity. At ViewSonic®, we believe that our products have the potential to make a positive impact in the world, and we are confident that the ViewSonic® product you have chosen will serve you well.
  • Page 3 Safety Precautions Please read the following Safety Precautions before you start using the projector. • Keep this user guide in a safe place for later reference. • Read all warnings and follow all instructions. • Allow at least 20“ (50 cm) clearance around the projector to ensure proper ventilation.
  • Page 4 (UPS). • If smoke, an abnormal noise, or a strange odor is present, immediately switch the projector off and call your dealer or ViewSonic®. It is dangerous to continue using the projector. • Use only attachments/accessories specified by the manufacturer.
  • Page 5 Safety Precautions - Ceiling Mounting Please read the following Safety Precautions before you start using the projector. If you intend to mount the projector on the ceiling, it is strongly recommended that you use a proper fitting projector ceiling mount kit and that you ensure it is securely and safely installed.
  • Page 6: Table Of Contents

    Replacing the Remote Control Batteries ..............14 Initial Setup ............... 15 Choosing a Location ....................15 Projection Dimensions ..................16 16:9 Image on a 16:9 Screen ..................16 X1-4K ........................... 16 X2-4K ........................... 17 16:9 Image on a 4:3 Screen ..................17 X1-4K ........................... 17 X2-4K ........................... 18 Mounting the Projector ..................19...
  • Page 7 Operation ..............28 Turning the Projector On/Off ................28 Starting Up the Projector ..................28 First Time Activation ....................28 WiFi Settings ....................... 29 Bluetooth Remote Control Settings ................30 Shutting Down the Projector ................. 31 Selecting an Input Source ..................32 Adjusting the Projected Image ................33 Adjusting the Projector's Height and Projection Angle ..........
  • Page 8 Appendix ..............89 Specifications ......................89 Projector Dimensions .................... 90 Timing Chart ......................91 Troubleshooting ....................93 Common Problems ....................93 LED Indicator ......................94 Maintenance......................95 General Precautions ....................95 Cleaning the Lens ....................95 Cleaning the Case ....................95 Storing the Projector ..................... 95 Disclaimer ......................
  • Page 9: Introduction

    Introduction Package Contents NOTE: The power cord and video cables included in your package may vary depending on your country. Please contact your local reseller for more information.
  • Page 10: Product Overview

    Lens shift (up/down) Indicator Light *The lens shift function is only available on specific model. Vent (cold air intake) Vent (cold air intake) Remote IR sensor Projection Lens X1-4K Focus Ring Zoom Ring Projection Lens X2-4K Controls and Functions Description Toggles the projector between standby mode and Power On.
  • Page 11: Connection Ports

    Connection Ports USB C AUDIO OUT RS232 SERVICE HDMI 1 HDMI 2 USB A HDCP 2.2 HDCP 2.2 5V/1A Service for SMART SYSTEM Kensington Anti-theft Lock Slot AC Power Cord Inlet Remote IR sensor Security Bar Ceiling Mount Holes Adjuster Foot Port Description [1] AUDIO OUT...
  • Page 12: Remote Control

    Remote Control Button Description Returns to the previous menu, main settings menu Controls and Functions or exit the app. Goes to the homepage of the SMART SYSTEM. Increases the projector volume. Decreases the projector volume. Mutes or unmutes the projector volume. Plays or pauses the playback of a file.
  • Page 13: Remote Control Effective Range

    Button Description Exits and saves menu settings. Goes to the homepage of the SMART SYSTEM. Increases the projector volume. Decreases the projector volume. Mutes or unmutes the projector volume. Not available. Remote Control Effective Range To ensure proper function of the remote control follow the steps below: The remote control must be held at an angle within 30°...
  • Page 14: Replacing The Remote Control Batteries

    Replacing the Remote Control Batteries Remove the battery cover from the rear of the remote control by pressing the finger grip and sliding it down. Remove any existing batteries (if necessary) and install two AAA batteries. NOTE: Observe the battery’s polarities as indicated. Replace the battery cover by aligning it with the base and pushing it back into position.
  • Page 15: Initial Setup

    Initial Setup This section provides detailed instructions for setting up your projector. Choosing a Location Personal preference and room layout will decide the installation location. Consider the following: • Size and Position of your screen. • Location of a suitable power outlet. •...
  • Page 16: Projection Dimensions

    (down/up) Lens shift (up/down) NOTE: (e) = Screen (f) = Center of Lens The Lens shift function is only available on X1-4K. • 16:9 Image on a 16:9 Screen X1-4K (a) Screen (b) Projection Distance (c) Image (d) Vertical Offset...
  • Page 17: X2-4K

    1516 1819 1245 110 2794 1667 2001 1370 120 3048 1819 2183 1494 • 16:9 Image on a 4:3 Screen X1-4K (a) Screen (b) Projection Distance (c) Image (d) Vertical Offset Size minimum maximum Height minimum maximum inch mm inch...
  • Page 18: X2-4K

    X2-4K (a) Screen (b) Projection Distance (c) Image (d) Vertical Offset Size minimum maximum Height minimum maximum inch mm inch inch inch inch inch 60 1524 1002 70 1778 1169 80 2032 1113 1336 90 2286 1252 1503 1029 100 2540 1391 1670 1143...
  • Page 19: Mounting The Projector

    If you buy a third-party mount, please use the correct screw size. Screw size can vary depending on the thickness of the mounting plate. To ensure the most secure installation, please use a ViewSonic® wall or ceiling mount. 2. Ensure the screws used to attach a mount to the projector meet the following specifications: •...
  • Page 20: Preventing Unauthorized Use

    Preventing Unauthorized Use The projector has several built-in security features to prevent theft, access, or accidental setting changes. Using the Security Slot To help prevent the projector from being stolen, use a security slot locking device to secure the projector to a fixed object. Below is an example of setting up a security slot locking device: NOTE: The security slot can also be used as a safety anchor if the projector is...
  • Page 21: Using The Password Function

    Using the Password Function To help prevent unauthorized access or use, the projector offers a password security option. The password can be set through the On-Screen Display (OSD) Menu. NOTE: Make note of your password, and keep it in a safe place. Setting a Password Press MENU or to open the OSD Menu and go to:...
  • Page 22: Changing The Password

    Changing the Password Press MENU or to open the OSD Menu and go to: SYSTEM > Security Settings > Change Password. 2. Press ENTER/OK, the message, ‘INPUT CURRENT PASSWORD’ will appear. 3. Enter the old password. ͫ If the password is correct, the message, ‘INPUT NEW PASSWORD’ will appear.
  • Page 23: Forgetting The Password

    Forgetting the Password If the password function is activated, you will be asked to enter the six-digit password every time you turn on the projector. If you enter the wrong password, the password error message, as pictured to the right, will appear for 5 seconds, and the message ‘INPUT PASSWORD’...
  • Page 24: Locking The Control Keys

    Locking the Control Keys With the control keys on the projector locked, you can prevent your settings from being changed accidentally (by children, for example). NOTE: When the Panel Key Lock is On, no control keys on the projector will operate except Power.
  • Page 25: Making Connections

    Making Connections This section guides you on how to connect the projector with other equipment. Connecting to Power 1. Connect the power cord to the AC IN jack at the rear of the projector. 2. Plug the power cord into a power outlet. NOTE: When installing the projector, incorporate a readily accessible disconnect device in the fixed wiring, or connect the power plug to an easily accessible...
  • Page 26: Connecting To Video/Computer Sources

    Connecting to Video/Computer Sources HDMI Connection Connect one end of an HDMI cable to the HDMI port of your video/computer device. Then connect the other end of the cable to the HDMI port of your projector. USB C Connection Connect one end of an USB C cable to the USB C port of your video/computer device.
  • Page 27 The connection illustrations below are for reference only. The connecting jacks available on the projector vary with each projector model. Some cables may not be included with the projector. They are commercially available from electronics stores. USB C AUDIO OUT RS232 SERVICE HDMI 1...
  • Page 28: Operation

    Operation Turning the Projector On/Off Starting Up the Projector 1. Press the Power button to turn on the projector. 2. The light source will light up, and a “Power On/Off Ring Tone” will play. 3. The Power Indicator Light stays green when the projector is On.
  • Page 29: Wifi Settings

    WiFi Settings 1. If the projector is activated for the first time, you can directly select the network name that you want to connect to and input the password in the WiFi settings page from the setup wizard.
  • Page 30: Bluetooth Remote Control Settings

    Select the device named "VIEWSONIC". NOTE: The supplied remote control for ViewSonic X1-4K/X2-4K supports both bluetooth and infrared mode. The remote control and projector are in infrared mode when the indicator on the remote control lights up red. If the remote control is paired with the projector in bluetooth connection, the buttons and indicator on the remote control light up blue.
  • Page 31: Shutting Down The Projector

    Shutting Down the Projector 1. Press the Power or Off button and a confirmation message will appear to prompt you to press the Power or Off button a second time. Additionally you can press any other button to cancel. NOTE: If you do not respond in a few seconds after the first press, the message will disappear.
  • Page 32: Selecting An Input Source

    Selecting an Input Source The projector can be connected to multiple devices at the same time. However, it can only display one full screen at a time. If you want the projector to automatically search for the input source, ensure the Quick Auto Search function in the SYSTEM menu is On.
  • Page 33: Adjusting The Projected Image

    Adjusting the Projected Image Adjusting the Projector's Height and Projection Angle The projector is equipped with one (1) adjuster foot. Adjusting the foot will change the projector’s height and the vertical projection angle. Carefully adjust the foot to fine tune the projected image’s position. Fine-Tuning the Image Size and Clarity To adjust the projected image to the size that you need, rotate the Zoom Ring.
  • Page 34: Correcting Keystone

    Correcting Keystone Keystoning refers to the situation where the projected image becomes a trapezoid due to angled projection. To correct this, besides adjusting the height of the projector, you may also: 1. Use the Left/ Right/ Up/ Down keys on the projector or remote control to display the keystone page (when the input source is not SMART SYSTEM).
  • Page 35: Adjusting 4 Corners

    Adjusting 4 corners You can manually adjusts the shape and size of an image that is unevenly rectangular on all sides. 1. To display the Corner Adj. page, you can do one of the followings: (when the input source • Press ENTER/OK is not SMART SYSTEM) •...
  • Page 36: Menu Functions

    Menu Functions This section will introduce the On-Screen Display (OSD) Menu and its options. General On-Screen Display (OSD) Menu Operation NOTE: The OSD screenshots in this manual are for reference only and may differ from the actual design. Some of the following OSD settings may not be available. Please refer to the actual OSD of your projector.
  • Page 37: On-Screen Display (Osd) Menu Tree

    On-Screen Display (OSD) Menu Tree Main Menu Sub-menu Menu Option DISPLAY Aspect Ratio Auto 16:9 16:10 2.35:1 Native Keystone Auto V Keystone Off/On Manual Vertical Horizontal Rotation Corner Adj. Top-Right Top-Left Bottom-Right Bottom-Left Warping Enable Off/On Control Method RS232 Warping Adj. Reset Zoom 0.8X ~2.0X...
  • Page 38 Main Menu Sub-menu Menu Option IMAGE Color Mode Brightest Gaming Movie User Low Blue Light Brightness 0~100 Contrast -50~50 Color Temp. 9300K/7500K/6500K Red Gain 0~100 Green Gain 0~100 Blue Gain 0~100 Red Offset -50~+50 Green Offset -50~+50 Blue Offset -50~+50 Advanced Color -50~50...
  • Page 39 Power On/Off Ring Tone Off/On Presentation Timer Timer Period 1~240 m Timer Display Always/1 min/2 min/3 min/Never Timer Position Top-Left/Bottom-Left/ Top-Right/Bottom-Right Timer Counting Direction Count Down/Count Up Sound Reminder Off/On Start Counting/Off Pattern Test Card Message Splash Screen Black Blue ViewSonic...
  • Page 40 Main Menu Sub-menu Menu Option ADVANCED HDR/HLG Auto/SDR EOTF Low/Mid/High 3D Settings 3D Format Auto Frame Sequential Frame Packing Top-Bottom Side-by-Side 3D Sync Invert Disable/Invert Save 3D Settings Yes/No HDMI Settings HDMI Format Auto/RGB/YUV HDMI Range Auto/Enhanced/ Normal Ultra Fast Input Inactive Active Light Source Settings Light Source Mode...
  • Page 41 Main Menu Sub-menu Menu Option SYSTEM Language Multi-Language OSD Selection Projector Position Front Table Rear Table Rear Ceiling Front Ceiling Menu Settings Menu Display Time 5 sec/10 sec/15 sec/20 sec/25 sec/30 sec Menu Position Center/Top-Left/ Top-Right/ Bottom-Left/ Bottom-Right High Altitude Mode Quick Auto Search Security Settings Change Password...
  • Page 42: Display Menu

    DISPLAY Menu 1. Press the MENU or button to display the On-Screen Display (OSD) Menu. 2. Press to select the DISPLAY menu. Then press ENTER/OK or use access the DISPLAY menu. 3. Press ENTER/OK to select the menu option. Then press to display its sub- menu, or press to adjust/select the setting.
  • Page 43 Menu Option Description Aspect Ratio Auto Scales an image proportionally to fit the projector’s native resolution in its horizontal width. This is suitable for the incoming image which is neither in 4:3 nor 16:9 and you want to make most use of the screen without altering the image’s aspect ratio.
  • Page 44 Menu Option Description Warping The function is to configure the geometric distortion of the projector’s images when the images are projected onto screens which have a kind of uneven surface such as a cylinder, a spherical shape, etc. Enable Keystone and Corner Adj. will not be available when Warping is enabled.
  • Page 45: Image Menu

    IMAGE Menu 1. Press the MENU or button to display the On-Screen Display (OSD) Menu. 2. Press to select the IMAGE menu. Then press ENTER/OK or use access the IMAGE menu. 3. Press to select the menu option. Then press ENTER/OK to display its sub- menu, or press...
  • Page 46 Menu Option Description Color Mode Brightest Maximizes the brightness of the projected image. This mode is suitable for environments where extra-high brightness is required, such as using the projector in well lit rooms. Optimized for viewing sports in well-lit environments. Gaming Suitable for playing video games in a bright living room.
  • Page 47 Menu Option Description Advanced Color A lower setting produces less saturated colors. If the setting is too high, colors will be overpowering and may appear unrealistic. Sharpness A higher value will sharpen the image, while a lower value will soften the image. Gamma Gamma refers to the brightness level of the projector’s grayscale levels.
  • Page 48: Power Management Menu

    POWER MANAGEMENT Menu 1. Press the MENU or button to display the On-Screen Display (OSD) Menu. 2. Press to select the POWER MANAGEMENT menu. Then press ENTER/OK or to access the POWER MANAGEMENT menu. 3. Press to select the menu option. Then press ENTER/OK to display its sub- menu, or press...
  • Page 49 Menu Option Description Auto Power On Signal Selecting HDMI allows the projector to turn on automatically once the HDMI/USB C signal is fed through the HDMI/USB C cable. This projector supports CEC (Consumer Electronics Control) function for synchronized power on/off operation via HDMI connection.
  • Page 50: Basic Menu

    BASIC Menu 1. Press the MENU or button to display the On-Screen Display (OSD) Menu. 2. Press to select the BASIC menu. Then press ENTER/OK or use access the BASIC menu. 3. Press to select the menu option. Then press ENTER/OK to display its sub- menu, or press...
  • Page 51 Menu Option Description Audio Settings Audio Mode Select a preferred audio mode to suit your audio content. Mute Select to temporarily turn off the projector’s internal speaker or the volume being output from the audio output jack. Audio Volume Adjusts the volume level of the projector’s internal speaker or the volume being output from the audio output jack.
  • Page 52 Menu Option Description Pattern Helps adjust the image size and focus, and checks for distortion in the projected image. Message Sets reminder messages On or Off. Splash Screen Selects which logo screen will appear during projector start-up.
  • Page 53: Advanced Menu

    ADVANCED Menu 1. Press the MENU or button to display the On-Screen Display (OSD) Menu. 2. Press to select the ADVANCED menu. Then press ENTER/OK or use access the ADVANCED menu. 3. Press to select the menu option. Then press ENTER/OK to display its sub- menu, or press...
  • Page 54 Menu Option Description HDR/HLG The projector supports HDR imaging sources. It can automatically detect the dynamic range of the source, and optimize image gamma and color settings to reproduce contents under wide range of light conditions. You also select SDR. EOTF The projector can automatically adjust the brightness levels of your image according to the input source.
  • Page 55 Menu Option Description HDMI Settings HDMI Format Select a suitable color space according to the color space setting of the output device connected. ͫ Auto: Sets the projector to detect the color space setting of the input signal automatically. ͫ RGB: Sets the color space as RGB. ͫ...
  • Page 56 Menu Option Description Light Source Settings Light Source Mode ͫ Normal: Provides full light source brightness. ͫ Eco: Reduces light source power consumption by 40% and lowers brightness to extend the light source life and decreases the fan noise. ͫ Dynamic Black 1: Reduces light source power consumption by up to 70% depending on the content brightness level.
  • Page 57: System Menu

    SYSTEM Menu 1. Press the MENU or button to display the On-Screen Display (OSD) Menu. 2. Press to select the SYSTEM menu. Then press ENTER/OK or use access the SYSTEM menu. 3. Press to select the menu option. Then press ENTER/OK to display its sub- menu, or press...
  • Page 58 Menu Option Description Language Sets the language for the On-Screen Display (OSD) Menu. Projector Position Selects a proper position for the projector. Menu Settings Menu Display Time Sets the length of time the OSD Menu will remain active after your last interaction. Menu Position Sets the OSD Menu’s position.
  • Page 59: Information Menu

    INFORMATION Menu 1. Press the MENU or button to display the On-Screen Display (OSD) Menu. 2. Press to select the INFORMATION menu and display its contents. Menu Option Description Source Shows the current input source. Color Mode Shows the selected mode in the IMAGE menu. Resolution Shows the native resolution of the input source.
  • Page 60: Smart System

    Smart System This section will introduce the SMART SYSTEM. Home Screen The Home Screen is displayed every time you start the projector. To navigate the Home Screen, simply use the directional buttons on the remote control. You can return to the main Home Screen at any time by pressing the Home button on the remote control, regardless of what page you are on.
  • Page 61: Home Screen - On-Screen Display (Osd) Menu Tree

    Home Screen - On-Screen Display (OSD) Menu Tree Main Menu Sub-menu Menu Option File Management Apps Center Bluetooth Disable SSID: Configure IP Settings Network Settings Wi-Fi IP Address Enable Subnet Mask Default Gateway DNS Server Settings Basic Settings Language Multi-Language OSD Selection Disable Automatic Date &...
  • Page 62 Main Menu Sub-menu Menu Option Reset Settings Cancel Advanced Settings Reset To Factory Default Cancel System Version Memory Information Information Wi-Fi Mac Address Screen Mirroring Add App Add App Add App Add App...
  • Page 63: Menu Operations

    Menu Operations File Management Easily manage files and folders. 1. Select: Home > File Management. 2. Select a device on the source list: USB, Local Storage, etc. Use the direction buttons to select the desired file. Then press OK on the remote control to open the selected file.
  • Page 64 How to Edit a File 1. While in File Management, press and hold the OK button for three (3) seconds. 2. A check box will appear at the front of each file. Use the direction buttons and press OK to select one or more files. 3.
  • Page 65 How to Use Control Bar Buttons The Control Bar buttons will appear on screen if a video, music, or photo file are selected to be opened. Picture Video Music Back Back Back Play Rewind Play Next Play Pause Zoom in Pause Next Zoom out...
  • Page 66 Supported File Formats Supported Office formats: Item Indicators Able to open and read documents in doc/ doc/docx Document docx viewing xls/xlsx Able to open and read documents in xls/xlsx function ppt/pptx Able to open and read documents in ppt/pptx Able to open and read documents in pdf English, Simplified Chinese, Chinese (TW), Chinese (HK), Spanish (LA), French (EU), PT (EU), PT (BR), German, Russian, Italian,...
  • Page 67 Supported Photo formats: Format Type Maximum Resolution Progressive JPEG 7680 x 4320 .jpg/.jpeg Baseline JPEG 7680 x 4320 .bmp 9600 x 6400 .png 7680 x 4320 Supported External Connected Device formats: Support Size Device NTFS Format FAT32 Format exFAT (Max. Size) Read Write Read...
  • Page 68 Apps Center View, launch, and uninstall Apps. 1. To view your Apps, select: Home > Apps Center. 2. Use the direction buttons to select the desired App. Then press OK on the remote control to launch the App. NOTE: Press the Home button on the remote control to return to the Home Screen at anytime.
  • Page 69 • Users can install third-party Apps by .apk file in File Management. However, some third-party Apps may have compatibility issues. • Apps not pre-loaded by ViewSonic may not be compatible or work properly. • Some Apps may require a Keyboard and Mouse.
  • Page 70 To Uninstall Apps 1. Open the Apps Center by selecting: Home > Apps Center. 2. Use the directional buttons to select the desired App. 3. Press and hold OK on the remote control for three (3) seconds. The below dialogue box will appear: 4.
  • Page 71 5. Upon successful connection, another sound effect will be audible. NOTE: The projector’s name will be labeled as “ViewSonic Projector”. Once paired, if both the projector and your device are powered on they will automatically connect via Bluetooth in Bluetooth Speaker mode. When connected please...
  • Page 72 the list and press ENTER/OK. You can also connect the projector to external headphones or speakers that support Bluetooth: 1. Go to: Home Screen > Bluetooth. 2. Use the to select Bluetooth Out. Then press ENTER/OK. NOTE: Once paired, if both the projector and your device are powered on they will automatically connect via Bluetooth.
  • Page 73 Setting Under Setting you can adjust Network, Basic, and Advanced Settings, Date & Time, Firmware Update, and view Information. Network Settings 1. Select: Home > Setting > Network Settings. 2. Choose Wi-Fi.
  • Page 74 3. Use the Left/ Right buttons to choose Enable. 4. The available networks appears. Choose a Wi-Fi network. 5. If a secure Wi-Fi network is connected, input the password when required.
  • Page 75 Custom SSID 1. Go to: Home > Settings > Network Settings > Wi-Fi 2. Press Left or Right on the remote control to select Enable. 3. From the available Wi-Fi networks list select Others and press OK on the remote control.
  • Page 76 5. Enter the password when prompted. Basic Settings 1. Select: Home > Setting > Basic Settings.
  • Page 77 2. Use the Up and Down buttons to select the desired option and press OK. Then use the Left and Right buttons to make adjustments or selections. 3. To return to a previous menu press the Return button. Menu Description Language Select your desired language.
  • Page 78 Date & Time Adjust Date, Time, Time Zone, and Time Format. NOTE: The time is displayed in the top-right corner after connecting to the Internet. 1. Select: Home > Setting > Date & Time. 2. Use the Up and Down buttons to select the desired option and press OK. Then use the Left and Right buttons to make adjustments or selections.
  • Page 79 Menu Description Users can synchronize the date and time automatically after connecting to the Internet. Enable Automatic Date & Time Turn on synchronization. Disable Turn off synchronization. Adjust the date automatically when connected to a Date network. Adjust the time automatically when connected to a Time network.
  • Page 80 Firmware Upgrade Users can update the firmware by internet or USB, and check the version number. NOTE: Do not unplug the power cord, USB, or disconnect from the Internet during the upgrading process. 1. Before entering the Firmware Upgrade menu, ensure the projector is connected to the Internet.
  • Page 81 3. The system will check the ViewSonic website (OTA) and display the below dialog message if there is new Firmware. 4. After selecting Yes, a progress bar will appear as the update process begins. 5. After reaching 100% the projector will restart and the screen will turn to black for a few minutes.
  • Page 82 Firmware Update by USB with FAT32 Format NOTE: NTFS format, read only. 1. Download the latest version from the ViewSonic website and copy the file to a USB device. 2. Plug the USB into the projector, then go to: Home > Setting > Firmware Upgrade >...
  • Page 83 Advanced Settings 1. Select: Home > Setting > Advanced Settings. 2. Use the Up and Down buttons to select the desired option and press OK. Then use the Left and Right buttons to make adjustments or selections. 3. To return to a previous menu press the Return button. Menu Description Reset Settings...
  • Page 84 Information 1. Select: Home > Setting > Information. 2. View system status and information. NOTE: Press the Home button on the remote control to return to the Home Screen at anytime.
  • Page 85 Screen Mirroring Mirror your personal device’s screen. NOTE: Ensure your device is connected to the same network as the projector. Screen Mirroring provides a 5GHz Wi-Fi connection for users to mirror the screen on their personal device. NOTE: Ensure your device is connected to the same network as the projector. For iOS: 3.
  • Page 86 NOTE: Some Android devices support direct “Casting”. If your device does, go to the Casting feature and choose “ViewSonic PJ-XXX” from the list of available devices. You can also scan the FAQ QR code and follow the steps to directly...
  • Page 87 Adding Apps Add your favorite Apps to the Home Screen. 1. From the Home Screen, select Add App and then press OK on the remote control. 2. Use the directional buttons to select the desired App and press OK. 3. Now your favorite App will appear on the Home Screen.
  • Page 88 Delete Apps From the Home Screen 1. From the Home Screen, select the App you want to delete and press and hold OK for three (3) seconds. 2. The message, “Do you want Delete this application from My Favorites?” will appear.
  • Page 89: Appendix

    (14” x 4.8” x 9.6”) (14” x 4.8” x 9.9”) Weight Physical 3.6±0.2 kg (7.94±0.44 lb) Power 236 W (Typical) consumption < 0.5W (Standby) Please use the power adapter from ViewSonic® or an authorized source only. The test condition follows EEI standards.
  • Page 90: Projector Dimensions

    Projector Dimensions X1-4K MENU BLANK EXIT ENTER SOURCE COLOR MODE 355 mm 121 mm X2-4K MENU BLANK EXIT ENTER SOURCE COLOR MODE...
  • Page 91: Timing Chart

    Timing Chart HDMI/USB C (PC) Signal Resolution (dots) Aspect ratio Refresh rate (Hz) 640 x 480 60/72/75/120 SVGA 800 x 600 60/72/75/120 1024 x 768 60/70/75/120 1152 x 864 1280x 720 16:9 60/120 WXGA 1280 x 768 15:9 1280 x 800 16:10 60/75/120 1366 x 768...
  • Page 92 HDMI/USB C (Video) Signal Resolution (dots) Aspect ratio Refresh rate (Hz) SDTV (480i) 720 x 480 4:3 / 16:9 SDTV (576i) 720 x 576 4:3 / 16:9 3D (HDMI signal included) Signal Resolution (dots) Aspect ratio Refresh rate (Hz) Signal Resolution (dots) Aspect Ratio Refresh Rate (Hz)
  • Page 93: Troubleshooting

    Troubleshooting Common Problems This section describes some common problems that you may experience when using the projector. Problem Possible Solutions The projector does not turn on • Ensure the power cord is properly attached to the projector and to the power outlet. •...
  • Page 94: Led Indicator

    LED Indicator Light Status and Description Orange Stand-by mode Green Flashing Powering up Green Normal operation Downloading Orange Flashing Burn in off Red Flashing once per second Fan error Red Flashing once per 3 seconds Thermal and temperature error Green & Red Flashing alternately Light source error...
  • Page 95: Maintenance

    • ViewSonic® does not recommend the use of any ammonia or alcohol-based cleaners on the lens or case. Some chemical cleaners have been reported to damage the lens and/or case of the projector. • ViewSonic® will not be liable for damage resulting from use of any ammonia or alcohol-based cleaners.
  • Page 96: Light Source Information

    Light Source Information This section will provided a better understanding of your projector’s light source. Light Source Hour When the projector is being used, the duration (in hours) of light source usage is automatically calculated by the built-in timer. To obtain the light source hour information: 1.
  • Page 97 Regulatory and Service Information Compliance Information This section addresses all connected requirements and statements regarding regulations. Confirmed corresponding applications shall refer to nameplate labels and relevant markings on the unit. FCC Compliance Statement This device complies with part 15 of FCC Rules. Operation is subject to the following two conditions: (1) this device may not cause harmful interference, and (2) this device must accept any interference received, including interference that may cause undesired operation.
  • Page 98 FCC Radiation Exposure Statement This equipment complies with FCC radiation exposure limits set forth for an uncontrolled environment. End users must follow the specific operating instructions for satisfying RF exposure compliance. This transmitter must not be co-located or operating in conjunction with any other antenna or transmitter.
  • Page 99 IC Radiation Exposure Statement This equipment complied with IC RSS-102 radiation exposure limits set forth for an uncontrolled environment. This equipment should be installed and operated with minimum distance 20cm between the radiator & your body. The device for the band 5150-5825 MHz is only for indoor usage to reduce potential for harmful interference to co-channel mobile satellite systems.
  • Page 100 Declaration of RoHS2 Compliance This product has been designed and manufactured in compliance with Directive 2011/65/EU of the European Parliament and the Council on restriction of the use of certain hazardous substances in electrical and electronic equipment (RoHS2 Directive) and is deemed to comply with the maximum concentration values issued by the European Technical Adaptation Committee (TAC) as shown below: Proposed Maximum Substance...
  • Page 101 Schedule 2 of the Rule. Product Disposal at End of Product Life ViewSonic® respects the environment and is committed to working and living green. Thank you for being part of Smarter, Greener Computing. Please visit the ViewSonic®...
  • Page 102 ENERGY STAR® is a registered trademark of the U.S. Environmental Protection Agency (EPA). As an ENERGY STAR® partner, ViewSonic® Corporation has determined that this product meets the ENERGY STAR® guidelines for energy efficiency. Disclaimer: ViewSonic® Corporation shall not be liable for technical or editorial errors or omissions contained herein;...
  • Page 103 For technical support or product service, see the table below or contact your reseller. NOTE: You will need the product’s serial number. Country/ Region Website Country/ Region Website Asia Pacific & Africa Australia www.viewsonic.com/au/ Bangladesh www.viewsonic.com/bd/ www.viewsonic.com.cn www.viewsonic.com/hk/ 中国 (China) 香港 (繁體中文) Hong Kong (English) www.viewsonic.com/hk-en/ India www.viewsonic.com/in/...
  • Page 104 If a product proves to be defective in material or workmanship during the warranty period, ViewSonic® will, at its sole option, repair or replace the product with a like product. Replacement product or parts may include remanufactured or refurbished parts or components.
  • Page 105 (e) the serial number of the product. 3. Take or ship the product, freight prepaid, in the original container to an authorized ViewSonic® service center or ViewSonic®. 4. For additional information or the name of the nearest ViewSonic® service center, contact ViewSonic®. Limitation of implied warranties:...
  • Page 106 Exclusion of damages: ViewSonic’s liability is limited to the cost of repair or replacement of the product. ViewSonic® shall not be liable for: 1. Damage to other property caused by any defects in the product, damages based upon inconvenience, loss of use of the product, loss of time, loss of profits, loss of business opportunity, loss of goodwill, interference with business relationships, or other commercial loss, even if advised of the possibility of such damages.
  • Page 107 If a product proves to be defective in material or workmanship during the warranty period, ViewSonic® will, at its sole option, repair or replace the product with a like product. Replacement product or parts may include remanufactured or refurbished parts or components &...
  • Page 108 Exclusion of damages: ViewSonic®’s liability is limited to the cost of repair or replacement of the product. ViewSonic® shall not be liable for: 1. Damage to other property caused by any defects in the product, damages based...
  • Page 109 Name, address, of manufacturer and importers: México, Av. de la Palma #8 Piso 2 Despacho 203, Corporativo Interpalmas, Col. San Fernando Huixquilucan, Estado de México Tel: (55) 3605-1099 http://www.viewsonic.com/la/soporte/index.htm NÚMERO GRATIS DE ASISTENCIA TÉCNICA PARA TODO MÉXICO: 001.866.823.2004 Hermosillo: Villahermosa: Distribuciones y Servicios Computacionales SA de CV.
  • Page 110 C0 M91 Y72 K24 Process Color C0 M0 Y0 K100 Process Color C0 M91 Y72 K24 Process Color Pantone Black C Spot Color Pantone 187 C Spot Color...

This manual is also suitable for:

X2-4kVs19300Vs19302

Table of Contents