Advertisement
Quick Links
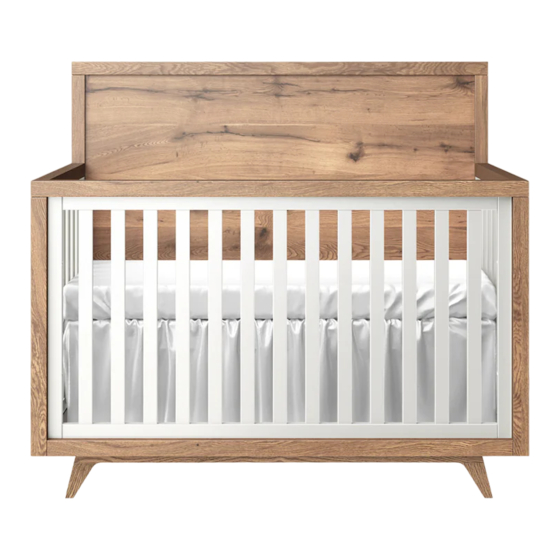
ASSEMBLY INSTRUCTIONS FOR THE
15503 UPTOWN
READ
ALL
INSTRUCTIONS
BEFORE
ASSEMBLING
CRIB. KEEP THE INSTRUCTION
BOOKLET FOR FURTHER USE.
NEVER
USE
THE
PLASTIC
SHIPPING
BAGS
OR
PLASTIC FILM AS MATTRESS
COVERS, AS THEY CAN CAUSE
SUFFOCATION.
MAKE SURE TO SELECT THE
CORRECT
SIZE
MATTRESS.
INFANTS CAN SUFFOCATE IN THE
GAPS BETWEEN THE CRIB SIDES
AND A MATTRESS THAT IS TOO
SMALL.
CONVERTIBLE CRIB
THE
WARNING: THE PROPER USE OF THIS
OTHER
CRIB IS IMPORTANT FOR YOUR BABY'S
SAFETY. IN ORDER TO KEEP YOU
BABY SAFE AND SECURE, AS WELL AS
AVOID POTENTIAL INJURY OR DEATH,
PLEASE READ AND BECOME FAMILIAR
WITH ALL THE WARNINGS, CAUTIONS
AND INSTRUCTIONS IN THIS BOOKLET.
KEEP THIS INSTRUCTION BOOKLET
FOR FURTHER USE.
DO NOT THROW THIS BOOKLET AWAY!
THIS
CRIB
CONFORMS
TO
APPLICABLE
REGULATIONS
PROMULGATED
CONSUMER PRODUCT SAFETY COMMISION AND
BY THE AMERICAN SOCIETY FOR TESTING AND
MATERIALS.
4300 Northlake Ct, Ste E, Charlotte,
NC 28216
Phone: 980-585-1460
www.rominafurniture.com
BY
THE
Advertisement

Related Manuals for Romina 15503 UPTOWN


Summary of Contents for Romina 15503 UPTOWN
- Page 1 ASSEMBLY INSTRUCTIONS FOR THE 15503 UPTOWN CONVERTIBLE CRIB READ INSTRUCTIONS THIS CRIB CONFORMS APPLICABLE REGULATIONS PROMULGATED BEFORE ASSEMBLING CONSUMER PRODUCT SAFETY COMMISION AND CRIB. KEEP THE INSTRUCTION BY THE AMERICAN SOCIETY FOR TESTING AND MATERIALS. BOOKLET FOR FURTHER USE. NEVER...
- Page 2 FASTENERS, MISSING PARTS, OR SHARP EDGES BEFORE AND AFTER ASSEMBLY AND FREQUENTLY DURING USE. SECURELY TIGHTEN LOOSE BOLTS AND OTHER FASTENERS. DO NOT USE CRIB IF ANY PARTS ARE MISSING, DAMAGED OR BROKEN. CONTACT ROMINA FURNITURE FOR REPLACEMENT PARTS AND INSTRUCTIONAL LITERATURE IF NEEDED. DO NOT SUBSTITUTE PARTS.
- Page 3 Wood, like any natural material is likely to present variations of grain and texture which will result in slight color variations or richness in the finish. These differences make each Romina Furniture item as beautiful and unique as you and your baby are.
-
Page 4: Box Content
Please refer to this number order to identify the correct one. Be sure to use the proper size in the event of needing to contact ROMINA and shape specified in the instructions. Be sure to COMPLETELY FURNITURE or your local supplier. - Page 5 STEP 1 (One adult is required in order to complete this step) Take the the mattress support (MS) of your crib and position it in order for the springs og the mesh to face upwards and for the metallic pins positioned nearby the metallic brackets to face downwards.
- Page 6 STEP 2 (Two adults are required in order to complete this step) Attach the mattress support (MS) to the left and right panels (LP & RP) using 4 Allen bolts (3), 4 washers (6) and the Allen key provided. Make sure you insert the washer in between the bolt and the predrilled holes.
- Page 7 STEP 3 (One adult is required in order to complete this step) Carefully place the headboard (HB) and footboard (FB) horizontally on the floor, while making sure not to scratch their finish. By using 12 Allen bolts (4) and 12 washers (6) (6 Allen bolts and washers per leg), attach the decorative legs (DL) to the headboard (HB) and footboard (FB) of the crib (see FIGURE 3).
- Page 8 STEP 4 (One adult is required in order to complete this step) Attach the footboard (FB) and headboard (HB) of the crib to the left and right panels (LP & RP) using 8 Allen bolts (5), 8 washers (6) and the Allen key (which is included). Make sure to insert the washers in between the bolt and the vertical post of the panels.
- Page 9 STEP 5 (One adult is required in order to complete this step) Completely tighten all 4 Allen bolts (3+6) used to attach the mattress support. REMINDER There are a total of 4 Allen bolts which need tightening, distributed as following: - 4 bolts (3+6) in the left and right panels (LP &...
- Page 10 STEP 6 (Two adults are required in order to complete this step) Carefully turn the crib on its back side (please see FIGURE 6) after completing STEP 5. Place the crib on a soft surface (blanket or carpet). Attach the metallic plates (MP) to the crib, using 12 Allen bolts (3) and 12 washers (6) and the Allen key provided. Make sure to insert the washed in between the bolts and the crib.
- Page 11 ADJUSTING THE HEIGHT OF YOUR MATTRESS SUPPORT To adjust the vertical position of your mattress support you must remove the mattress support from the crib (please see STEP 2) and re-attach it to the lateral panels of the crib according to the desired height (please see FIGURE 7). Then, you must completely tighten all bolts.
- Page 12 NOTE: YOUR 15503 CONVERTIBLE CRIB CAN BE CONVERTED INTO A FULL SIZE BED WITH THE PURCHASE OF ROMINA ITEM CODE CKC 15503 (CONVERSION KIT FOR CRIBS, CODE 15503). THE ASSEMBLY INSTRUCTIONS FOR THE FULL SIZE BED OPTION CAN BE FOUND INSIDE OF THE CKC 15503 PACKAGE.
- Page 13 PERIODICALLY INSPECT CRIB FOR DAMAGED HARDWARE, LOOSE JOINTS OR SPLINTERED EDGES. DO NOT USE CRIB IF PARTS ARE DAMAGED OR BROKEN! CONTACT YOUR DEALER OR ROMINA FURNITURE FOR ASSISTANCE AND REPLACEMENT PARTS. PLEASE BE SURE TO HAVE YOUR MODEL CODE WRITTEN DOWN BEFORE YOU MAKE CONTACT.
- Page 14 THIS PAGE WAS INTENTIONALLY LEFT BLANK.
- Page 15 THIS PAGE WAS INTENTIONALLY LEFT BLANK.
- Page 16 Regular cleaning with mild soap on a soft cloth, followed by a clean damp cloth, then a dry cloth, will preserve the original luster and beauty of this fine finish of your Romina Furniture product. Visit www.rominafurniture.com for updates, special offers and more new designs.
Need help?
Do you have a question about the 15503 UPTOWN and is the answer not in the manual?
Questions and answers