Advertisement
Quick Links
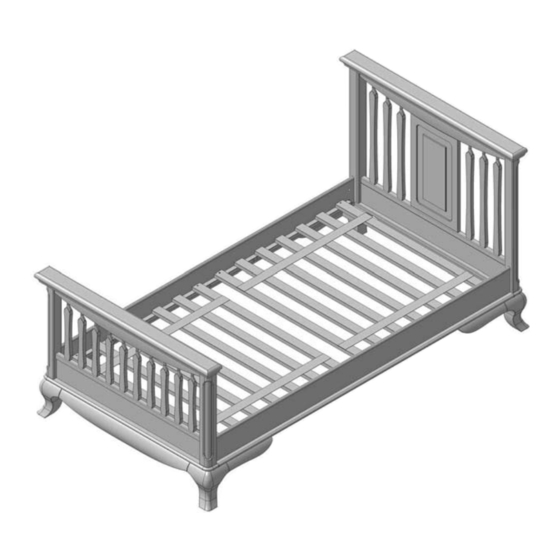
these pictures shows how your beds
should look like after completing assembly
20 Corporation Row, Edison, NJ 088 7
1
Phone
(718) 478 5100, Fax (718) 478 5117
www.rominafurniture.com
ASSEMBLY INSTRUCTIONS
FOR
ANTONIO & CLEOPATRA
IMPORTANT:
PLEASE, READ
INSTRUCTIONS
BEFORE
ASSEMBLING!
PLEASE, SAVE INSTRUCTIONS
FOR FUTURE USE
YOUR
BEDS
ALL
DO NOT THROW OUT THIS
INSTRUCTION BOOKLET
NOTE: THE STYLE OF YOUR
BED MAY VARY FROM WHAT IS
P I C T U R E D
I N
T H E
I N S T R U C T I O N
S H E E T
Advertisement

Related Manuals for Romina 6515


Summary of Contents for Romina 6515
- Page 1 DO NOT THROW OUT THIS these pictures shows how your beds should look like after completing assembly INSTRUCTION BOOKLET ASSEMBLY INSTRUCTIONS YOUR ANTONIO & CLEOPATRA BEDS IMPORTANT: PLEASE, READ INSTRUCTIONS BEFORE ASSEMBLING! NOTE: THE STYLE OF YOUR BED MAY VARY FROM WHAT IS PLEASE, SAVE INSTRUCTIONS 20 Corporation Row, Edison, NJ 088 7 P I C T U R E D...
- Page 6 - wooden ornament = 2+2 FREE FROM DAMAGE, AND THAT ALL CONNECTIONS ARE TIGHT. § DO NOT SUBSTITUTE PARTS. PLEASE, CONTACT ROMINA FURNITURE FOR REPLACEMENT PARTS. One bag of hardware with the following: § THE USE OF WATER OR SLEEP FLOTATION MATTRESSES IS PROHIBITED.
- Page 7 STEP 1 (for all ANTONIO & CLEOPATRA beds) Attach one of the bed rails ( ) to the headboard ( ) using 2 bigger Allen bolts ( ) and 2 barrel nuts ( ). Make sure that the wood brackets attached to the bed rail faces towards the inside of the bed.
- Page 8 STEP 3 (for all ANTONIO & CLEOPATRA beds) Using all eight smaller Allen bolts ( ), all four metallic dowels ( ) and all four cam fittings ( ), attach the wooden ornaments ) to the bed rails ( ) and to the end panels ( &...
- Page 9 STEP 4 (for all ANTONIO & CLEOPATRA beds) Place the support slats ( onto the wood brackets attached to the bed rails ( ). Position the support slats evenly between the bed ends. Make sure you firmly attach the support slats to the wood brackets using all eight wood screws ( ) provided.
- Page 12 Regular cleaning with mild soap on a soft cloth, followed by a clean damp cloth, then a dry cloth, will preserve the original luster and beauty of the fine finish of your Romina Furniture product. Thank you for being one of our distinguished clients.
Need help?
Do you have a question about the 6515 and is the answer not in the manual?
Questions and answers