Table of Contents
Advertisement
Advertisement
Table of Contents

Related Manuals for Nokia E7


Summary of Contents for Nokia E7
- Page 1 Nokia E7–00 User Guide Issue 1.0...
-
Page 2: Table Of Contents
Device set-up Copy contacts or pictures from your old device Visit Nokia's Ovi Store Use the in-device user guide Install Nokia Ovi Suite on your PC Basic use Touch screen actions Interactive home screen elements Switch between open applications Write text... -
Page 3: Contents
Print a picture you have taken View pictures and videos on a TV Videos and TV Videos Watch Web TV Music and audio Music player Buy music from Nokia's Ovi Music Protected content Record sounds FM radio Maps Maps overview My position... - Page 4 Message indicator blinking A contact appears twice in the contacts list Unreadable characters while browsing the web Prepare your device for recycling Nokia original accessories Practical rules about accessories Battery Protect the environment Save energy Recycle Product and safety information...
-
Page 5: Safety
QUALIFIED SERVICE Only qualified personnel may install or repair this product. CHARGERS AND OTHER ACCESSORIES Use only chargers and other accessories approved by Nokia for use with this device. Do not connect incompatible products. KEEP YOUR DEVICE DRY Your device is not water-resistant. Keep it dry. - Page 6 Safety PROTECT YOUR HEARING Listen to a headset at a moderate level, and do not hold the device near your ear when the loudspeaker is in use.
-
Page 7: Get Started
Get started Keys and parts Nokia AV connector (3.5 mm) Power key HDMI™ connector Charging indicator USB connector Front Earpiece Light sensor Menu key Secondary camera lens Get started... - Page 8 Get started Back Camera flash Camera lens Loudspeaker Microphone Sides Key lock switch/Flashlight key SIM card slot Volume/Zoom key Camera key...
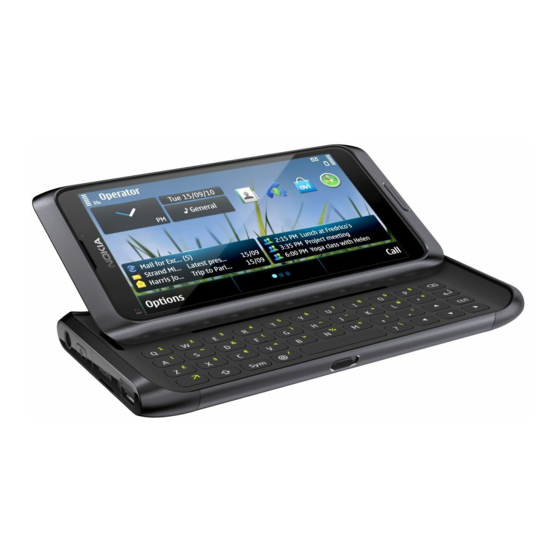
- Page 9 Bottom Microphone Keyboard Your device has a full keyboard. To open the keyboard, push the touch screen up. The display rotates automatically from portrait to landscape when you open the keyboard. Function key. To insert special characters printed at the top of keys, press the function key, and then press the corresponding key.
- Page 10 Get started Sym key. To insert special characters not shown on the keyboard, press the sym key, and select the desired character. To change the writing language, press and hold the shift key, and then press the sym key, and select the desired language. Space key Backspace key.
-
Page 11: Change The Volume Of A Call, Song, Or Video
Get started Change the volume of a call, song, or video Use the volume key. You can change the volume during a call or when an application is active. The built-in loudspeaker allows you to speak and listen from a short distance without having to hold the device to your ear. -
Page 12: Flashlight
Get started Define the length of time after which the keys and screen are locked automatically. Flashlight The camera flash can be used as a flashlight. To switch the flashlight on or off, slide and hold the lock switch for two seconds. The flashlight can only be used when you are in the home screen. -
Page 13: Charge Your Device
Insert the SIM card holder back into the device. Charge your device About the battery Your device has an internal, nonremovable, rechargeable battery. Use only Nokia approved chargers designated for this device. You can also use a compatible USB data cable to charge your device. - Page 14 Get started Important: Only qualified personnel or an authorised service facility should replace the battery. Unauthorised battery replacement may invalidate your warranty. When your device is low on power, it goes into power save mode. To deactivate power save mode, press , and select Deactivate power saving.
-
Page 15: Antenna Locations
Get started You do not need to charge the battery for a specific length of time, and you can use the device while it is charging. If the battery is completely discharged, it may take several minutes before the charging indicator appears on the display or before any calls can be made. -
Page 16: Headset
Get started Headset You can connect a compatible headset or compatible headphones to your device. Switch the device on or off Press and hold... -
Page 17: Nokia Account And Nokia's Ovi Services
Nokia account and Nokia's Ovi services When you switch on your device for the first time, you can create a Nokia account, so you can access Nokia's Ovi services. With Ovi services and your Nokia account, you can, for example: See your friends' statuses in different social networking services •... -
Page 18: Copy Contacts Or Pictures From Your Old Device
Applications > If your old Nokia device does not have the Phone switch application, your new device sends it in a message. Open the message in the old device, and follow the instructions. Select the device you want to connect to, and pair the devices. Bluetooth needs to be activated. -
Page 19: Use The In-Device User Guide
Download the latest version of Nokia Ovi Suite from www.ovi.com/suite. If you cannot connect to the internet, to install Nokia Ovi Suite and Nokia Ovi Player from your device: Use a compatible USB data cable to connect your device to your computer. - Page 20 Media transfer. To learn more about Nokia Ovi Suite, go to www.ovi.com/suite. To check which operating systems Nokia Ovi Suite supports, go to www.nokia.com/ support. Media transfer: on your >...
-
Page 21: Basic Use
Basic use Basic use Touch screen actions To interact with the user interface, tap or tap and hold the touch screen. Open an application or other screen element Tap the application or element. Access functions quickly Tap and hold the item. A pop-up menu with available options opens. For example, to send an image or delete an alarm, tap and hold the image or alarm, and from the pop- up menu, select the appropriate option. - Page 22 Basic use Drag an item Tap and hold the item, and slide your finger across the screen. The item follows your finger. You can drag items in the home screen or the main menu, when you have activated editing mode. Swipe Place a finger on the screen, and steadily slide your finger in the desired direction.
-
Page 23: Interactive Home Screen Elements
Basic use Zoom out Place two fingers on the item, and slide your fingers together. Tip: You can also tap the item twice to zoom in or out. Interactive home screen elements The home screen elements are interactive. For example, you can change the date and time, set alarms, write calendar entries, or edit the profiles directly in the home screen. -
Page 24: Switch Between Open Applications
Basic use In most other views, you can select the notification area (4), and do the following: Modify the connectivity settings. • Open the Clock application, and set an alarm. • View the battery status, and activate power saving mode. •... - Page 25 Function key. To insert special characters printed at the top of keys, press the function key, and then press the corresponding key. To enter several special characters in a row, press the function key twice. To return to normal mode, press the function key.
- Page 26 Basic use Insert a number or special character that is printed at the top of a key Press and hold the desired key. Touch input Enter text with the virtual keyboard Use the virtual keyboard Select a text input field, and turn your device so it is horizontal. Virtual keyboard Close key - Close the virtual keyboard.
- Page 27 If the word is not in the dictionary, the device suggests an alternative word from the dictionary. To add the new word to the dictionary, select the word you have written. Deactivate predictive text input mode Select Input options > Modify the text input settings Select Input options...
- Page 28 To write the desired word, use the keys 2-9. Select each key once for each letter. For example, to write Nokia when the English dictionary is selected, select 6 for N, 6 for o, 5 for k, 4 for i, and 2 for a.
-
Page 29: Keyboard Shortcuts
Define the writing language Select Menu Settings > Change the language when using the keyboard Select Input options > Change the language when using the keypad Select Writing language. > Keyboard shortcuts Shortcuts can make the use of the applications more efficient. General shortcuts Ctrl + A Select all. -
Page 30: Display Indicators
Basic use Go to the next message. Open a message. Go to the previous message. Reply to a message. Search for a message. Move up in the current view. Mark a message as read or unread. Synchronise the mail account. Ctrl + S Save a message in the Drafts folder Display indicators... -
Page 31: Connectivity Indicators
Messaging indicators You have unread messages. If the indicator is blinking, the SIM card memory for messages may be full. You have received new mail. You have messages waiting to be sent in the Outbox folder. Network indicators Your device is connected to a GSM network (network service). Your device is connected to a 3G network (network service). -
Page 32: Search In Your Device And On The Internet
Basic use The device is synchronising. You have connected a compatible headset to the device. You have connected a compatible TV-out cable to the device. You have connected a compatible text phone to the device. Set the notification light to blink for missed calls or messages Your device has a notification light in the menu key. -
Page 33: Prolong Battery Life
When you use the offline profile, you can still use WLAN, for example, to read your mail or browse the internet. You can also use Bluetooth connectivity. Remember to comply with any applicable safety requirements when you establish and use WLAN or Bluetooth connections. -
Page 34: Personalise Your Device
Personalise your device Set the packet data connection to be established only when needed. Select • Menu Settings > data connection > When you are listening to music, and do not want to make or receive calls, activate • the offline profile. Close the applications you are not using. -
Page 35: Change Your Theme
Change your profile for meetings or outdoor use When the meeting profile is activated, your device discreetly beeps once instead of ringing. When the outdoor profile is activated, the ringing tone is louder, so you won't miss a call in a noisy environment. In the home screen, select the profile and Create a new profile How can you make your device meet your needs at work or college or home? You can... - Page 36 Change wallpaper > Select the desired picture. Select Done. Tip: Download more background images from Nokia's Ovi Store. To learn more about Ovi Store, go to www.ovi.com. Rearrange items in the home screen Tap and hold the home screen. Drag and drop items to a new location.
- Page 37 Select Done. Add items to the home screen Want to open your favourite applications directly from the home screen? You can create shortcuts to your most used features. You can also add mini-applications (widgets), that display helpful information, such as the current weather conditions. You can add shortcuts to applications, web bookmarks, or actions, such as writing a message.
-
Page 38: Organise Your Applications
Telephone Select Done. Organise your applications Want to open your most used applications more quickly? In the main menu, you can organise your applications and hide less used applications in folders. Press the menu key, and select Create a new folder Select Options folder. -
Page 39: Call A Contact
Call a contact Select Menu > Contacts. To search for a contact, enter the first letters or characters of the first or second name in the search field. Select the contact. In the contact card, select If the contact has more than one phone number, select and hold select the desired number. -
Page 40: Make A Conference Call
Telephone The video call is active when you see two videos, and hear the sound through the loudspeaker. The call recipient may deny video sending (indicated with you only hear the voice of the caller, and may see an image or a grey screen. To end the video call, select Indicators You are not receiving video (the recipient is not sending video or the network... -
Page 41: Call The Numbers You Use The Most
Have a private conversation with a conference call participant Select Go to the participant, and select The other participants continue the conference call. To return to the conference call, select Drop a participant from a conference call Select , go to the participant, and select End an active conference call Select Call the numbers you use the most... -
Page 42: Make Calls Over The Internet
Telephone When you use voice dialling, the loudspeaker is in use. Hold the device at a short distance away when you say the voice command. In the home screen, select and hold Call. If a compatible headset with the headset key is attached, press and hold the headset key. -
Page 43: Call The Last Dialled Number
Make an internet call When you are signed into a internet call service, you can make a call from the friends list or the contacts list. Select Menu > Contacts. Call a contact in the friends list Open the internet call service tab, and sign in to a internet call service. Select a contact from the friends list, and select Make an internet call to a phone number or SIP address In the home screen, select... -
Page 44: View Your Missed Calls
Telephone View your missed calls In the home screen, you can see when you have missed calls. To view the phone number, select Show. The caller's name is displayed if stored in the contacts list. Missed and received calls are logged only if supported by the network, and the device is switched on and within the network service area. -
Page 45: Prevent Making Or Receiving Calls
Select Menu Settings > Call divert is a network service. For details, contact your service provider. Divert all voice calls to your voice mailbox Select All voice calls Activate > Divert all voice calls to another phone number Select All voice calls Enter the number, or select Several diverting options, such as same time. -
Page 46: Allow Calls Only To Certain Numbers
Telephone Allow calls only to certain numbers With the fixed dialling service, you can restrict calls, and only allow calls to certain phone numbers. For example, you can allow your children to call only family members or other key numbers. Select Menu Contacts... - Page 47 Set up video sharing To set up video sharing, you need person-to-person and 3G connection settings. A person-to-person connection is also known as a Session Initiation Protocol (SIP) connection. The SIP profile settings must be configured in your device before you can use video sharing.
-
Page 48: Contacts
Contacts If you access another application while sharing a video, the sharing is paused. Continue sharing In the home screen, select Stop sharing video Select Stop. To end the voice call, select ends. Save the live video you shared Select when prompted. -
Page 49: Save A Number From A Received Call Or Message
Save a number from a received call or message Have you received a call or a message from a person whose phone number is not yet saved in the contacts list? You can easily save the number in a new or existing contact list entry. -
Page 50: Set A Ringing Tone For A Specific Contact
Contacts Change or remove a picture Select and hold the picture, and from the pop-up menu, select Remove image. The contacts must be stored in your device memory. To check which memory is in use, select Options Settings > Set a ringing tone for a specific contact Want to be able to hear that a particular person is calling you? You can set a ringing tone specifically for that person. -
Page 51: Send A Message To A Group Of People
Back up your contacts to Ovi by Nokia If you back up your contacts to Ovi by Nokia, you can easily copy your contacts to a new device. If your device is stolen or damaged, you can still access your contacts list online. -
Page 52: Messaging
Messaging contacts is not available if you have activated contacts synchronisation in Mail for Exchange. Messaging About Messaging Select Menu > Messaging. You can send and receive various kinds of messages: Text messages • Audio messages • Multimedia messages that contain pictures and videos •... -
Page 53: Send An Audio Message
Only compatible devices can receive and display multimedia messages. Messages may look different in different devices. Send an audio message You can record a sound clip, such as a birthday song, and send it to your friend as an audio message. Select Menu >... -
Page 54: View A Conversation
Messaging View a conversation You can see the messages you have sent to and received from a particular contact from a single view, and continue the conversation from that view. Select Menu > Messaging. Select Conversations and a contact. All messages sent to and received from that contact are displayed. -
Page 55: Mail About Mail
Get a free mail account from Ovi by Nokia With Nokia's Ovi Mail, you can use your device or PC to access your mail. The anti- spam protection helps keep your mailbox in order, and the virus protection increases security. -
Page 56: Add A Mailbox
Applications > Add a mailbox Select New, and follow the instructions. To get a free Ovi Mail account from Nokia, select Add a mail widget to the home screen In the home screen, tap and hold an empty area. Select and the desired widget from the list. -
Page 57: Send A Mail
Reply to a mail Select Options > Reply. Forward a mail Select Options > Forward. Tip: If there is a web address in a mail and you would like to open the address in the device browser, or add it to your bookmarks, select the address, and from the pop-up menu, select the desired option. -
Page 58: Browse The Web
Internet With the Web application, you can view web pages on the internet. To browse the web, you must have an internet access point configured in your device and be connected to a network. Browse the web Select Menu > Web. Tip: If you do not have a flat-rate data plan from your service provider, to save data costs in your phone bill, you can use a wireless local area network (WLAN) to connect to the internet. -
Page 59: Discover Nearby Events
Browse the available services, and for more information, select the service. Some content is generated by third parties and not Nokia. The content may be inaccurate and is subject to availability. Some services may not be available in all countries, and may be provided only in selected languages. -
Page 60: See Your Friends' Status Updates In One View
For information about data transmission charges, contact your service provider. The social networking services are third party services and not provided by Nokia. Check the privacy settings of the social networking service you are using as you may share information with a large group of people. -
Page 61: Link Your Online Friends To Their Contact Information
From your contacts list, select the contact to which to link the profile. See your friends' status updates on the home screen When you sign in to social networking services through Ovi by Nokia, you can see your online friends' status updates directly on the home screen. -
Page 62: Share Your Location In Your Status Update
Social networks Add a caption and a tag with a comment to a particular section of the picture. Share your location in your status update With the Social application, you can let your friends know where you are, so they can find you. -
Page 63: Camera
Select Menu Social netw. > Select an invitation to an event. Add the event to your device calendar. This feature is available only if supported by the service. Camera About Camera Select Menu Applications > Why carry a separate camera if your device has all you need for capturing memories? With the Camera application, you can easily take pictures or record videos. -
Page 64: Take A Picture In The Dark
Camera location information is shared, and your location may be visible to third parties viewing the file. This feature requires network service. Location information indicators: — Location information is unavailable. Location information may not be saved to pictures or videos. —... -
Page 65: Send A Picture
Press and hold To switch from image mode to video mode, if necessary, select To start recording, press To pause recording, select Pause. If you pause recording and do not press any key within one minute, the recording stops. To zoom in or out, use the volume keys. To stop recording, press Send a picture You can send pictures to your friends as a multimedia or mail message, or through... -
Page 66: Edit The Pictures You Have Taken
Your pictures and videos Zoom in or out Place two fingers on the screen, and to zoom in, slide your fingers apart. To zoom out, slide your fingers together. View your pictures as a slide show Select a picture and Options selected picture. -
Page 67: Print A Picture You Have Taken
Save the sound files that you want to use in a movie to the device. You cannot add a DRM protected sound file to a movie. Create a movie With Storyboard, you can easily create short movies from videos and pictures. Select Menu Applications... -
Page 68: View Pictures And Videos On A Tv
Your pictures and videos To use the USB connection to print, select To print the picture, select Tip: You can also use a Bluetooth printer. Select selected printer to Bluetooth, and follow the instructions on the display. Tip: When the USB cable is connected, you can change the USB mode. In the top right corner of the browsing view, select View pictures and videos on a TV Connect your device to a TV using HDMI... - Page 69 Phone > Connect a Nokia Video Connectivity Cable to the video input of a compatible TV. The colour of the plugs must match the colour of the sockets. Connect the other end of the Nokia Video Connectivity Cable to the Nokia AV Connector of your device.
-
Page 70: Videos And Tv
Videos and TV Connect the HDMI adapter to the HDMI connector of your device. Connect an HDMI cable (available separately) to the adapter, and then to the HDMI connector of your home theatre. The home theatre needs to support the HDMI 1.3 standard and be able to pass through video to your TV over HDMI. -
Page 71: Watch Web Tv
USB data cable to copy videos between your computer and your device. Use a compatible USB data cable to connect your device to your computer. Open Nokia Ovi Suite on your computer, and follow the displayed instructions. Watch Web TV With on-demand Web TV, you can keep up with the news and catch up on the latest episodes of your favourite TV series. -
Page 72: Music And Audio
Music and audio Find more Web TV services To download Web TV services from Nokia's Ovi Store, select services are saved in the Applications folder, but you can move them to another folder, such as a dedicated Web TV folder. -
Page 73: New Playlist
Tip: When listening to music, you can return to the home screen, leaving Music player application playing in the background. Create a playlist Want to listen to different music for different moods? With playlists, you can create selections of songs to play in a specific order. Select Menu Music... -
Page 74: Buy Music From Nokia's Ovi Music
Copy music from your PC Do you have music on your PC that you want to listen on your device? Nokia Ovi Player is the fastest way to transfer music on your device, and you can use it to manage and synchronise your music collection. -
Page 75: Record Sounds
Manage digital rights licences Select Menu Settings > Protected content. Record sounds You can use your device recorder to record sounds from nature, such as birds singing, as well as voice memos. You can send the recorded sound clips to your friends. Select Menu Office... - Page 76 Music and audio Find and save radio stations Search for your favourite radio stations, and save them, so you can easily listen to them later. Select Menu Music > Radio. > From the toolbar, select To find radio stations, you can use the automatic scanning, or you can set a frequency manually.
-
Page 77: Maps
Go to the next or previous saved station Swipe right or left. Alternatively, select Scan for another available station Swipe up or down. Alternatively, select and hold Listen to the radio using the loudspeaker Select Options Activate > You can make or answer a call while listening to the radio. The radio is automatically muted during an active call. -
Page 78: My Position
Almost all digital cartography is inaccurate and incomplete to some extent. Never rely solely on the cartography that you download for use in this device. Some content is generated by third parties and not Nokia. The content may be inaccurate and is subject to availability. - Page 79 Map view Selected location Indicator area Point of interest (for example, a railway station or a museum) Information area Change the look of the map View the map in different modes, to easily identify where you are. Select Menu Maps >...
- Page 80 Use the Nokia Ovi Suite application to download the latest maps and voice guidance files to your compatible computer. To download and install Nokia Ovi Suite on your compatible computer, go to www.ovi.com.
-
Page 81: Find Places
The compass has limited accuracy. Electromagnetic fields, metal objects, or other external circumstances may also affect the accuracy of the compass. The compass should always be properly calibrated. About positioning methods Maps displays your location on the map using GPS, A-GPS, WLAN, or cell ID based positioning. - Page 82 When you find a place that does not exist or contains inappropriate information or incorrect details, such as the wrong contact information or location, it is recommended that you report it to Nokia. and a category, such as shopping, accommodation, or position.
-
Page 83: Favourites
Report incorrect information Select a place and its information area ( Place and the appropriate option. To report a place, you need an active internet connection. The available options may vary. Favourites Save places and routes Save addresses, places of interest, and routes, so they can be quickly used later. Select Menu >... - Page 84 To synchronise places or routes between your mobile device and the Ovi Maps internet service, you need to be signed in to your Nokia account. Synchronise saved places and routes...
-
Page 85: Share Location
Maps > To share your location, you need a Nokia account and a Facebook account. Sign in to your Nokia account, or, if you do not yet have one, select account. Sign in to your Facebook account. Select your current location. - Page 86 Maps Change the voice guidance language In the main view, select the appropriate option. Deactivate voice guidance In the main view, select None. Repeat the voice guidance for car navigation In the navigation view, select Adjust the volume of the voice guidance for car navigation In the navigation view, select Drive to your destination When you need turn-by-turn directions while driving, Maps helps you get to your...
- Page 87 Navigation view Route Your location and direction Compass Information bar (speed, distance, time) Get traffic and safety information Enhance your driving experience with real-time information about traffic events, lane assistance, and speed limit warnings, if available for your country or region. Select Menu Maps...
- Page 88 The location of speed cameras may be shown on your route during navigation, if this feature is enabled. Some jurisdictions prohibit or regulate the use of speed camera location data. Nokia is not responsible for the accuracy, or the consequences of using speed camera location data.
- Page 89 Select Move. Tap the place where you want to move the route point to. Edit the location of a route point Tap the route point, and select View the route on the map Select Show route. Navigate to the destination Select Show route Options...
-
Page 90: Time Management
Time management Time management Clock About the clock Select Menu Applications > Set and manage alarms, and check local times in different countries and cities. Set the time and date In the home screen, select the clock and Tip: To view the time and date when the screen and keys are locked, press and hold the menu key. - Page 91 Activate the sensors Select Menu Settings > Activate turning control for snoozing Select Menu Settings > alarms. Update the time and date automatically You can set your device to update the time, date, and time zone automatically. In the home screen, select the clock and update >...
-
Page 92: Calendar
Time management Check the time in different cities To view the time in different locations, add them to your world clock tab. You can also add pictures for the locations, for example, a picture of your friend who lives in the city in question, or a view from your favourite tourist attraction. - Page 93 Fill in the fields. To close the text input dialog, select To add a reminder for the task, select Add an appointment Save your important appointments to your calendar as meeting entries. In the home screen, select the date. Go to the desired date, and select Fill in the fields.
-
Page 94: Office
Office Select the desired entry type. Select Calendar entry saved to In different calendar views, the colour codes indicate to which calendar an entry is saved. Office Quickoffice About Quickoffice Select Menu Office > Quickoffice consists of the following: Quickword for viewing and editing Microsoft Word documents •... -
Page 95: Insert Text
Create a new document Select document. Insert text Select an empty area, and enter text. Edit text Select a paragraph. Format text To edit the font and paragraph properties, select Edit a workbook With Quickoffice, you can edit Microsoft Excel workbooks. Select Menu Office... -
Page 96: Read Pdf Documents
Office Read PDF documents With Adobe Reader, you can read PDF documents. Select Menu Office > > Open a file Select the memory where the file is stored, browse to the correct folder, and select the file. Make a calculation Select Menu Office... -
Page 97: Translate Words From One Language To Another
Translate words from one language to another You can translate words from one language to another. Not all languages may be supported. Select Menu Office > Dictionary. > Enter text in the search field. Suggestions of words to translate are displayed. Select the word from the list. -
Page 98: Wireless Lan
Connectivity Automatically use a packet data connection when in your home network Select Data use in home country To set the device to connect only through your home network service provider when in your home country, select confirmation before connecting, select Request confirmation before using a packet data connection when outside your home network Select... -
Page 99: Bluetooth
Connect to a WLAN at home To help save data costs, connect to your home WLAN when you are at home and want to browse the web on your device. Select Menu Settings > Select and hold your home WLAN, and from the pop-up menu, select browsing. -
Page 100: Paired Device
100 Connectivity You can use the connection to send items from your device, transfer files from your compatible PC, and print files with a compatible printer. Since devices with Bluetooth wireless technology communicate using radio waves, they do not need to be in direct line-of-sight. However, they must be within 10 metres (33 feet) of each other, although the connection may be subject to interference from obstructions such as walls or from other electronic devices. -
Page 101: Send Via Bluetooth
Send a picture or other content to another device using Bluetooth You can use Bluetooth to send pictures, videos, business cards, calendar entries, and other content to your friend's compatible devices and to your computer. You can have several Bluetooth connections active at a time. For example, if you are connected to a compatible headset, you can also send files to another compatible device at the same time. -
Page 102: Usb Data Cable
102 Connectivity Deactivate remote SIM mode Press the power key, and select Block a device You can prevent devices from creating a Bluetooth connection to your device. Select Menu Settings > Open the Paired devices tab, select and hold the device you want to block, and from the pop-up menu, select Block. - Page 103 Menu Settings > Nokia Ovi Suite — Connect your device to a compatible computer that has Nokia Ovi Suite installed. In this mode, you can synchronise your device with Ovi Suite and use other Ovi Suite features. This mode is activated automatically when you open the Ovi Suite application.
-
Page 104: Vpn Connections
After installing a policy, a VPN connection method is automatically added to an intranet destination. For more information, search for mobile VPN at www.nokia.com. Close a network connection If several applications are using an internet connection, you can use the Connection manager application to close some or all network connections. -
Page 105: Store Your Files On A Remote Drive
View details for a connection Select and hold the connection, and from the pop-up menu, select Details. Details, such as the amount of transferred data and connection duration, are displayed. Tip: In most views, to open the Connection manager application, select the notification area in the top right corner and Store your files on a remote drive If you want to back up your data or save space on your device, you can use a remote... -
Page 106: 106 Device Management
106 Device management Device management Keep your device software and applications up to date About device software and application updates With device software updates and application updates, you can get new features and enhanced functions for your device. Updating the software may also improve your device performance. -
Page 107: Manage Files
> Update device software using your PC You can use the Nokia Ovi Suite PC application to update your device software. You need a compatible PC, a high-speed internet connection, and a compatible USB data cable to connect your device to the PC. - Page 108 It is recommended that you back up the device memory regularly to a compatible computer. Tip: If you have DRM-protected content, use Nokia Ovi Suite to back up both the licences and the content to your computer. Format the mass memory Want to delete all content from your device mass memory? When you format the mass memory, all the data on it is deleted.
-
Page 109: Increase Available Memory For More Content Do You Need To Increase The Available Device Memory, So You Can Install More Applications, And Add More Content
You can use Nokia Ovi Suite to back up data to a compatible computer. Digital rights management (DRM) technologies may prevent some backup data from being restored. For more information about DRM used for your content, contact your service provider. -
Page 110: Synchronise Content
The files may use large amounts of memory and prevent you from storing other files. To maintain sufficient memory, use Nokia Ovi Suite to back up installation files to a compatible PC, then use the file manager to remove the installation files from the device memory. - Page 111 With Ovi Sync, you can synchronise contacts, calendar entries, and notes between your device and Ovi by Nokia. This way you always have a backup of your important content. To use Ovi Sync, you need a Nokia account. If you do not have a Nokia account, create one at www.ovi.com.
-
Page 112: Copy Contacts Or Pictures Between Devices
Additional charges may apply, and all the personal data in your device may be deleted. For more information, contact a Nokia Care point or your device dealer. Options... -
Page 113: Find More Help 113
Support When you want to learn more about how to use your product or you are unsure how your device should function, go to www.nokia.com/support, or using a mobile device, nokia.mobi/support. You can also read the in-device guide. Select Applications User guide. -
Page 114: 114 Access Codes
114 Access codes If your issue remains unsolved, contact Nokia for repair options. Go to www.nokia- asia.com/repair. Before sending your device for repair, always back up your device data. Access codes PIN code — This code protects your SIM card against unauthorised use. The PIN code (4 - 8 digits) is usually supplied with the SIM card. -
Page 115: What To Do When The Memory Is Full
A: The maximum number of messages are stored on your device. Delete some messages. The number of messages that can be stored on the SIM card is considerably lower than the number that can be stored in the device memory. You can use Nokia Ovi Suite to save messages to a compatible computer. -
Page 116: 116 Nokia Original Accessories
Nokia original accessories Warning: Use only batteries, chargers, and accessories approved by Nokia for use with this particular model. The use of any other types may invalidate any approval or warranty, and may be dangerous. In particular, use of unapproved chargers or batteries may present a risk of fire, explosion, leakage, or other hazard. -
Page 117: Protect The Environment 117
To guarantee the correct disposal and reuse, Nokia co-operates with its partners through a program called We:recycle. For information on how to recycle your old Nokia products and where to find collection sites, go to www.nokia.com/werecycle, or using a mobile device, nokia.mobi/werecycle, or call the Nokia Contact Center. -
Page 118: 118 Product And Safety Information
Digital rights management (DRM) protected content comes with an associated licence that defines your rights to use the content. If your device has OMA DRM-protected content, to back up both the licences and the content, use the backup feature of Nokia... - Page 119 Other transfer methods may not transfer the licences which need to be restored with the content for you to be able to continue the use of OMA DRM-protected content after the device memory is formatted. You may also need to restore the licences in case the files on your device get corrupted.
- Page 120 120 Product and safety information Do not modify, remanufacture, attempt to insert foreign objects into the battery, or immerse or expose it to water or other liquids. Batteries may explode if damaged. Use the battery and charger for their intended purposes only. Improper use, or use of unapproved batteries or chargers may present a risk of fire, explosion, or other hazard, and may invalidate any approval or warranty.
- Page 121 • application at a time. Using more may affect performance and operation of the device and/or computer. If you access preinstalled bookmarks and links to third party internet sites, take the appropriate precautions. Nokia does • not endorse or assume liability for such sites.
-
Page 122: Copyright And Other Notices
Nokia, Nokia Connecting People, Eseries, Nokia Original Accessories logo, and Ovi are trademarks or registered trademarks of Nokia Corporation. Nokia tune is a sound mark of Nokia Corporation. Other product and company names mentioned herein may be trademarks or tradenames of their respective owners. - Page 123 Nokia reserves the right to revise this document or withdraw it at any time without prior notice.
-
Page 124: 124 Index
124 Index Index access codes alarm clock anniversary entries antennas applications audio messages backing up data barring calls battery — charging — saving power birthday entries blocking — device blogs Bluetooth bookmarks browser Internet business cards cable connection cache memory Calculator Calendar calendar... - Page 125 mail factory settings, restoring favourites feeds, news file management flashlight FM radio HDMI (high-definition multimedia interface HDMI (high-definition multimedia interface) headset help home screen icons images pictures IMEI number inbox, messages indicators installing applications Internet — bookmarks — browsing pages —...
- Page 126 MMS (multimedia message service) movies multimedia messages multitasking music — playlists My Card news feeds Nokia account Nokia original accessories Nokia Ovi Suite Nokia support information Nokia's Ovi services Notes notification light office applications offline profile Ovi account Nokia account...
- Page 127 radio RDS (radio data system) rebooting recording — calls — sounds — videos recycling remote drives remote lock remote locking restoring settings ringing tones searching — contacts — radio stations security code sensor settings settings — access points — language —...
- Page 128 128 Index — watching on a TV virtual keyboard virtual keypad voice calls calls voice commands volume control VPN (virtual private network) wallpaper Internet web browser web connection web feeds widgets WLAN (wireless local area network) world clock Zip manager 68, 69 57, 115 57, 71...
Need help?
Do you have a question about the E7 and is the answer not in the manual?
Questions and answers