Table of Contents
Advertisement
USER MANUAL
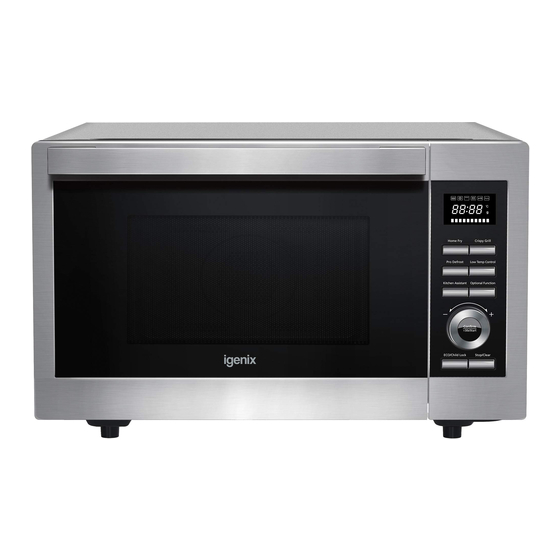
30 Litre 1000W Digital
Combination Microwave
Stainless Steel
Batch code:
Please read these instructions carefully before use and retain for future reference
always check for any damage which may have been caused in transit
IG3095
Before switching on your appliance,
OVEN COOKING
FUNCTION
MAXIMUM OVEN
TEMPERATURE 230°C
315mm
TURNTABLE
HOME FRY
FUNCTION
CRISPY GRILL
FUNCTION
OVEN STYLE PULL
DOWN DOOR
GRILL PAN & RACK
ACCESSORIES
Advertisement
Table of Contents

Related Manuals for iGenix IG3095


Summary of Contents for iGenix IG3095
- Page 1 HOME FRY FUNCTION CRISPY GRILL FUNCTION OVEN STYLE PULL DOWN DOOR IG3095 GRILL PAN & RACK ACCESSORIES Batch code: Please read these instructions carefully before use and retain for future reference Before switching on your appliance, always check for any damage which may have been caused in transit...
-
Page 2: Table Of Contents
CONTENTS Safety Instructions ..............3-6 Specifications ................6 Suitable Container Advice ............7 Appliance Overview ..............8 Installation of the Appliance ............9 Control Panel ................10 Operating Instructions ............11-19 Cleaning ..................19 Trouble Shooting ..............20 Fuse Replacement ..............21 Disposal of the Appliance ............21... -
Page 3: Safety Instructions
IMPORTANT SAFETY INSTRUCTIONS WARNING: To reduce the risk of fire, electric shock, injury to persons or exposure to excessive microwave energy when using your appliance, follow basic precautions, including the following: • The appliance must not be installed behind a decorative door as this can cause overheating. - Page 4 • Do not overcook food. • Do not use the microwave cavity for storage purposes. Do not store items, such as bread, cookies, etc. inside the oven. • Remove wire twist-ties and metal handles from paper or plastic containers/bags before placing them in the microwave. •...
- Page 5 • The appliances are not intended to be operated by means of an external timer or separate remote-control system. • Only use the temperature probe recommended for temperature- sensing this microwave. WARNING: The appliance and its accessible parts become hot during use.
-
Page 6: Specifications
If the apparatus is not maintained in a good state of cleanliness, its surface could be degraded and affect the lifespan of the apparatus and lead to a dangerous situation. SPECIFICATIONS Model: IG3095 Voltage/Frequency: 230-240V~50Hz Rated Input Power (Microwave): 1550W... -
Page 7: Suitable Container Advice
SUITABLE CONTAINER ADVICE Heat Resistant Glass - Heat-resistant ovenproof glassware only. Make sure there is no metallic trim. Do not use cracked or chipped dishes. Heat Resistant Ceramics - Heat Resistant ovenproof ceramics only. Make sure there is no metallic trim. Do not use cracked or chipped dishes. Ready Meal Containers - Microwave-safe and ovenproof only. -
Page 8: Appliance Overview
APPLIANCE OVERVIEW Your microwave comes with the following accessories: Glass tray x1 Turntable ring assembly x1 Instruction Manual x1 A) Control panel B) Turntable C) Observation window D) Door assembly E) Door catch X2 Grill Rack (Cannot be used in microwave Turntable installation function and must be placed on the glass tray) -
Page 9: Installation Of The Appliance
COUNTERTOP INSTALLATION Remove all packing material and accessories. Examine the microwave for any damage such as dents or a broken door. Do not install if microwave is damaged. Cabinet: Remove any protective film found on the microwave cabinet surface. Do not remove the light brown Mica cover that is attached to the microwave cavity to protect the magnetron. -
Page 10: Control Panel
CONTROL PANEL Indicates microwave cooking is taking place Indicates grill cooking is taking place Indicates convection cooking is taking place Indicates microwave and grill combi cooking is taking place Indicates microwave and convection combi cooking is taking place Indicates grill and grill convection cooking is taking place Indicates microwave, grill and convection combi cooking is taking place Indicates the Home Fry function has been selected... -
Page 11: Operating Instructions
OPERATING INSTRUCTIONS This microwave oven uses modern electronic control to adjust cooking parameters to meet your needs for better cooking. 1. Clock Setting When the microwave oven is turned on, the oven will display “00:00” and the Buzzer will ring once. 1) Press “Kitchen Assistant”... - Page 12 4) Press “Confirm/+30s/Start” to confirm power setting. 5) Turn “Dial” to adjust the cooking time (The maximum cooking time is 95 minutes). 6) Press “Confirm/+30s/Start” to start cooking. Note: The adjustment intervals on the dial vary according to the time set, as per below table.
- Page 13 It is recommended that you should pre-heat the oven to the appropriate temperature before placing the food in the oven. 1) Press “Optional Function” 3 times, “140” flashes. 2) Press “Confirm/+30s/Start” to confirm the function. “140” will display. 3) Press “Optional Function” repeatedly or turn “Dial” to select the convection temperature.
- Page 14 Instructions Display Microwave Grill Convection • • • • • • • • • 8. Defrost by W.T. 1) Press “Pro Defrost” once, the screen displays “dEF1”. 2) Turn “Dial” to select the weight of food. The weight should be 100g-2000g. 3) Press “Confirm/+30s/Start”...
- Page 15 2) Press “Home Fry” repeatedly or turn “Dial” to select home fry menu from H1 to H9. 3) Press “Confirm/+30s/Start” to start cooking. Menu Weight (g) Frozen French fries Frozen potato croquettes Frozen squid Frozen onion rings Frozen chicken nuggets Escalope Shrimps Vegetables...
- Page 16 13. Auto Menu For the auto menu function, user can directly choose the menu for cooking specific foods such as pasta and pizza. It makes cooking much easier and save users’ time on checking the menu and doing research. 1) Turn “Dial” left to choose the menu, and “A1” and “A10” will be display. 2) Press “Confirm/+30s/Start”...
- Page 17 Menu Weight Display Power A6 PASTA 100% (with 450ml cold water) 100g (with 800g cold water) 150g (1200g cold water) A7 SOUP 200g 100% 400g 600g A8 CAKE 475g Preheat to 140°C A9 PIZZA 200g 300g 400g A10 CHICKEN 500g 750g 1000g 1000...
- Page 18 17. Crispy Grill This function is similar to Home Fry and uses the grill pan. It can make food crispy outside and moist and juicy inside. It can be used to cook chicken wings; fish and other food which you could like to have a crispy surface and juicy inside effect.
-
Page 19: Cleaning
Press “Kitchen Assistant” 4 times, the screen displays “AS-4”. Then press “Confirm/+30s/Start” to exit mute mode. 20. ECO Function Press “Eco/Child Lock” once, the screen goes off. Press any button to light the screen again. 21. Inquiring Function 1) Whilst microwaving or grilling, if the clock has been set, press “Kitchen Assistant”... -
Page 20: Trouble Shooting
TROUBLE SHOOTING GUIDE If you experience difficulties with the appliance, please check the suggestions below before contacting customer services on 01473 271272: To test microwave is working before cooking food – DO NOT operate empty, instead place one cup of water (approx.150ml) in a glass in the microwave and close the door securely. -
Page 21: Fuse Replacement
CAUTION- HIGH VOLTAGE WARNING This appliance is equipped with an earthed plug for your protection against possible shock hazards and should be connected to a properly earthed power socket. Do not operate this oven if the door is bent, warped or otherwise damaged and does not close firmly. - Page 22 lgenix Warranty Terms & Conditions This product is guaranteed for a period of 12 months as standard from the date of purchase against mechanical and electrical defects. You can extend your warranty for a further 12 months by registering your product. Upon registration we will cover your product for a period of 24 months from the original purchase date against any mechanical or electrical defects.
- Page 23 To qualify for the 2 year warranty you must register your product within 30 days of purchase. The full Terms & Conditions of our warranty policy are shown on the opposite page. They are also available on our website. www.igenix.co.uk...
- Page 24 38 Bluestem Road, Ransomes Europark, Ipswich, IP3 9RR Tel. 01473 271 272 Disclaimer: Igenix operate a policy of continual improvement and development. We therefore reserve the right to change/alter the specification and appearance of our appliances without prior notice. All diagrams and images shown in this manual are for illustration purposes only.
Need help?
Do you have a question about the IG3095 and is the answer not in the manual?
Questions and answers