Table of Contents
Advertisement
Quick Links
Advertisement
Table of Contents

Related Manuals for iGenix IG2096


Summary of Contents for iGenix IG2096
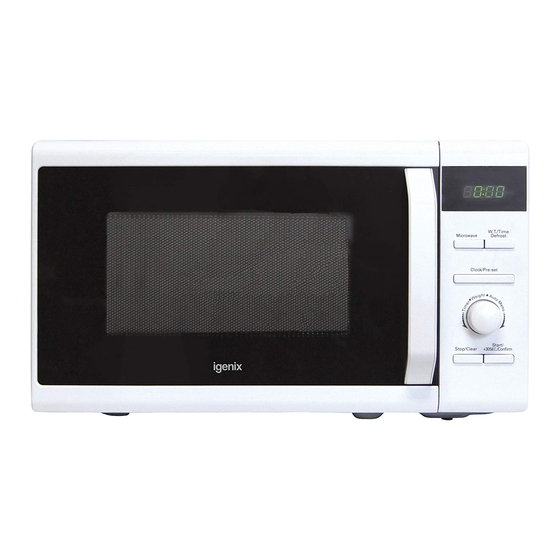
- Page 1 USER MANUAL 800W 20L Digital Microwave IG2096/IG2097 PO Number: Please read these instructions carefully before use and retain for future reference Before switching on your appliance, always check for any damage which may have been caused in transit...
-
Page 2: Table Of Contents
CONTENTS Important Safety Instructions ..........3-5 Suitable Cookware ..............6 Technical Specification ...............7 Appliance Overview ..............7 Installation ..................8 Operating Instructions ............9-12 Cleaning & Maintenance ............13 Trouble Shooting Guide ............14 Fuse Replacement ..............15 Disposal Information ............... 15 Terms and Conditions and Warranty Information ..16-17... -
Page 3: Important Safety Instructions
IMPORTANT SAFETY INSTRUCTIONS Read and follow all of the instructions even if you feel you are familiar with the product, and find a place to keep this manual handy for future reference. Important: This appliance is intended for use in a domestic environment only. - Page 4 • Do not store or use this appliance outdoors. • Do not use this microwave oven near water, in a wet basement or near a swimming pool. • Read and follow the specific section named “Precautions to Avoid Possible Exposure to Excessive Microwave Energy”. •...
- Page 5 • During use the appliance becomes hot. Care should be taken to avoid touching hot surfaces and heating elements inside the microwave oven and vents should not be covered. • The microwave oven should not be placed in any cabinets or units unless cabinet or unit has been approved to house a microwave.
-
Page 6: Suitable Cookware
Suitable Cookware to use in Microwaves 1. The ideal material for a microwave utensil is a microwave safe transparent plastic dish. 2. Microwaves cannot pass through metal. Metallic utensils, dishes with metallic trim and aluminium foil should not be used. 3. -
Page 7: Technical Specification
Both glass tray and turntable ring assembly must always be used during cooking. All food and containers of food are always placed on the glass tray for cooking. If glass tray or turntable ring assembly cracks or breaks, contact our Igenix customer service team... -
Page 8: Installation
COUNTERTOP INSTALLATION Remove all packing material and accessories. Examine the microwave for any damage such as dents or a broken door. Do not install if microwave is damaged. Cabinet: Remove any protective film found on the microwave cabinet surface. Do not remove the light brown Mica cover that is attached to the microwave cavity to protect the magnetron. -
Page 9: Operating Instructions
OPERATING INSTRUCTIONS 1. Clock Setting When the microwave oven is turned on, the oven will display “0:00”, and the buzzer will sound once. Press “Clock/Pre-set” once.“00:00” displays. Turn “ ” to adjust the hour figures, the input time should be within 0--23(24-hour). Press “Clock/Pre-set”... - Page 10 Note: The step quantities for the adjustment time of the coding switch are as follow: 0---1 min: 5 seconds 1---5 min: 10 seconds 5---10 min: 30 seconds 10---30 min: 1 minute 30---95 min: 5 minutes Press Once Twice 3 times 4 times 5 times Microwave Power...
- Page 11 6. Multi-Stage Cooking A maximum of two stages can be set. If one stage is defrosting, it will be put in the first stage automatically. The buzzer will sound once after each stage and the next stage will begin. Example: If you want to defrost the food for 5 minutes, then to cook with 80% microwave power for 7 minutes.
- Page 12 8. Auto Menu In waiting states, turn “ “ right to choose the menu from “A-1” to “A-8”; Press “START/+30SEC./CONFIRM“ to confirm the menu you choose; Turn “ “ to choose the food weight; Press “START/+30SEC./CONFIRM “ to start cooking. After cooking finish, the buzzer sounds five times.
-
Page 13: Cleaning & Maintenance
CLEANING & MAINTENANCE Be sure to unplug the appliance from the power supply. Clean the cavity of the microwave after use with a slightly damp cloth. Clean the accessories in the usual way in soapy water. The door frame and seal and neighbouring parts must be cleaned carefully with a damp cloth when they are dirty. -
Page 14: Trouble Shooting Guide
TROUBLE SHOOTING GUIDE TROUBLE SHOOTING GUIDE If you experience difficulties with the appliance, please check the suggestions below If you experience difficulties with the appliance, please check the suggestions below before contacting customer services on 01473 271272: before contacting customer services on 01473 271272: To test microwave is working before cooking food –... -
Page 15: Fuse Replacement
MAINS PLUG FUSE REPLACEMENT Fuse Cover Fuse Replacement (Class I) This appliance must be earthed. Remove the fuse cover with a small flat head screw driver. Take out the fuse and replace with a new fuse of the same Amp. Replace the fuse cover and push back into place. -
Page 16: Terms And Conditions And Warranty Information
lgenix Warranty Terms & Conditions This product is guaranteed for a period of 12 months as standard from the date of purchase against mechanical and electrical defects. You can extend your warranty for a further 12 months by registering your product. Upon registration we will cover your product for a period of 24 months from the original purchase date against any mechanical or electrical defects. - Page 17 To qualify for the 2 year warranty you must register your product within 30 days of purchase. The full Terms & Conditions of our warranty policy are shown on the opposite page. They are also available on our website. www.igenix.co.uk...
Need help?
Do you have a question about the IG2096 and is the answer not in the manual?
Questions and answers