
Related Manuals for Bresser Zoomar Mono 8-25x25


Summary of Contents for Bresser Zoomar Mono 8-25x25
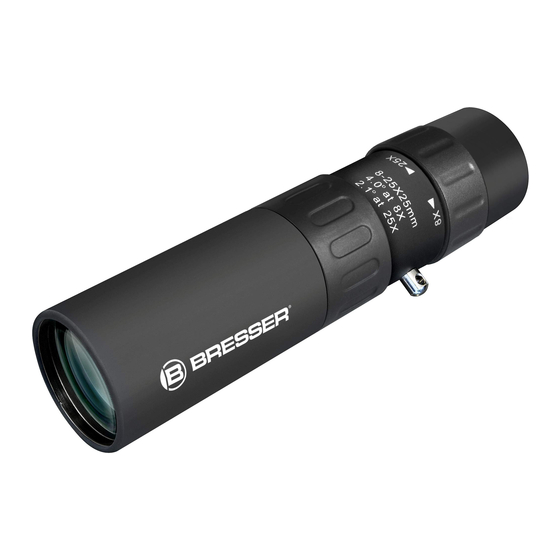
- Page 1 Zoomar Mono 8-25x25 Art. No. 16-62525 Bedienungsanleitung Instruction manual Mode d‘emploi Manual de instrucciones Handleiding...
- Page 2 Fig. 1 Bedienungsanleitung ... 4 Instruction manual ..... 11 Mode d‘emploi ....17 Manual de instrucciones ... 24 Handleiding......31...
- Page 3 Fig. 2 Fig. 3...
-
Page 4: Allgemeine Informationen
Allgemeine Informationen Verwendungszweck Dieses Produkt dient ausschließlich der privaten Nut- Zu dieser Anleitung zung. Es wurde entwickelt zur vergrößerten Darstellung Diese Bedienungsanleitung ist als Teil des Gerätes zu von Naturbeobachtungen. betrachten. Lesen Sie vor der Benutzung des Geräts Allgemeine Warnhinweise aufmerksam die Sicherheitshinweise und die Bedie- nungsanleitung.Bewahren Sie diese Bedienungsanlei- GEFAHR von Körperschäden! - Page 5 GEFAHR von Sachschäden! Kinder dürfen das Gerät nur unter Aufsicht benutzen. Verpackungsmaterialien (Plastiktüten, Gummibän- Bauen Sie das Gerät nicht auseinander! Wenden Sie der, etc.) von Kindern fernhalten! Es besteht ERSTI- sich im Falle eines Defekts an Ihren Fachhändler. Er CKUNGSGEFAHR! nimmt mit dem Service-Center Kontakt auf und kann das Gerät ggf.
- Page 6 Lieferumfang (Fig. 1) 7. Skala für den Objektabstand Monokular (A), Trageriemen (B), Gürteltasche (C), 8. Nahfokussierung/Makro Putztuch (D), Bedienungsanleitung 9. Objektiv 10. Trageriemenhalterung 1. Teileübersicht (Fig. 2+3) 2. Scharfeinstellung 1. Monokular 2. Okular Wie Sie ein Beobachtungsobjekt mit diesem Monoku- 3.
- Page 7 2.2 Nahfokus-Scharfeinstellung im Nahbreich von unter einem halben Meter. (< 0,5 m Entfernung) 2.1 Gewöhnliche Scharfeinstellung Für Beobachtungsabstände von unter einem halben Stellen Sie über die Zoomeinstellung (4) die kleinste Meter (Makroeinstellung oder Near Focus) gehen Sie Vergrößerungsstufe (8x) auf der Zoomskala (5) ein. zunächst wie in Kapitel 2.1 beschrieben vor.
-
Page 8: Hinweise Zur Reinigung
3. Zoomeinstellung fohlen. Das Sehfeld würde so stark verkleinert, dass Nachdem Sie das Bild in der kleinsten Vergröße- eine Fokussierung auf das Beobachtungsobjekt nicht rungsstufe scharf eingestellt haben, können Sie die mehr gegeben wäre. Vergrößerung stufenlos weiter erhöhen. Drehen Sie HINWEISE zur Reinigung dazu die Zoomeinstellung (4) nach rechts bis Sie die gewünschte Vergrößerung erreicht haben.Regulieren... - Page 9 und Feuchtigkeit! Bei hoher Luftfeuchtigkeit kann das tuellen gesetzlichen Bestimmungen! Informationen verbaute Glas beschlagen und es kann zu Feuchtig- zur fachgerechten Entsorgung erhalten Sie bei den keitsbildung kommen. Dies ist kein Mangel! Lassen Sie kommunalen Entsorgungsdienstleistern oder dem Um- in diesem Fall das Gerät bei Zimmertemperatur einige weltamt.
-
Page 10: Garantie & Service
Tag des Kaufs. Um von einer verlängerten, freiwil- ligen Garantiezeit wie auf dem Geschenkkarton ange- geben zu profitieren, ist eine Registrierung auf unserer Website erforderlich. Die vollständigen Garantiebedingungen sowie Informa- tionen zu Garantiezeitverlängerung und Serviceleistun- gen können Sie unter www.bresser.de/garantiebedin- gungen einsehen. - 10 -... -
Page 11: General Information
General Information Intended Use This product is intended only for private use. It was About this Instruction Manual developed for the magnified display of things in nature. These operating instructions are to be considered Allgemeine Warnhinweise a component of the device. Please read the safety instructions and the operating instructions carefully RISK of bodily injury! before use. - Page 12 bags and rubber bands, out of the reach of children, as contact the Service Centre and can send the device in these materials pose a choking hazard. to be repaired, if necessary. Do not shake the device. FIRE RISK! Do not place the device, particularly the lenses, in direct sunlight.
- Page 13 Scope of supply (Fig. 1) 7. Scale for the object distance Monocular (A), carrying strap (B), belt case (C), 8. Proximity focusing / macro cleaning cloth (D), operating instructions 9. Object lens 10. Carrying strap holder 1. Parts overview (Fig. 2+3) 2.
-
Page 14: Zoom Setting
setting or near focus) initially proceed as described in 2.1 Conventional focus setting Section 2.1. Subsequently, slowly extract the refocusing Set the lowest magnification (8x) on the zoom scale (5) (8) until you get a sharp image. using the zoom setting (4). Turn the focus setting (6) Note: till the calibration mark ∞... -
Page 15: Notes On Cleaning
ting (4) towards the right until you reach the desired free cloth, (e.g. microfibre cloth). To avoid scratching the magnification. Adjust the sharpness of the image by lenses, use only gentle pressure with the cleaning cloth. slowly turning the focus setting (6). To remove more stubborn dirt, moisten the cleaning cloth with an eyeglass-cleaning solution and wipe the lenses Note:... -
Page 16: Warranty And Service
You can consult the full warranty terms as well as infor- waste-disposal service or environmental authority. mation on extending the warranty period and details of our services at www.bresser.de/warranty_terms - 16 -... -
Page 17: Informations Générales
Informations générales Utilisation conforme Ce produit est exclusivement destiné pour un usage A propos de ce manuel privé. Il a été conçu pour l’agrandissement d’images Le présent mode d‘emploi doit être considéré comme dans le cadre d’expériences d’observation de la nature. faisant partie intégrante de l’appareil. - Page 18 RISQUE de dommages matériels ! Les enfants ne doivent utiliser cet appareil que sous surveillance. Maintenez les enfants éloignés des maté- Ne pas démonter l’appareil ! En cas de défaut, veuillez riaux d’emballage (sacs plastiques, bandes en caout- vous adresser à votre revendeur spécialisé. Celui-ci chouc, etc.) ! RISQUE D’ETOUFFEMENT ! prendra contact avec le service client pour, éventuelle- ment, envoyer l’appareil en réparation.
- Page 19 Volume de livraison (fig. 1) 7. échelle pour mesurer la distance de l’objet Monoculaire (A), dragonne (B), sac banane (C), chiffon 8. mise au point rapprochée/macro de nettoyage (D), mode d’emploi 9. objectif 10. œillet pour dragonne 1. Aperçu des pièces (fig. 2+3) 2.
- Page 20 grande distance mais aussi en cas de distance courte loin de vous (par exemple la flèche d’une église). de moins d’un demi-mètre. Réglez l’acuité de l’image en tournant l’anneau de mise au point (6) vers la gauche ou vers la droite. 2.1 Mise au point ordinaire 2.2 Mise au point précise de près À...
- Page 21 Remarque: Remarque: dans la distance de mise au point Pour des distances courtes, il est rapprochée, le champ de vision n’est que très restreint. conseillé de ne pas dépasser un facteur d’agrandisse- D’où la nécessité d’une mise au point très précise. ment de x8.
- Page 22 ELIMINATION tilles. Pour éliminer les traces plus coriaces, le chiffon peut être humidifié avec un produit liquide destiné au Eliminez l’emballage en triant les matériaux. Lors nettoyage de lunettes de vue avant d’essuyer la len- de l’élimination de l’appareil, veuillez respecter tille avec le chiffon en exerçant une pression légère.
-
Page 23: Garantie Et Service
Vous pouvez consulter l’intégralité des conditions de garantie ainsi que les informations sur l’extension de la période de garantie et le détail de nos services via le lien suivant : www.bresser.de/garantiebedingungen - 23 -... -
Page 24: Uso Previsto
Informaciones de carácter general Uso previsto Este producto sirve exclusivamente para el uso priva- Sobre este manual do. Se ha desarrollado para ampliar la representación El presente manual de instrucciones se debe considerar de observaciones naturales. parte integrante del aparato. Advertencias de carácter general Antes de utilizar el aparato, lea detenidamente las indica- ciones de seguridad y el manual de instrucciones. - Page 25 ¡PELIGRO de daños materiales! Los niños solo deberían utilizar el aparato bajo super- visión. Mantener los materiales de embalaje (bolsas de No desmonte el aparato. En caso de que exista algún plástico, bandas de goma) alejadas del alcance de los defecto, le rogamos que se ponga en contacto con su niños.
- Page 26 Contenido de la entrega (Fig. 1) 7. Escala para la distancia foco-objeto monocular (A), correas (B), funda para el cinturón (C), 8. Enfoque a corta distancia / macro paño de limpieza, instrucciones de uso 9. Objetivo 10. Soporte para las correas 1.
- Page 27 2.2 Ajuste de enfoque a distancias cortas distancia (menos de medio metro). (distancia < 0,5 m) 2.1 Ajuste de enfoque normal Para la observación a distancias cortas de menos de Coloque en la configuración del zoom (4) el grado más medio metro (ajuste de macro o Near focus) desplace bajo de aumento (8x) de la escala del zoom (5).
-
Page 28: Notas Sobre La Limpieza
3. Configuración del zoom campo de visión se reduciría de tal manera que resul- Después de que haya configurado de manera nítida taría imposible enfocar el objeto a observar. una imagen en su nivel de aumento más bajo, puede NOTAS sobre la limpieza seguir aumentando la ampliación de manera continua. - Page 29 ELIMINACIÓN polvo y la humedad! En porcentajes de humedad am- biente elevada, el cristal (acrílico) puede empañarse. Elimine los materiales de embalaje separados Esto no es un defecto! En este caso se debe dejar el por tipos. Por favor, tenga en cuenta las disposi- dispositivo a temperatura ambiente durante algún tiem- ciones legales vigentes a la hora de eliminar el aparato.
-
Page 30: Garantía Y Servicio
Las condiciones completas de garantía, así como información relativa a la ampliación de la garantía y servicios, puede encontrarse en www.bresser.de/ warranty_terms. - 30 -... -
Page 31: Algemene Informatie
Algemene informatie gebruiker van het product worden verstrekt. Over deze handleiding Beoogd gebruik Deze handleiding moet worden gezien als onderdeel Dit product is uitsluitend bestemd voor privé-gebruik. van het apparaat. Lees voor het gebruik de Het is ontwikkeld voor het uitvergroot weergeven van veiligheidsvoorschriften en de gebruiksaanwijzing dingen in de natuur. - Page 32 RISK van materiële schade! zon of in de directe nabijheid van de zon te kijken. Dit kan leiden tot blindheid. Kinderen mogen het Demonteer het apparaat niet. Neem in geval van apparaat alleen onder toezicht van volwassenen een defect contact op met uw dealer. De dealer gebruiken.
- Page 33 1. Onderdelen overzicht (Afb. 2+3) 2. Scherpstelling 1. Monoculair Het scherp configureren van een waarnemingsobject 2. Oculair met dit monoculair, is in principe afhankelijk van 3. Opvouwbare rubberen oogschelpen de afstand tot het object. Dankzij de geïntegreerde 4. Zoom instelling macrofunctie kunt u het beeld niet alleen op grote 5.
- Page 34 scherpstelling (6) tot het kalibratiemerk ∞ op de schaal scherp beeld krijgt. voor de objectafstand (7) wordt gedetecteerd. Kijk door Opmerking: het oculair (2) naar een object in de verte (bijv. een Het gezichtsveld is slechts zeer kerktoren). Stel de scherpte van het beeld in door de klein in het close-focus bereik.
- Page 35 het beeld aan door langzaam aan de scherpstelling (6) de lenzen te voorkomen, dient u alleen lichte druk uit te te draaien. oefenen met het reinigingsdoekje. Om meer hardnekkig vuil te verwijderen, bevochtigt u het reinigingsdoekje met Opmerking: In het nabije bereik wordt de ver- een reinigingsvloeistof voor brillen en veegt u de lenzen grotingsinstelling niet aanbevolen boven de 8 keer.
- Page 36 Meer informatie over de juiste afvalverwerking kunt onze website vereist. u verkrijgen bij uw lokale afvalverwijderingsdienst of de U kunt de volledige garantievoorwaarden en informatie milieudienst. over de verlenging van de garantieperiode en de de- tails van onze diensten raadplegen op www.bresser.de/ warranty_terms. - 36 -...
- Page 37 Please contact the service centre first for any questions nächst den Service kontaktieren, vorzugsweise per E-Mail. regarding the product or claims, preferably by e-mail. E-Mail: service@bresser.de · Tel.*: +49 28 72 80 74 210 E-Mail: service@bresseruk.com · Phone*: +44 1342 837 098 BRESSER GmbH BRESSER UK Ltd.
- Page 38 (de préférence via e-mail). centrum (bij voorkeur per e-mail). E-Mail: sav@bresser.fr · Téléphone*: 00 800 6343 7000 E-Mail: info@bresserbenelux.nl · Tel.*: +31 528 23 24 76 BRESSER France SARL BRESSER Benelux Pôle d’Activités de Nicopolis ·...
- Page 39 E-Mail: servicio.iberia@bresser-iberia.es Teléfono*: +34 91 67972 69 BRESSER Iberia SLU c/Valdemorillo,1 Nave B, P.I. Ventorro del Cano · 28925 Alcorcón Madrid · España *Número local de España (el importe de cada llamada telefónica dependen de las tarifas de los distribuidores);...
- Page 40 Bresser GmbH Gutenbergstraße 2 46414 Rhede · Germany www.bresser.de @BresserEurope Irrtümer und technische Änderungen vorbehalten. · Errors and technical changes reserved. · Sous réserve d’erreurs et de modifications techniques. · Queda reservada la posibilidad de incluir modificaciones o de que el texto contenga errores.
Need help?
Do you have a question about the Zoomar Mono 8-25x25 and is the answer not in the manual?
Questions and answers