Table of Contents
Advertisement
Available languages
Available languages
Quick Links
Advertisement
Table of Contents

Related Manuals for Bresser National Geographic 3X25


Summary of Contents for Bresser National Geographic 3X25
- Page 1 NACHTSICHTGERÄT NIGHT VISION DEVICE 3X25/5X50 Bedienungsanleitung Operating instructions Mode d’emploi Istruzioni per l’uso Instrucciones de uso Руководство по эксплуатации Art.No. 90-75000/90-75500...
- Page 2 3X25 5X50 Art.No.: 90-75000 Art.No.: 90-75500 Bedienungsanleitung ............4 Operating instructions .............10 Mode d’emploi ..............16 Istruzioni per l’uso ............22 Instrucciones de uso ............28 Руководство по эксплуатации ........34...
-
Page 4: Allgemeine Warnhinweise
Allgemeine Warnhinweise • Schauen Sie mit diesem Gerät niemals direkt in die Sonne oder in die Nähe der Sonne. Es besteht ERBLINDUNGSGEFAHR! • Setzen Sie das Gerät – speziell die Linsen – keiner direkten Sonneneinstrah- lung aus! Durch die Lichtbündelung könnten Brände verursacht werden. •... -
Page 5: Eg-Konformitätserklärung
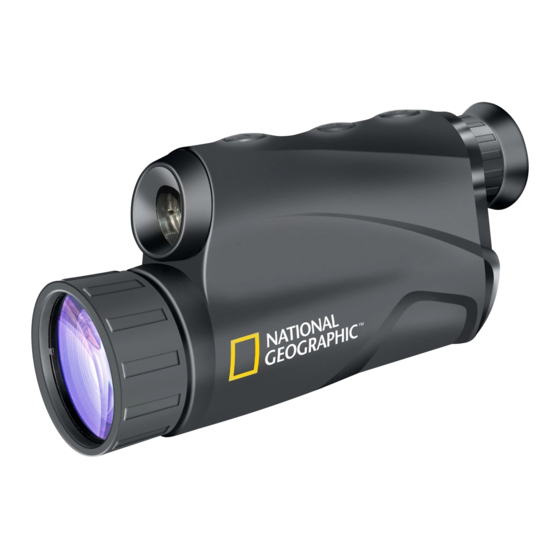
Die Garantiezeit beträgt 2 Jahre und beginnt am Tag des Kaufs. Bitte bewahren Sie die Rechnung auf. Sie können die Garantiezeit auf 5 Jahre verlängern, wenn Sie sich auf www.bresser.de/garantie registrieren und den kurzen Fragebogen ausfüllen. Zur Inanspruchnahme der 5-Jahre-Garantie müssen Sie die Registrie- rung innerhalb von 3 Monaten nach dem Kauf (es gilt das Datum des Kaufbelegs) durchführen. - Page 6 Teileübersicht 1. Infrarotaufheller 2. Objektiv 3. Okular 4. Helligkeit verringern (Infrarotaufheller/Bildschirm) 5. Helligkeit erhöhen (Infrarotaufheller/Bildschirm) 6. Anschalten/Abschalten 7. Batteriefach 8. Status LED Funktionen • Bei diesem Nachtsichtgerät mit integriertem Infrarotaufheller ist es mög- lich die Helligkeit der Infrarotbeleuchtung über die Tasten (4, 5) anzupas- sen.
-
Page 7: Bedienung
Bedienung Multifunktionstaste (3 Funktionen): • Anschalten • Automatische Abschaltung (an/aus) • Abschalten Anschalten: Wenn das Gerät abgeschaltet ist, kann es durch kurzes gedrückt halten der Taste (1-2 Sekunden) eingeschaltet werden. Die Status-LED blinkt im eingeschalteten Zustand im 1-Sekunden Intervall grün. Automatische Abschaltung (an/aus): Wenn das Gerät eingeschaltet ist und die automatische Abschaltung aktiviert ist, kann man diese mit einem kurzen Druck der Taste (<... - Page 8 Die Leuchtkraft des Infrarotaufhellers kann durch langes Drücken der Taste (> 3 Sekunden) schnell auf 100% erhöht werden. Wenn die rote Diode während dieser Bedienung leuchtet, hat weiteres Drücken (> 3 Sekunden) keine Auswirkung. Leuchtstärke des Bildschirms erhöhen: Bei eingeschaltetem Gerät wird die Bildschirmhelligkeit durch jeden kurzen Tastendruck (<...
- Page 9 ENTSORGUNG Entsorgen Sie die Verpackungsmaterialien sortenrein. Beachten Sie bitte bei der Entsorgung des Geräts die aktuellen gesetzlichen Be- stimmungen. Informationen zur fachgerechten Entsorgung erhalten Sie bei den kommunalen Entsorgungsdienstleistern oder dem Umweltamt. Werfen Sie Elektrogeräte nicht in den Hausmüll! Gemäß der Europäischen Richtlinie 2002/96/EG über Elektro- und Elektronik-Altgeräte und deren Umsetzung in nationales Recht müs- sen verbrauchte Elektrogeräte getrennt gesammelt und einer umweltge- rechten Wiederverwertung zugeführt werden.
-
Page 10: General Warning
General Warning • Never use this device to look directly at the sun or in the direct proximity of the sun. This will result in a risk of blindness. • Do not place the device, particularly the lenses, in direct sunlight. The concentration of light could cause a fi... -
Page 11: Ec Declaration Of Conformity
Warranty and warranty term extension The warranty term is two years from the date of purchase. Please keep your proof of purchase. Register at www.bresser.de/warranty and fi ll out a brief questionnaire to get your warranty term extended to fi ve years. Registration must be completed within three months of purchase (date of receipt) to validate the warranty. -
Page 12: Parts Overview
Parts overview 1. Infrared illuminator 2. Objective 3. Ocular 4. Decrease brightness (Infrared illuminator/image display) 5. Increase brightness (Infrared illuminator/image display) 6. Power On/Off 7. Battery compartment 8. Status LED Features • This night vision device features an integrated infrared illuminator. The brightness is adjustable by pressing the appropriate buttons (4, 5). -
Page 13: Operation
Operation Multifunction button (3 functions): • Power On • Automatic Power Off function (APO) • Power Off Power On: The device can be turned on by pressing the button for 1-2 seconds. The status LED will start flashing green at 1-second intervals when the power is on. - Page 14 You can quickly increase the brightness of the infrared illuminator with a sin- gle long press of more than 3 seconds, until it has reached 100%. The red indicator will be lit during this operation. After reaching 100%, long presses will have no effect.
- Page 15 DISPOSAL Dispose of the packaging materials properly, according to their type, such as paper or cardboard. Contact your local waste-disposal ser- vice or environmental authority for information on the proper disposal. Do not dispose of electronic devices in the household garbage! As per Directive 2002/96/EC of the European Parliament on waste electrical and electronic equipment and its adaptation into German law, used electronic devices must be collected separately and recycled in an...
-
Page 16: Consignes Générales De Sécurité
Consignes générales de sécurité • Ne jamais regarder directement le soleil à travers cet appareil en le pointant directement en sa direction. L’observateur court un RISQUE DE CECITE ! • Ne jamais orienter l’appareil – en particuliers les lentilles – de manière à capter directement les rayons du soleil ! La focalisation de la lumière peut déclencher des incendies. -
Page 17: Déclaration De Conformité Ce
à 5 ans facultative de la garantie, il vous suffi t de vous enregistrer sur notre site Internet sous le lien suivant www.bresser.de/warranty et de répondre à quel- ques questions. Pour pouvoir profi ter de cette garantie, vous devez vous enregistrer dans les 3 mois qui suivent l’achat (date mentionnée sur votre ticket de caisse). -
Page 18: Vue D'ensemble Des Pièces
Vue d'ensemble des pièces 1. Illuminateur infrarouge 2. Objectif 3. Oculaire 4. Diminuer la luminosité (affichage illuminateur infrarouge/image) 5. Augmentez la luminosité (affichage illuminateur infrarouge/image) 6. Alimentation On/Off 7. Compartiment à piles 8. Voyant d'état LED Caractéristiques • Cet appareil de vision nocturne dispose d'un illuminateur infrarouge intégré. -
Page 19: Opération
Opération Bouton multifonctions (3 fonctions) : • Power On / Mise sous tension • Mise hors tension /coupure automatique (APO) (marche/arrêt) • Mise hors tension Power On / Mise sous tension : A partir de l'appareil éteint, il peut être allumé... - Page 20 La luminosité de l'illuminateur infrarouge augmente rapidement avec une seule pression longue de plus de 3 secondes, jusqu'à ce qu'elle atteigne 100 %. Le voyant rouge est allumé pendant cette opération. Ensuite, les longues pressions ne seront plus valides. Augmenter la luminosité de l'affichage de l'image : Avec l'appareil allumé, la luminosité...
- Page 21 ELIMINATION Eliminez l’emballage en triant les matériaux. Pour plus d’informations concernant les règles applicables en matière d’élimination de ce type des produits, veuillez vous adresser aux services communaux en charge de la gestion des déchets ou de l’environnement. Ne jamais éliminer les appareils électriques avec les ordures ménagè- res ! Conformément à...
-
Page 22: Avvertenze Di Sicurezza Generali
Avvertenze di sicurezza generali • Mai utilizzare questo apparecchio per fi ssare direttamente il sole o altri oggetti nelle sue vicinanze. PERICOLO PER LA VISTA! • Non esporre l’apparecchio, in particolare le lenti, ai raggi solari diretti. La compressione della luce può provocare un incendio. •... -
Page 23: Dichiarazione Di Conformità Ce
5 anni, è suffi ciente effettuare la registrazione in Internet e compilare un breve modulo. La registrazione va effettuata all'indirizzo www.bresser.de/warranty. Per potersi avvalere dell’estensione facoltativa della garanzia, la registrazione va effettuata entro e non oltre 3 mesi dalla data di acquis- to del prodotto (fa fede la data riportata sullo scontrino fi... - Page 24 Sommario 1. Illuminatore a infrarossi 2. Obiettivo 3. Oculare 4. Riduzione della luminosità (illuminatore a infrarossi/visualizzazione delle immagini) 5. Aumento della luminosità (illuminatore a infrarossi/ visualizzazione delle immagini) 6. Accensione / Spegnimento (On/Off) 7. Vano batteria 8. Indicatore LED Caratteristiche •...
- Page 25 Funzioni Tasto multifunzione (3 funzioni): • Accensione • Spegnimento automatico (On/Off) • Spegnere Accensione: Quando il dispositivo è spento, può essere attivata premendo il tasto per 1-2 secondi. Poi il LED verde inizia a lampeggiare a intervalli di 1 secondo. Auto-spegnimento (On/Off): Quando l'apparecchio è...
- Page 26 La luminosità della luce infrarossa aumenterà rapidamente con una pressione prolungata di più di 3 secondi fino a raggiungere il 100%. Durante quest’ope- razione il LED rosso si accende. Al termine, continuare a premere il pulsante non fornisce altre funzioni. Aumentare la luminosità...
- Page 27 SMALTIMENTO Smaltire i materiali di imballaggio in maniera differenziata. Le informa- zioni su uno smaltimento conforme sono disponibili presso il servizio di smaltimento comunale o l’Agenzia per l’ambiente locale. Non smaltire gli apparecchi elettronici con i rifiuti domestici! Secondo la Direttiva Europea 2002/96/CE riguardante gli apparecchi elettrici ed elettronici usati e la sua applicazione nel diritto nazionale, gli apparecchi elettronici usati devono essere raccolti in maniera differenziata e destinati al riciclaggio ecologico.
-
Page 28: Advertencias De Carácter General
Advertencias de carácter general • No mire nunca directamente al sol o cerca de él con este aparato. ¡Existe PELIGRO DE CEGUERA! • No exponer el aparato – especialmente las lentes – a la radiación directa del sol. La concentración de la luz puede provocar incendios. •... -
Page 29: Declaración De Conformidad
5 años, sólo tiene que registrarse en Internet y rellenar un breve cuestionario. Puede realizar el registro en www.bresser.de/warranty. Para hacer uso de la garantía es necesario realizar este registro dentro del plazo de 3 meses después de la compra (para ello se utiliza como referencia el justifi... - Page 30 Resumen 1. Iluminador de infrarrojos 2. Objetivo 3. Ocular 4. Disminución del brillo (Iluminador infrarrojo / visualización de imágenes) 5. Aumento del brillo (Iluminador infrarrojo / visualización de imágenes) 6. Encendido/ Apagado (On / Off) 7. Compartimento para las pilas 8.
-
Page 31: Operación
Operación Botón multifunción (3 funciones): • Encendido • Función de desactivación automática (APO) (encendido/apagado) • Apagado Encendido: Con el dispositivo apagado, puede activarlo pulsando el botón durante 1-2 segundos. El LED de estado verde comenzará a parpadear con intervalos de 1 segundo. Función de apagado automático: (APO) (encendido/apagado): con el dispositivo encendido y la función APO activada, una pulsación corta del botón (menos de 1 segundo) desactiva la función APO. - Page 32 El brillo de la luz infrarroja se incrementa rápidamente con una pulsación larga de más de 3 segundos hasta que se haya alcanzado el 100%. El indicador rojo se ilumina durante esta operación. Después, más presiones no surtirán efecto. Aumentar el brillo de la visualización de la imagen: con el dispositivo en- cendido, el brillo de la imagen aumenta en un 10% por cada pulsación breve del botón (menos de 1 segundo) hasta que se haya alcanzado el 100%.
- Page 33 ELIMINACIÓN Elimine los materiales de embalaje separados por tipos. Obtendrá información sobre la eliminación reglamentaria en los proveedores de servicios de eliminación comunales o en la agencia de protección medioambiental. ¡No elimine los electrodomésticos junto con la basura doméstica! Conforme a la directiva europea 2002/96/UE sobre aparatos eléctri- cos y electrónicos usados y a su aplicación en la legislación nacional, los aparatos eléctricos usados se deben recoger por separado y conducir a un reciclaje que no perjudique al medio ambiente.
-
Page 34: Общие Предупреждения
Общие предупреждения • Ни в коем случае не смотрите через это устройство прямо на солнце или в направлении солнца. Опасность ПОТЕРИ ЗРЕНИЯ! • Не оставляйте устройство – в особенности линзы – под прямыми сол- нечными лучами! Из-за фокусировки солнечных лучей может возникнуть пожар! •... -
Page 35: Сертификат Соответствия Ес
Гарантийный срок составляет два года со дня покупки. Сохраняйте кассовый чек как подтверждение покупки. Для продления гарантии еще на 3 года за- регистрируйтесь на веб-сайте и заполните анкету: www.bresser.de/warranty. Регистрацию необходимо пройти в течение трех месяцев со дня покупки (дня, указанного... - Page 36 Устройство прибора ночного видения: 1. ИК-осветитель 2. Объектив 3. Окуляр 4. Кнопка уменьшения яркости (ИК-осветитель/дисплей) 5. Кнопка увеличения яркости (ИК-осветитель/дисплей) 6. Кнопка включения и выключения прибора 7. Батарейный отсек 8. Светодиодный индикатор Особенности • Данная модель работает за счет встроенного ИК-осветителя. Яркость осветителя...
- Page 37 Эксплуатация Функции кнопки включения и выключения • Включение прибора • Автоматическое выключение прибора (вкл/выкл) • Выключение прибора Включение прибора: чтобы включить прибор ночного видения, на- жмите и удерживайте эту кнопку от одной до два секунд. Светодиодный индикатор начнет мигать зеленым светом с коротким интервалом. Автоматическое...
- Page 38 Если ИК-осветитель включен, каждое нажатие и удержание кнопки (от одной до два секунд) увеличивает яркость на 20%. После достижения максимального значения (100%) яркость увеличиваться не будет. При удержании кнопки свыше трех секунд яркость будет быстро увеличи- ваться, пока не достигнет 100% значения. После достижения максималь- ного...
- Page 39 УТИЛИЗАЦИЯ Утилизируйте упаковку как предписано законом. При необходимо- сти проконсультируйтесь с местными властями. Не выбрасывайте электронные детали в обычный мусорный кон- тейнер. Европейская директива по утилизации электронного и электрического оборудования 2002/96/EU и соответствующие ей законы требуют отдельного сбора и переработки подобных устройств. Использованные...
- Page 40 NATIONAL GEOGRAPHIC and Yellow Border Design are trademarks of the National Geographic Society. All rights reserved. Meade Instruments Europe GmbH & Co. KG Gutenbergstr. 2 · DE-46414 Rhede www.bresser.de · info@bresser.de Irrtümer und technische Änderungen vorbehalten. ANL9075X00MSP0113NG Errors and technical changes reserved.
Need help?
Do you have a question about the National Geographic 3X25 and is the answer not in the manual?
Questions and answers