
Related Manuals for Case 2060


Summary of Contents for Case 2060
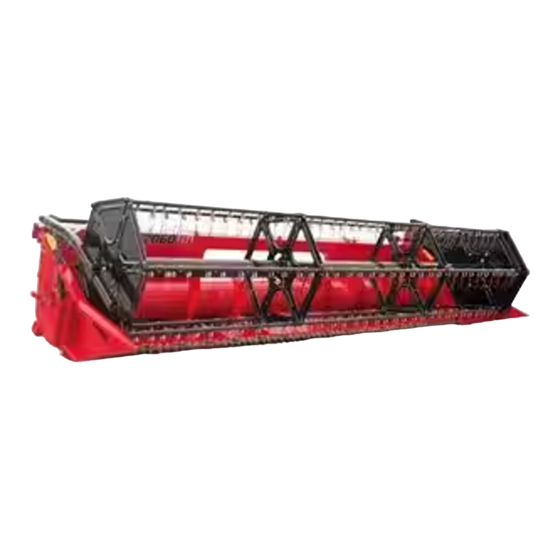
- Page 1 2060 Header SERVICE MANUAL Part number 47846161 English March 2015 © 2015 CNH Industrial Belgium N.V. All Rights Reserved.
- Page 2 SERVICE MANUAL 2060 47846161 05/03/2015...
-
Page 3: Table Of Contents
Contents INTRODUCTION Main gearbox and drive ............... 14 [14.100] Main gearbox and drive ............14.1 Hydraulic systems............... -
Page 4: Introduction
INTRODUCTION 47846161 05/03/2015... - Page 5 Contents INTRODUCTION Basic instructions - How to use and navigate through this Manual ......3 Advice .
-
Page 6: Basic Instructions - How To Use And Navigate Through This Manual
INTRODUCTION Basic instructions - How to use and navigate through this Manual Technical information This manual has been produced by a new technical information system. This new system is designed to deliver technical information electronically through Web delivery (eTim), DVD and in paper manuals. A coding system called SAP has been developed to link the technical information to other Product Support functions, e.g., Warranty. - Page 7 INTRODUCTION How to use this manual This manual is divided into Sections. Each Section is then divided into Chapters. Contents pages are included at the beginning of the manual, then inside every Section and inside every Chapter. An alphabetical Index is included at the end of a Chapter.
- Page 8 INTRODUCTION 63 - Chemical applicators 64 - Chopping 66 - Threshing 68 - Tying/Wrapping/Twisting 69 - Bale wagons 70 - Ejection 71 - Lubrication system 72 - Separation 73 - Residue handling 74 - Cleaning 75 - Soil preparation/Finishing 76 - Secondary cleaning / Destemmer 77 - Seeding 78 - Spraying 79 - Planting...
- Page 9 INTRODUCTION Section contents Section Number Description Maintenance Machine completion and equipment Engine Main gearbox and drive Clutch Transmission Four wheel drive system Front axle system Rear axle system Hydrostatic drive Implement power take-off Brakes and controls This Section covers the central parts of the hydraulic system.
- Page 10 INTRODUCTION Number Description Section Telescopic single arm Booms, dippers and buckets Dozer blade and arm Accessories Tools This Section covers all the main functions and systems related to the body of the machine, including the Platform, cab, bodywork and decals operators cab and the platform.
- Page 11 INTRODUCTION Chapters Each Chapter is identified by a number e.g. Hydraulic Systems - Main check valve- 35.359. The first number is identical to the Section number i.e. Chapter 35.359 is inside Section 35, Hydraulic Systems. The second number is representative of the Chapter contained within the Section. CONTENTS The Chapter Contents lists all the technical data (specifications), functional data (how it works), service data (remove, install adjust, etc..) and diagnostic data (fault codes and troubleshooting) that have been written in that Chapter for...
- Page 12 INTRODUCTION Information units and information search Each chapter is composed of information units. Each information unit has a page reference within that Chapter. The information units provide a quick and easy way to find just the right piece of technical information you are looking for. Example information unit Main control valve - Sectional View (35.359) Information Unit SAP code...
-
Page 13: Advice
In any case, no warranty is given or attributed on the product manufactured or marketed by the manufacturer in case of damages due to an anomalous behavior of parts and/or components not approved by the manufacturer. -
Page 14: Foreword
Improper disposal of batteries can contaminate the soil, groundwater, and waterways. CASE IH strongly recommends that you return all used batteries to a CASE IH dealer, who will dispose of the used batteries or recycle the used batteries properly. In some countries, this is a legal requirement. - Page 15 INTRODUCTION Points of sale are obliged to: • Accept the return of your used batteries • Store the returned batteries in a suitable location • Send the returned batteries to the battery manufacturer for recycling 47846161 05/03/2015...
-
Page 16: Safety Rules
INTRODUCTION Safety rules LEGAL OBLIGATIONS This machine may be equipped with special guarding or other devices in compliance with local legislation. Some to these require active use by the operator. Therefor, check local legislations on the usage of this machine. ACCIDENT PREVENTION Most accidents or injuries that occur in workshops are the result of non compliance to simple and fundamental safety principles. - Page 17 INTRODUCTION • Bring all hydraulic cylinders to the home positions (down, retracted, etc.) before engine shut down. • Stop the engine and check that the hydraulic circuits are pressure-free before removing caps, covers, valves, etc. • All repair and maintenance operations must be carried out using extreme care and attention. •...
- Page 18 INTRODUCTION Machine start-up. • Never run the engine in confined spaces that are not equipped with adequate ventilation for exhaust gas extraction. • Never place the head, body, limbs, feet, hands or fingers near rotating and moving parts. Hydraulic systems and fuel injection systems •...
-
Page 19: Basic Instructions
INTRODUCTION Basic instructions SHIMMING For each adjustment operation, select adjusting shims and measure individually using a micrometer, then add up the recorded values. Do not rely on measuring the entire shimming set, which may be incorrect, or the rated value indicated on each shim. - Page 20 INTRODUCTION PROTECTING THE ELECTRONIC/ ELECTRICAL SYSTEMS DURING CHARGING OR WELD- To avoid damage to the electronic/electrical systems, always observe the following: 1. Never make or break any of the charging circuit connections, including the battery connections, when the engine is running. 2.
- Page 21 Only use "CNH Original Parts" or " CASE IH Parts". Only genuine spare parts guarantee the same quality, duration and safety as original parts, as they are the same parts that are assembled during standard production. Only "CNH Original Parts" or " CASE IH Parts" can offer this guarantee.
-
Page 22: Torque
INTRODUCTION Torque Minimum hardware tightening torques (in N m or lb in /lb ft) for normal assembly applica- tions unless otherwise stated NOTICE: Shown below is the suggested initial torque tightening sequences for general applications, tighten in se- quence from item 1 through to the last item of the hardware. The minimum hardware tightening torque on drawings, in specifications etc. - Page 23 INTRODUCTION ZEIL06CS0136F0A ZEIL06CS0135F0A 47846161 05/03/2015...
-
Page 24: Basic Instructions - Chain Wear Tables - Roller Chains
INTRODUCTION Basic instructions - Chain Wear Tables - Roller Chains Chain Wear The individual joints in a roller chain articulate as they enter and leave the sprockets. This articulation results in wear on the pins and bushings. A material is worn away from these surfaces the chain will gradually elongate. ZEIL10GH0003A0B Chains do not "stretch"... - Page 25 INTRODUCTION For example, if 40 pitches (40 pins) of a #40 chain were measured and the result was 523 mm (20.6 in) or greater (using 3 % as the maximum allowable wear), the chain should be replaced. Anything less than 523 mm (20.6 in) would still be acceptable by most industrial standards.
-
Page 26: Conversion Factors
INTRODUCTION Conversion factors Length 1 mm 0.0393 in 1 in 25.4 mm 1 km 0.621 miles 1 miles 1.609 km 3.281 ft 1 ft 0.3048 m Area 1 ha 2.471 ac 1 ac 0.404 US fl oz 1 m² 10.76 ft² 1 ft²... -
Page 27: Product Identification
INTRODUCTION Product identification EXPLANATION OF MACHINE SERIAL NUMBERS Example : nr. 173762001 173762001: The first two digits identify the width of the header in foot. 17 3762001: The third digit indicates the product line. There are different product lines: CR-CX-CS-CSX Combine Harvesters: TC Combine Harvesters Combine Headers: Forage Harvesters:... - Page 28 INTRODUCTION Product identification EXPLANATION OF MACHINE SERIAL NUMBERS Example : n° 178762001 178762001: The first two digits identify the width of the header in foot. 17 8762001: The third digit indicates the product line. There are different product lines: Attachments: Balers: Forage Harvesters: 178 762001: These 3 digits indicate the batch in which the machine was made.
- Page 29 INTRODUCTION 47846161 05/03/2015...
- Page 30 SERVICE MANUAL Main gearbox and drive 2060 47846161 05/03/2015...
-
Page 31: Main Gearbox And Drive
Contents Main gearbox and drive - 14 [14.100] Main gearbox and drive ............. . 14.1 47846161 05/03/2015... -
Page 32: [14.100] Main Gearbox And Drive
Main gearbox and drive - 14 Main gearbox and drive - 100 2060 47846161 05/03/2015 14.1 [14.100] / 1... - Page 33 Contents Main gearbox and drive - 14 Main gearbox and drive - 100 SERVICE Power Take-Off (PTO) shaft Remove ................. . 3 Install (*) .
- Page 34 Main gearbox and drive - Main gearbox and drive Power Take-Off (PTO) shaft - Remove 1. Remove the three screws (1). 83085324 2. Retract the collar (1) and if required remove the chain (2) from the header. 20090437 3. Retract the dust cap (1). 83085324 4.
- Page 35 Main gearbox and drive - Main gearbox and drive Power Take-Off (PTO) shaft - Install Grain Header APAC 1. Press the quick coupler (1) and push the power-take-off (2)onto the shaft (3). 20090438 2. Reassemble the dust cap (1) and the collar (2) with the three screws (3).
- Page 36 Main gearbox and drive - Main gearbox and drive Power Take-Off (PTO) shaft - Adjust WARNING Avoid injury! Always do the following before lubricating, maintaining, or servicing the machine. 1. Disengage all drives. 2. Engage parking brake. 3. Lower all attachments to the ground, or raise and engage all safety locks. 4.
- Page 37 Main gearbox and drive - Main gearbox and drive Power Take-Off (PTO) shaft - Adjust WARNING Avoid injury! Always do the following before lubricating, maintaining, or servicing the machine. 1. Disengage all drives. 2. Engage parking brake. 3. Lower all attachments to the ground, or raise and engage all safety locks. 4.
- Page 38 Index Main gearbox and drive - 14 Main gearbox and drive - 100 Power Take-Off (PTO) shaft - Adjust ..............5 Power Take-Off (PTO) shaft - Adjust .
- Page 39 All rights reserved. No part of the text or illustrations of this publication may be reproduced. CASE IH policy is one of continuous improvement and the right to change prices, specification or equipment at any time without notices is reserved.
-
Page 40: Hydraulic Systems
SERVICE MANUAL Hydraulic systems 2060 47846161 05/03/2015... -
Page 41: [35.000] Hydraulic Systems
Contents Hydraulic systems - 35 [35.000] Hydraulic systems..............35.1 [35.420] Reel vertical positioning system. - Page 42 Hydraulic systems - 35 Hydraulic systems - 000 2060 47846161 05/03/2015 35.1 [35.000] / 1...
- Page 43 Contents Hydraulic systems - 35 Hydraulic systems - 000 FUNCTIONAL DATA Hydraulic systems Hydraulic schema 12, 13, 15ft ............. . . 3 Hydraulic schema 17, 20, 24, 30ft (*) .
- Page 44 Hydraulic systems - Hydraulic systems Hydraulic systems - Hydraulic schema 12, 13, 15ft ZEIL10GH0004F0B Reel up/down Orifice diameter 1.5 mm Reel fore/after SLAVE Reel up/down With flushing on retraction Orifice diameter 1 mm Reel fore/after MASTER With flushing on retraction Multifastener 47846161 05/03/2015 35.1 [35.000] / 3...
- Page 45 Hydraulic systems - Hydraulic systems Hydraulic systems - Hydraulic schema 17, 20, 24, 30ft Grain Header APAC ZEIL10GH0005F0B Reel fore/after SLAVE Reel up/down MASTER With flushing on retraction With flushing on retraction Multi-fastener Orifice 1.5 mm 17, 20 and 24ft only Orifice diameter 1.5 mm Orifice 1 mm 30ft only...
- Page 46 Hydraulic systems - Hydraulic systems Hydraulic systems - Hydraulic symbol Grain Header APAC Engine Reservoir Hydraulic pump, direction Hydraulic pump single with variable displacement direction fixed displacement Hydraulic pump, directional Steering motor with displacement (bi-directional) Motor, single direction fixed Motor bi-directional fixed displacement displacement 2 position valve...
- Page 47 Hydraulic systems - Hydraulic systems Filter Filter opening Shuttle valve Temperature sender Pressure sensor Restrictor valve 47846161 05/03/2015 35.1 [35.000] / 6...
- Page 48 Index Hydraulic systems - 35 Hydraulic systems - 000 Hydraulic systems - Hydraulic schema 12, 13, 15ft ........... . . 3 Hydraulic systems - Hydraulic schema 17, 20, 24, 30ft (*) .
- Page 49 47846161 05/03/2015 35.1 [35.000] / 8...
-
Page 50: [35.420] Reel Vertical Positioning System
Hydraulic systems - 35 Reel vertical positioning system - 420 2060 47846161 05/03/2015 35.2 [35.420] / 1... - Page 51 Contents Hydraulic systems - 35 Reel vertical positioning system - 420 FUNCTIONAL DATA Cylinders Sectional view ................3 SERVICE Cylinders Service instruction Cylinder with a detachable cylinder head.
- Page 52 Hydraulic systems - Reel vertical positioning system Cylinders - Sectional view ZEIL04GH0033E0B Reel adjustment cylinder (Left-hand and Right-hand side) 1 Cylinder 2 Piston rod 3 Guide ring 4 Seal 5 Locking wire 47846161 05/03/2015 35.2 [35.420] / 3...
- Page 53 Hydraulic systems - Reel vertical positioning system Cylinders - Service instruction Cylinder with a detachable cylinder head. All seals can be replaced and are made available in a seal kit. Make sure to order the correct seal kit. 1. Loosen the cylinder head (1) by turning the head clock wise, using a punch mark and a hammer.
- Page 54 Hydraulic systems - Reel vertical positioning system 4. Clean and oil the piston rod (2), the cylinder sleeve (4) and the seals and reassemble them. Slide the cylinder head (1) onto the piston rod (2). Install the cylinder sleeve (4) and tighten the bolt (3). ZDF0734A 5.
- Page 55 Index Hydraulic systems - 35 Reel vertical positioning system - 420 Cylinders - Sectional view ................3 Cylinders - Service instruction Cylinder with a detachable cylinder head.
-
Page 56: [35.430] Reel Fore-And-Aft Positioning System
Hydraulic systems - 35 Reel fore-and-aft positioning system - 430 2060 47846161 05/03/2015 35.3 [35.430] / 1... - Page 57 Contents Hydraulic systems - 35 Reel fore-and-aft positioning system - 430 FUNCTIONAL DATA Cylinder Sectional view ................3 47846161 05/03/2015 35.3 [35.430] / 2...
- Page 58 Hydraulic systems - Reel fore-and-aft positioning system Cylinder - Sectional view ZEIL04GH0036E0B Reel adjustment cylinder (Left-hand side) 1 Cylinder 6 Guide ring 2 Piston rod 7 Seal 3 Piston guide ring 8 Seal 4 Seal 9 Cylinder head 5 Seal 10 Bolt (torque 34 Nm - 25 lb ft) ZEIL04GH0034E0B Reel adjustment cylinder (Right-hand side)
- Page 59 Index Hydraulic systems - 35 Reel fore-and-aft positioning system - 430 Cylinder - Sectional view ................3 47846161 05/03/2015 35.3 [35.430] / 4...
- Page 60 47846161 05/03/2015 35.3 [35.430] / 5...
- Page 61 All rights reserved. No part of the text or illustrations of this publication may be reproduced. CASE IH policy is one of continuous improvement and the right to change prices, specification or equipment at any time without notices is reserved.
- Page 62 SERVICE MANUAL Electrical systems 2060 47846161 05/03/2015...
-
Page 63: Electrical Systems
Contents Electrical systems - 55 [55.000] Electrical system ..............55.1 [55.100] Harnesses and connectors. -
Page 64: [55.000] Electrical System
Electrical systems - 55 Electrical system - 000 2060 47846161 05/03/2015 55.1 [55.000] / 1... - Page 65 Contents Electrical systems - 55 Electrical system - 000 FUNCTIONAL DATA Electrical system Electrical standard (*) ............... 3 Component diagram (*) .
-
Page 66: Electrical Standard (*)
Electrical systems - Electrical system Electrical system - Electrical standard Grain Header APAC Colour code Nine colours of wires are used on the header, each color having its specific signification. • Black (BK/ZW): directly earthed to the frame • White (WH/WT): connected with the pin of a switch which engages a system that increases something (e.g. in- crease of reel speed) •... -
Page 67: Component Diagram (*)
Electrical systems - Electrical system Electrical system - Component diagram Grain Header APAC HEADER CONNECTOR CONNECTOR HEADER CONNECTOR POSITION WIRE COLOUR CIRCUIT REFERENCE LEFT HEIGHT / TILT RIGHT HEIGHT / TILT CENTRE HEIGHT / TILT SENSOR SUPPLY 1A SENSOR GROUND 1A REEL RPM REEL HORIZONTAL POSITION REEL VERTICAL POSITION... - Page 68 Electrical systems - Electrical system ZEIL05GH0013A0A 47846161 05/03/2015 55.1 [55.000] / 5...
- Page 69 Electrical systems - Electrical system HEADER RECOGNITION SENSOR CONNECTOR HEADER RECOGNITION SENSOR POSITION WIRE NUMBER CIRCUIT REFERENCE 1223 - (PK) SENSOR SUPPLY 1116 - (YE) SIGNAL 750 - (BL) SENSOR GROUND NOTE: For the wiring colour code refer to Electrical system - Electrical standard (55.000). NOTE: For the connector number refer to the Repair Manual of your combine.
-
Page 70: Component Diagram (*)
Electrical systems - Electrical system Electrical system - Component diagram Grain Header APAC REEL SPEED SENSOR CONNECTOR REEL SPEED SENSOR POSITION WIRE COLOUR CIRCUIT REFERENCE GROUND REEL SPEED SENSOR SIGNAL NOTE: For the wiring colour code refer to Electrical system - Electrical standard (55.000). NOTE: For the connector number refer to the Repair Manual of your combine. - Page 71 Electrical systems - Electrical system REEL VARIATOR MOTOR CONNECTOR REEL VARIATOR MOTOR POSITION WIRE COLOUR CIRCUIT REFERENCE REEL VARIATOR MOTOR (SLOW) SIGNAL REEL VARIATOR MOTOR (FAST) SIGNAL NOTE: For the wiring colour code refer to Electrical system - Electrical standard (55.000). NOTE: For the connector number refer to the Repair Manual of your combine.
-
Page 72: Electrical Schema (*)
Electrical systems - Electrical system Electrical system - Electrical schema Grain Header APAC Stubble height (Left-hand side) Stubble height (Right-hand side) Centre Height Reel speed Reel horizontal position Reel vertical position 14. Not used 15. Not used 18. Hydraulic vertical knife (Left-hand side) 19. - Page 73 Index Electrical systems - 55 Electrical system - 000 Electrical system - Component diagram (*) ............4 Electrical system - Component diagram (*) .
-
Page 74: [55.100] Harnesses And Connectors
Electrical systems - 55 Harnesses and connectors - 100 2060 47846161 05/03/2015 55.2 [55.100] / 1... - Page 75 Contents Electrical systems - 55 Harnesses and connectors - 100 TECHNICAL DATA Wiring harnesses Special tools 2 ................3 Special tools 3 .
- Page 76 Electrical systems - Harnesses and connectors Wiring harnesses - Special tools 2 Description Special tool number NH reference 380000352 84021086 Pin crimp tool ZEIL08SPT001A0A 80679968 Pin removal tool, suitable to remove pins from electronic box connectors and sort likes ZEIL08SPT002A0A 380000354 84021088 Pin removal tool, suitable to remove pins from PCB...
- Page 77 Electrical systems - Harnesses and connectors Special tool number NH reference Description 380000353 84021087 Pin removal tool, suitable to remove pins from PCB connectors ZEIL08SPT005A0A 380000355 84021089 Pin removal tool, suitable to remove pins from connectors attached to the electronic box and sort likes ZEIL08SPT006A0A 380000356 84021092...
- Page 78 Electrical systems - Harnesses and connectors Wiring harnesses - Special tools 3 Description Special tool number NH reference 84400045 Pin crimping pliers ZEIL08SPT008A0A 84400044 Plastic pin removal tool (orange) ZEIL08SPT009A0A 380001162 80900370 Plastic pin removal tool (red) ZEIL08SPT010A0A 47846161 05/03/2015 55.2 [55.100] / 5...
- Page 79 Electrical systems - Harnesses and connectors Special tool number NH reference Description 84074681 Plastic pin removal tool (blue) ZEIL08SPT011A0A 84400046 Retraction tool. ZEIL08SPT012A0A 47846161 05/03/2015 55.2 [55.100] / 6...
- Page 80 Index Electrical systems - 55 Harnesses and connectors - 100 Wiring harnesses - Special tools 2 ..............3 Wiring harnesses - Special tools 3 .
- Page 81 All rights reserved. No part of the text or illustrations of this publication may be reproduced. CASE IH policy is one of continuous improvement and the right to change prices, specification or equipment at any time without notices is reserved.
-
Page 82: Attachments/Headers
SERVICE MANUAL Attachments/Headers 2060 47846161 05/03/2015... - Page 83 Contents Attachments/Headers - 58 [58.101] Attachment/Header reel ............. . 58.1 [58.105] Attachment/Header reel control system.
-
Page 84: [58.101] Attachment/Header Reel
Attachments/Headers - 58 Attachment/Header reel - 101 2060 47846161 05/03/2015 58.1 [58.101] / 1... - Page 85 Contents Attachments/Headers - 58 Attachment/Header reel - 101 SERVICE Reel Remove (*) ................3 Install (*) .
- Page 86 Attachments/Headers - Attachment/Header reel Reel - Remove Grain Header APAC Prior operation: Hydraulic motor - Remove (35.518). 1. Secure the reel at the central tube with ropes and use an adequate lifting device. ZEIL06GH0001A0A 2. On both sides, secure the reel with a tap (1). ZEIL06GH0002A0B 3.
- Page 87 Attachments/Headers - Attachment/Header reel 4. On both sides, remove the nut (7) and the bolt (6) from the piston rod (8). ZEIL06GH0003A0B 5. On both sides, remove the tap (1) to remove the reel from the header beams. ZEIL06GH0004A0B 47846161 05/03/2015 58.1 [58.101] / 4...
- Page 88 Reel - Install Grain Header APAC 1. On both sides, add CASE IH AKCELA 251H EP MULTI-PURPOSE GREASE to the reel beam. Slide the reel onto the beams using an adequate lifting device. Secure the reel with the taps (1).
- Page 89 Index Attachments/Headers - 58 Attachment/Header reel - 101 Reel - Install (*) ..................5 Reel - Remove (*) .
-
Page 90: [58.105] Attachment/Header Reel Control System
Attachments/Headers - 58 Attachment/Header reel control system - 105 2060 47846161 05/03/2015 58.2 [58.105] / 1... - Page 91 Contents Attachments/Headers - 58 Attachment/Header reel control system - 105 SERVICE Reel speed variator Reel variator belt - Remove ..............3 Reel variator belt - Install .
- Page 92 Attachments/Headers - Attachment/Header reel control system Reel speed variator Reel variator belt - Remove 1. Start the engine, switch on the threshing and header mechanism and set the reel speed to minimum. 2. Switch off the threshing mechanism and stop the en- gine.
- Page 93 Attachments/Headers - Attachment/Header reel control system 7. Remove the plate (7). Loosen the Allen screw and the lock collar. Remove the bearing (8) with the flanges. ZEIL04GH0074A0B 8. On the left-hand side, loosen the Allen screw and the lock collar of the bearing (9). Loosen the three bolts of the flanges.
- Page 94 Install the bearing (8) and tighten the nuts of the flanges. NOTE: Rub the seals of the bearing with CASE IH AKCELA 251H EP MULTI-PURPOSE GREASE and grease the inner ring of the bearing and the lock collar with anti-corrosive grease.
- Page 95 Attachments/Headers - Attachment/Header reel control system 9. Reinstall the cover (6). ZEIL04GH0073A0B 47846161 05/03/2015 58.2 [58.105] / 6...
- Page 96 Attachments/Headers - Attachment/Header reel control system Reel speed variator Drive disk - Remove Prior operation: Tensioner pulleys - Remove (58.110). 1. Start the engine, switch on the threshing and header mechanism and set the reel speed to minimum. 2. Switch off the threshing mechanism and stop the en- gine.
- Page 97 Attachments/Headers - Attachment/Header reel control system 6. Remove the plate (7). Loosen the Allen screw and the lock collar. Remove the bearing (8) with the flanges. ZEIL04GH0074A0B 7. On the left-hand side, loosen the Allen screw and the lock collar. Remove the bearing (9) with the flanges. ZEIL04GH0075A0B 8.
- Page 98 Attachments/Headers - Attachment/Header reel control system Reel speed variator Drive disk - Disassemble Prior operation: Tensioner pulleys - Remove (58.110). Prior operation: Reel speed variator Drive disk - Remove (58.105). 1. Slide out the bearing housing (6) and the bearing (1) from the shaft (12).
- Page 99 Attachments/Headers - Attachment/Header reel control system Reel speed variator Drive disk - Assemble 1. Install the variator disc (10) and (9) on the shaft (12). 2. Install the three threaded rods (11) completely (full depth) in the disc (9). Install the lock washers and tighten the three nuts (8) with a minimum torque of 110 N·m ( 81 lb ft).
- Page 100 2. Install the bearings (8) and (9). Tighten the nuts of the flanges. NOTE: Rub the seals of the bearing with CASE IH AKCELA 251H EP MULTI-PURPOSE GREASE and grease the inner ring of the bearing and the lock collar with anti-corrosive grease.
- Page 101 Attachments/Headers - Attachment/Header reel control system 9. Reinstall the cover (6). ZEIL04GH0073A0B Next operation: Tensioner pulleys - Install (58.110). 47846161 05/03/2015 58.2 [58.105] / 12...
- Page 102 Attachments/Headers - Attachment/Header reel control system Reel speed variator Driven disk - Remove 1. Start the engine, switch on the threshing and header mechanism and set the reel speed to minimum. 2. Switch off the threshing mechanism and stop the en- gine.
- Page 103 Attachments/Headers - Attachment/Header reel control system Reel speed variator Driven disk - Disassemble Prior operation: Reel speed variator Driven disk - Remove (58.105). 1. To remove the pressure plate (2), turn the three lock nuts (1) evenly one turn at a time. Take off the spring (3).
- Page 104 Attachments/Headers - Attachment/Header reel control system Reel speed variator Driven disk - Assemble 1. Install the variator disc (6) and (5) on the shaft (7). 2. Install the three threaded rods (4) completely (full depth) in the disc (6) and tighten the three nuts with a minimum torque of 110 N·m ( 81 lb ft).
- Page 105 2. Install the bearing (4) and (5). Tighten the nuts of the flanges. NOTE: Rub the seals of the bearing with CASE IH AKCELA 251H EP MULTI-PURPOSE GREASE and grease the inner ring of the bearing and the lock collar with anti-corrosive grease.
- Page 106 Attachments/Headers - Attachment/Header reel control system 8. Reinstall the cover (6). ZEIL04GH0073A0B 47846161 05/03/2015 58.2 [58.105] / 17...
- Page 107 Index Attachments/Headers - 58 Attachment/Header reel control system - 105 Reel speed variator Drive disk - Assemble ............10 Reel speed variator Drive disk - Disassemble .
-
Page 108: [58.110] Attachment/Header Cutting Mechanism
Attachments/Headers - 58 Attachment/Header cutting mechanism - 110 2060 47846161 05/03/2015 58.3 [58.110] / 1... - Page 109 Contents Attachments/Headers - 58 Attachment/Header cutting mechanism - 110 TECHNICAL DATA Cutting blade drive shaft Main gearbox and drive - Special tools ............3 Sickle cutterbar Special tools .
- Page 110 Attachments/Headers - Attachment/Header cutting mechanism Main gearbox and drive - Special tools Description Tool No. Puller 380000320 ZEIL04CS0101A0B 47846161 05/03/2015 58.3 [58.110] / 3...
- Page 111 Attachments/Headers - Attachment/Header cutting mechanism Sickle cutterbar - Special tools Description Tool No. Head blade straightening lever 380000336 47846161 05/03/2015 58.3 [58.110] / 4...
- Page 112 Attachments/Headers - Attachment/Header cutting mechanism Cutting blade drive shaft - Exploded view ZEIL10GH0002F0B Belt tensioner pulley Sprocket 15. Belleville washer 22. Nut Belt 16. Pulley 23. Retaining ring Bolt 10. Washer 17. Key 24. Washer 11. Ball bearing 18. Bolt 25.
- Page 113 Attachments/Headers - Attachment/Header cutting mechanism Wobble box - Remove 1. Loosen the belt tensioner (1) and remove the belt (2). ZEIL04GH0016A0B 2. Remove the bolt (6). NOTE: Turn at the drive pulley to have the best position of the knife arm. ZEIL04GH0019A0B 3.
- Page 114 Attachments/Headers - Attachment/Header cutting mechanism Wobble box - Disassemble Prior operation: Wobble box - Remove (58.110). 1. Flatten the locking plate (4). Remove the nut (2) and the washer (3). Remove the knife arm (1) from the splined end of the output shaft tapping it gently with a plastic hammer.
- Page 115 Attachments/Headers - Attachment/Header cutting mechanism 5. Remove the inner bearing (17) from the input shaft (18),using a bearing puller. ZEIL04GH0006A0B 6. Remove the ring nut (19) to remove the input shaft and the eccentric bearing housing (20) with the bearings (21).
- Page 116 Attachments/Headers - Attachment/Header cutting mechanism Wobble box - Assemble 1. Assemble the eccentric bearing (21) and the bearing housing (20) onto the eccentric shaft. NOTICE: Assemble with the set screw holes facing to- wards the eccentric shaft drive end. ZEIL04GH0008A0B 2.
- Page 117 Attachments/Headers - Attachment/Header cutting mechanism 5. Install the complete eccentric mechanism. Clean and de-grease the contact surface between the box and it's cover prior to adding L ® 515 ( OCTITE ® A136 or FIT® FD1042) as sealant. ERMABOND OMNI NOTICE: Do not add lubricant or operate the wobble box for one hour.
- Page 118 Attachments/Headers - Attachment/Header cutting mechanism 7. Install the seal on input shaft (18). Install the two needle bearings (23) in the bearing hous- ing. (24) is the top of the output shaft. Install the seal (22). Distance X should be between 6.85 - 7.85 mm (0.3 - 0.3 in).
- Page 119 Attachments/Headers - Attachment/Header cutting mechanism 8. Install the bearing housing (9) with the two needle bear- ings and the seal on the wobble box. Apply L ® OCTITE 542 ( FIT® 80 M or P ® A130) to the four OMNI ERMABOND bolts and tighten equal and crosswise onto 100 N·m...
- Page 120 Attachments/Headers - Attachment/Header cutting mechanism Wobble box - Install NOTICE: When new bolts are used, a sealant is foreseen on the bolts. When the bolts are re-used, lock the five bolts at the bottom of the wobble box with L ®...
- Page 121 Attachments/Headers - Attachment/Header cutting mechanism Wobble box - Filling 1. Remove the filler plug (25). 2. Fill the wobble box with 0.9 l (0.24 US gal) oil. Refer to your Operator's Manual for the oil specifica- tions. 3. Reinstall the filler plug (25) with a torque of 10 - 15 N·m (7.4 - 11.1 lb ft).
- Page 122 Attachments/Headers - Attachment/Header cutting mechanism Wobble box - Adjust 1. The clearance at (7) between the connection planes of the knife arm and the knife head, while the bottom of the knife section touches on the knife guards, may be maximum 0.5 mm (0.02 in).
- Page 123 Attachments/Headers - Attachment/Header cutting mechanism Sickle cutterbar - Check 1. Move the knife bar in extreme left position and do the following check: The knife touches on the knife guards and there is a maximum clearance of "X" = 0.2 mm ( 0.007 in) on the nearest place near to the knife hold-on clips.
- Page 124 Attachments/Headers - Attachment/Header cutting mechanism Tensioner pulleys - Remove NOTE: Some annotations are not shown in the drawings. For more details and references to annotations, refer to Cutting blade drive shaft - Exploded view (58.110). 1. Loosen the auger drive chain tensioner and open the chain.
- Page 125 Attachments/Headers - Attachment/Header cutting mechanism Tensioner pulleys - Install NOTE: Some annotations are not shown in the drawings. For more details and references to annotions, refer to Cutting blade drive shaft - Exploded view (58.110). 1. Clean up the conical part of the shaft (6). If there are traces of slippage, polish the shaft (6).
- Page 126 Index Attachments/Headers - 58 Attachment/Header cutting mechanism - 110 Cutting blade drive shaft - Exploded view ............. . 5 Main gearbox and drive - Special tools .
- Page 127 47846161 05/03/2015 58.3 [58.110] / 20...
-
Page 128: [58.120] Attachment/Header Feed Auger
Attachments/Headers - 58 Attachment/Header feed auger - 120 2060 47846161 05/03/2015 58.4 [58.120] / 1... - Page 129 Contents Attachments/Headers - 58 Attachment/Header feed auger - 120 SERVICE Feed auger Remove ................. . 3 Install .
- Page 130 Attachments/Headers - Attachment/Header feed auger Feed auger - Remove Prior operation: Slip clutch - Remove (60.122) valid for High Capacity Grain Headers up to 24ft. Prior operation: Slip clutch - Remove (60.122) valid for 30 ft High Capacity Grain Headers and all Extra Capacity Grain headers. Prior operation: Feed auger drive chain Drive sprocket - Remove (58.120) valid for Varifeed™...
- Page 131 Attachments/Headers - Attachment/Header feed auger 4. Remove the lever (4), use a soft hammer and a suitable crow bar. NOTE: If required, remove the paint from the shaft. ZEIL06GH0033A0B ZEIL06GH0034A0B On the left hand side 5. Loosen the Allen screw (5) on the bearing collar (6). ZEIL06GH0035A0B 6.
- Page 132 Attachments/Headers - Attachment/Header feed auger 7. Remove the tie rod (7). ZEIL06GH0037A0B 8. Remove the bolt (8) and the tie rod (9). ZEIL06GH0038A0B 9. Loosen the three nuts (10) and remove the support as- sembly (11). ZEIL06GH0039A0B 10. Remove the three bolts (13) and the three nuts (12) and remove the shaft end (14).
- Page 133 Attachments/Headers - Attachment/Header feed auger 11. Put the reel into an suitable position so the auger can be removed. ZEIL06GH0041A0B 12. Remove the auger. 47846161 05/03/2015 58.4 [58.120] / 6...
- Page 134 Attachments/Headers - Attachment/Header feed auger Feed auger - Install DANGER Lift and handle all heavy components using lifting equipment of appropriate lifting capacity. Make sure that units or parts are supported by suitable slings or hooks. Make sure that no-one is in the vicinity of the load to be lifted.
- Page 135 Attachments/Headers - Attachment/Header feed auger 5. Reinstall the tie rod (9) and the bolt (8) with the nuts. ZEIL06GH0038A0B 6. Install the tie rod (7). ZEIL06GH0037A0B 7. Reinstall the bearing collar (6). Lock collar of bearings by tapping it in normal direction and lock screws with the two punch holes across each other without damag- ing the internal hexagon.
- Page 136 Attachments/Headers - Attachment/Header feed auger On the right hand side 9. Reinstall the lever (4). ZEIL06GH0033A0B 10. Reinstall the two washers (3) with the two nuts (2) and fasten the nut (1). ZEIL06GH0032A0B Next operation: Slip clutch - Install (60.122) valid for High Capacity Grain Headers up to 24ft. Next operation: Slip clutch - Install (60.122) valid for 30 ft.
- Page 137 Attachments/Headers - Attachment/Header feed auger Retractable finger assembly - Remove 1. Remove the auger cover (1). ZEIL04GH0025A0B 2. Remove the auger cover (2). ZEIL04GH0026A0B 3. Remove all the hair cotter pins (3) and the retractable tines (4). ZEIL04GH0027A0B 4. On the right-hand side, loosen the Allen screw and the lock collar.
- Page 138 Attachments/Headers - Attachment/Header feed auger 5. On the left-hand side, loosen the two bolts (6) of the crank (7). NOTE: Before remove the bolts, put a mark on the shaft and the crank. 6. Move the crank (7) completely to the left. ZEIL04GH0027A0B 7.
- Page 139 Attachments/Headers - Attachment/Header feed auger Retractable finger assembly - Install 1. Install the eccentric shaft through the opening in the middle of the auger. 2. On the right-hand side, install the three bolts (5). NOTICE: Make sure the cranks are in line. ZEIL04GH0028A0B 3.
- Page 140 Attachments/Headers - Attachment/Header feed auger 7. Reinstall the cover (1). ZEIL04GH0025A0B 47846161 05/03/2015 58.4 [58.120] / 13...
- Page 141 Index Attachments/Headers - 58 Attachment/Header feed auger - 120 Feed auger - Install ................. 7 Feed auger - Remove .
- Page 142 47846161 05/03/2015 58.4 [58.120] / 15...
- Page 143 All rights reserved. No part of the text or illustrations of this publication may be reproduced. CASE IH policy is one of continuous improvement and the right to change prices, specification or equipment at any time without notices is reserved.
- Page 144 SERVICE MANUAL Product feeding 2060 47846161 05/03/2015...
-
Page 145: Product Feeding
Contents Product feeding - 60 [60.150] Feeder drive system ..............60.1 47846161 05/03/2015... -
Page 146: [60.150] Feeder Drive System
Product feeding - 60 Feeder drive system - 150 2060 47846161 05/03/2015 60.1 [60.150] / 1... - Page 147 Contents Product feeding - 60 Feeder drive system - 150 SERVICE Slip clutch Remove ................. . 3 Install .
- Page 148 Product feeding - Feeder drive system Slip clutch - Remove NOTE: For 30ft headers, from series 7048 onwards, the torque limiter is relocated to the header p.t.o. drive shaft. Refer to: Power Take-Off (PTO) shaft - Remove (14.100). 1. Loosen and remove the belt (2). 2.
- Page 149 Product feeding - Feeder drive system Slip clutch - Install NOTE: For 30ft headers, from series 7048 onwards, the torque limiter is relocated to the header p.t.o. drive shaft. Refer to: Power Take-Off (PTO) shaft - Install (14.100). 1. Put the torque limiter (5) on the shaft. 2.
- Page 150 Index Product feeding - 60 Feeder drive system - 150 Slip clutch - Install ................. . 4 Slip clutch - Remove .
- Page 151 All rights reserved. No part of the text or illustrations of this publication may be reproduced. CASE IH policy is one of continuous improvement and the right to change prices, specification or equipment at any time without notices is reserved.
- Page 152 SPECIAL TOOL INDEX Genuine Reference PAGE 380000352 [Wiring End Cable Wiring harnesses - Special tools 2 55.2 / 3 AMP Pin Crimping Pliers] 80679968 [Pin Removal Wiring harnesses - Special tools 2 55.2 / 3 Tool, Suitable To Remove Pins From Electronic Box Connectors And Sort Likes] 380000354 [Timer Pin Puller] Wiring harnesses - Special tools 2 55.2 / 3...
- Page 153 All rights reserved. No part of the text or illustrations of this publication may be reproduced. CASE IH policy is one of continuous improvement and the right to change prices, specification or equipment at any time without notices is reserved.
Need help?
Do you have a question about the 2060 and is the answer not in the manual?
Questions and answers