Page 1
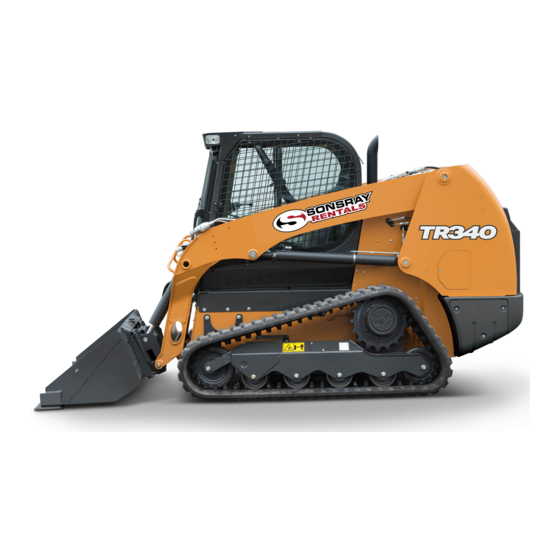
SR270 / SV340 Tier 4B (final) Alpha Series Skid Steer Loader PIN NHM435463 and above TR340 / TV380 Tier 4B (final) Alpha Series Compact Track Loader PIN NHM435463 and above SERVICE MANUAL Part number 48060319 edition English November 2017...
In any case, no warranty is given or attributed on the product manufactured or marketed by the manufacturer in case of damages caused by parts and/or components not approved by the manufacturer.
13. When transporting on a road or highway, use accessory lights and devices for adequate warning to the opera- tors of other vehicles. In this regard, check local government regulations. Various safety lights and devices are available from your CASE CONSTRUCTION dealer. 14. Practice safety 365 days a year.
Improper disposal of batteries can contaminate the soil, groundwater, and waterways. CASE CONSTRUCTION strongly recommends that you return all used batteries to a CASE CONSTRUCTION dealer, who will dispose of the used batteries or recycle the used batteries properly.
INTRODUCTION Torque - Minimum tightening torques for normal assembly METRIC NON-FLANGED HARDWARE NOM. LOCKNUT LOCKNUT SIZE CL.8 CL.10 CLASS 8.8 BOLT and CLASS 10.9 BOLT and W/CL8.8 W/CL10.9 CLASS 8 NUT CLASS 10 NUT BOLT BOLT PLATED PLATED UNPLATED UNPLATED W/ZnCr W/ZnCr 2.2 N·m (19 lb...
Page 14
INTRODUCTION METRIC FLANGED HARDWARE NOM. CLASS 8.8 BOLT and CLASS 10.9 BOLT and LOCKNUT LOCKNUT SIZE CLASS 8 NUT CLASS 10 NUT CL.8 CL.10 W/CL8.8 W/CL10.9 BOLT BOLT PLATED PLATED UNPLATED UNPLATED W/ZnCr W/ZnCr 2.4 N·m (21 lb 3.2 N·m (28 lb 3.5 N·m (31 lb 4.6 N·m (41 lb 2.2 N·m (19 lb...
Page 15
INTRODUCTION 1. Manufacturer's Identification 2. Property Class 3. Clock Marking of Property Class and Manufacturer's Identification (Optional), i.e. marks 60° apart indicate Class 10 properties, and marks 120° apart indicate Class 8. INCH NON-FLANGED HARDWARE LOCKNUT LOCKNUT NOMINAL SAE GRADE 5 BOLT SAE GRADE 8 BOLT GrB W/ Gr5 GrC W/ Gr8...
Page 17
INTRODUCTION Inch Lock Nuts, All Metal (Three optional methods) 20090268 Grade Identification Grade Corner Marking Method (1) Flats Marking Method (2) Clock Marking Method (3) Grade A No Notches No Mark No Marks Grade B One Circumferential Notch Letter B Three Marks Grade C Two Circumferential Notches...
INTRODUCTION Torque - Standard torque data for hydraulics INSTALLATION OF ADJUSTABLE FITTINGS IN STRAIGHT THREAD O RING BOSSES 1. Lubricate the O-ring by coating it with a light oil or petroleum. Install the O-ring in the groove adjacent to the metal backup washer which is assembled at the extreme end of the groove (4).
Page 19
INTRODUCTION PIPE THREAD FITTING TORQUE PIPE THREAD FITTING Torque (Maximum) Thread Size Before installing and tightening pipe fittings, clean the 1/8-27 13 N·m (10 lb ft) threads with a clean solvent or Loctite cleaner and ap- 1/4-18 16 N·m (12 lb ft) ply sealant for all fittings including stainless steel or for 3/8-18 22 N·m (16 lb ft)
Only use CNH Original Parts or CASE CONSTRUCTION Original Parts. Only genuine spare parts guarantee the same quality, duration, and safety as original parts, as they are the same parts that are assembled during standard production. Only CNH Original Parts or CASE CONSTRUCTION Original Parts can offer this guarantee.
Page 21
W0111A Special tools The special tools that CASE CONSTRUCTION suggests and illustrate in this manual have been specifically re- searched and designed for use with CASE CONSTRUCTION machines. The special tools are essential for reliable repair operations. The special tools are accurately built and rigorously tested to offer efficient and long-lasting oper- ation.
INTRODUCTION Basic instructions - Video links This service manual contains video links that are viewable through the eTIM service or through the Dealer Portal. Video links are denoted by the YouTube™ icon within the document, and can be viewed in the eTIM service instruction or through the Dealer Portal.
INTRODUCTION Hydraulic contamination Contamination in the hydraulic system is a major cause of the malfunction of hydraulic components. Contamination is any foreign material in the hydraulic oil. Contamination can enter the hydraulic system in several ways: • When you drain the oil or disconnect any line •...
96.5 L (25.5 US gal) Specifications #2 Diesel ultra-low sulfur Cooling system Capacity 19.0 L (5.0 US gal) Specifications CASE AKCELA ACTIFULL™ OT EXTENDED LIFE COOLANT Hydraulic system Reservoir capacity 22.7 L (6.0 US gal) System capacity: 45.4 L (12.0 US gal) Specifications ™...
-40 °F -22 °F -4 °F 14 °F 32 °F 50 °F 68 °F 86 °F 104 °F 122 °F (H) CASE CONSTRUCTION recommends the use of an engine oil pan heater or coolant block heater in this range. 48060319 28/08/2017...
NOTE: CNHi recommends SAE 10W30 for applications where continuous operations above 38 °C (100 °F) ambient temperature or frequent roading applications (above 20 – 30 min) are common. NOTE: CNHi recommends CASE AKCELA HYDRAULIC EXCAVATOR FLUID for improved cold weather operation. Standard factory fill oil T ™...
INTRODUCTION Product identification Write your machine model number, Product Identification Number (PIN), and serial numbers on the lines provided below. Always give these numbers and component plate numbers to your dealer when you need parts or information for your machine. Make a record of the numbers.
Page 28
INTRODUCTION Roll Over Protective Structure (ROPS) certification plate. • Front edge (lower) inside cab. 931007505A Engine serial number plate location • On the side of the Exhaust Gas Recirculation (EGR) cooler. • On top of the valve cover. • The serial number is also stamped on the engine front cover 23119866 Hydrostatic pump...
Page 29
INTRODUCTION Bucket identification plate (part number and description) BT04F026-01 48060319 28/08/2017...
INTRODUCTION Product identification - Machine orientation RAPH12SSL0057BA The terms front (1), right (2), rear (3), and left (4) are used in this manual to indicate the direction as seen from the operator's seat. 48060319 28/08/2017...
Engine - Engine and crankcase Engine - Drain fluid - Remote oil drain 1. Remove the access cover (2) by removing the mount- ing bolts (1). 931001637 2. Remove the drain plug (1). 3. When the oil has drained from the engine, install the drain plug (1).
C0107B CAUTION Chemical hazard! Avoid getting engine oil on your skin. In case of skin contact, wash with running water. Failure to comply could result in minor or moderate injury. C0202B NOTE: The images may differ slightly based on the machine configuration. The procedure is the same.
Page 38
Engine - Engine and crankcase 4. Thread the quick-disconnect hose assembly (1) (48109944) onto the quick-disconnect drain fitting (2) (48103849). 5. Allow the oil to drain completely from the crankcase. 6. Remove the receptacle, with the used oil, from under the machine.
Page 39
Engine - Engine and crankcase 9. Install the cover (1) underneath the machine and se- cure with the hardware (2). RAPH17SSL0168QA Next operation: See Engine - Filling (10.001) for the proper procedure to refill the engine oil fluid. 48060319 28/08/2017 10.1 [10.001] / 6...
Engine - Engine and crankcase Engine - Remove WARNING Avoid injury! Always do the following before lubricating, maintaining, or servicing the machine. 1. Disengage all drives. 2. Engage parking brake. 3. Lower all attachments to the ground, or raise and engage all safety locks. 4.
Page 41
Engine - Engine and crankcase 1. Remove the access plate (1) for the engine oil pan by removing the bolts. RAPH12SSL0233AA 2. Disconnect the hose (1) for the oil drain plug from the engine oil pan. RAPH12SSL0232AA 3. Remove the mounting bolts for the overflow bottle. 4.
Page 42
Engine - Engine and crankcase 5. Remove the air cooler (1) by removing the bolts. RAIL14SSL0798BA 6. Disconnect the hoses from the radiator (1) by loosening the clamps. 7. Remove the radiator (2) from the shroud by removing the bolts. RAIL14SSL0797BA 8.
Page 43
Engine - Engine and crankcase 9. Detach the mount (1) for the oil dip stick from the shroud. RAIL14SSL0847BA 10. Disconnect the overflow tube from the filler neck. RAPH17SSL0165BA 11. Remove the shroud (1) by removing the screws. RAIL14SSL0795BA 48060319 28/08/2017 10.1 [10.001] / 10...
Page 44
Engine - Engine and crankcase 12. Disconnect the engine connectors (1) from the engine. 13. If your machine has A/C, disconnect the A/C lines (2) to the A/C compressor. 14. If your machine has A/C, disconnect the A/C compres- sor (3). 15.
Page 45
Engine - Engine and crankcase 20. Remove the right-hand side hood stop (1). RAIL14SSL0849BA 21. Disconnect the restriction sensor (1). 22. Detach the air cleaner assembly (2) from the rear deck by removing the hardware. RAIL14SSL0851BA 23. Detach the rear deck (1) from the chassis, and remove the rear deck (1) by removing the bolts.
Page 46
Engine - Engine and crankcase 24. Disconnect the NOx module (4), NH3 module (3), and the temperature sensor (2). 25. Remove any wire ties, P-clamps, and retainers that are securing these wires. 26. Detach the NOx module (1) from the bracket for the control modules.
Page 47
Engine - Engine and crankcase 30. Remove the retaining straps (1) for the SCR muffler. RAIL14SSL0854BA 31. Detach the fuel filter assembly (1) from the chassis by removing the bolts. 32. Lay the fuel filter assembly (1) on the engine. RAIL14SSL0855BA 33.
Page 48
Engine - Engine and crankcase 37. Remove the muffler mounting bracket (1). RAIL14SSL0844BA 38. Disconnect the left-hand coolant line (4) and the right- hand coolant line (2). 39. Disconnect the Diesel Exhaust Fluid (DEF) hose (1). 40. Disconnect the injector (3). 41.
Page 49
Engine - Engine and crankcase 44. Remove the exhaust clamp (1). 45. Remove the exhaust tube (2). RAIL14SSL0784BA 46. Detach the lines (1) for the remote, engine oil filter from the engine. 931001923 47. If your machine has a cab heater, disconnect the heater hose from the engine.
Page 50
Engine - Engine and crankcase 49. Support the hydrostatic drive with a suitable lifting de- vice (1). RAPH12SSL0057AA 50. Remove the mounting bolts (1) for the hydrostatic drive assembly. 931001928 51. Separate the hydrostatic drive assembly (2) from the engine bell housing (1). 931001936 52.
Page 51
Engine - Engine and crankcase 54. Detach the positive battery cable (2) from the starter. 55. Disconnect the starter (1). 56. Disconnect the alternator (3). 57. Detach the ground cable (5) from the engine. RAIL14SSL0778BA 58. Detach the positive battery cable (1) from the alterna- tor.
Page 52
Engine - Engine and crankcase 61. Attach adequate lifting equipment to the engine. 62. Carefully lift the engine from the chassis. 931001946 Next operation: Engine - Install (10.001) 48060319 28/08/2017 10.1 [10.001] / 19...
Page 53
Engine - Engine and crankcase Engine - Install Prior operation: Engine - Remove (10.001) 1. Carefully lower the engine into the chassis. 931001946 2. Connect the feed line (1) and return line (2) for the fuel to the injection pump. RAIL14SSL0777BA 3.
Page 54
Engine - Engine and crankcase 5. Install the positive battery cable (2) onto the starter. 6. Connect the starter (1). 7. Connect the alternator (3). 8. Connect the ground cable (5) to the engine. 9. Secure all wires, harnesses, and hoses away from hot components.
Engine - Engine and crankcase 15. Engage the hydrostatic drive assembly (2) to the en- gine bell housing (1). 931001936 16. Apply L ® 243™ to the threads of the mounting OCTITE bolts (1) for the hydrostatic drive assembly. 17. Install the mounting bolts (1). Torque the mounting bolts (1) for the hydrostatic drive assembly to 87 –...
Page 56
Engine - Engine and crankcase 21. Attach the exhaust tube (2) to the exhaust manifold. Torque the clamp (1) to 11 – 15 N·m (97 – 133 lb in). RAIL14SSL0784BA 22. Place the diesel oxidation catalyst (DOC) muffler in position. 23.
Page 57
Engine - Engine and crankcase 28. Attach the DOC muffler to the muffler mounting bracket. Torque the bolts (1) to 54 – 73 N·m (40 – 54 lb ft). 29. Attach the exhaust tube (3) to the DOC muffler. Torque the clamp (2) to 11 – 15 N·m (97 – 133 lb in). RAIL14SSL0787BA 30.
Page 58
Engine - Engine and crankcase 35. Install the retaining straps (1) for the SCR muffler. RAIL14SSL0854BA 36. Attach the SCR muffler (1) to the muffler mounting bracket. RAIL14SSL0853BA 37. Attach the exhaust tube (1) to the SCR muffler. Torque the clamp (2) to 11 – 15 N·m (97 – 133 lb in). 38.
Page 59
Engine - Engine and crankcase 39. Attach the NOx module (1) to the bracket for the con- trol modules. 40. Connect the NOx module (4), NH3 module (3), and temperature sensor (2). 41. Secure all wires, harnesses, and hoses away from hot components.
Page 60
Engine - Engine and crankcase 45. Attach the fuel filter assembly (1) to the chassis. 46. Lay the fuel filter assembly (1) on the engine. 47. Attach the air cleaner assembly (3) the rear deck. Torque the bolts (2) to 27 – 37 N·m (20 – 27 lb ft). RAIL14SSL0855BA 48.
Page 61
This as a preview PDF file from best-manuals.com Download full PDF manual at best-manuals.com...
Need help?
Do you have a question about the Alpha Series and is the answer not in the manual?
Questions and answers