Table of Contents
Advertisement
Available languages
Available languages
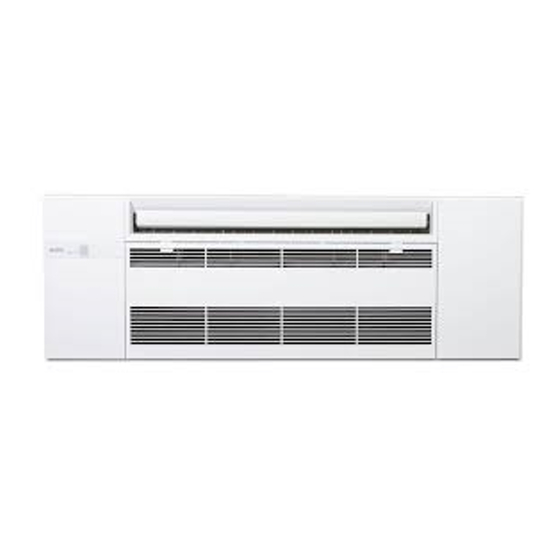
MITSUBISHI Room Air Conditioner Optional Grille
Model MLP-448WU
INSTALLATION MANUAL
Correct installation is essential for good performance of the product and safety. Be sure to read this manual
before installation.
THE FOLLOWING SHOULD ALWAYS BE OBSERVED FOR SAFETY
• Be sure to read "THE FOLLOWING SHOULD ALWAYS BE OBSERVED FOR SAFETY" before installation.
• Be sure to observe the warnings and cautions specified here as they include important items related to safety.
• After reading this manual, be sure to keep it together with the OPERATING INSTRUCTIONS for future reference.
Do not perform installation by yourself (user).
Incomplete installation could cause fire or electric shock, injury due to
the unit falling, or leakage of water. Consult the dealer from whom you
purchased the unit or a qualified installer.
Perform the installation securely referring to the installation
manual.
Incomplete installation could cause fire or electric shock, injury due to the
unit falling, or leakage of water.
1. Components
● This kit contains the following parts.
Q'ty
Remark
2. Checks before installation
● Before installing the grille (1), make sure the indoor unit is square with the ceiling opening (or parallel to the wall-ceiling joint).
● Check that the 4 points for securing the grille (1) on the indoor unit are level with the ceiling surface.
Use the installation template supplied with the indoor unit to arrange the position of the indoor unit so that the 4 points for securing the grille (1) are
level with the ceiling surface with a tolerance of 3 mm (1/8 inch). (Fig. 1)
Note: Instructions for using the installation template are provided on the installation template itself.
Note: If the misalignment between the 4 points for securing the grille (1) and the ceiling surface is more than 3 mm (1/8 inch), the intake
grille may not open or close properly.
● Make sure the following is completed: insulation for the refrigerant pipes, drainage pipes, etc. and wiring connections and arrangements.
● Check that any material like ceiling insulation does not protrude to the ceiling opening.
Points for securing grille (1)
Points for securing grille (1)
(1) Grille
1
WARNING
(Could lead to death, serious injury, etc.)
Install the unit securely in a place which can bear the weight of the
unit.
If the installation location cannot bear the weight of the unit, the unit could
fall causing injury.
Be sure to use the parts provided or specified parts for the installa-
tion work.
The use of defective parts could cause fire or electric shock, injury due to
the unit falling, or leakage of water.
Use appropriate protective equipment and tools for safety.
Failure to do so could cause injury.
(2) Screw
6
M5 × 16
Ceiling surface
Point for securing grille (1)
Fig. 1
(3) Screw
1
4 × 12
Drain pan
Make sure these surfaces are flush
with each other (0 - 3 mm [0 -1/8 inch]).
En-1
Advertisement
Table of Contents

Related Manuals for Mitsubishi Electric MLP-448WU


Summary of Contents for Mitsubishi Electric MLP-448WU
- Page 1 MITSUBISHI Room Air Conditioner Optional Grille Model MLP-448WU INSTALLATION MANUAL Correct installation is essential for good performance of the product and safety. Be sure to read this manual before installation. THE FOLLOWING SHOULD ALWAYS BE OBSERVED FOR SAFETY • Be sure to read “THE FOLLOWING SHOULD ALWAYS BE OBSERVED FOR SAFETY” before installation.
-
Page 2: Grille Installation
3. Grille installation 1. Open the intake grille by pressing the 2 tabs on the intake grille to the direction indicated by arrows. (Fig. 2) Slide the 2 shafts inward and remove the intake grille from the shafts. (Fig. 3) Remove the safety strings from the grille and remove the intake grille. (Fig. 3) Shaft 2. Remove the side cover fixing screws on the both sides. Open the side covers L/R and remove the safety strings from the grille, then Slide remove the side covers. (Fig. 3) inward. 3. Remove the screw cover at the center of the grille. (Fig. 3) Intake grille Side cover Side cover fixing screw fixing screw Fig. 3 Intake grille Side cover safety strings Screw cover safety string Fig. -
Page 3: Checks After Installation
3. Grille installation 10. Hook the safety strings of the side covers L/R to the grille and install the side covers. (Fig. 8) • Make sure that the catches of the side covers L/R are engaged securely. (Fig. 8) • Make sure that the safety strings do not hang out of the side covers L/R. Attach to the 11. Fix the side covers L/R with the side cover fixing screws removed in step 2. (Fig. 9) hook on the grille. Hook for engaging catch Side cover safety string Hooks for engaging catches (3 positions) Side cover Side cover fixing screw Hook for Fig. 9 engaging catch Fig. 8 Attach to the hook 12. Attach the Air cleaning filters (option) to the hooks for them on the on the grille. Shaft grille. (Fig. 10) 13. Attach the safety strings of the intake grille to the grille and insert the shafts into the holes of the intake grille. Insert Intake grille safety string 14. Close the intake grille. (Fig. 11) • Press the intake grille firmly against the grille until a "click" is heard from the each tab on the both sides. Intake grille Press 3 points. Hooks Hooks Fig. -
Page 4: Por Razones De Seguridad, Deberá Observarse Siempre Lo Siguiente
Rejilla opcional para aire acondicionado de sala MITSUBISHI Modelo MLP-448WU MANUAL DE INSTALACIÓN Una instalación correcta es esencial para el buen funcionamiento del producto y su seguridad. Asegúrese de leer este manual antes de la instalación. POR RAZONES DE SEGURIDAD, DEBERÁ OBSERVARSE SIEMPRE LO SIGUIENTE •... -
Page 5: Instalación De La Rejilla
3. Instalación de la rejilla 1. Abra la rejilla de entrada presionando las 2 lengüetas de dicha rejilla en la dirección indicada por las flechas. (Fig. 2) Deslice los 2 ejes hacia el interior y retire la rejilla de entrada de los ejes. (Fig. 3) Retire los cordones de seguridad de la rejilla de entrada y retírela. - Page 6 3. Instalación de la rejilla 10. Enganche los cordones de seguridad de las cubiertas laterales I/D a la rejilla e instálelas. (Fig. 8) • Compruebe que los cierres de las cubiertas laterales I/D estén enganchados de forma segura. (Fig. 8) Colocar en el gancho de la •...
-
Page 7: Contrôles Avant L'installation
Grille optionnelle du climatiseur individuel MITSUBISHI Modèle MLP-448WU NOTICE D’INSTALLATION Seule une installation correcte vous permettra d’obtenir un fonctionnement optimal conforme aux règles de sécurité. Veuillez lire ce manuel attentivement avant de procéder à l’installation. INSTRUCTIONS A RESPECTER A TOUT MOMENT PAR MESURE DE SECURITE •... -
Page 8: Installation De La Grille
3. Installation de la grille 1. Ouvrez la grille d'admission en appuyant sur les 2 languettes de la grille d'admission dans le sens indiqué par les flèches. (Fig. 2) Glissez les 2 axes vers l'intérieur et retirez la grille d'admission des axes. (Fig. 3) Retirez les cordons de sécurité... - Page 9 3. Installation de la grille 10. Accrochez les cordons de sécurité des caches latéraux G/D à la grille et montez les caches latéraux. (Fig. 8) • Assurez-vous que les taquets des caches latéraux G/D sont bien engagés. (Fig. 8) • Assurez-vous que les cordons de sécurité ne dépassent pas des caches latéraux G/D. Fixer au crochet sur la grille.
- Page 12 HEAD OFFICE: TOKYO BUILDING, 2-7-3, MARUNOUCHI, CHIYODA-KU, TOKYO 100-8310, JAPAN DT79B450H01...
Need help?
Do you have a question about the MLP-448WU and is the answer not in the manual?
Questions and answers