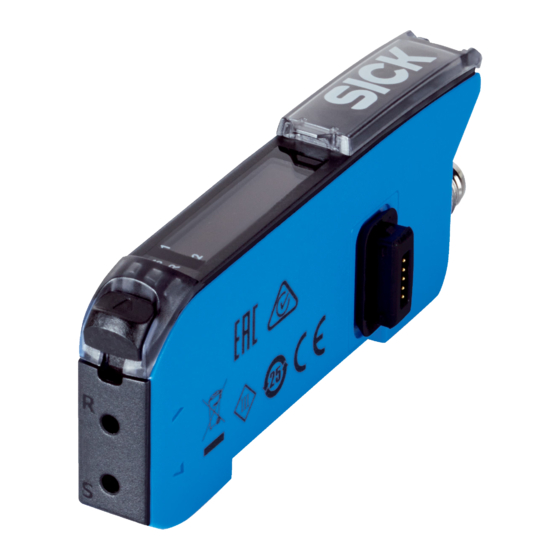
SICK WLL80 Analog Quick Start
Hide thumbs
Also See for WLL80 Analog:
- Operating instructions manual (74 pages) ,
- Quick start (4 pages)
Advertisement
Quick Links
8027945/12.10.2022
SICK AG
Erwin-Sick-Straße 1
DE-79183 Waldkirch
www.sick.com
WLL80 Analog
NO
2006/42/EC
SAFETY
UL Environmental Rating: Enclosure Type 1.
Quickstart in
other languages:
en/es/fr/it/pl/pt/ru,
8027404:
UL Satisfaction Ratings Listed or Recognized models
The total output current and ambient temperature will be restricted as follows
depends on the number of the sensors.
E300503
No control output setting
Stand-alone analog model:
Input: 12 - 24 Vdc, Class 2, Max. 0.126
A
Analog current output: Max. 0.024 A
Analog voltage output: Max. 10 V
Maximum Ambient Temperature
+55°C
Environmental
Enclosure Type Rateing: Type 1
Q U I C K S T A R T
en:
These instructions are only valid in connection with operating instructions
8027386. You can find the operating instructions at www.sick.com.
There may be additional commissioning-related requirements for WLL80x-
xxxxxxxxSxxxxxx devices. These can be found in the operating instructions.
Connection, mounting, and configuration may only be performed by trained spe‐
cialists.
Not a safety component in accordance with the EU Machinery Directive.
Do not install the sensor in places exposed to direct sunlight or other weather
conditions unless this is expressly permitted in the operating instructions.
de:
Diese Anleitung ist ausschließlich in Verbindung mit der Betriebsanleitung
8026879 gültig. Die Betriebsanleitung finden Sie unter www.sick.com.
Für die Geräte WLL80x-xxxxxxxxSxxxxxx kann es weitere, für die Inbetriebnahme
relevante Angaben geben. Diese finden Sie in der Betriebsanleitung.
Anschluss, Montage und Einstellung nur durch Fachpersonal.
Kein Sicherheitsbauteil gemäß EU-Maschinenrichtlinie.
Installieren Sie den Sensor nicht an Orten, die direkter Sonneneinstrahlung oder
sonstigen Wettereinflüssen ausgesetzt sind, ausser dies ist in der Betriebsanlei‐
tung ausdrücklich erlaubt.
zh:
本指南仅在配合使用 8027388 操作指南时有效。查看操作指南可访问
www.sick.com 网页。
针对设备 WLL80x-xxxxxxxxSxxxxxx 可能还有更多与调试相关的说明。请参考
操作指南对其进行查阅。
仅允许由专业人员进行连接、安装和设置。
非欧盟机械指令中定义的安全组件。
请勿将传感器安装在阳光直射或受其它气候影响的位置,除非操作指南中明确
允许。
ja:
本説明書は、 取扱説明書 8027387 との併用時に限り有効です。同取扱説明書
は www.sick.com から入手可能です。
機器 WLL80x-xxxxxxxxSxxxxxx では、 コミッショニングに関連する情報が更に
存在している可能性があります。それは取扱説明書に記載されています。
接続、取り付けおよび設定を行うのは専門技術者に限ります。
本製品は EU 機械指令の要件を満たす安全コンポーネントではありません。
取扱説明書で明確に許可されている場合を除いて、直射日光や天候の影響を
受ける場所には、センサを設置しないでください。
8027945/12.10.2022/de
Operating Instruction
8027947:
1 control output setting
Stand-alone analog model:
Input: 12 - 24 Vdc, Class 2, Max. 0.126
A
Output: 12 - 30 Vdc, Class 2, Max.
0.05 A
Analog current output: Max. 0.024 A
Analog voltage output: Max. 10 V
Maximum Ambient Temperature
+55°C
ko:
이 지침서는 작동 지침서 8027389와 함께 사용하는 경우에만 유효합니다. 작
동 지침서는 www.sick.com에 있습니다.
WLL80x-xxxxxxxxSxxxxxx 장치의 경우 커미셔닝과 관련된 추가 사항이 있을 수 있
습니다. 해당 정보는 작동 지침서에서 확인할 수 있습니다.
연결, 마운팅, 설정 작업은 반드시 전문 인력이 실시해야 합니다.
EU 기계류 지침에 따른 안전 부품이 아닙니다.
작동 지침서에서 명시적으로 허용하는 경우가 아니라면, 직사광선 또는 기타
날씨 영향에 노출된 장소에 센서를 설치하지 마십시오.
1
Operating and status indicators
Bedien- und Anzeigeelemente
操作及显示元件
6
1 2
5
7 8
1
S
R
A
4 3
1
Fiber optic interlock / Lichtleiterverriegelung / 光纤锁 / 光ファイバロック / 화이버
잠금 장치
2
Yellow LED: Status channel 1 / Gelbe LED: Status Kanal 1 / 黄色の LED: ステータ
ス チャネル 1 / 노란색 LED: 상태 채널 1 / 黄色 LED:状态通道 1
3
Green LED: supply voltage active / Grüne LED: Versorgungsspannung aktiv / 绿色
LED:工作电压激活 / 緑色の LED: 動作電圧有効 / 초록색 LED: 공급 전압 활성
상태
4
Yellow LED: status of analog output / Gelbe LED: Status Analogausgang / 黄色の
LED: アナログ出力の状態 / 노란색 LED: 아날로그 출력 상태 / 黄色 LED:模拟输
出的状态
5
Indicator for correctly inserted fibers / Anzeige für korrekt eingeführte Lichtleiter /
关于光纤正确插入的指示 / 光ファイバが正しく挿入されていることを表示するイン
ジケータ / 화이버 정상 삽입 표시부
6
Display / Anzeige / 显示 / 表示 / 표시부
7 + 8
+/- button / +/- Taste / 加/减按钮 / プラス/マイナスボタン / +/- 버튼
9
Menu / OK pushbutton / Menü- / OK-Taste / 菜单/确定键 / メニュー/OK ボタン /
메뉴/OK 버튼
ß
Teach-in / escape pushbutton / Teach-in- / Escapetaste / 示教键/退出键 / ティー
チイン/エスケープボタン / 티치인/이스케이프 버튼
2
Mounting
Montage
安装
Ambient temperature in operation
Umgebungstemperatur im Betrieb
运行环境温度
動作時の周囲温度
동작 시 주변 온도
–25°C ... +55 °C
–13°F ... +131 °F
2.1 Connecting fibers
Lichtleiter verbinden
连接光纤
6
3
1
4
2
5
en
1.
Open the fiber locking mechanism 1.
2.
Insert the fibers 4 into the openings provided (see receiver and sender
symbol on the housing) 2+5 as far as they will go (check the indicator for
correctly inserted fibers 6).
3.
Close the fiber locking mechanism 3.
操作/表示要素
조작 및 표시 요소
9
ß
OK
ESC
MENU TEACH
取付
마운팅
光ファイバの接続
화이버 연결하기
WLL80 Analog | SICK
1
Advertisement

Summary of Contents for SICK WLL80 Analog
- Page 1 Menu / OK pushbutton / Menü- / OK-Taste / 菜单/确定键 / メニュー/OK ボタン / 메뉴/OK 버튼 These instructions are only valid in connection with operating instructions 8027386. You can find the operating instructions at www.sick.com. ß Teach-in / escape pushbutton / Teach-in- / Escapetaste / 示教键/退出键 / ティー...
- Page 2 | To run mode reit. / 传感器已准备就绪。 / センサの稼動準備 が整っています。 / 센서가 사용 가능한 상태입 니다. Link to the Youtube video: / Link zum Youtube- Video: / Youtube 视频链接: / Youtube 動画への リンク: / Youtube 동영상 링크: 8027945/12.10.2022/de WLL80 Analog | SICK...
- Page 3 When I/O polarity is set to Push-pull and the sensor is connected with plus common circuits. / Wenn die I/O-Polarität auf Push-pull eingestellt ist und der Sensor mit gemein‐ samen Pluskreisen verbunden ist. / 当 I/O 极性设置为推挽式且传感器连接到公共正 8027945/12.10.2022/de WLL80 Analog | SICK...
- Page 4 정됩니다. 물체 감지 시 신호 차단 Switch-on 임계와 Switch-off 이력 현상 값 키우기 임계 간 편차(= 이력 현상 값)가 너무 작음 또는 물 체에서 반송되는 빛의 변 동이 설정된 이력 현상 값에 비해 너무 큼. 8027945/12.10.2022/de WLL80 Analog | SICK...


Need help?
Do you have a question about the WLL80 Analog and is the answer not in the manual?
Questions and answers