Farberware 6 Qt. Oval Slow Cooker Manual and Recipes
- Use and care manual (27 pages)
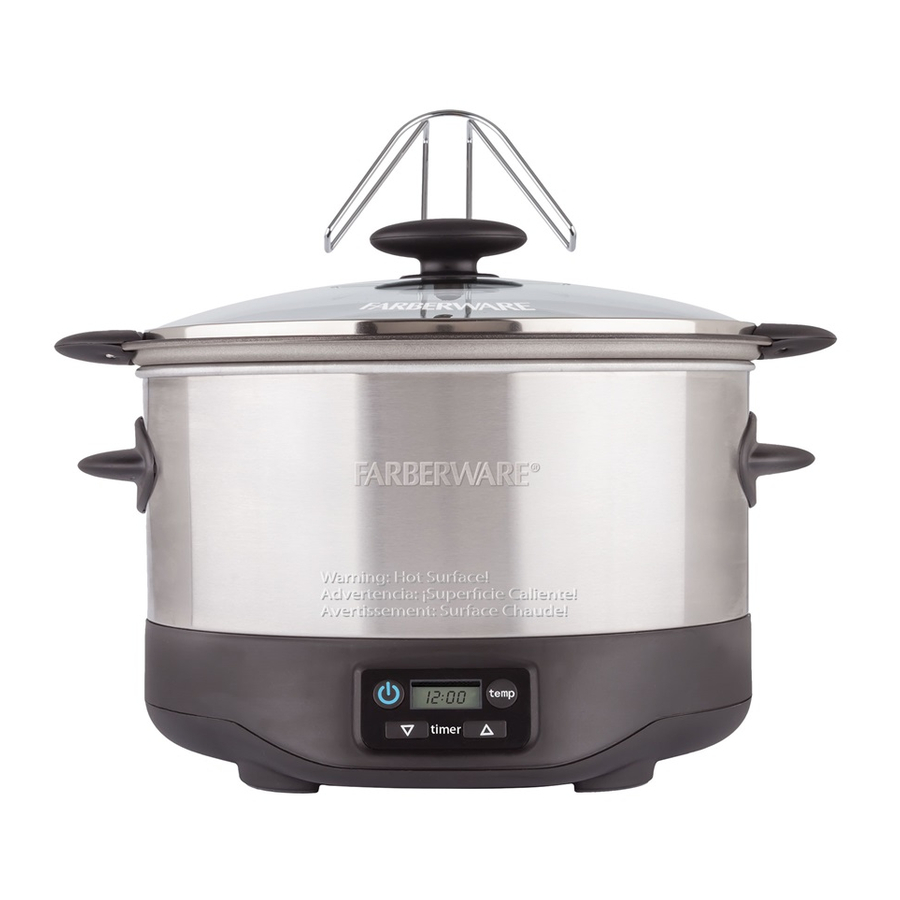
Advertisement
- 1 IMPORTANT SAFEGUARDS
- 2 ADDITIONAL SAFEGUARDS
- 3 PARTS
- 4 ILLUSTRATIONS
- 5 OPERATION
-
6
RECIPES
- 6.1 Italian Pot roast
- 6.2 Family Favorite Pot roast and vegetables
- 6.3 Heartland Style Pork Roast with Vegetables
- 6.4 Hungarian Beef in Creamy Paprika Sauce
- 6.5 All Time Favorite Chili
- 6.6 Spaghetti Sauce
- 6.7 Chicken and vegetable Soup
- 6.8 Asian Chicken Soup
- 6.9 South American Inspired Beef Stew
- 6.10 Tuscan Beef and Bean Soup
- 6.11 Aztec Chicken
- 6.12 Basil Chicken with Pasta
- 6.13 Tangy Meatballs
- 6.14 Spicy Lil' Franks
- 6.15 Low'n'Slow Pulled Pork
- 6.16 Slow and Smoky Brisket
- 6.17 Lemon Blueberry Poppy Seed loaf
- 6.18 Chocolate Almond Pound Cake
- 7 HINTS AND TIPS
- 8 CLEANING
- 9 TROUBLESHOOTING
- 10 TECHNICAL DATA
- 11 CUSTOMER ASSISTANCE
- 12 Documents / Resources
IMPORTANT SAFEGUARDS
When using electrical appliances, basic safety precautions should always be followed, including the following:
- Read all instructions before use.
- Do not touch hot surfaces. Use handles or knobs.
![shock hazard]() To protect against electric shock do not immerse cord or plugs in water or other liquid.
To protect against electric shock do not immerse cord or plugs in water or other liquid.- Close supervision is necessary when any appliance is used by or near children.
- Unplug from wall outlet when not in use and before cleaning. Allow to cool before putting on or taking off parts, and before cleaning the appliance.
- Do not operate any appliance with a damaged cord or plug, or after the appliance malfunctions or has been dropped or damaged in any manner. Call our toll-free customer assistance number for information on examination, repair, or adjustment.
![burn hazard]()
![shock hazard]()
The use of accessory attachments not recommended by the appliance manufacturer may result in fire, electric shock or injuries to persons.- Do not use outdoors or in a damp area.
- Do not let power cord hang over edge of table or counter, or touch hot surfaces.
- Do not place on or near a hot gas or electric burner, or in a heated oven.
- Extreme caution must be used when moving an appliance containing hot oil or other hot liquids.
- To disconnect, first place the appliance in stand-by mode by pressing the
![]() button and then remove plug from wall outlet.
button and then remove plug from wall outlet. - Do not use appliance for other than intended use.
- Always close and lock the lid when transporting food inside the pot.
- Never use the lid handle to lift up the locked pot. Always handle the appliance using the handles provided. Never exert excessive downward force on the lid or handles.
- Any other servicing should be performed by an authorized service representative.
 To protect against electric shock do not immerse cord or plugs in water or other liquid.
 button and then remove plug from wall outlet.
SAVE THESE INSTRUCTIONS!
ADDITIONAL SAFEGUARDS
This appliance is for HOUSEHOLD USE ONLY.
Extension cord
- A short detachable power-supply cord is to be provided to reduce the risk resulting from becoming entangled in or tripping over a longer cord.
- Longer extension cords are available and may be used if care is exercised in their use. If long detachable power-supply cord or extension is used:
- The marked electrical rating of the cord or extension cord should be at least as great as the electrical rating of the appliance.
- If the appliance is of the grounded type, the extension cord should be a grounding 3-wire cord; and
- The longer cord should be arranged so that it does not drape over the countertop or table top where it can be pulled on by children or tripped over unintentionally.
Polarized plug
![shock hazard]() This appliance has a polarized plug (one blade is wider than the other). To reduce the risk of electric shock, this plug is intended to fi t into a polarized outlet only one way. If the plug does not fit fully into the outlet, reverse the plug. If it still does not fit, contact a qualified electrician. Do not attempt to modify the plug in any way.
This appliance has a polarized plug (one blade is wider than the other). To reduce the risk of electric shock, this plug is intended to fi t into a polarized outlet only one way. If the plug does not fit fully into the outlet, reverse the plug. If it still does not fit, contact a qualified electrician. Do not attempt to modify the plug in any way.
PARTS

- Lid handle
- Lid
- Steam vent
- Lid lock
- Pot handles
- Pot
- Lid holder sockets
- Housing handles
- Cord storage
- Power cord with plug
- Control panel
- Housing
- Lid holder
- TEMP
![]() button (up)
button (up)- Display
![]() button (down)
button (down)![]() button (on/stand-by)
button (on/stand-by)
 button (up)
 button (down)
 button (on/stand-by)
ILLUSTRATIONS


OPERATION
Before first use
- Remove all packaging materials, labels and/or stickers from your appliance.
- Check package contents for completeness and damage. Do not operate the appliance if package content is incomplete or appears damaged. Return it immediately to the dealer.

Danger of suffocation! Packaging materials are not toys. Always keep plastic bags, foils and Styrofoam parts away from babies and children. Packaging material could block nose and mouth and prevent breathing.
- Place the appliance on a clean, flat and heat resistant surface.
- Connect the plug (10) to a suitable wall outlet (ill.
![]() ) (
) ( ![]() Using the appliance).
Using the appliance). - When using the appliance for the first time, it is recommended to operate it for at least 30 minutes, filled with 3 cups of water, on its highest setting with no lid (2) (
![]() Operation), until no odor is present. During use, ensure ample ventilation.
Operation), until no odor is present. During use, ensure ample ventilation.
 ) (
) (  Using the appliance).
Never let the power cord (10) come in contact with the appliance during use (ill.  )
)
- Let the appliance cool completely.
- Clean the appliance (
![]() Cleaning).
Cleaning).
Assembly
- Place the housing (12) on a clean, flat and heat resistant surface.
- Carefully place the pot (6) inside the housing (12) (ill.
![]() ).
). - Align the lid holder (13) with the lid holder sockets (7) and carefully push it into place (ill.
![]() ). Ensure the crossbar is flush with the lid holder support.
). Ensure the crossbar is flush with the lid holder support. - To remove the lid holder (13), carefully pull it out of the lid holder sockets (7).
 ).
). ). Ensure the crossbar is flush with the lid holder support.
Using the appliance
This appliance is for cooking food at low temperatures over extended periods of time.
NOTE: The appliance has a rated power of 200W. Before plugging it into the wall outlet, ensure that the electrical circuit is not overloaded with other appliances. This appliance should always be operated on a separate 120V~ 60Hz wall outlet.
Do not overfill the appliance (ill.  ). Do not use the appliance without the pot (6) or fill food directly into the housing (12) (ill.
  )
)
Do not use the pot (6) in an oven or microwave (ill.  ). You can use the pot (6) on a top stove or burner. Do not use it on an induction hob. .
- Carefully place the food in the pot (6) (ill.
![]() ). Do not overfill (ill.
). Do not overfill (ill. ![]() ).
). - Place the lid (2) on the pot (6) (ill.
![]() ). Do not lock it.
). Do not lock it.
 ). Do not overfill (ill.
  ). Do not lock it.
NOTE: Always use the appliance with the lid (2). Using the appliance without the lid (2) will increase required cooking times.
- Connect the plug (10) to a wall outlet (ill.
![]() ). The
). The ![]() button (18) lights up, "04:00" and "hi" flashes on the display (16).
button (18) lights up, "04:00" and "hi" flashes on the display (16). - Change the temperature setting by pressing the TeMP button (14).
- Change the cooking time by pressing the
![]() (15) or
(15) or ![]() (17) button, to either increase or decrease the cooking time respectively after setting the time, the temperature can be changed by pressing the TeMP button (14) repeatedly, the set time will not be changed.
(17) button, to either increase or decrease the cooking time respectively after setting the time, the temperature can be changed by pressing the TeMP button (14) repeatedly, the set time will not be changed.
 ). The
 NOTE: Pressing of any button will emit a signal tone.
| Press TEMP button (14) | Setting | Default timer/Display |
| 1 time | low | 06:00 / lo |
| 2 times | warm | 03:00 / warm |
| 3 times | high | 04:00 / hi |
NOTE: Pressing the ![]() (15) or
(15) or ![]() (17) button will increase or decrease the cooking time by increments of 30 minutes respectively. The maximum cooking time is 12 hours, the shortest is 30 minutes.
(17) button will increase or decrease the cooking time by increments of 30 minutes respectively. The maximum cooking time is 12 hours, the shortest is 30 minutes.
- Press the
![]() button (18) to start the cooking process. The set temperature is permanently displayed.
button (18) to start the cooking process. The set temperature is permanently displayed.
NOTE: During the cooking process, the cooking time or temperature can be adjusted by pressing the respective button. The display will flash for 5 seconds. The appliance will continue cooking with the new settings and the time counting down. If the ![]() button (18) is pressed after 5 seconds, the appliance will return to stand-by mode.
button (18) is pressed after 5 seconds, the appliance will return to stand-by mode.
- To stop the cooking process prematurely at any time, press the
![]() button (18). The time and temperature displayed will reset to "04:00" and "hi" and start flashing.
button (18). The time and temperature displayed will reset to "04:00" and "hi" and start flashing.
NOTE: During the cooking process, the time displayed will count down until it reaches one minute.
NOTE: It is recommended to stir the food from time to time to ensure even cooking.
Do not use metal utensils (ill. ![]() ).
).
- When the set time has reached one minute, the appliance will automatically switch from the set temperature to "warm". The display (16) will show "00:00" and "warm" , with a long signal tone. The displayed time will count up from "00:00" to "03:00". After 3 hours, a second long signal tone will sound and the appliance switches to stand-by mode, "04:00" and "hi" will flash on the display for 3 minutes. If no button is pressed, the display backlight will turn off, while the
![]() button (18) remains illuminated.
button (18) remains illuminated. - Alternatively, press the
![]() button(18) to switch the appliance to stand-by mode manually. The time and temperature displayed will reset to "04:00" and "hi" and start flashing.
button(18) to switch the appliance to stand-by mode manually. The time and temperature displayed will reset to "04:00" and "hi" and start flashing. - Disconnect the plug (10) from the wall outlet (ill.
![]() ).
). - Remove the lid(2) and place it on the lid holder (13) (ill.
![]() ).
).
 ).
). ).
).
Always use caution when removing the lid (2) from the pot (6). Always use mittens and ensure to lift the lid (2) so steam is diverted away from you. Allow the condensed hot water to drip into the pot (6) (ill.  ). Only use the handles provided.
- With caution serve the prepared food from the pot (6) (
![]() Hints and Tips).
Hints and Tips).
Transport
The appliance can be used to transport food from one location to another.
- Disconnect the plug (10) from the wall outlet (ill.
![]() ).
). - Allow some time for the appliance cool.
 ).
).
Handle the appliance carefully while the sides are warm.
- Lock the lid (2) by sliding the lid locks (4) in place (ill.
![]() ).
). - Store the power cord (10) in the cord storage (9) of the appliance (ill.
![]() ).
).
 ).
).NOTE: When transporting the entire appliance, it is recommended to remove the lid holder (13) form the housing (12) (ill.  ).
).
NOTE: Never use the lid handle (1) to lift up the locked pot (6). Always handle the appliance using the handles provided (1, 5, 8) (ill.  ). Never exert excessive downward force on the lid or handles.
Retractable cord
- Carefully and slowly, pull the cord from the cord storage to desired length. Do not unwind cord beyond colored mark on the cord.
- To place the cord back in the cord storage, slightly pull the cord outwards before allowing to rewind automatically.
To reduce the risk of injury, keep hold of the plug while the cord is retracting.
NOTE: If the cord jams during windup, pull out slightly and allow to retract again. Do not force the cord into the cord storage, this could damage the windup mechanism.
RECIPES
Italian Pot roast
| 1 | medium onion, diced |
| 2 stalks | celery, sliced |
| 2 | carrots, sliced |
| 1 (3-4-pound) | beef rump roast |
| salt and pepper, to taste | |
| 1 jar (26 ounces) | spaghetti sauce |
- Place onion, celery and carrots in slow cooker. Place roast on top; season roast with salt and pepper. Pour spaghetti sauce over all.
- Cover and cook Low 7 to 8 hours.
- Slice and serve sauce over roast.
Makes 6 servings.
Tip: There is enough wonderful sauce to also serve with pasta or mashed potatoes.
Family Favorite Pot roast and vegetables
| 1 | medium onion, cut into thin wedges |
| 1 (3-4-pound) | beef rump roast |
| 1 package (1 ounce) | brown gravy mix |
| 1 tbsp | dry minced garlic |
| 1 tsp | pepper |
| 2 pounds | new potatoes |
| 2 | carrots, sliced |
| Salt, to taste | |
| 2 | vegetable oil |
| ½ cup | beef broth or water |
- Place onion in slow cooker. Place roast on top of onions.
- Combine brown gravy mix, dry minced garlic and pepper. Sprinkle 2 tablespoons seasoning mixture over roast; rub to coat evenly.
- Place potatoes and carrots in a zip-top plastic bag. Drizzle oil over vegetables and shake to coat well. Sprinkle with remaining seasoning mixture; seal and shake to coat evenly. Arrange vegetables around roast. Season with salt. Pour broth over roast.
- Cover and cook on low 7 to 8 hours.
Makes 6 to 8 servings.
Heartland Style Pork Roast with Vegetables
| 1 tbsp | olive oil |
| 1 (3-4-pound) | boneless pork loin roast |
| 3-4 | medium potatoes, peeled and cut into 2-inch pieces |
| 2 cups | baby carrots |
| Salt and pepper | |
| 1 | medium onion, sliced thick |
| 1½ cups | barbecue sauce (preferably a sweeter variety such as KC Masterpiece Original) |
- Heat olive oil in a medium skillet over medium high heat. Add pork roast and brown on all sides, then place in slow cooker. Place potatoes and carrots around pork roast. Season pork roast with salt and pepper. Place onion on top of meat and vegetables. Drizzle with barbecue sauce.
- Cover and cook on low 7 to 8 hours.
Makes 6 to 8 servings.
Tip: If desired, add 1 can (14 ounces) sauerkraut, drained, to this recipe, along with the potatoes and carrots. Cook as directed.
Hungarian Beef in Creamy Paprika Sauce
| 2 pounds | beef stew meat |
| 1 | large onion, chopped |
| 1 jar (12 ounces) | roasted red peppers, drained and chopped |
| 1 can (14.5 ounces) | diced tomatoes, undrained |
| ¼ cup | red wine |
| 2 tbsps | paprika (preferably Hungarian sweet paprika) |
| 2 tsps | dry minced garlic |
| ¼ tsp | salt |
| ¼ tsp | pepper |
| ¼ cup | sour cream |
| Hot cooked noodles |
- Combine all ingredients, except sour cream and noodles in slow cooker. Stir to blend.
- Cover and cook on low 7 to 8 hours.
- Just before serving, blend in sour cream, stirring until melted. Serve over hot cooked noodles.
Makes 6 to 8 servings.
All Time Favorite Chili
| 2½ pounds | ground beef |
| 1 | large onion, chopped |
| 3 tbsps | tablespoons chili powder |
| 1 tbsp | tablespoon dry minced garlic |
| 1 tsp | teaspoon ground cumin |
| ½ tsp | teaspoon salt |
| 1⁄3 cup | ketchup |
| 1 jar (8 ounces) | picante sauce or salsa (mild or medium) |
| 1 can (14.5 ounces) | diced tomatoes, undrained |
| 2 cans (15 ounces each) | pinto beans, rinsed and drained |
- Cook ground beef in large skillet over medium heat, stirring frequently to crumble, until beef is browned; drain. Place beef in slow cooker. Add remaining ingredients. Stir well.
- Cover and cook on Low 8 hours.
Makes 8 servings
Tip: If desired, garnish cooked chili with shredded Cheddar cheese, chopped onions, sliced jalapeno peppers or other favorite chili toppings.
Spaghetti Sauce
| 1 pound | ground beef or Italian sausage, browned and drained |
| 1 | medium onion, finely chopped |
| 2 tbsps | minced fresh parsley |
| 1 tbsp | dry minced garlic |
| 1 tbsp | sugar |
| 1 tbsp | Italian seasoning |
| ½ tsp | pepper |
| ½ tsp | salt |
| 2 bay | leaves |
| 1 can (28 ounces) | crushed tomatoes |
| 1 can (28 ounces) | tomato puree |
| 1 can (6 ounces) | tomato paste |
| 1 cup | beef broth |
- Combine all ingredients in slow cooker. Stir well.
- Cover and cook on low 8 hours. Remove bay leaves before serving.
Makes 6 to 8 servings.
Tip: If desired, omit ground beef and add meatballs. Prepare your favorite meatballs, or use frozen, prepared meatballs. Add to the sauce and cook as directed.
Chicken and vegetable Soup
| 1-1¼ pounds | boneless, skinless chicken thighs |
| 1 | medium onion, chopped |
| 2 | carrots, chopped |
| 1 stalk | celery, chopped |
| 1 can (14.5 ounces) | diced tomatoes, undrained |
| 1 carton (32 ounces) | chicken broth |
| ½ cup | water |
| 1 tsp | dried basil leaves |
| 1 tsp | dry minced garlic |
| ½ tsp | pepper |
| ½ tsp | salt |
| ¼ cup | uncooked long grain rice |
| 1 cup | frozen mixed vegetables, thawed and drained |
- Place all ingredients, except rice and mixed vegetables in slow cooker. Stir well.
- Cover and cook on Low 8 hours, then High 1 hour.
- After 7 hours, stir in rice and thawed mixed vegetables. Cover and cook on High setting 1 hour.
- Just before serving, stir to break chicken thighs into bite size pieces.
Makes 6 servings.
Asian Chicken Soup
| 1 pound | boneless, skinless chicken breasts, cut into 1 inch cubes |
| 1 cup | sliced celery (approximately 3 large stalks) |
| 1 cup | sliced carrots (approximately 3 medium) |
| 6 | green onions, chopped (white and green parts) |
| 1 cup | sliced mushrooms |
| 6 cups | chicken broth |
| 1 tsp | teaspoon dry minced garlic |
| ¼ cup | light soy sauce |
| ½ cup | uncooked long grain rice |
| 2 tbsps | rice vinegar or cider vinegar |
| 2 tbsps | cornstarch |
- Place chicken cubes in slow cooker along with celery, carrots, green onions and mushrooms.
- Add chicken broth, minced garlic and soy sauce.
- Cover and cook on Low 7 hours, then High 1 hour.
- After 7 hours, stir rice into slow cooker. Combine vinegar and cornstarch; stir into slow cooker along with rice. Cover and cook on High setting 1 hour, stirring once halfway through.
Makes 6 to 8 servings
Tip: If desired serve with fried won ton strips.
South American Inspired Beef Stew
| 2 pounds | beef stew meat |
| 3 | potatoes, peeled and cut into 1-inch chunks |
| 1 | onion, chopped |
| 1 | carrot, cut into 1-inch pieces |
| 1 can (28 ounces) | crushed tomatoes |
| 1 tbsp | dry minced garlic |
| 2 tsps | dried oregano leaves |
| 1 tsp | chili powder |
| ¼ tsp | crushed red pepper |
| ½ tsp | salt |
| ¼ cup | all-purpose flour |
| ¼ cup | water |
| 1 cup | frozen corn, partially thawed |
- Combine beef, potatoes, onion, carrot, tomatoes, garlic, oregano, chili powder, red pepper and salt in slow cooker. Stir well.
- Cover and cook on Low 7 hours, then High 1 hour.
- After 7 hours, stir flour and water together until mixture makes a smooth paste. Stir flour-water paste and corn into slow cooker. Cover and cook on High setting 1 hour.
Makes 6 to 8 servings
Tuscan Beef and Bean Soup
| 1 pound | ground beef, browned and drained |
| 2 | carrots, chopped |
| 2 | potatoes, chopped |
| 1 | onion, chopped |
| 1 | stalk celery, chopped |
| 1 can (14.5 ounces) | diced tomatoes, undrained |
| 2 cans (14.5 ounces each) | beef broth |
| 2 tsps | Italian seasoning |
| ½ tsp | salt |
| ½ tsp | pepper |
| ¼ tsp | crushed red pepper |
| 1½ cups | water |
| 1 can (15 ounces) | dark red kidney beans, rinsed and drained |
| 1 cup | cup chopped unpeeled zucchini |
| 1 cup | frozen cut green beans, partially thawed |
| 2 tbsps | tablespoons minced Italian (flat leaf) parsley |
| Shredded Parmesan cheese |
- Combine all ingredients, except red kidney beans, zucchini, green beans, parsley and grated Parmesan cheese in slow cooker. Stir well.
- Cover and cook on Low 7 hours, then High 1 hour.
- After 7 hours, stir in kidney beans, zucchini, green beans and parsley. Cover and cook on High setting 1 hour.
- Garnish each serving with shredded Parmesan cheese.
Makes 8 servings
Aztec Chicken
| 1 cup | chopped red onion |
| 1½ pounds | boneless, skinless chicken breast halves |
| 1 jalapeno | pepper, seeded and minced |
| 2 cloves | garlic, minced |
| 2 tbsps | teaspoons chili powder |
| 1 can (15 ounces) | black beans, rinsed and drained |
| 1 can (14.5 ounces) | diced tomatoes, undrained |
| 2 tbsp | minced cilantro |
- Place red onion in slow cooker, then top with chicken breasts and remaining ingredients, except cilantro.
- Cover and cook on Low 4 hours.
- Sprinkle with cilantro just before serving.
Makes 4 to 6 servings.
Tip: Serve over hot cooked rice, if desired. Or, thinly slice chicken and serve chicken and vegetable mixture in a warm, flour tortilla.
Basil Chicken with Pasta
| 1 pound | boneless, skinless chicken breasts, cut into 1-inch cubes |
| 1 can | (4 ounces) sliced mushrooms, drained |
| ½ cup | chopped onion |
| 3 cloves | garlic, minced |
| ¼ cup | white wine |
| 2 tbsps | lemon juice |
| 2 tsps | Italian seasoning |
| ½ tsp | salt |
| ¼ tsp | pepper |
| 8 oz | penne or other pasta, cooked and drained |
| 3 tbsps | minced fresh basil |
| 3 tbsps | fat-free half and half |
| ½ cup | shredded Parmesan cheese |
- Combine chicken, mushrooms, onion, garlic, wine, lemon juice, Italian seasoning, salt and pepper in slow cooker.
- Cover and cook on Low 4 hours.
- Stir in pasta, basil, half and half and Parmesan cheese just before serving. Makes 4 to 6 servings.
Tangy Meatballs
| 1 package (28 ounces) | frozen prepared meatballs |
| 1 jar (12 ounces) | chili sauce |
| 1 jar (12 ounces) | red currant jelly |
| ½ cup | chopped red or green bell pepper |
| 1 tbsp | rice or cider vinegar |
| 1 tbsp | soy sauce |
| 1 tsp | garlic powder |
| ½ tsp | crushed red pepper flakes |
| ¼ tsp | ground ginger |
| ¼ tsp | ground black pepper |
| 3 | green onions, chopped (green and white part) |
Place meatballs in slow cooker.
- Combine remaining ingredients except green onions; stir to blend well. Pour sauce over meatballs and stir to coat.
- Cover and cook on low for 4 to 6 hours.
- Just before serving sprinkle with green onions.
Makes 8 to 10 appetizer servings.
Tip: For a main dish dinner for four, serve meatballs and sauce over hot, cooked white rice.
Spicy Lil' Franks
| 1 cup | brown sugar |
| 1 cup | ketchup |
| ½ cup | barbecue sauce |
| ½ cup | bourbon |
| 4 tsps | Worcestershire sauce |
| ½ tsp | chili powder |
| 2 packages (16 ounces each) | cocktail franks |
- Combine all ingredients, except cocktail franks in slow cooker; stir to blend well.
Stir in franks. - Cover and cook on Low for 4 to 6 hours.
Makes 16 to 20 appetizer servings.
Tip: If you prefer, substitute water, beef broth or apple cider for bourbon.
Low'n'Slow Pulled Pork
| 1 (4-pound) | boneless pork shoulder or Boston Butt roast |
| ¼ cup | brown sugar |
| 1 tbsp | dry minced garlic |
| 2 tsps | chili powder |
| 1 tsp | salt |
| 1 tsp | paprika |
| ½ tsp | pepper |
| ¼ cup | ketchup |
| 3 tbsp | cider vinegar |
| 2 tbsps | Worcestershire sauce |
- Place roast in slow cooker. Combine brown sugar, garlic, chili powder, salt, paprika, and pepper. Sprinkle seasonings over roast, turning roast to cover evenly and rubbing in gently. Combine ketchup, vinegar and Worcestershire sauce and drizzle over roast.
- Cover and cook on Low 10 to 12 hours.
- Remove roast from liquid, reserving liquid. Shred meat with tines of two forks. Skim fat from reserved liquid. Place meat back in slow cooker and drizzle with about 2 cups of reserved liquid. Stir to combine.
Makes about 10 servings.
Tip: If desired, served on toasted buns and top each with prepared cole slaw.
Slow and Smoky Brisket
| 1 (3½ to 4½-pound) | beef brisket |
| 1½ tsps | seasoned salt |
| 2 tbsps | celery seeds |
| 1 tsp | black pepper |
| 2 tsps | liquid smoke |
- Place brisket on a large piece of aluminum foil. Sprinkle both sides of meat with seasoned salt, celery seeds and black pepper; pressing with hands to adhere to meat. Raise sides of foil and drizzle liquid smoke over brisket. Wrap foil tightly around meat and seal. Place foil-wrapped meat in slow cooker.
- Cover and cook on Low 10 to 12 hours.
- Carefully lift aluminum foil packet out of slow cooker; drain and reserve juices. Allow meat to stand 15 to 20 minutes. Skim fat from reserved juices. Thinly slice meat and spoon reserved juices over meat. Makes 8 to 10 servings.
Lemon Blueberry Poppy Seed loaf
| 1 package (15.8 ounces) | Lemon Poppy Seed Muffin and Quick Bread Mix with Lemon Glaze Pouch (plus ingredients as required for preparing mix) |
| 1 cup | fresh blueberries |
| 1tbsp | all-purpose flour |
- Prepare muffin mix according to package directions for muffins. Toss blueberries with flour and gently stir into batter.
- Grease bottom only of an 8 x 4-inch loaf pan. Pour batter in prepared pan and place in slow cooker. Cover and cook on High 3 hours.
- When finished cooking, remove from slow cooker and allow to cool in pan 10 minutes. Carefully run a knife around edges to loosen and invert loaf onto serving platter.
- Drizzle with lemon glaze.
Makes 10 to 12 servings.
Tip: Frozen blueberries can be substituted for fresh. Thaw and drain well and then proceed to toss in flour.
Tip: If lemon glaze is not included in your muffin mix package, combine 1 cup confectioners' sugar with 1 tablespoon lemon juice. Stir in an additional 1 tablespoon lemon juice, or as needed to make of glaze consistency.
Chocolate Almond Pound Cake
| 1 package | (18.25 ounces) double chocolate muffin mix |
| 1 cup | water |
| 1 | egg |
| ½ tsp | teaspoon almond extract |
| Glaze: | |
| ½ cup | sifted confectioners' sugar |
| ½ tsp | almond extract |
| 2-3 tsps | milk |
| ¼ cup | sliced almonds, toasted |
Line the bottom of 9 x 5-inch loaf pan with parchment paper or wax paper. Grease and flour paper.
- Combine muffin mix, water, egg, and almond extract, stirring just until moistened.
- Spoon the batter into prepared pan. Place in slow cooker.
- Cover and cook on High 3 hours.
- Allow to stand 10 minutes, then turn out of pan. Allow to cool completely on wire rack.
- Combine confectioner's sugar, almond extract and milk; stir until smooth. Drizzle over cake, then sprinkle with toasted almonds.
Makes 10 to 12 servings.
Tip: To toast almonds, preheat oven to 350°F. Spread almonds in a single layer in a baking pan. Bake 5 to 7 minutes or until toasted.
HINTS AND TIPS
- It is recommended to always preheat the appliance, as will reduce cooking times.
- It is recommended to only cook defrosted food and cook from a fridge temperature.
- It is recommended to only use nylon, heat-proof plastic or wooden cooking utensils. Metal utensils may damage the non-stick surface.
- During slow cooking liquids do not boil away. Begin with a small amount of liquid and add more during the cooking process when needed. If there is too much liquid at the end of the cooking process, set the slow cooker to "hi" high. Cook on this setting to reduce the amount of liquid.
- For better flavor do not crush or ground herbs and spices.
- Meats with a high fat percentage can influence the flavor of the dish. Browning or precooking can reduce the fat.
- Cut foods into smaller pieces. They will cook faster than foods left whole.
- Some vegetables require a longer cooking time. Place vegetables like potatoes, carrots or beets on the bottom of the pot. Cover with liquid.
- Add pre-cooked rice or pasta only at the end of the cooking process.
CLEANING
Proper maintenance will ensure many years of service from your appliance. Clean the appliance after every use. The appliance contains no user serviceable parts and requires little maintenance. Leave any servicing or repairs to qualified personnel.
Disconnect the plug (10) from the wall outlet. Allow all parts of the appliance to cool down completely.
NOTE: Do not immerse the power cord with plug (10) and housing (12) into water or any other liquid. Do not use abrasive cleaners, steel wool or scouring pads (ill.  ). Dry all parts thoroughly after cleaning, before using or storing the appliance. Ensure that no water enters the appliance housing.
- The pot (6) and lid (2) can be fully immersed in water and are dishwasher safe.
- Clean all part of the appliance after each use.
- Clean the inside and outside of the housing (12) with a slightly damp, soft cloth.
NOTE: Dry all parts and surfaces thoroughly before use. Make sure that all parts and surfaces are completely dry before connecting the appliance to a wall outlet.
Storage
- Before storage, always make sure the appliance is completely cool, clean and dry.
- It is recommended to store the appliance in a dry place.
- Store the power cord (10) in the cord storage (9) of the appliance.
- Store the appliance on a stable shelf or in a cupboard, preferably in its original packaging. To avoid accidents, ensure that both the appliance and its power cord are beyond reach of children or pets.
TROUBLESHOOTING
| PROBLEM | CAUSE | SOLUTION |
The appliance is not working | Appliance not plugged in Wall outlet not energized | Insert the plug (10) into the wall outlet Check fuses and circuit breaker |
The appliance does not reach set temperature | Lid (2) not placed on the appliance The appliance is in stand-by mode | Place the lid (2) on the pot (6) during the cooking process Press the |
Food not fully cooked | Food parts too large Cooking time too short | Remove food and chop into smaller pieces Continue cooking and check process regularly |
 button (18) to start the cooking process
If additional assistance is needed, please contact our Customer Assistance at 1-855-451-2897(US).
TECHNICAL DATA
Rated voltage: 120V ~ 60Hz
Rated current: 1.66A
Rated power input: 200W
Capacity: 6 qt
CUSTOMER ASSISTANCE
If you have a claim under this warranty, please call our Customer Assistance Number. For faster service, please have the model number and product name ready for the operator to assist you. This number can be found on the bottom of your appliance and on the front page of this manual.
Customer Assistance Number 1-855-451-2897 (US)
Keep these numbers for future reference!
Two-year limited warranty
For how long after the original purchase?
- Two years.
How do you make a warranty claim?
- Save your receipt.
- Properly pack your unit. We recommend using the original carton and packing materials.
- Return the product to your nearest WAL-MART store or call Customer Assistance at 1-855-451-2897 (US).
What if you encounter a problem with this product while using it outside the country of purchase?
- The warranty is valid only in the country of purchase and if you follow the warranty claim procedure as noted.
© 2012 Farberware licensing Company, llC. All rights reserved. Copyrights and Trademarks of Farberware licensing Company, llC, including FArBerwAre®, are used under license from Farberware licensing Company, llC.

Documents / ResourcesDownload manual
Here you can download full pdf version of manual, it may contain additional safety instructions, warranty information, FCC rules, etc.
Download Farberware 6 Qt. Oval Slow Cooker Manual and Recipes
Advertisement


Need help?
Do you have a question about the 6 Qt. Oval Slow Cooker 104554 and is the answer not in the manual?
Questions and answers