Advertisement
INTRODUCTION

Before starting work the installer should carefully read this Installation & Operation Manual, and make sure all instructions contained therein are understood and observed.
- The thermostat should be mounted, operated and maintained by specially trained personnel only. Personnel in the course of training are only allowed to handle the product under the supervision of an experienced fitter. Subject to observation of the above terms, the manufacture shall assume the liability for the equipment as provided by legal stipulations.
- All instructions in this Installation & Operation manual should be observed when working with the controller. Any other application shall not comply with the regulations. The manufacturer shall not be liable in case of incompetent use of the control. Any modifications and amendments are not allowed for safety reasons. The maintenance may be performed by service shops approved by the manufacturer only.
- The functionality of the controller depends on the model and equipment. This installation leaflet is part of the product and has to be obtained.
APPLICATION
- The UFH thermostat is developed to control and manage actuators mounting on the manifold.
- The thermostat is normally used in conjunction with a complete connecting box "UFH-MASTER" with or without "Heating & Cooling module" to connect all electrical & hydraulic components of the installation like a circulation pump, actuators...
- The controllers have been designed for use in residential rooms, office spaces and industrial facilities. Verify that the installation complies with existing regulations before operation to ensure proper use of the installation.
SAFETY INSTRUCTIONS
Before starting work disconnect power supply!
- All installation and wiring work related to the controller must be carried out only when de-energized. The appliance should be connected and commissioned by qualified personnel only. Make sure to adhere to valid safety regulations.
- Theconnecting boxes are neither splash- nor drip-proof.
Therefore, they must be mounted at a dry place. - Do not interchange the connections of the sensors, actuators and the 24V connections under any circumstances!
Interchanging these connections may result in life endangering electrical hazards or the destruction of the appliance and the connected sensors and other appliances.
Technical characteristics
- Wired Analogic thermostat (24VAC) specially designed to control your Under Floor Heating managed by actuator (NC).
- Flush Mounting version, standard fixing with 60mm axes.
- Thermostat with silent output.
- Can drive directly the actuators, or can be connected to the UFH connecting boxes range.
| Measured temperature precision | 0.1°C |
| Operating temperature | 0°C - 50°C |
| Setting temperature range | 5°C - 30°C |
| Regulation characteristics | hysteresis (ON/OFF) |
| Electrical Protection | Class II - IP30 |
| Power Supply Consumption | 24VAC 50Hz ~ 0,5W |
| Output | TRIAC 24VAC 15W Max |
| Norms and homologation:Your thermostat has been designed in conformity with the following standards or other normative documents | |
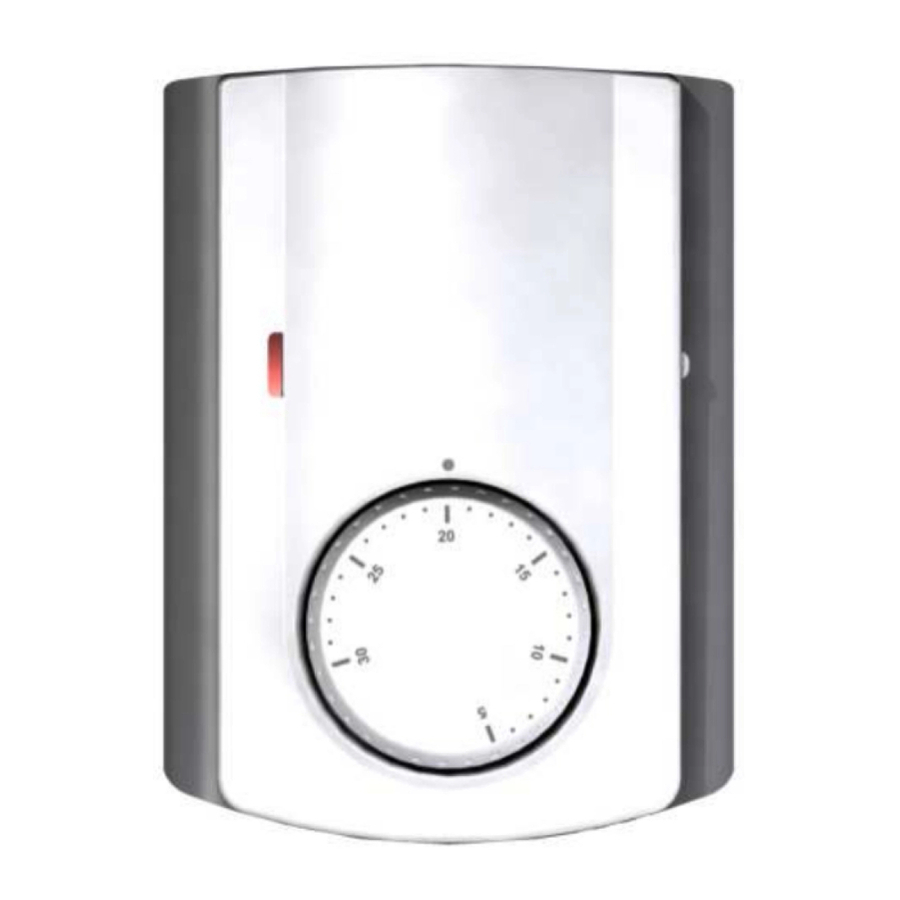
How to use your thermostat
Setting knob
The thermostat will follow the setting temperature all the time.
LED Indicator
Red: Heating indication.
How to caliber and limit the setting range
If your thermostat needs to calibrated, make these operations:
- Put a thermometer in the middle of the room at 1.5 Meter distance of the floor.
- Wait 1 hour to be sure that your thermostat shows the correct temperature.
- Remove the setting button by pressing gently outwards with a narrow screwdriver between the button and the cover. (pay attention to avoid setting button rotation)
- Remove the internal wheel from the button.

- Put the internal wheel alone on the thermostat.

- You can now put the setting button on the thermostat, while making corresponds real room temperature (showed by the thermometer) and thermostat indexer.


If your thermostat needs to be limited, make these operations:
- Set the setting button on the middle of the new setting range.
- Remove the setting button by pressing gently outwards with a narrow screwdriver between the button and the cover.
- Remove the dial pins and put in the desired holes to limit the setting range of the thermostat.

- You can now put the setting button on the thermostat.

Rettig Germany GmbH
Lierestraße 68
38690 Goslar, Germany
Tel: +49 5324 808-0 Fax: +49 5324 808-999
info@purmo.de
www.purmo.de
Rettig Belgium NV
Vogelsancklaan 250 B-3520 Zonhoven
Belgium
Tel: +49 5324 808-0 Fax: +49 5324 808-999
info@radson.be
www.radson.com

Documents / Resources
References
Download manual
Here you can download full pdf version of manual, it may contain additional safety instructions, warranty information, FCC rules, etc.
Advertisement


Need help?
Do you have a question about the TempCo Basic and is the answer not in the manual?
Questions and answers