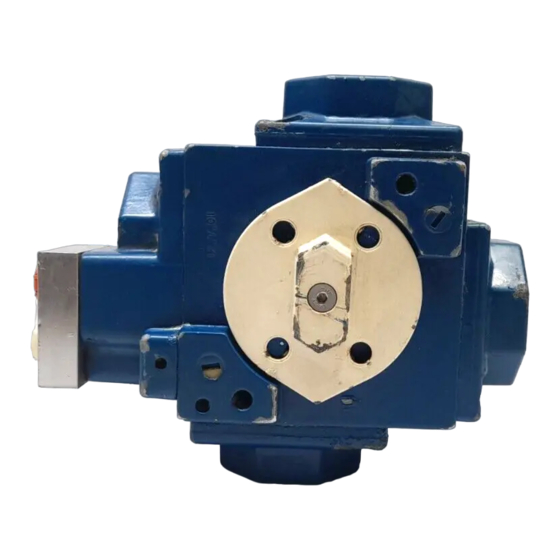
Summary of Contents for HABONIM H25 Series
- Page 1 Three Piece High Pressure Ball Valves – H25 Valves Series Installation, Operating & Maintenance Three Piece High Pressure Ball Valves H25 Valves Series REV00-03/23 Item number: YP0007941...
-
Page 2: Table Of Contents
Three Piece High Pressure Ball Valves – H25 Valves Series Habonim cannot anticipate all of the situations user may encounter while installing and using Habonim valves. The user MUST know and follow all applicable industry specifications on the safe installation and use of these valves. -
Page 3: General
• Acidic media PH < 5 or alkaline media PH > 9 Habonim recommend a proof test interval of 12 months; in case of Fail to Open ESD system, a partial stroke is acceptable to confirm that the installation is functioning properly. -
Page 4: Atex - Explosive Environment
Bearings/soft parts actuator and the actuator will only contain non-explosive Habonim recommend replacing all bearings and soft parts every 500,000 cycles or 5 instrumentation air in both chambers. years, whichever comes first. Closing the actuator by stopping the pressure supply to port A. At this... -
Page 5: Limitations
1(mm). When this allowance has gone, the valve should no longer be used. Inspect the valve wall thickness every time the valve is maintained. Refer to Habonim Chemical Compatibility Chart to determine the corrosion rate for your application. As the variety of applications these valves can be used in is large, it is impossible to cover all installation and maintenance instructions for servicing the valves. -
Page 6: Storage
5.1.6. Visual inspection should be performed on a semi-annual basis and results recorded. 6. Installation The installation procedure for Habonim ball valves is critical to ensuring both long life and satisfying performance. Valves stored on site, awaiting installation, should be kept in their original packing, in dry conditions, where damage will not occur (See Para. - Page 7 Unless otherwise requested, nameplates will be secured to the valve body and will be visible to user. The information on the nameplate is as described below: Standard Habonim Tag Standard CE Tag Standard ATEX Tag...
- Page 8 6.4.4. Use appropriate joining sealants material in correct quantities. 6.4.5. If “back-welding” is required on threaded end valves, refer to the instructions for Weld End valves or to the “Habonim Welding Instructions” bulletin. Three Piece High Pressure Ball Valves – H25 Valves Series...
-
Page 9: Operating Instructions
Habonim Valves provide tight shut off when used under normal conditions and in accordance with Habonim’s published pressure/temperature chart. If these valves are used in a partially open (throttled) position, seat life may be reduced. Consult with Habonim for the proper seat material selection. -
Page 10: Maintenance
Only Habonim authorized spare parts should be used. Default repair kit parts from Habonim can be found at "components & materials" in Habonim catalog. 7.5. In addition to repair kits, other spare parts are available from Habonim, such as stem, glands, bolts, screws and nuts. 7.6. -
Page 11: Packages Assembly & Disassembly
Three Piece High Pressure Ball Valves – H25 Valves Series 5. Remove the adaptor and place it in a secured place. 9. Packages Assembly and Disassembly Disassembly Do not attempt to maintain the actuator while it is still connected to the valve or to any ancillary device. Verify that the actuator is not pressurized. - Page 12 Three Piece High Pressure Ball Valves – H25 Valves Series Assembly Spring return actuator 4. Make sure the adaptor sits on the valve stem tip, and For Normally Closed (NC) valve (valve closed on air there is an air gap between the stem nut lock clip and failure), turn the valve to its closed position.
- Page 13 Three Piece High Pressure Ball Valves – H25 Valves Series 8. Carry out an operating check with the air pressure connected to port A, in the case of a spring-return actuator, or to port B for a double-acting actuator. Ensure that opening and closing of the valve is complete, i.e.
-
Page 14: Disassembly & Assembly Manual
Three Piece High Pressure Ball Valves – H25 Valves Series Disassembly & Assembly Manual Three Piece High Pressure Ball Valves Series included: H25 Series Sizes included: ¼” – 1.5” (DN8 – DN40) Three Piece High Pressure Ball Valves – H25 Valves Series... - Page 15 Three Piece High Pressure Ball Valves – H25 Valves Series Habonim cannot anticipate all of the situations user may encounter while installing and using Habonim valves. The user MUST know and follow all applicable industry specifications on the safe installation and use of these valves.
- Page 16 General • It is strongly recommended to review both the disassembly and assembly chapters before getting started. • For any discrepancies, please contact Habonim. Disassembly • Cycle the valve with the line pressure fully relieved before attempting to remove the valve from the pipeline, to ensure pressure has also been discharged from the valve cavity.
- Page 17 Three Piece High Pressure Ball Valves – H25 Valves Series Detail A: Assembly Detail A: The following instructions are for valves of all sizes. 3.1. Lubricate the stem thrust seal (7) and the stem seal(9) with appropriate lubricant. 3.2. Place the stem thrust seal (7) on the stem (4). 3.3.
- Page 18 Three Piece High Pressure Ball Valves – H25 Valves Series The following instructions are for off-line assembly of valves all sizes 3.16. Bring the valve handle to the close position and insert the ball (3). 3.17. Place the ball into the valve body (1) until the stem tongue is engaged and turn the stem so the valve is at open position, to prevent the ball from falling out.


Need help?
Do you have a question about the H25 Series and is the answer not in the manual?
Questions and answers