Table of Contents
Advertisement
Quick Links
Advertisement
Table of Contents

Related Manuals for by.schulz G.2 ST


Summary of Contents for by.schulz G.2 ST
- Page 1 Parallel suspension seatpost INSTALLATION + OPERATING INSTRUCTIONS...
-
Page 2: Table Of Contents
The correct tigh- The G.2 ST / LT seatpost is suited for use in bicycles, cargo tening torque is either listed on the part itself or in the- bikes, pedelecs and e-bikes up to 45 km/h. -
Page 3: Technical Data
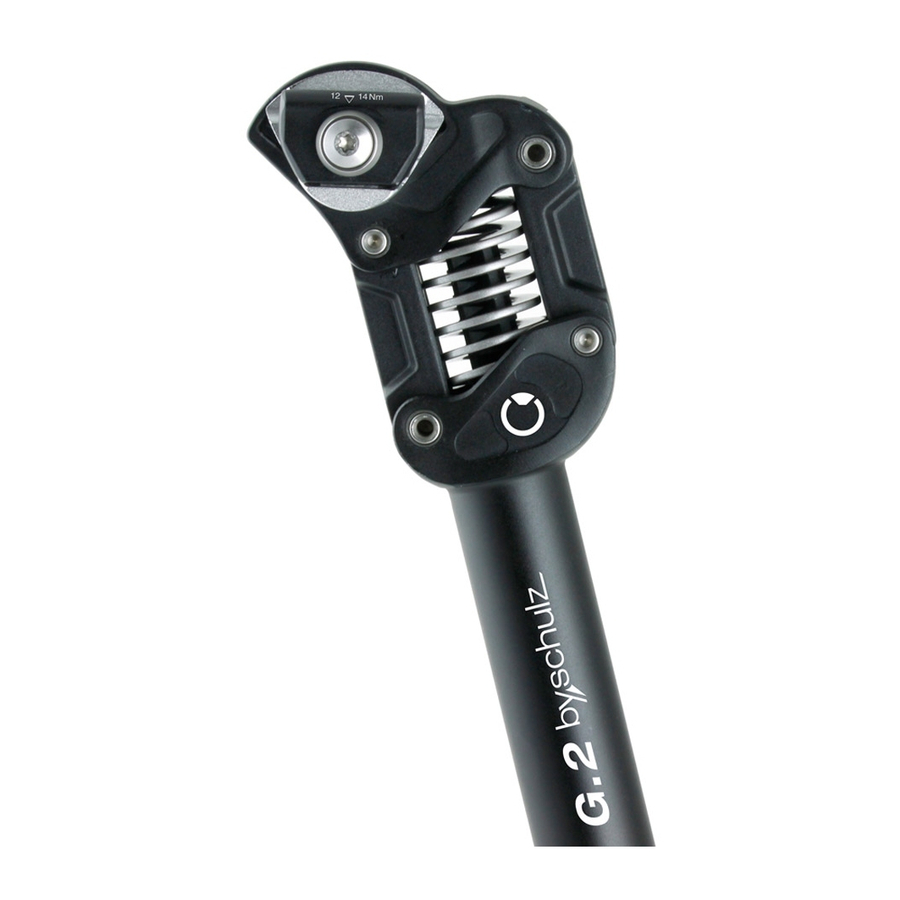
In order to adjust the G.2 ST / LT to the weight of the When compressing, the G.2 ST parallelogram suspension rider and the riding style, easily interchangeable spring... - Page 4 Installation + Operating Instructions G.2 ST / LT Seatpost 04/12 Exploded view G.2 ST (and G.2 LT) March 2018, may change at any time...
-
Page 5: Components
Installation + Operating Instructions G.2 ST / LT Seatpost 05/12 6. COMPONENTS 7. SPRING ELEMENTS For the parallelogram suspended G.2 seat post, different SEAT CLAMP : strong spring elements are offered which can be easily 1. Seat clamp- assembled and quickly changed (see page 08-09). The following table will help you in the choice of the right suspension element, 1.1 Seat clamp base with toothing... -
Page 6: Installation Requirements
· Please make sure that the inner diameter of the seat tube inside of the upper seat tube (the reducer sleeve should of the bicycle frame and the outer diameter of the G.2 ST / LT also be greased when used). This ensures problem-free seatpost are the same. -
Page 7: Saddle Installation And Adjustments
Installation + Operating Instructions G.2 ST / LT Seatpost 07/12 Note : make sure the saddle is firmly attached to the seat clamps. A loose saddle can lead to accidents, personal injuries or material damage. 2. Once you have found your seat position, tighten the saddle clamp bolts firmly with a torque wrench in com- Abb.9.2.1... -
Page 8: Changing The Spring Element
Fig. 10.1.1 1. Open the M5 grub screw of the large pivot bearing in the rear arm of the G.2 ST / LT seatpost with a 2.5 mm Allen key. Turn the screw counterclockwise until it protrudes ap- prox. 2 mm from the arm. Then use a proper tool to push the 8 mm stainless steel axle out of the bearing. - Page 9 Installation + Operating Instructions G.2 ST / LT Seatpost 09/12 10.2 Installation of the spring element centering pin Fig. 10.2.3 Fig.10.2.1 3. Fold the entire parallel suspension mechanism in the 1. Place the original ST / LT spring element in the parallel- small pivot bearing back downwards to the stop.
-
Page 10: Maintenance And Care
010/12 11. MAINTENANCE / CARE / CLEANING For the by,schulz seat post type G.2 ST / LT we provide warranty according to the following conditions / points: The G.2 ST / LT suspension seatpost is based on a well thought out concept and consists of high-quality compo- 1. - Page 11 Installation + Operating Instructions G.2 ST / LT Seatpost 11/12 NOTES :...
- Page 12 © 2023 No reprints, translations or copies of any kind allowed without the prior written approval of by.schulz GmbH. Subject to technical alterations, errors and misprints excepted. Used photos can varying from the original product M-G2-20230214-EN / AN-10890-EN...
Need help?
Do you have a question about the G.2 ST and is the answer not in the manual?
Questions and answers