Table of Contents
Advertisement
Quick Links
Advertisement
Table of Contents

Subscribe to Our Youtube Channel
Related Manuals for Veeder-Root DPLLD


Summary of Contents for Veeder-Root DPLLD
- Page 1 Manual No: 577013-933 Revision: G DPLLD Site Prep and Installation Guide...
- Page 2 Notice Veeder-Root makes no warranty of any kind with regard to this publication, including, but not limited to, the implied warranties of merchantability and fitness for a particular purpose. Veeder-Root shall not be liable for errors contained herein or for incidental or consequential damages in connection with the furnishing, performance, or use of this publication.
-
Page 3: Table Of Contents
DPLLD Equipment Overview DPLLD Components ......................7 DPLLD Installation Example .....................7 DPLLD Transducer Installation Red Jacket Standard Pumps (DPLLD w/SwiftCheck) ............8 Red Jacket Standard Pumps (DPLLD) ................14 The Red Jacket Pump ....................15 Red Jacket Maxxum Big-Flo ...................16 FE Petro Pumps ......................17 FE Petro High Capacity Pumps................19... - Page 4 Figure 12. Locating Discharge Port Plug For Line Leak Transducer .....15 Figure 13. Example DPLLD Installation In A Red Jacket Maxxum Big-Flo Pump..16 Figure 14. Location of DPLLD Transducer And Model ‘R’ Precision Check Valve In FE Petro Pump ............18 Figure 15.
-
Page 5: Contractor Certification Requirements
Detection (DPLLD). The DPLLD equipment performs 3.0 gph line leak tests following each dispense. Depending on the software enhancement module installed, the DPLLD equipment will also allow, with certain pump types, 0.2 and/or 0.1 gph line tests at full pump pressure. The DPLLD equipment executes leak tests automatically to eliminate the need for separate annual line leak testing. - Page 6 Introduction Product Marking Information The control drawings contain information related to the correct installation of the overall intrinsically Safe System. This includes information such as maximum number of apparatus, specific apparatus allowed in the system, maximum cable lengths, references to codes, proper grounding and so on. Control drawings can be found on the accompanying Compact Disk (TECH DOCS CD) or on the INTERNET at veeder.com under SUPPORT;...
-
Page 7: Safety Symbols
Introduction Safety Symbols Safety Symbols The following safety symbols may be used throughout this manual to alert you to important safety hazards and precautions. EXPLOSIVE FLAMMABLE Fuels and their vapors are extremely explo- Fuels and their vapors are extremely flammable. sive if ignited. -
Page 8: Safety Warnings
4. Do not alter or modify any component or substitute components in this kit. 5. Warning! Substitution of components may impair intrinsic safety. 6. Field wiring to the DPLLD Transducer must not share a conduit with any non-intrinsically safe device’s wiring. 7. To prevent ignition of flammable or combustible atmospheres, turn off, tag and lockout power to console and pumps before servicing. -
Page 9: Before You Begin
DPLLD equipment from automatically starting up the pump. Warning tags [Figure 1] are provided with the DPLLD equipment. For your safety and the safety of others who may service dispensers, submersible pumps, or DPLLD equipment, you must attach a tag to each of the following devices where it can clearly be seen by a service person performing work on the system: •... -
Page 10: Site Considerations
You must ensure that there are no existing check valves already installed in the pipeline. The presence of any check valve (other than the one used with the DPLLD equipment) can prevent the DPLLD equipment from detecting line leaks in the area of pipeline downstream from the check valve. -
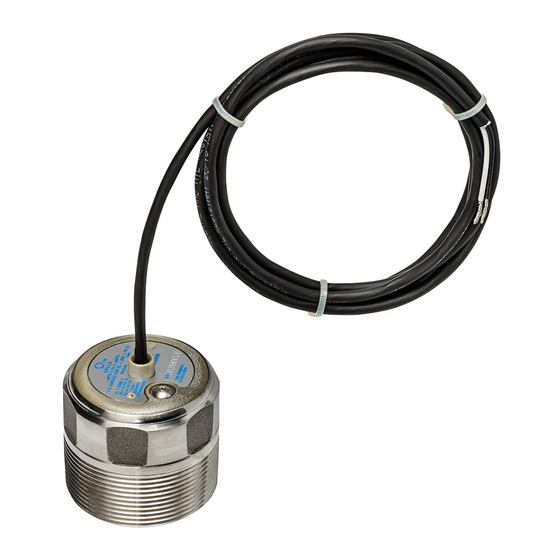
Page 11: Dplld Equipment Overview
• I/O Module to control site primary and secondary STPs DPLLD Installation Example Figure 2 shows an example DPLLD installation for a single tank and a manifolded tank set having Red Jacket Standard pumps. Figure 2. Example DPLLD Equipment Installation... -
Page 12: Dplld Transducer Installation
• FE-Petro (page 17) Red Jacket Standard Pumps (DPLLD w/SwiftCheck) Use this installation procedure to install a DPLLD transducer with a SwiftCheck valve in a Red Jacket Standard pump. Disconnect, lock out, and tag all AC power to the TLS console, dispens- ers and submersible pumps. -
Page 13: Figure 3. Sealing Surface For Swiftcheck Valve's External O-Ring
8. If there is a Stage II vapor recovery device installed, go to Step 7. If there is no Stage II vapor recovery, install the SwiftCheck valve [Figure 4] in the mechanical LLD pump port. Thread the DPLLD transducer into the SwiftCheck Valve. -
Page 14: Figure 4. Dplld Transducer Installation
Red Jacket leak detector fitting (P/N 038-072) as shown in Figure 5 instead of in the pump’s leak detector port. Because the DPLLD transducer must be installed downstream from these devices, a monitored containment sump is required. -
Page 15: Figure 6. Modifying The Functional Element In Red Jacket Pumps
Classified, nontoxic pipe sealant suitable for the fuel involved. Screw the cord grip into one of the openings in the weatherproof junction box. Feed the end of the DPLLD transducer cable through the cord grip and then tighten the nut to ensure a watertight seal. Connect and seal the pressure transducer wires to the wires from the TLS console as described in ‘Epoxy Sealing DPLLD Transducer Field Wiring Connections’... -
Page 16: Figure 7. Functional Element Screw Tightening Sequence
DPLLD Transducer Installation Red Jacket Standard Pumps (DPLLD w/SwiftCheck) 13. Lubricate the o-ring on the Lockdown Screw, using petroleum jelly (see Figure 7). Figure 7. Functional Element Screw Tightening Sequence 14. Return the Diaphragm to the normal position on the top of the Functional Element. Install the top of the Functional Element, Poppet, and Diaphragm assembly onto the body of the Functional Element using the 6 –... -
Page 17: Figure 10. Installing Check Valve And Spring In Packer
DPLLD Transducer Installation Red Jacket Standard Pumps (DPLLD w/SwiftCheck) facing up. Clean the packer facing prior to installing new Functional Element. Figure 10. Installing Check Valve And Spring In Packer 17. Carefully set the new functional element assembly in place, then install the two new 3/8-inch securing bolts from the kit and torque to 20 - 35 ft-lb (27 - 50 N•m). -
Page 18: Red Jacket Standard Pumps (Dplld)
Red Jacket Standard Pumps (DPLLD) Use this installation procedure to install a DPLLD transducer in a Red Jacket Standard pump that has a Functional Element that will be used for leak detection. NOTE: This installation method is approved for 3.0 gph testing only and cannot be used if there is a Stage II vapor recovery device installed in the pressurized piping. -
Page 19: The Red Jacket Pump
2. If the pump does not have a Stage II vapor recovery device installed in the pressurized piping, remove the 2’’ NPT plug from line leak detector port. Install the DPLLD transducer into the 2’’ NPT port (see Figure 12). -
Page 20: Red Jacket Maxxum Big-Flo
Classified, nontoxic pipe sealant suitable for the fuel involved. Screw the cord grip into one of the openings in the weatherproof junction box. Feed the end of the DPLLD transducer cable through the cord grip and then tighten the nut to ensure a watertight seal. Connect and seal the pressure transducer wires to the wires from the TLS console as described in ‘Epoxy Sealing DPLLD Transducer Field Wiring Connections’... -
Page 21: Fe Petro Pumps
Ensure that the Healy pump is wired according to the manufacturer’s instructions and utilizes isolation relays. 4. For DPLLD operation there must be a FE Petro model R precision check valve in the pump, If necessary, replace the current check valve with a model R precision check valve (ref. Figure 14). -
Page 22: Figure 14. Location Of Dplld Transducer And Model 'R' Precision
Classified, nontoxic pipe sealant suitable for the fuel involved. Screw the cord grip into one of the openings in the weatherproof junction box. Feed the end of the DPLLD transducer cable through the cord grip and then tighten the nut to ensure a watertight seal. Connect and seal the pressure transducer wires to the wires from the TLS console as described in ‘Epoxy Sealing DPLLD Transducer Field Wiring Connections’... -
Page 23: Fe Petro High Capacity Pumps
Pole 1 on dip switch SW2 (Figure 16) controls the pump start up time. Set this switch to OFF so that the submersible pump will run at 34 psi for 6 seconds each time it is started. Pole 2 does not affect DPLLD operation;... -
Page 24: Figure 16. Dip Switch Sw2 And Rotary Switch Locations In The
DPLLD Transducer Installation FE Petro Pumps Figure 16. Dip Switch SW2 And Rotary Switch Locations In The FE-Petro IST-VFC Unit Table 2. FE-IST-VFC Rotary Switch Positions W/V1.1/1.2 Software Position Pressure (psi) IST-VFC Software Version 1.3 The settings for software version 1.3 are the same as versions 1.1 and 1.2, except that the rotary switch can be... -
Page 25: Dplld Field Wiring
2. Using wire nuts, connect the white and black wires from the DPLLD transducer to field wires in the weatherproof sump junction box (ref. Figure 17). Be sure to maintain correct polarity between the color- coded or marked field wires and DPLLD transducer wires when making all connections. -
Page 26: Figure 18. Epoxy Sealing Pressure Transducer Field Connections
DPLLD Field Wiring DPLLD Transducers Figure 18. Epoxy Sealing Pressure Transducer Field Connections... -
Page 27: Dplld Wiring Connections In The Console
Once a connector has been wired to a module and the console has been programmed, the connector and module cannot be moved to another slot without reprogramming the system. • Record the location (e.g., Line #1 (regular), Line #2 (super), etc.) of each DPLLD transducer on the circuit directory inside the right-hand console door. -
Page 28: Figure 20. Dplld Pump Control Diagram For Red Jacket Relay Control Box
2. DPLLD pump control wiring varies depending on the pump manufacturer’s relay control box. Refer to the appropriate wiring diagram example below to connect DPLLD controlled pumps to the I/O Module in the TLS console (circuit diagrams are for switched ‘hot’... -
Page 29: Figure 21. Red Jacket Maxxum Big-Flo Single-Phase Wiring
DPLLD Wiring Connections In the Console Pump Wiring Connections Figure 21. Red Jacket Maxxum Big-Flo Single-Phase Wiring... -
Page 30: Figure 22. Red Jacket Maxxum Big-Flo 3-Phase Wiring
DPLLD Wiring Connections In the Console Pump Wiring Connections Figure 22. Red Jacket Maxxum Big-Flo 3-Phase Wiring... -
Page 31: Figure 23. Dplld Pump Control Diagram For
DPLLD Wiring Connections In the Console Pump Wiring Connections Figure 23. DPLLD Pump Control Diagram For Non-Red Jacket Relay Control Box... -
Page 32: Figure 24. Wiring Diagram - Manifolded Lines Dplld - Multiple Tanks
DPLLD Wiring Connections In the Console Pump Wiring Connections Figure 24. Wiring Diagram - Manifolded Lines DPLLD - Multiple Tanks (RJ Relay Control Box Shown In This Example) -
Page 33: Figure 25. Dplld Pump Control Diagram For Gilbarco Dispenser Isolation Box
DPLLD Wiring Connections In the Console Pump Wiring Connections Figure 25. DPLLD Pump Control Diagram For Gilbarco Dispenser Isolation Box... -
Page 34: Figure 26. Manifolded Product Lines - Dual Fe Petro Ist-Vfc Controllers
DPLLD Wiring Connections In the Console Pump Wiring Connections Figure 26. Manifolded Product Lines - Dual FE Petro IST-VFC Controllers... -
Page 35: Figure 27. Manifolded Product Lines - Dual Red Jacket Iq Controllers
DPLLD Wiring Connections In the Console Pump Wiring Connections Figure 27. Manifolded Product Lines - Dual Red Jacket IQ Controllers... -
Page 36: Dplld Equipment Checkout Steps
Do not switch On power to the console. This must be done by an Authorized Service Contractor during the warranty checkout and start-up procedure! An Authorized Service Contractor must program the DPLLD set-up information into the console before beginning these DPLLD equipment checks. -
Page 37: Determine Dplld Transducer Pressure Offset
The Pressure Offset test procedure described in this step MUST be performed when using new DPLLD transducers with serial numbers of 100,000 or above, in sites located at altitudes above 2,000 feet. Note: this procedure can also be used with transducers having serial numbers below 100,000 instead of using the vent screw to equalize pressure. -
Page 38: Enable The Line For Dispensing
5. Enable the Line for Dispensing After completing the DPLLD installation, the console will not enable dispensing from a line until a 3.0 gph test on the line has been passed. In this step, as you run the required 3.0 gph test, you will also verify that the Pump On...
Need help?
Do you have a question about the DPLLD and is the answer not in the manual?
Questions and answers