Flexit Nordic S4 Installation Instructions Manual
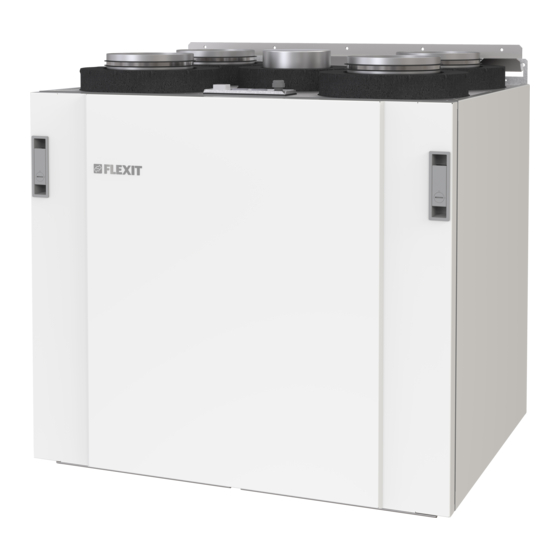
Air handling unit
Hide thumbs
Also See for Nordic S4:
- Installation instructions manual (28 pages) ,
- User manual (20 pages) ,
- Quick manual (12 pages)

Related Manuals for Flexit Nordic S4


Summary of Contents for Flexit Nordic S4
- Page 1 115545EN-01 2018-02 Nordic S4 Flexit ART.NO. 800130, 800131, 800132, 800133 INSTALLATION INSTRUCTIONS Air handling unit...
- Page 2 N O R D I C S 4...
-
Page 3: Table Of Contents
For use with a water battery ...................14 Plumbing work .........................14 Cover ..........................15 6.1. Preparations ........................15 6.2. Flexit duct cover .........................15 Installing the kitchen fan ....................16 7.1. Installation of external kitchen fan ................16 7.1.1. Kitchen fan without motor ................16 7.1.2. Kitchen fan with motor ..................16 7.2. - Page 4 N O R D I C S 4 Symbols used These products bear a number of symbols used for labelling the actual product and in installation and user documentation. Supply air Extract air Extract air from kitchen DANGER: DANGER! DO NOT ELECTRICITY TOUCH Exhaust air...
- Page 5 SAFETY INSTRUCTIONS • • This unit is only designed for shock or injury, read all the safety ventilation air in homes and instructions and warning texts commercial buildings. before using the unit. • To maintain a good indoor climate, • All electrical connections must be comply with regulations and avoid condensation damage, the unit •...
-
Page 6: Planning And Preparation Work
N O R D I C S 4 1. Planning and preparation 1.2. PLUMBER work (if the unit has a water battery) Water pipe layout and placement of the water battery 1.1. JOINER/FITTER (channel battery) must be planned. These must be kept warm to avoid frost damage. -
Page 7: Installation
2. Installation The unit can be installed in the following ways: • On the wall (vertically). (Mounting supplied with unit.) • • On the ceiling (vertically). as an accessory). Positioning of bushings for electrical conductors. Cable type Not in use (accessory) Network cable Cable for control panel Hanging on wall, e.g. -
Page 8: What Is Supplied
N O R D I C S 4 2.1. WHAT IS SUPPLIED? -
Page 9: Positioning Requirements
2.2. POSITIONING REQUIREMENTS LIVING ROOMS The unit is designed to be installed in boiler rooms, laundry rooms, stores or other suitable areas. The unit can be in a cold location. Positioning must comply with individual countries’ electrical safety legislation. Check which rules apply BOILER ROOM in your country. -
Page 10: Space Requirements
N O R D I C S 4 2.3. SPACE REQUIREMENTS The unit must be installed with suitable space for and cleaning of fans and recovery system. See Fig. 1. These are minimum requirements and only take service needs into account. All electrical conductors from the unit must be easily accessible when the unit is fully installed. -
Page 11: Installation
2.4. INSTALLATION Alternative mounting methods: 1. Vertical mounting on wall The unit is available in left and right versions (outdoor air nipple to the left or right), depending on what is the most favourable in relation to the duct location. In the case of wall mounting, secure the wall bracket to the wall and hang the unit in place (Fig. - Page 12 N O R D I C S 4 Alternative mounting methods:...
-
Page 13: Duct Connection
3. Duct connection 3.1. CONNECTION TO THE UNIT See Fig. 4. All ducts that pass through a cold zone must be insulated. see the markings on top of the unit and chap.8. System The ducts normally require min. 50 mm insulation, with and general drawings on page 17 0.035 W/m.°C or better. -
Page 14: Electrical Work
Colour Function Brown HIGH Green COOKER +24V (REF) White Reference the Flexit GO app, see instructions in reference manual (116903). Control panel: A control panel can be connected to the 2-pole contact marked CI 70. For more information, see the instructions for the... -
Page 15: Cover
Therefore plan the positioning of both the unit and the cover prior to installation. data does not include possible noise from ducting. 6.2. FLEXIT DUCT COVER Flexit duct covers are available as accessories. N O R D I C S 4... -
Page 16: Installing The Kitchen Fan
N O R D I C S 4 7. Installing the kitchen fan 7.2. ADJUSTING THE KITCHEN FAN If the kitchen fan is not supplied by Flexit, the fan 7.1. INSTALLATION OF EXTERNAL KITCHEN hood, and arrange for supply air to the hood. -
Page 17: System And General Drawings
8. System and general drawings 8.1. SYSTEM DRAWING (ELECTRIC HEATING BATTERY) (shown as a right model) Abbreviation Description Supply air temperature sensor Extract air temperature sensor Outdoor air temperature sensor Exhaust air temperature sensor Heating battery Overheating thermostat, manual reset Overheating thermostat, automatic reset Supply air fan Extract air fan... -
Page 18: General Drawing
N O R D I C S 4 8.3. GENERAL DRAWING With electric heating battery No. Abbreviation Description (shown as a right model) Supply air fan Extract air fan HR-R Rotary wheel-type heat exchanger Rotor motor Control unit Kitchen hood connection Supply air temperature sensor Extract air temperature sensor Outdoor air temperature sensor... - Page 19 Without heating No. Abbreviation Description (shown as a right model) Supply air fan Extract air fan HR-R Rotary wheel-type heat exchanger Rotor motor Control unit Kitchen hood connection Supply air temperature sensor Extract air temperature sensor Outdoor air temperature sensor Exhaust air temperature sensor N O R D I C S 4...
-
Page 20: Nipple Location
N O R D I C S 4 8.4. NIPPLE LOCATION Right model top FRONT Left model top FRONT... -
Page 21: Technical Data
Fan motor control 0-10 V 0-10 V Max. fan speed RPM 3,980 3,980 Automatic control, standard Flexit GO Flexit GO Filter class ePM1 55% (F7) ePM1 55% (F7) Filter type (supply air/extract air) Filter dimensions (WxHxD) 247 x 365 x 31 mm... -
Page 22: Dimensioned Drawing
N O R D I C S 4 10. Dimensioned drawing 610 mm 564 mm 753 mm 607 mm 377 mm 147 mm Ø160 mm Ø125 mm... -
Page 23: Capacity And Sound Data
11. Capacity and sound data 11.1. SUPPLY AIR SIDE < 1000 100% 100% dB(A) dB(A) dB(A) dB(A) [m³/h] 116670 -21 -25 116671 -40 -48 116672 -15 -18 11.2. EXTRACT AIR SIDE < 0,75 1000 100% 100% dB(A) dB(A) dB(A) dB(A) dB(A) [m³/h] N O R D I C S 4... -
Page 24: Correction Factor For Lw
N O R D I C S 4 Explanation of diagram: capacity diagrams. (This is sound to duct.) These values can be corrected by means of the table for adaptation to A band). The correction table for the various octaves is stated in Lw, which means that the Lw values are after conversion Data for supply air is measured in accordance with of each octave for supply air and extract air. -
Page 25: Final Checks/Starting
12.2. STARTING Using a control panel: Using the Flexit GO app (standard): • Check that the control panel has been wired up and • Connect the mains plug to the unit. was connected before the unit was started up. -
Page 26: Ce Declaration Of Conformity
1254/2014 Energy Labelling Directive Our products have been tested in accordance with 2006/42/EC Machine Directive (Safety) Producer: FLEXIT AS, Televeien 15, 1870 Ørje, Norway Type: Nordic S4 Air handling unit Complies with the following standards: Safety standard EN 60335-1:2012 + A11... - Page 27 Warranty claims will only be valid if the instructions in the manuals have been followed. Our products are subject to continuous development and we therefore reserve the right to make changes. We also disclaim liability for any printing errors that N O R D I C S 4...
- Page 28 FLEXIT AS, Televeien 15, 1870 Ørje, Norway www.flexit.no...
Need help?
Do you have a question about the Nordic S4 and is the answer not in the manual?
Questions and answers