Table of Contents
Advertisement
Quick Links
Quick Start Guide
Easy steps to getting started
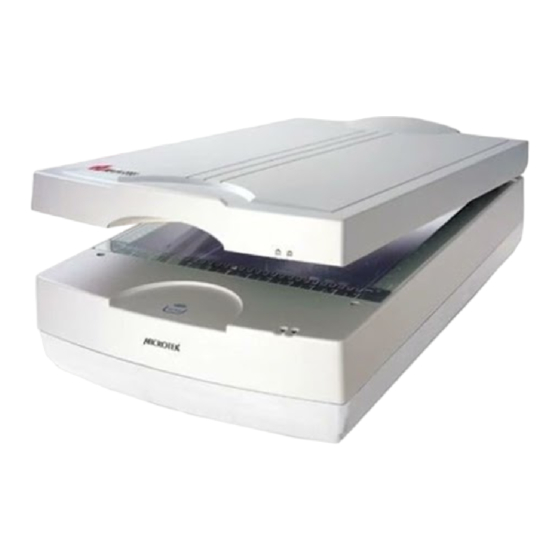
Unpack Contents
Unpack your digitizer package and check for
major components.
1. Medi-5000 Film Image Digitizer
(lower base)
2. Transparent Media Adapter
(TMA)
3. Hi-Speed USB Cable
4. Power Cord
5. Software CD
6. 18 x 24 cm Mammography Film Holder
7. 24 x 30 cm Mammography Film Holder
Install Software
Important: You must install software before connecting
your digitizer. Always close any open programs and turn
off Anti-virus utilities before installing software.
A. Turn on your computer.
B. Place the Medi-5000 CD-ROM into the CD-ROM drive, and follow the on-screen
instructions to install the driver and software.
C. Restart your computer.
NOTE: If the Software Installer screen does not come up automatically, double-click the following in
succession: "My Computer"; the CD-ROM icon; then cdsetup.exe to start the installer program.
Copyright © 2013
Microtek International, Inc.
I49-004627 B, September 2013
2
3
4
1
http://www.microtek.com
1
6
5
7
Mammography
18 x 24 cm Film Holder
Mammography
24 x 30 cm Film Holder
Advertisement
Table of Contents

Subscribe to Our Youtube Channel
Related Manuals for Microtek Medi-5000

Summary of Contents for Microtek Medi-5000
- Page 1 Always close any open programs and turn off Anti-virus utilities before installing software. A. Turn on your computer. B. Place the Medi-5000 CD-ROM into the CD-ROM drive, and follow the on-screen instructions to install the driver and software. C. Restart your computer.
- Page 2 Unlock Digitizer A. Remove the yellow “Unlock” sticker from your digitizer. B. With the digitizer power off, turn the digitizer on its side and locate the locking screw at the bottom of the digitizer. C. Using a screwdriver, push and turn the locking screw counterclockwise to the unlock position.
- Page 3 Connect Digitizer To the power cord A. Connect the power cord to the back of the digitizer. B. Plug one end of the power cord into a wall outlet or other power source. To the Hi-Speed USB cable C. Connect one end of the Hi-Speed USB cable to your computer. D.
- Page 4 U-shaped ruler located at the scan Microtek logo bed of the digitizer. Make sure to U-shaped ruler (front orient the side with the “Microtek” area of the scan bed) logo facing up. • The arrow marks on both the film holder and the digitizer are pointing to each other.
- Page 5 All four windows (Preview, Settings, Scan Job Preview window in the ScanWizard Medi Queue and Information) appear automatically or the Scan button on the Medi-5000 unit. after the ScanWizard Medi is started up at the first time. You may hide the Scan Job b) When the “Scan To: Save As”...
- Page 6 In step 3a, instead, choose “ Reflective” to switch to the Reflective scanning mode; a different look of the Preview window appears. For more details about how to scan the reflectives, refer to the Medi-5000 User’s Manual.
- Page 7 Problems? All On - Ready to scan The green LED on the front panel indicates the status of the digitizer. The amber LED beside it Green Flashing - Scanning stands for power and should always stay on steady when the digitizer is on. All Off - digitizer is off First, make sure that you have followed installation steps as described in this document.
- Page 8 After you finish the installation of software, if you found that the installed drivers and software cannot run your product or your computer system properly later, please go to the Microtek Download Service site at ww7.microtek.com.tw/service.php to download and install any updates you may require.
Need help?
Do you have a question about the Medi-5000 and is the answer not in the manual?
Questions and answers