
Related Manuals for TICA MINI VRF CHR Series


Summary of Contents for TICA MINI VRF CHR Series
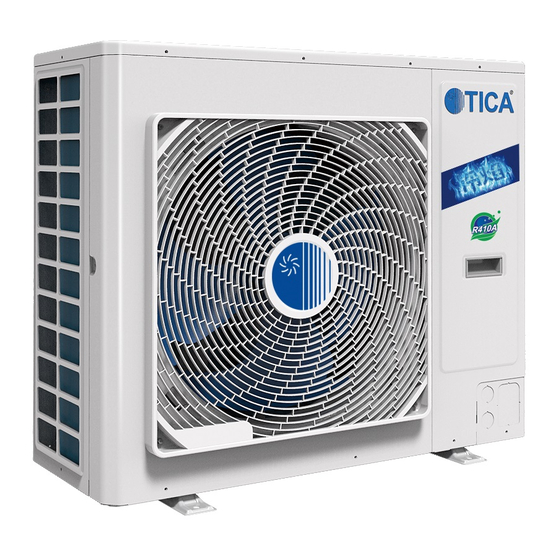
- Page 1 INSTALLATION& OPERATION MANUAL Installation&Operation Manual MINI VRF (CHR/CSREA series)
-
Page 2: Table Of Contents
Contents Safety Precautions ........................... 5 Installation of ODU ........................... 6 Dimensions ............................. 6 Installation space............................ 7 Handling ............................... 10 Placement ............................10 Installation of refrigerant piping ......................12 Caution: ..............................12 Diameters of refrigerant piping ......................13 Installation of branch pipes ........................14 Limits for refrigerant piping........................ - Page 3 No.: Application Form for Debugging Household Inverter VRF Air Conditioning Unit by Installer Full name of installer:_________________________________________________________ Address of installer:___________________________________________________________ Owner's name or employer:_____________________________________________________ Person to contact:________________________Tel:__________________________________ Installation site: ______________Province City_________________ Unit model:_______________________________ IDU bar code:_____________________________ ODU bar code:____________________________ Distributor:_______________________________ Person to contact:_______________________ Tel:_____________________________________ Fax:__________________________________...
- Page 4 Whether vacuumized refrigerating system against installation manual Yes ( ) No ( ) g. Whether supplemented refrigerant according to standard Yes ( ) No ( ) «TICA PRO» LLC Tel.: +7 495 127 79 00, +7 969 190 85 85 E-mail: info@tica.pro...
-
Page 5: Safety Precautions
Caution: Read this manual carefully before installation and use of the unit. The following standard is applied to this product: GB/T 18837-2015 GB4706.1-2005 This installation manual is applied to TICA TIMS series household R410A inverter VRF air conditioning units. The manual is subject to change based on improvement on air conditioners without further notice. -
Page 6: Installation Of Odu
Installation of ODU Standard model ODU capacity is indicated by its cooling capacity with the unit kW TIMS180 TIMS080 TIMS100 TIMS112 TIMS TIMS TIMS TIMS200 TIMS224 Model 125CHR 140CHR 160CHR CSREA CSREA CSREA Cooling 8.0kW 10.0kW 11.2kW 12.5kW 14.0kW 16.0kW 18.0kW 20.0kW 22.4kW... -
Page 7: Installation Space
Installation of ODU Installation space Requirements for installation position • The installation position shall have sufficient strength to bear the unit weight and its vibration during operation. If the ODU is installed on a roof, make sure the roof is strong enough and water-proof. - Page 8 • The side with TICA symbol attached shall be the front side of ODU. • The space required for installing or maintaining an ODU is shown in the following figure.
- Page 9 Installation of ODU...
-
Page 10: Handling
Installation of ODU Handling Caution: • Fragile and handle with care. • The degree of inclination shall not exceed 30° while handling (do not put the unit on its side). • Keep heat exchange fins safe while handling and installing the unit. In case of any damages, please use fin comb to fix it up. - Page 11 Installation of ODU • Concrete foundation: the foundation shall be above the ground for at least 150 mm. • Use anchor bolts, nuts and pads to fasten the ODU tightly to the base. Caution: shock-absorbing pads need to cover the entire bottom of the unit, and the pad thickness is greater than or equal to 20 mm.
-
Page 12: Installation Of Refrigerant Piping
Installation of refrigerant piping Caution: • Use clean piping that is free from dust, moisture or any other substances. • Store all the pipelines needed for installation indoors, and keep two ends of pipelines sealed till welding. • Pass copper pipes into the holes at wall and seal the holes to prevent dirt coming in. •... -
Page 13: Diameters Of Refrigerant Piping
*1: Contact TICA's engineers when exceeding the above limits. *2. The total refrigerant quantity of the unit should not be greater than 6.5 kg, otherwise the unit may fail to operate safely and reliably. Please consult TICA's engineers for details. Diameters of refrigerant piping... -
Page 14: Installation Of Branch Pipes
Installation of refrigerant piping • The piping between the last-level branch pipe and IDU shall have the same sizes with IDU piping. • The piping between branch pipes shall be based on the total capacity of downstream IDUs connected to the piping. Air pipe specifications Total capacity of connected IDUs Liquid pipe specifications (mm) - Page 15 Installation of refrigerant piping Branch pipes can be vertically or horizontally installed and as close as possible to the IDU. When installed horizontally, the angle shall be between ±15°. See the following figure when branch pipes are installed vertically. • Size of branch pipes: TBP4022TA...
- Page 16 TBP4033TA TBP4072TA...
-
Page 18: Limits For Refrigerant Piping
Installation of refrigerant piping Limits for refrigerant piping Capacity combination 80% ≤ ≤ 130% Σ Rated cooling capacity of IDU Rated cooling capacity of ODU Remarks: It is recommended that the above value shall not be greater than 100% when selecting models. -
Page 19: Air Tightness Test, Vacuuming And Supplementing Refrigerant
Air tightness test, vacuuming and supplementing refrigerant For TIMS units, vacuum pump, pressure gauge, compound pressure gauge and charging hose used for R410A refrigerant are different from those used for R22 refrigerant. Make sure to use R410A dedicated tools. Air tightness test Caution: •... -
Page 20: Supplementing Refrigerant
Air tightness test, vacuuming and supplementing refrigerant • Vacuum air pipe and liquid pipe at the same time. Before vacuuming, make sure again that stop valves at air and liquid sides of IDUs are closed. • Use R410A dedicated tools, such as pressure gauge and liquid supplementing pipe. Supplementing refrigerant Principles: Before delivery, the ODUs have been filled with a certain amount of refrigerant, but which... -
Page 21: Electrical Control Installation
Electrical control installation Wiring cautions Cautions for power wiring • Use copper wire as power wire and do not make it too tight. • All the IDUs and ODUs of the same system must be supplied with power simultaneously. • The distribution box shall be provided with a set of electric leakage protection device and air switch for each module. - Page 22 • When power line is parallel with communication line, they shall be covered by respective conduits and kept at some distance away.
-
Page 23: Wiring Specifications
Electrical control installation Wiring specifications Notes: • As wires need to be bent during installation process, it is recommended to use flexible wires, otherwise installation may fail. • The parameters in the table below are corresponding to multiple strands of flexible copper wires. -
Page 24: Electrical Wiring
Electrical control installation Electrical wiring Communication wiring... -
Page 25: Code Settings
ODU Control Panel Mechatronic control panel (8.0 kW and 10.0 kW) Digital display Code settings Notes: '0' for the status above, and '1' when dialed to the "ON" position. Description on ODU address setting: based on the specific situation after installation is completed. - Page 26 ODU Control Panel 11.2 kW – 33.5 kW Digital display KEY1 KEY2 KEY3 KEY4 KEY5 Code settings S1: model setting BIT5 BIT6 BIT7 BIT8 BEDC Reserved CHTF Reserved CHRF Reserved Single phase: 0 DHTF BEDC DHRF Reserved Reserved Reserved Reserved Reserved CHTA Reserved...
- Page 27 ODU Control Panel S2 reserved: BIT1 BIT2 BIT3 BIT4 Remarks Value Reserved Reserved Reserved Reserved S3: DIP switch of ODU capacity BIT1 BIT2 BIT3 BIT4 Capacity 8 kW 10 kW 11.2 kW 12.5 kW 14 kW 16 kW 18 kW 20 kW 22.4 kW 25.2 kW...
- Page 28 ODU Control Panel Parameter setting: MEU1 parameters Set centralized control SP01 AR01, AR02……AR99 address Set baud rate for SP02 1920Q 9600 centralized monitoring SP03 Silent mode non-silent mode temperature trend control smart silent mode forced silent mode 0003: cooling fully on, 0004: cooling SP09 Manual power on/off fully off...
- Page 29 ODU Control Panel Table of fault codes of digital tubes: Fault Code Content E000 Disconnection of inverter high pressure switch E001 Fan drive fault E002 Inverter compressor overload E003 Too high air discharge temperature E004 Inverter drive communication fault E005 Fan drive communication fault E006 Inverter drive overheat fault...
- Page 30 ODU Control Panel E037 Protection enabled when ambient temperature too high/low E038 No communication E039 System failure E040 Protection against high AC voltage E041 Protection against low AC voltage E042 Protection against high AC current E043 Disconnection of low pressure switch E044 Heat exchanger high temperature protection E045...
- Page 31 Follow the Official Site of TICA PRO LLC www.tica.ru «TICA PRO» LLC Tel.: +7 495 127 79 00, +7 969 190 85 85 E-mail: info@tica.pro www.tica.ru...
Need help?
Do you have a question about the MINI VRF CHR Series and is the answer not in the manual?
Questions and answers