Netopia 3341-ENT Getting Started Manual
Netopia 3341-ent: user guide
Hide thumbs
Also See for 3341-ENT:
- Firmware user manual (334 pages) ,
- Specifications (2 pages) ,
- Specification sheet (2 pages)
Table of Contents
Advertisement
Advertisement
Table of Contents

Related Manuals for Netopia 3341-ENT


Summary of Contents for Netopia 3341-ENT
-
Page 1: Adsl Router
Netopia™ 3341-ENT ADSL Router Getting Started Guide ™ AKING ROADBAND... - Page 2 This manual and any associated artwork, software, and product designs are copyrighted with all rights reserved. Under the copyright laws such materials may not be copied, in whole or part, without the prior written consent of Netopia, Inc. Under the law, copying includes translation to another language or format.
-
Page 3: Table Of Contents
What You Need ... 2-1 Important Safety Instructions ... 2-2 Identify the Connectors and Attach the Cables ... 2-3 Netopia 3341-ENT ADSL Router Status Lights... 2-6 Readying Computers on Your Local Network... 3-1 Connecting to an Ethernet Network ... 3-2 Configuring TCP/IP on Windows-based Computers... - Page 4 Getting Started Guide 3. IP Easy Setup ... 6-6 4. Easy Setup Security Configuration ... 6-8 Appendix A — Technical Specifications and Safety Information ..A-1 Description... A-1 Power requirements ... A-1 Environment ... A-1 Software and protocols... A-1 Agency approvals... A-2 Regulatory notices ...
-
Page 5: Chapter 1 - Introduction
The Netopia 3341-ENT ADSL Router is a full-featured, stand-alone DSL router for connecting diverse local area networks (LANs) to the Internet and other remote networks. The Netopia 3341-ENT ADSL Router uses a high performance ADSL line to provide your whole network with a high-speed connection to the outside world. -
Page 6: How To Use This Guide
3-hole punched paper, so that you can put the pages in a binder for future reference. This guide is organized into chapters describing the Netopia 3341-ENT’s advanced features. You may want to read each chapter’s introductory section to familiarize yourself with the various features available. -
Page 7: Chapter 2 - Making The Physical Connections
Cable length and network size limitations when expanding networks For small networks, install the Netopia 3341-ENT near one of the LANs. For large networks, you can install the Netopia 3341-ENT in a wiring closet or a central network administration site. -
Page 8: Important Safety Instructions
You will need: • A Windows–based PC or a Macintosh computer with Ethernet connectivity for configuring the Netopia 3341-ENT. This may be built-in Ethernet or an add-on card, with TCP/IP installed and configured. See “Sharing the Connection” on page •... -
Page 9: Identify The Connectors And Attach The Cables
Identify the Connectors and Attach the Cables Identify the connectors and switches on the back panel and attach the necessary Netopia Router cables. • • • • E E E E t t t t h h h h e e e e r r r r n n n n e e e e t t t t C C C C o o o o n n n n n n n n e e e e c c c c t t t t i i i i o o o o n n n n m m m m e e e e t t t t h h h h o o o o d d d d ( ( ( ( p p p p r r r r e e e e f f f f e e e e r r r r r r r r e e e e d d d d ) ) ) ) Connect your computer, DSL line, and power source as shown. - Page 10 Windows and Macintosh are included on the Netopia CD. Connect your computer, DSL line, and power source as shown. 1. Run the USB driver installer program from the Netopia CD to install USB drivers on your Windows PC or Macintosh. Follow the on screen instructions.
- Page 11 3341-ENT. For a new installation, use an Ethernet connection. You can either connect your computer directly to the Ethernet port using the supplied Category 5 Ethernet cable, or connect both your computer and the Netopia 3341-ENT to an existing LAN environment. The Ethernet port is auto-sensing, eliminating the need for a crossover cable.
-
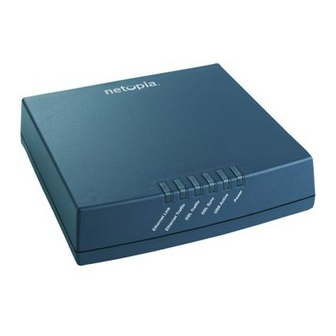
Page 12: Netopia 3341-Ent Adsl Router Status Lights
2-6 Getting Started Guide Netopia 3341-ENT ADSL Router Status Lights The figure below represents the Netopia 3341-ENT status light (LED) panel. Netopia 3341-ENT status indicator lights Ethernet Link: Solid green Ethernet Traffic: Blinks green over the Ethernet DSL Traffic: Blinks... -
Page 13: Chapter 3 — Connecting To Your Local Area Network
C C C C o o o o n n n n n n n n e e e e c c c c t t t t i i i i n n n n g g g g t t t t o o o o Y Y Y Y o o o o u u u u r r r r L L L L o o o o c c c c a a a a l l l l A A A A r r r r e e e e a a a a N N N N e e e e t t t t w w w w o o o o r r r r k k k k This chapter describes how to physically connect the Netopia 3341-ENT to your local area network (LAN). Before you proceed, make sure the Netopia 3341-ENT is properly configured. -
Page 14: Connecting To An Ethernet Network
Ethernet: Ethernet hardware and software drivers enable your PC or Macintosh computer to communicate on the LAN. Once the Netopia 3341-ENT is properly configured and connected to your LAN, PC and Macintosh computers that have their required components in place will be able to connect to the Internet or other remote IP networks. -
Page 15: Chapter 4 - Sharing The Connection
Once you have set up your physical local area network, you will need to configure the TCP/IP stack on each client workstation connected to your Netopia 3341-ENT. This chapter describes how to configure TCP/IP for both Windows-based and Macintosh computers. -
Page 16: Dynamic Configuration (Recommended)
DNS will be assigned by the router with DHCP. Click OK in this window and the next window. When prompted, reboot the computer. Note: You can also use these instructions to configure other computers on your network to accept IP addresses served by the Netopia 3341-ENT. -
Page 17: Static Configuration (Optional)
IP Address: 192.168.1.2 Subnet Mask: 255.255.255.0 This address is an example of one that can be used to configure the router. Your ISP or network administrator may ask you to use a different IP address and subnet mask. Sharing the Connection 4-3... - Page 18 Click on the Gateway tab (shown below). Under “New gateway,” enter 192.168.1.1. Click Add. This is the Netopia 3341-ENT’s pre-assigned IP address. Click OK in this window and the next window. When prompted, reboot the computer. Note: You can also use these instructions to configure other computers on your network with manual or static IP addresses.
-
Page 19: Configuring Tcp/Ip On Macintosh Computers
You must have either Open Transport or Classic Networking (MacTCP) installed. If you want to use the Dynamic Host Configuration Protocol (DHCP) server built into your Netopia 3341-ENT to assign IP addresses to your Macintoshes, you must be running Open Transport, standard in MacOS 8 and higher and optional in earlier system versions. -
Page 20: Static Configuration (Optional)
Option: Connect via: Configure: IP Address: Subnet mask: Router or Gateway address: Name server address: Implicit Search Path: Starting domain name: Close the TCP/IP or MacTCP control panel and save the settings. If you are using MacTCP, you must restart the computer. If you are using Open Transport, you do not need to restart. - Page 21 Be sure each computer on your network has its own IP address. More information about configuring your Macintosh computer for TCP/IP connectivity through a Netopia 3341-ENT can be found in Technote NIR_026, “Open Transport and Netopia Routers,” located on the Netopia Web site.
- Page 22 4-8 Getting Started Guide...
-
Page 23: Chapter 5 - Telnet-Based Management
T T T T e e e e l l l l n n n n e e e e t t t t - - - - B B B B a a a a s s s s e e e e d d d d M M M M a a a a n n n n a a a a g g g g e e e e m m m m e e e e n n n n t t t t Telnet-based management is a menu-driven interface for the capabilities built into the Netopia 3341-ENT. -
Page 24: Connecting Through A Telnet Session
The Quick View menu displays at a glance current real-time operating information about your router. Connecting through a Telnet Session Features of the Netopia 3341-ENT can be configured through the Telnet screens. Before you can access the Telnet screens, you must have: •... -
Page 25: Configuring Telnet Software
If you connect a Macintosh computer, you can use the NCSA Telnet program supplied on the Netopia 3341-ENT CD. You install NCSA Telnet by simply dragging the application from the CD to your hard disk. Navigating through the Telnet Screens Use your keyboard to navigate the Netopia 3341-ENT’s configuration screens, enter and edit information, and... - Page 26 5-4 Getting Started Guide...
-
Page 27: Chapter 6 - Easy Setup
E E E E a a a a s s s s y y y y S S S S e e e e t t t t u u u u p p p p This chapter describes how to use the Easy Setup Telnet screens on your Netopia 3341-ENT. After completing the Easy Setup Telnet screens, your router will be ready to connect to the Internet or another remote site. -
Page 28: Quick Easy Setup Connection Path
6-2 Getting Started Guide Quick Easy Setup Connection Path This section may be all you need to do to configure your Netopia 3341-ENT ADSL Router. Your service provider will supply you with several parameter values. Below is a handy checklist:... - Page 29 The Main Menu appears. If you do not see the Main Menu, verify that: • The computer used to view the Telnet screen has an Ethernet connection to the Netopia 3341-ENT’s Ethernet port. See “Connecting through a Telnet Session” on page •...
-
Page 30: Dsl Line Configuration
Tip/Ring (Inner Pair) is the most common type, and you can usually leave this default. If there is a problem connecting, you can select AutoSense and the Router will attempt to detect the type and adjust itself accordingly. If you want to set it yourself, and you know that you have the reversed inner/outer pair type of wiring, choose A/A1 (Outer Pair) from the pop-up menu. -
Page 31: Easy Setup Profile
ISP or a corporate site. On a Netopia 3341-ENT you can add up to 15 more connection profiles, for a total of 16, although you can only use one at a time, unless you are using Virtual Private Networks (VPNs). -
Page 32: Ip Easy Setup
Select Ethernet IP Address and enter the first IP address from the IP address range your ISP has given you only if you are not using Network Address Translation (NAT). This will be the Netopia Router’s IP address. The Ethernet IP Address defaults to an address (192.168.1.1) within a range reserved by the Internet address administration authority for use within private networks. - Page 33 If you do not enter a Default IP Gateway value, the router defaults to the remote IP address you entered in the Easy Setup connection profile. If the Netopia Router does not recognize the destination of any IP traffic, it forwards that traffic to this gateway.
-
Page 34: Easy Setup Security Configuration
PREVIOUS SCREEN Configure a Configuration Access Name and Password here. The final step in configuring the Easy Setup Telnet screens is to restart the Netopia 3341-ENT, so that the configuration settings take effect. Select RESTART DEVICE. A prompt asks you to confirm your choice. -
Page 35: Appendix A - Technical Specifications And Safety Information
Dimensions: 13.5 cm (w) x 13.5 cm (d) x 3.5 cm (h) 5.25” (w) x 5.25” (d) x 1.5” (h) Communications interfaces: The Netopia 3341-ENT Router has an RJ-45 jack for WAN line connections and 1–port 10/100Base-T Ethernet switch for your LAN connections. The USB port can be used to connect to your Power requirements •... -
Page 36: Regulatory Notices
EN300 386 V1.2.1 Regulatory notices European Community. This Netopia product conforms to the European Community CE Mark standard for the design and manufacturing of information technology equipment. This standard covers a broad area of product design, including RF emissions and immunity from electrical disturbances. - Page 37 It is the responsibility of users requiring service to report the need for service to our Company or to one of our authorized agents. Service can be obtained at Netopia, Inc., 6001 Shellmound Street, Emeryville, California, 94608. Note: Important This product was tested for FCC compliance under conditions that included the use of shielded cables and connectors between system components.
-
Page 38: Important Safety Instructions
-4 Getting Started Guide Caution Users should not attempt to make such connections themselves, but should contact the appropriate electric inspection authority, or electrician, as appropriate. The Ringer Equivalence Number (REN) assigned to each terminal device provides an indication of the maximum number of terminals allowed to be connected to a telephone interface. -
Page 39: Electrical Safety Advisory
If your home has specially wired alarm equipment connected to the telephone line, ensure the installation of this Netopia 3300 Series router does not disable your alarm equipment. If you have questions about what will disable alarm equipment, consult your telephone company or qualified installer. - Page 40 -6 Getting Started Guide...
Need help?
Do you have a question about the 3341-ENT and is the answer not in the manual?
Questions and answers