Table of Contents
Advertisement
Quick Links
Instruction & Installation Manual
Portable water-cooled air conditioner
CTW-18
.
THANK YOU FOR PURCHASING THIS WATER-COOLED PORTABLE AIR CONDITIONER
FOR
SAFE AND CORRECT OPERATION, PLEASE CAREFULLY READ THE INSTRUCTIONS BEFORE
OPERATION.
NOTE: All of the information reported herein is based on data available at the moment of printing.
The factory reserves the right to modify its own products at any moment without notice. The
company reserves the right of final interpretation.
844-349-5665
www.Clima-Temp.com
1
Advertisement
Table of Contents

Related Manuals for ClimaTemp Portables CTW-18


Summary of Contents for ClimaTemp Portables CTW-18
- Page 1 Instruction & Installation Manual Portable water-cooled air conditioner CTW-18 THANK YOU FOR PURCHASING THIS WATER-COOLED PORTABLE AIR CONDITIONER SAFE AND CORRECT OPERATION, PLEASE CAREFULLY READ THE INSTRUCTIONS BEFORE OPERATION. NOTE: All of the information reported herein is based on data available at the moment of printing.
-
Page 2: Table Of Contents
Table of Contents 1. Warnings and Safety Instructions………………… 2. Technical Specifications…………………………… 3. Components and Parts Breakdown……………… 4. Hose Kit & Nozzle Kit Accessories……………… 5. HEPA Kit Accessory………………………………. 6. Installation Instructions…………………………… 7. Operation……………………………………………. 8. Unit Placement……………………………………… 9. Maintenance and Inspection……………………. 10. Off Season Preventative Maintenance…………. 11. - Page 3 INSTALLATION & GENERAL SAFETY INFORMATION ● Unit Designed for indoor usage only. Do not submerge or spray water on the portable air conditioner. ● Do not use the unit at conditions above 95°F in cooling mode ● Use 115V-60HZ, 1Phase power supply only. Securely plug into grounded 15amp outlet.
-
Page 4: Technical Specifications
Please do not put your fingers and hands into the air outlet Unit is equipped with a LCDI power supply cord and must be replaced with a new LCDI power cord from ClimaTemp Portables, if damaged. Replacing the plug or repairing will void the unit warranty. - Page 5 Parts and Components Breakdown...
- Page 6 Parts and Components List Item Item Description Qty. Item Item Description Qty. Recessed handle Universal wheel Hinge Directional wheel Upper cover assembly Chassis Upper panel assembly Power cord clamp Cover plate of electric control box Drain plug Electric control display board Copper nut M18 Drainage welding joint Electric control box...
- Page 7 Product Components Supply Air Grill Return Air Grill Filter screen Water In Water Out Lower panel Condensate Out Storage box door Hose Kit Storage Pocket Power cord hook Drain valve Drain plug of heat exchanger Control panel Electrical box Drainage pump...
-
Page 8: Hose Kit & Nozzle Kit Accessories
Accessories Hose Kit 30' Quick Connect •Accessories Hose Kit 1(30’) Connecting connector Gasket 1 Gasket 2 Union gasket Duct base 1(Buy separately) Cold air duct 2(Buy separately) Quick female connector Male coupler to drain hoses Gasket 1 Gasket 2 Movable coupling nut Connecting connector Union seal ring Water Inlet Hose... -
Page 9: Hepa Kit Accessory
Please follow the instructions for installing the HEPA accessory kit below: 1. Working from the front of the CTW-18 remove the front lower metal panel by removing the set screws. This will allow access to the 2 screws to remove the evaporator panel. -
Page 10: Installation Instructions
Quick Connect Hose Kit Installation Instructions All ClimaTemp portable water-cooled units are equipped with quick connect fittings. These quick connect fittings feature a double lock quick connection for a safer connection between the unit and hose kit. (a) To connect hose, hold the female quick connector and line up with male quick connect on the unit; (b) Connect the female connector with the connector on the machine according to the corresponding color code, move the locking sliding sleeve of the female connector back by hand, and release the sliding sleeve after the connector is completely connected;... - Page 11 Requirements for Connecting the Hose Kit to Water Source Thread specification for sink adapter fitting External thread specification 15/16"-27 Internal thread specification 55/64"-27T Connection method: (a) Install sink adapter fitting to sink or faucet connection and tighten, make sure gasket is in place. (b) Connect and tighten the ¾”...
- Page 12 Power cord connection Please take power directly from 115V/60Hz power socket Notice u If you need to use an extension cord, please select the appropriate power extension cord according to the following table. u If the extension wire is too long and thin, it will cause voltage drop and make the machine unable to operate normally, leading to machine failure.
-
Page 13: Operation
Operation ● Inspection before use Check whether the cooling water is connected; Check whether the power supply meets the requirements of the machine. ● Power switch When the power is turned on, the power switch indicator is on. Press the power switch button to turn the machine on and off. - Page 14 Air Louvre and Castor Adjustments Adjustment of air outlet direction. The user can gently push and pull the Louvre to adjust the air outlet direction as required. Down Locking of casters. The front two universal wheels are equipped with locking devices. For safety, please fix the locking device in the OFF position when the machine is in operation.
-
Page 15: Unit Placement
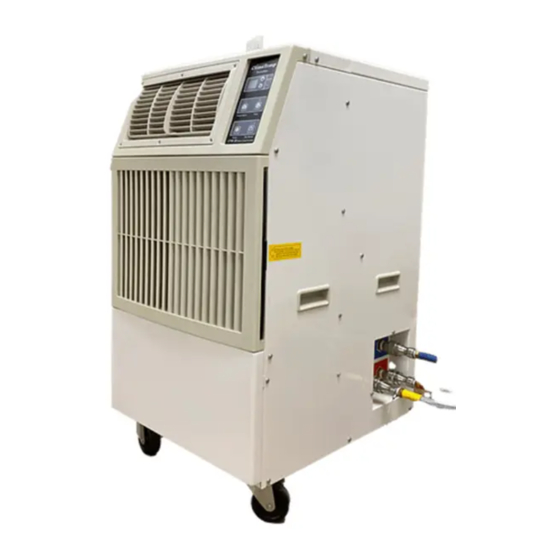
Unit Placement Requirements • The machine should be placed on a flat ground and shall not be used on slopes, uneven floors, and building exits, etc. to avoid safety accidents. • The unit should not be used in wet locations and is not rated for outdoor use. Left view illustration Top view diagram... -
Page 16: Maintenance And Inspection
Maintenance and Inspection Be careful ● Please clean the filter screen regularly. If there is dust and dirt on the filter screen, it will affect the air inlet volume of the machine and may malfunction or cause machine failure, ● When cleaning the machine surface, do not use thinner, volatile oil and other chemicals, otherwise the appearance quality of the machine will be affected, ●... -
Page 17: Off Season Preventative Maintenance
DRAINING THE QUICK CONNECT HOSE KIT To drain the CTW-18 hose kit, disconnect all hoses from unit, connect lanyard fitting which is attached to the hose kit ends, and allow the hoses to gravity drain. REMOVING WATER FROM THE CONDENSATE PUMP Access the condensate pump by removing the lower front cover of the unit. -
Page 18: Servicing And Replacement Of Component Parts
Servicing & Replacement of Component Parts ELECTRONIC CONTROL MAIN PC BOARD (PART #80) 1. Remove lower front cover to access components and main PC board. 2. Take a picture of wire placement on the main PC board for reference. 3 . Disconnect wires individually, making note of location for reconnection. 4. -
Page 19: Troubleshooting And Fault Codes
Troubleshooting and Fault Codes Problem Causes Solutions Make sure the LCDI power plug is seated into the LCDI ground fault breaker trip or breaker receptacle firmly. trip from power source. Reset the LCDI on the plug. A green light should The power plug is loose from receptacle. -
Page 20: Product Warranty
Limited Warranty ClimaTemp Portables Inc. warrants its portable air conditioner products and accessories against defects in material or workmanship. Under ordinary use ClimaTemp will, at its sole discretion, repair or replace any defective product or part covered by this warranty. Warranty coverage is (12) monthsfor all parts on the ClimaTemp product and (36) months on the compressor or compressor components. - Page 21 Technical Support For Technical Support, Service or Parts, Contact us at 844-349-5665. We can also be reached on our website for Technical Support and Warranty Registration at www.clima-temp.com/warranty-registration UL 2998 Ozone-Free Validation ClimaTemp Portables Inc. 844-349-5665. www.Clima-Temp.com...
Need help?
Do you have a question about the CTW-18 and is the answer not in the manual?
Questions and answers