Chapters

Related Manuals for Itek ITMF22V075FHD


Summary of Contents for Itek ITMF22V075FHD
-
Page 1: Table Of Contents
ITMF22V075FHD User Manual Table Of Contents Safety Precautions 2. Maintenance Guidelines Box Contents Product Overview t nd Inst llat on Mount Installation Connectivity Options Basic Operation Indicator Light Technical Specifications For more information please visit our web site or write us an email: https://www.itekevo.com... -
Page 3: Safety Precautions
1. Safety Precautions WARNING:Safety Instructions Do not place the monitor in rain,humid environment or open the monitor case to avoid any shock, electrical hazards,and/or mechanical hazards. Oper ation • Keep the monitor out of direct sunlight and away from stoves or any other heat source. -
Page 4: Box Contents
Stand Stem x 1 Stand Base x 1 Screws x 5 Spacer Screws x 4 HDMI Cable x 1 (For Wall Mounting) ITMF22V075FHD User Manual Table Of Contents Safety Precautions 2. Maintenance Guidelines Box Contents Product Overview t nd Inst llat on... -
Page 5: Product Overview
4. Product Overview 4.1 – Monitor Buttons Rocker switch button: Press to turn on or turn off the monitor. Left rocker button: Push the rocker left to exit OSD menu. Down rocker button: Push the rocker down to move down in menus. Right rocker button: Push the rocker right to enter sub-menus/ quickly enter the main menu. - Page 6 5. Stand lnstallation 1. Open the package, take out the product with foam still attached, and gently place it on a desktop or table. Stand Stem Upper foam cover Stand Base Lower foam cover 2. Take out the stand, install it on the rotary shaft of the monitor and tighten them with 2 screws.
-
Page 7: Mount Installation
4. Grasp the bracket with your hands to stand up the machine. During the process of erecting the machine, do not directly pinch the screen with your hands to prevent the screen from breaking. 6. Mount Installation 1. Open the package, take out the product with foam still attached, and gently place it on a desktop or table. -
Page 8: Connectivity Options
3. Do not pinch the screen directly with your hands during the process of hanging the product to prevent the screen from breaking. Wall bracket Wall adapter Do not place or hang any object on the mount, and the using height of the mount should be less than 2 meters. 7. - Page 9 7.3 – VGA Connectivity In order for the monitor to receive VGA signals from the computer, use the VGA cable to connect the monitor to the computer. VGA Cable (Not Included) VGA OUTPUT 7.4 – HDMI Connectivity In order for the monitor to receive HDMI signals from the computer, use the HDMI cable to connect the monitor to the computer.
-
Page 10: Basic Operation
8. Basic Operation 1. Insert one end of the HDMI cable into your PC's graphics card. A VGA cable may also be used. 2. Connect the other end of the cable to the corresponding connector on your monitor. HDMI Connector Audio Output VGA Connector 3. -
Page 11: Osd
10. OSD The On-Screen Display(OSD) Menu may be used to adjust your monitor's settings and appears on screen after turning on the monitor and pressing the M button. When using the monitor for the first time, settings will automatically adjust to optimal settings according to your computer's configuration and parts etc. - Page 12 10.1– OSD Menu Functions Main Menu Sub Menu Options Description 0-100 BRIGHTNESS BRIGHTNESS Adjust display brightness CONTRAST 0-100 Adjust display contrast STANDARD/GAME/ Set visual mode RTS/FPS/MOVIE/TEXT OFF/ON Turn off/on DCR function IMAGE H.POSITION 0-100 Adjust horizontal position V.POSITION 0-100 Adjust vertical position CLOCK 0-100 Adjust clock...
-
Page 13: Technical Specifications
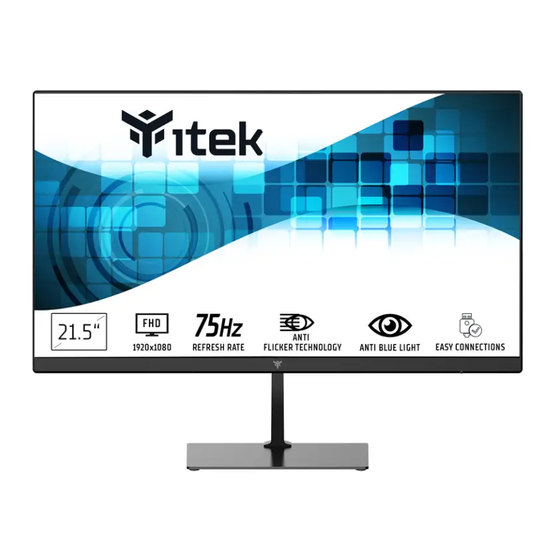
11. Technical Specifications ITMF22V075FHD Model Screen Size 21.45" Aspect Ratio 16:9 E-LED Backlight Brightness 250cd/m²(Typ.) Panel Resolution HDMI1.4: 1920*1080@75Hz Refresh Rate 75Hz Response Time 178°(H)/178°(V) Viewing Angle 3000:1 Contrast Ratio VESA Mounting 75 x 75mm 16.7M Display Colours Adaptive-sync HDMI 1.4*1, VGA *1... - Page 14 Imported and distribuited for ITEK Europe Bestit Srl, via dei Fabbri, 40050, Funo di Argelato, Bologna, Italy Web: www.itekevo.com Mail: info@itekevo.com...
- Page 15 ITMF22V075FHD Manuale utente Sommario Misure di sicurezza 2. Linee guida per la manutenzione Contenuto della scatola Panoramica del prodotto lnstallazione Stand lnstallazione del supporto Opzioni di connettività Funzionamento di base lndicatore LED Specifiche tecniche For more information please visit our web site or write us an email: https://www.itekevo.com...
-
Page 17: Misure Di Sicurezza
1. Misure di sicurezza AVVISO: lstruzioni di sicurezza Non posizionare il monitor in presenza di liquidi, umidità o aprire la scocca per evitare scosse, pericoli elettrici e/o meccanici. Operazione • Tenere il monitor lontano dalla luce solare diretta e da qualsiasi altra fonte di calore. •... -
Page 18: Contenuto Della Scatola
Stand stelo x 1 Base del supporto x 1 Viti x 5 Viti distanziali x 4 Cavo HDMI x 1 (Per montaggio a parete) ITMF22V075FHD Manuale utente Sommario Misure di sicurezza 2. Linee guida per la manutenzione Contenuto della scatola Panoramica del prodotto... -
Page 19: Panoramica Del Prodotto
4. Panoramica del prodotto 4.1 – Pulsanti del monitor Tasto Rocker: premerlo per accendere o spegnere il monitor. Tasto Rocker sinistro: premere il tasto rocker a sinistra per uscire dal menu OSD. Tasto Rocker giù: premere il tasto Rocker verso il basso per spostarsi verso il basso nei menu. -
Page 20: Lnstallazione Stand
5. lnstallazione Stand 1. Aprire la confezione, estrarre il prodotto con l’imballo di polistirolo e posizionarlo delicatamente sopra un tavolo. Stand stelo Copertura in polistirolo superiore Base del supporto Copertura in polistirolo inferiore 2. Estrarre lo stand e utilizzando due viti fissarlo al supporto rotante del monitor. viti 3. -
Page 21: Lnstallazione Del Supporto
4. Afferrare il supporto con entrambe le mani per sollevare il monitor. Durante il processo di installazione, per evitare che lo schermo si rompa, non schiacciarlo con le mani. 6. lnstallazione del supporto 1. Aprire la confezione, estrarre il prodotto con l’imballo di polistirolo e posizionarlo delicatamente sopra un tavolo. -
Page 22: Opzioni Di Connettività
3. Durante il processo di installazione del prodotto maneggiare con attenzione lo schermo senza schiacciarlo con le mani. Supporto a parete Adattatore da parete Note: per evitare che il monitor sul supporto si muova, installarlo saldamente. Non posizionare o appendere alcun oggetto sul supporto e l'altezza di utilizzo del supporto deve essere inferiore a 2 metri. - Page 23 7.3 – Connettività VGA Affinché il monitor riceva i segnali VGA dal computer, utilizzare il cavo VGA per collegare il monitor al computer. Cavo VGA (Non Incluso) VGA OUTPUT 7.4 – Connettività HDMI Affinché il monitor riceva i segnali HDMI dal computer, utilizzare il cavo HDMI per collegare il monitor al computer.
-
Page 24: Funzionamento Di Base
8. Funzionamento di base 1. Inserire un'estremità del cavo HDMI nella scheda grafica del PC. Può essere utilizzato anche un cavo VGA. 2. Collegare l'altra estremità del cavo al connettore corrispondente sul monitor. Connettore HDMI Uscita Audio Connettore VGA 3. Collegare il cavo di alimentazione al monitor, quindi collegare l'altra estremità alla fonte di alimentazione. -
Page 25: Osd
10. OSD II menu OSD (On-Screen Display) può essere utilizzato per regolare le impostazioni del monitor e viene visualizzato sullo schermo dopo aver acceso il monitor e aver premuto il tasto M. Quando si utilizza il monitor per la prima volta, le impostazioni verranno automaticamente regolate sulle impostazioni ottimali in base alla configurazione e alle componenti del computer, ecc. - Page 26 10.1– Funzioni del menu OSD Menu Principale Sottomenu Options Descrizione 0-100 LUMINOSITÀ LUMINOSITA' Regola la luminosità del display CONTRASTO 0-100 Regola il contrasto del display STANDARD/GIOCO/ Imposta la modalità visiva RTS/FPS/FILMATO/TESTO OFF/ON Disattiva/attiva la funzione DCR 0-100 IMMAGINE POSIZIONE O. Regola la posizione orizzontale POSIZIONE V.
-
Page 27: Specifiche Tecniche
11. Specifiche tecniche ITMF22V075FHD Modello Dimensioni dello schermo 21.45" Proporzioni 16:9 E-LED Retroilluminazione Luminosità 250cd/m²(Typ.) Pannello Risoluzione HDMI1.4: 1920*1080@75Hz Frequenza 75Hz Tempo di risposta 178°(H)/178°(V) Angolo di visualizzazione 3000:1 Rapporto di contrasto Montaggio VESA 75 x 75mm 16.7M Colori Dispay Adaptive-sync HDMI 1.4*1, VGA *1... - Page 28 Importato e distribuito per ITEK Europe Bestit Srl, via dei Fabbri, 40050, Funo di Argelato, Bologna, Italy Web: www.itekevo.com Mail: info@itekevo.com...
Need help?
Do you have a question about the ITMF22V075FHD and is the answer not in the manual?
Questions and answers