Table of Contents
Advertisement
Quick Links
P. O. Box 12010
Oklahoma City, OK 73157-2010
888.956.0000 • Fax: 405.228.1561
www.RedLionProducts.com
INTRODUCTION
EN
This instruction sheet provides you with the information required
to safely own and operate your Red Lion pump. Retain these
instructions for future reference.
The Red Lion pump you have purchased is of the highest quality
workmanship and material, and has been engineered to give you
long and reliable service. Red Lion pumps are carefully tested,
inspected, and packaged to ensure safe delivery and operation.
Please examine your pump carefully to ensure that no damage
occurred during shipment. If damage has occurred, please
contact the place of purchase. They will assist you in replacement
or repair, if required.
read
these
iNstructioNs
attemptiNG to iNstall, operate, or serVice Your
red lioN pump. KNoW the pump's applicatioN,
limitatioNs, aNd poteNtial haZards. protect
YourselF aNd others BY oBserViNG all saFetY
iNFormatioN.
Failure
iNstructioNs could result iN persoNal iNJurY
aNd/or propertY damaGe!
saFetY GuideliNes
During installation, follow all local electrical and safety codes, as
well as the National Electrical Code (NEC) and the Occupational
Safety and Health Act (OSHA).
This pump is supplied with a grounding conductor and/or
grounding-type attachment plug. To reduce the risk of electric
shock, ensure that it is connected to a properly-grounded,
grounding-type receptacle.
For maximum safety, this pump should be connected to a three-
prong grounded outlet equipped with a ground fault circuit
interrupter (GFCI) device.
Do not use the power cord for lifting the pump.
Do not use to pump flammable or explosive fluids such as
gasoline, fuel oil, kerosene, etc. Pump should only be used with
liquids compatible with pump component materials. Do not use in
explosive atmospheres or hazardous locations. Failure to follow this
warning can result in property damage, personal injury, or death.
Applications requiring continuous or near continuous duty should
use a submersible pump. This pump is designed for light duty
residential applications only.
operatioN
This pump is designed for domestic household service only. Pump
run time in application should be two hours or less per day.
Sump size: 13" minimum diameter, 18" minimum depth, 24"
maximum depth.
This pedestal sump pump is designed to fit most residential
basement sumps. The pump must sit level in the sump. A tilted
pump can trap air and cause possible damage to the bearings.
Make sure the base sits on a flat surface before proceeding with
the installation.
1. INSTALL FLOAT ROD GUIDE AND FLOAT ROD: Remove the
float stem components from the polybag. Thread the float
onto the float stem approximately eight turns. Slide the float
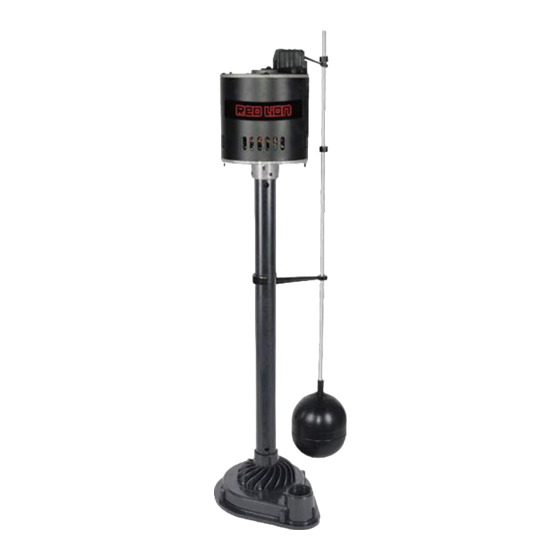
pedestal sump
pump
Model • Modèle • Modelo
sp33ped (thermoplastic)
careFullY
BeFore
to
complY
With
these
stem guide onto the float stem. Push the rubber stopper down
approximately 5" from the top of the float stem. Place the float
stem guide onto the pump column by aligning the tab on the
inside of the half circle with the hole in the column. Slide the
float stem through the opening in the switch lever and place
the remaining rubber stopper on the top of the float stem.
2. Adjust the pump level by raising or lowering the lower rubber
stopper.
3. Make sure the discharge pipe and switch side are clear from
the walls of the pump. Allowing maximum clearance around
the float will help provide long life and reliable service.
4. In situations where the piping is long, or the vertical discharge
is above 7' to 8', or a small pit has been provided, use of a
check valve is recommended to prevent back flow of water
into the sump. When a check valve is used, drill a relief hole
(1/8" to 3/16" diameter) in the discharge pipe. The hole should
be located below the floor line between the pump discharge
and the check valve. Unless a relief hole is provided, the pump
could air lock and not pump water, even though it will run.
5. A variety of possible discharge arrangements are available,
dependent on the location of the sump and existing, if any,
piping. It is recommended that a 16" length of 1-1/4" pipe
and check valve be mounted directly to the pump discharge.
Alternative discharge piping can be connected to this 16"
stand pipe and the installation can proceed from this point
as needed. The rigid 1-1/4" discharge stand pipe ensures
that flexible joints or flexible pipes do not obstruct the free
movement of the switch mechanism. Also, this arrangement
improves flow.
6. TEST THE PUMP AFTER ALL CONNECTIONS HAVE BEEN
MADE: Run water into the sump. Do not attempt to operate the
pump without water; this will damage the seals and bearings
and could result in permanent damage to the pump. Fill the
sump to the normal "on" level and allow pump to remove water
to the normal "off" level. (See Figure 1.)
7. Place the cover on sump (if provided). This will prevent debris
from falling into the pit. Make sure the cover does not obstruct
free movement of the float and that maximum clearance is
provided around the pump column and float stem rod.
serVice iNstructioNs
MAKE CERTAIN THE UNIT IS DISCONNECTED FROM THE
POWER SOURCE BEFORE ATTEMPTING TO SERVICE OR
REMOVE ANY COMPONENT!
Sump pumps are usually idle in dry weather, and may receive little or
no maintenance during this time. But when needed, after long periods
of non-use, they are expected to perform without failure. This pump
is designed to require as little maintenance as possible; however,
for long life and reliable service, periodically check the pump and its
installation during dry months to be sure that it will be ready when
needed. To properly maintain your pump, regularly:
1. Check the power cord to ensure that it is in good condition,
with no nicks or cuts.
2. After ensuring that the discharge pipe is securely in place,
check the pump for proper operation by gently lifting the lever
arm on the switch to activate the motor. Release the lever arm
after a few seconds.
3. Disconnect the power cord from the power source, then reach
into the sump and remove any debris that may be present.
4. Reconnect the power cord to the power source, then place a
hose into the sump and slowly fill it with clean water. Allow the
pump to operate for three or four cycles to flush sediment out
of the system.
5. If pump does not operate properly, consult the troubleshooting
chart. If trouble cannot be located with these steps shown,
consult your pump dealer or take the pump to a Red Lion
authorized service center.
1
Advertisement
Table of Contents

Subscribe to Our Youtube Channel
Related Manuals for red lion SP33PED


Summary of Contents for red lion SP33PED
- Page 1 The Red Lion pump you have purchased is of the highest quality into the sump. When a check valve is used, drill a relief hole workmanship and material, and has been engineered to give you (1/8"...
- Page 2 Figure 1. INTRODUCTION La présente notice d’emploi comporte tous les renseignements nécessaires pour utiliser en toute sécurité les pompes Red Lion. Garder le présent document pour référence ultérieure. Les pompes Red Lion sont soigneusement emballées, et testées pour assurer une livraison et un fonctionnement sans problèmes.
- Page 3 Lorsque ce clapet est utilisé, percer un trou de dégagement (diam. 1/8 à 3/16 po) dans le Adjunta a su bomba Red Lion, se encuentra una hoja de tuyau d’écoulement, sous le niveau du plancher et entre la instrucciones que le proporciona la informacion necesaria para sortie de la pompe et le clapet de retenue.
- Page 4 La bomba debe lleve la bomba a un centro de servicio autorizado de Red Lion. apoyarse a nivel en el sumidero. Una bomba inclinada puede 2.
- Page 5 TRoUBleSHooTING INFoRMATIoN • INFoRMATIoN SUR lA RelèVe deS dÉRANGeMeNTS • INFoRMACIoN de INVeSTIGACIoN de AVeRIAS PRoBleM • FoNCTIoNNeMeNT dÉFecteuX PRoBABle CAUSeS • CAUSeS PRoBABleS CoRReCTIVe ACTIoNS • SolUTIoNS • SolUCIoN • PRoBleMA • CAUSAS PRoBABleS Pump does not turn on. • La pompe ne peut être mise Pump not plugged in •...
- Page 6 GaraNtie limitÉe For warranty consideration, the Red Lion brand (hereafter “the Brand”) warrants Lors des requêtes en garantie, la marque de Red Lion (ci-après appelée that the products specified in this warranty are free from defects in material or « la Marque ») garantit les produits spécifiés dans cette garantie contre workmanship of the Brand.
- Page 7 GaraNtÍa limitada RECURSO. Antes de usarlo, el usuario deberá determinar la idoneidad Para consideraciones de la garantía, la marca de Red Lion del producto para el uso propuesto y asumirá todos los riesgos y toda (denominada de ahora en adelante “la Marca”), garantiza que los la responsabilidad que ello implique.
- Page 8 For technical assistance, parts, or repair, please contact ........1.888.956.0000 pour l’aide technique, des parties ou la réparation, entrez s’il vous plaît en contact .
Need help?
Do you have a question about the SP33PED and is the answer not in the manual?
Questions and answers