DOM Roq Mounting Instruction
Hide thumbs
Also See for Roq:
- Operating and calibrating instructions (28 pages) ,
- Mounting (140 pages)
Table of Contents
Advertisement
Quick Links
Advertisement
Table of Contents

Subscribe to Our Youtube Channel
Related Manuals for DOM Roq


Summary of Contents for DOM Roq
- Page 1 Mounting Instruction ® DOM Roq DOM Roq® Smart Lock...
-
Page 2: Table Of Contents
Completion and Testing After Mounting and Setup ............56 INTERNET GATEWAY AND ONLINE CONNECTION ............57 Connecting Gateway with Internet ..................57 Mounting and Connection of Pin Code Reader (Chip Reader) with DOM Roq® ....58 Add Transponder or Pin Code to Pin Code Reader ............62 DOM Roq® Smart Lock... - Page 3 DOMRoq® Table of Content CHARGE BATTERY PACK ....................63 DISMOUNTING MOTOR UNIT ....................65 Removing the Motor Unit ....................65 LASER SENSOR .........................66 TECHNICAL DATA ......................69 MAINTENANCE ........................69 Storage and Care ......................70 DISPOSAL ...........................70 DOM Roq® Smart Lock...
-
Page 4: Product Description
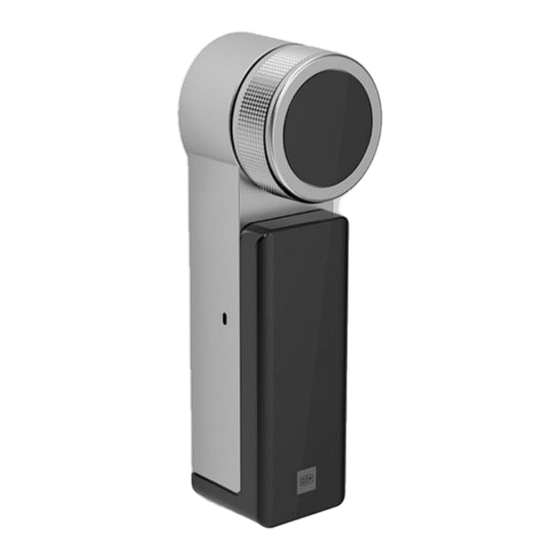
DOM Roq® Fig. 02: Pin Code Reader By using the optional accessory, the door can be locked / unlocked via the DOM Roq® Pin Code Reader with transponders or pin codes (number combinations). Notifications to your smartphone help you check when your children are arriving at or leaving home. -
Page 5: For Your Safety
Attention! Material damage due to incorrect storage. If you store the DOM Roq® motor unit for a longer period of time before assem- bly, store all components in the original packaging, dust-free and at room tem- perature. - Page 6 The instruction describes the installation and use of this product. Any installation or use which does not correspond to the scope of application determined by DOM is considered to be not in accordance with the intended use. DOM accepts no liability or warranty for damage or defects resulting from im- proper use of the product or from failure to observe the instructions in this man- ual.
-
Page 7: Scope Of Delivery
Cardboard template for testing the point of impact of the laser Connection adapter / gateway for internet access of the motor unit DOM Roq® lock cylinder (outside key, inside cardan shafts - connection for DOM Roq® motor unit) 3 mechanical keys... - Page 8 3 AAA cells Allen key 3 fastening screws 3 dowels 3 DOM Standard transponder black Attention! For additional screwing into the door leaf below the fitting. This attachment is optional and is used for stabilisation.
-
Page 9: Measure Cylinder Length
(measured on the cylinder body, not on the cores. This usually protrude 1-2 mm) to measure proceed as follows: 1. Use a ruler or order a DOM measuring aid from your DOM dealer. (See also You Tube help from DOM.) 2. - Page 10 Note! If your handle set has a so-called "pull protection", it is useful to remove the cylinder to avoid measuring errors. DOM Roq® Fig. 04: Pulling Protection To be able to measure the cylinder lengths, it is useful to dismount the cylinder.
-
Page 11: Set Cylinder Length
Set Cylinder Length Set Cylinder Length When determining the cylinder length for the DOM Roq® locking cylinder, it is important to clarify in advance how you want to attach your motor unit. For the cylinder length on the outside, the same length can be selected as for your old cylin- der (if the "old fitting"... -
Page 12: Remove Old Cylinder
DOM Roq® Remove Old Cylinder Remove Old Cylinder DOM Roq® Fig. 07: Remove Old Cylinder Attention! Only remove the cylinder when the door is open and secured against closing. 1. Insert the key into the cylinder ( ) from the inside. -
Page 13: Installing A New Cylinder
DOM Roq® Installing a New Cylinder Installing a New Cylinder DOM Roq® Fig. 08: Installing a new cylinder Attention! Only install the cylinder when the door is open and secured against closing. 1. Insert new cylinder with locking lug in basic position (A) (flush 6 o'clock, can be turned into position manually) from the inside. -
Page 14: Preparation
Preparation Preparation To ensure proper installation, you will need the DOM Roq® motor unit, the new locking cylin- der already installed, the screws enclosed according to your specifications and the corre- sponding accessories (see scope of delivery, page 4), as well as the correct tools. -
Page 15: Mounting
Proceed in the order described and observe the notes and illustrations. Attention! Damage due to the use of unsuitable tools. Only use the "tool" described in the mounting procedures for mounting. DOM accepts no liability for damage caused by the use of unsuitable tools. -
Page 16: Prepare Mounting
Mounting Prepare Mounting With every DOM Roq® order, you will receive a box containing the parts you need to mount the DOM Roq® on your door (see also scope of delivery page 7). Before starting to dismount / mount the individual elements, make sure you have the tools and aids listed in the Preparation / Tools section available. -
Page 17: Mounting Directly On Door Leaf
Note! If the installation described here is not possible because you have a dif- ferent / older handle set, please contact your DOM specialist dealer. To mount the DOM Roq® motor unit directly on the door leaf (inside), proceed as follows: DOM Roq® Fig. 09: Long Plate Inside and Outside... - Page 18 (flush, 6 o'clock) when you can pull out the cylinder with the key (see also Re- moving the cylinder, page 12). DOM Roq® Fig. 10: Long Plate Inside and Outside 6. Insert new cylinder (with locking lug in home position, page 13) from the inside. ( 7.
- Page 19 The screws may only be tightened until the base plate rests on the door leaf without pulling the cylinder out towards the base plate. 15. Fix the base plate to the outside fitting with DOM Roq® connecting countersunk screws M5 / M6 and correspondingly matching countersunk washer through the door in the lower fixing point of the fitting.
- Page 20 DOM Roq® Mounting Directly on Door Leaf DOM Roq® Fig. 12: Long Plate Inside and Outside 18. Mount the inside shield (not included in the scope of delivery) according to the en- closed instructions. (L) 19. Motor unit is fixed and ready for commissioning (from page 53).
-
Page 21: Long Plate Outside / Round Rosettes Inside
Note! If the installation described here is not possible because you have a dif- ferent / older handle set, you should contact the specialist trade. To mount the DOM Roq® motor unit directly on the door leaf, proceed as follows: DOM Roq® Fig. 13: Long Plate Outside, Round Rose Inside... - Page 22 (flush, 6 o'clock) when you can pull out the cylinder with the key (see also Re- moving the cylinder, page 12). DOM Roq® Fig. 14: Long Plate Outside, Round Rose Inside 6. Insert new cylinder (with closing lug in basic position, page 13) from the inside. ( 7.
- Page 23 The screws may only be tightened until the base plate rests on the door leaf without pulling the cylinder out towards the base plate. 15. Fix the base plate to the outside fitting with DOM Roq® connecting countersunk screws M5 / M6 and correspondingly matching countersunk washer through the door in the fixing points of the fitting.
-
Page 24: Round/Oval Rosette On Both Sides
(through-screwing), the installation option round/oval rosette and span- ish rosette ("without screwing through inside rosette", from page 47) should be selected if possible. In this case, the DOM Roq® is mounted on the existing in- ner rosette and screwed to the cylinder. - Page 25 (flush, 6 o'clock) when you can pull out the cylinder with the key (see also Re- moving the cylinder, page 12). DOM Roq® Fig. 17: Round Oval Rosette on Both Sides 7. Insert new cylinder (with locking lug in home position, page 13) from the inside. ( 8.
- Page 26 M5 / M6 and correspondingly matching countersunk washer through the door in the fixing points of the fitting. DOM Roq® Fig. 18: Round Oval Rosette on Both Sides 18. Place the motor unit on the base plate and press lightly (>Click< , base plate is locked with the 3 protruding brackets).
-
Page 27: Spanish Rosette
An adapter kit is required for this kind of mounting! If this is not possible, contact your DOM specialist dealer. To mount the DOM Roq® motor unit directly on the door leaf, proceed as follows: DOM Roq® Fig. 19: Spanish Rosette... - Page 28 (flush, 6 o'clock) when you can pull out the cylinder with the key (see also Re- moving the cylinder, page 12). DOM Roq® Fig. 20: Spanish Rosette 7. Insert new cylinder (with closing lug in home position, page 13) from the inside. ( 8.
- Page 29 (inner part cylinder, motor unit cardan shaft). Do not join the motor unit and the base plate together with violence or great force. DOM accepts no liability for damage caused by improper installation. 20. Turn the handwheel to check whether the bolt can be moved in and out of the lock and whether the deadbolt can be moved.
-
Page 30: Mounting Directly On Existing Handle Set
Front plate inside without screw connection through inside plate (page 40). To attach the DOM Roq® motor unit directly to the old handle set, proceed as follows: DOM Roq® Fig. 22: Long Plate with Screw Connection Through Inside Plate... - Page 31 DOM Roq® Long Plate with Screw Connection Through Inside Plate DOM Roq® Fig. 23: Long Plate with Screw Connection Through Inside Plate 2. Insert the key into the lock cylinder from the inside and then remove the forend screw (fixing screw of the cylinder). ( 3.
- Page 32 Otherwise the cylinder or the motor unit may be damaged. DOM Roq® Fig. 25: Long Plate with Screw Connection Through Inside Plate 9. Retract the latch and remove the key.
- Page 33 DOM Roq® Long Plate with Screw Connection Through Inside Plate DOM Roq® Fig. 26: Long Plate with Screw Connection Through Inside Plate 15. Cut the foam piece according to dimension h and the shape (pay attention to the printed pattern lines) of the trim. ( 16.
- Page 34 DOM Roq® Fig. 28: Long Plate with Screw Connection Through Inside Plate 19. Fix the base plate to the outside fitting with DOM Roq® connecting countersunk screw M5 / M6 and corresponding matching countersunk washer.
- Page 35 DOM Roq® Long Plate with Screw Connection Through Inside Plate DOM Roq® Fig. 29: Long Plate with Screw Connection Through Inside Plate 20. Place the motor unit on the base plate and press lightly (>Click< , base plate is locked with the 3 protruding brackets). ( Attention! Damage due to improper fitting.
-
Page 36: Round / Oval Rosette And Spanish Rosette With Screw Connection Through The Inner Rosette
Spanish Rosette Without Screw Connection Through Inside Rosette". (see page 46). To mount the DOM Roq® motor unit directly on the old handle set, proceed as follows: DOM Roq® Fig. 30: Round/Oval Rosette and Spanish Rosette with Screw Connection Through the Inner Rosette 1. - Page 37 Round / Oval Rosette and Spanish Rosette with Screw Connection Through the Inner Rosette DOM Roq® Fig. 31: Round/Oval Rosette and Spanish Rosette with Screw Connection Through the Inner Rosette 5. Insert new cylinder (with closing lug in home position, see page 13) from the inside.
- Page 38 Round / Oval Rosette and Spanish Rosette with Screw Connection Through the Inner Rosette DOM Roq® Fig. 32: Round/Oval Rosette and Spanish Rosette with Screw Connection Through the Inner Rosette 11. Fit the rosette (inside). ( 12. Check that the cylinder protrudes a maximum of 4 mm from the trim!
- Page 39 Round / Oval Rosette and Spanish Rosette with Screw Connection Through the Inner Rosette DOM Roq® Fig. 33: Round/Oval Rosette and Spanish Rosette with Screw Connection Through the Inner Rosette 17. Cut the foam piece according to dimension and the shape (pay attention to the printed pattern lines) of the trim.
- Page 40 21. Fit the outer rosette on the outside. ( 22. Fix the base plate through the inner rosette to the outer rosette with DOM Roq® con- necting countersunk screws M5 / M6 and correspondingly suitable countersunk wash- ers.
-
Page 41: Long Plate Inside Without Visible Screw Connection
If your handle set has visible connecting screws on the inside plate, follow the instructions Long With Screw Connection Through Inside Plate (page 29). To fix the DOM Roq® motor unit in front of the old handle set, proceed as follows: DOM Roq® Fig. 36: Long Plate Inside Without Visible Screw Connection... - Page 42 DOM Roq® Long Plate Inside Without Visible Screw Connection DOM Roq® Fig. 37: Long Plate Inside Without Visible Screw Connection 3. Insert new cylinder with locking lug in basic position (flush, 6 o'clock, see page 13) from the inside. ( 4.
- Page 43 DOM Roq® Long Plate Inside Without Visible Screw Connection DOM Roq® Fig. 38: Long Plate Inside Without Visible Screw Connection 9. Check that the cylinder protrudes a minimum of 4.5 mm to a maximum of 9 mm from the trim! 10.
- Page 44 DOM Roq® Long Plate Inside Without Visible Screw Connection DOM Roq® Fig. 39: Long Plate Inside Without Visible Screw Connection 16. Cut the foam piece according to dimension h and the shape (pay attention to the printed pattern lines) of the trim. ( 17.
- Page 45 DOM Roq® Long Plate Inside Without Visible Screw Connection DOM Roq® Fig. 40: Long Plate Inside Without Visible Screw Connection Attention! Damage of the door leaf Pre-drilling and fixing with the sheet metal/wood screws ST 3.9 x length or glu- ing on the foam part can / will damage the door leaf.
- Page 46 22. Fasten the base plate to the door leaf with the sheet metal / wood screws ( DOM Roq® Fig. 41: Long Plate Inside Without Visible Screw Connection 23. Place the motor unit on the base plate and press lightly (>Click< , base plate is locked with the 3 protruding brackets).
-
Page 47: Round / Oval Rosette And Spanish Rosette Without Screw Connection Through Inner Rosette
The illustration shows a round rosette. To mount the DOM Roq® motor unit directly on the old trim (rosette), proceed as follows: DOM Roq® Fig. 42: Round / Oval Rosette and Spanish Rosette Without Screw Connection Through Inner Rosette Attention! Dismounting and mounting should only be executed with the door open and se- cured against closing. - Page 48 Round / Oval Rosette and Spanish Rosette Without Screw Connection Through Inner Rosette DOM Roq® Fig. 43: Round / Oval Rosette and Spanish Rosette Without Screw Connection Through Inner Rosette 3. Insert new cylinder with locking lug in basic position (flush, 6 o'clock, see page 13) from the inside.
- Page 49 Round / Oval Rosette and Spanish Rosette Without Screw Connection Through Inner Rosette DOM Roq® Fig. 44: Round / Oval Rosette and Spanish Rosette Without Screw Connection Through Inner Rosette 9. Check that the cylinder protrudes a minimum of 4.5 mm to a maximum of 9 mm from the trim! 10.
- Page 50 Round / Oval Rosette and Spanish Rosette Without Screw Connection Through Inner Rosette DOM Roq® Fig. 45: Round / Oval Rosette and Spanish Rosette Without Screw Connection Through Inner Rosette 16. Cut the foam piece according to dimension and the shape (pay attention to the printed pattern lines) of the trim.
- Page 51 Round / Oval Rosette and Spanish Rosette Without Screw Connection Through Inner Rosette DOM Roq® Fig. 46: Round / Oval Rosette and Spanish Rosette Without Screw Connection Through Inner Rosette Attention! Damage of the door leaf Pre-drilling and fixing with the sheet metal/wood screws ST 3.9 x length or glu- ing on the foam part can / will damage the door leaf.
- Page 52 22. If necessary, fix the base plate to the door leaf with the sheet metal / wood screws (N). DOM Roq® Fig. 47: Round / Oval Rosette and Spanish Rosette Without Screw Connection Through Inner Rosette 23. Place the motor unit on the base plate and press lightly (>Click< , base plate is locked with the 3 protruding brackets).
-
Page 53: Setup Dom Roq® Motor Unit
6. Access the setting mode (see Commissioning) by pressing and holding the push but- ton for 3 seconds within the 30 seconds after inserting the battery pack. The LED changes from slow green flashing to fast green flashing. DOM Roq® Fig. 48: End Position Adjustment DOM Roq® Smart Lock... - Page 54 End Position Adjustment To set the end positions (locked and unlocked), proceed as follows: DOM Roq® Fig. 49: End Position Adjustment 7. As soon as the LED has changed from flashing slowly to flashing quickly, lock the door with the handwheel until you can no longer turn it. ( 8.
-
Page 55: Setting Confirmation
Have all the necessary information and products ready. This includes the ac- cess data for your WLAN network (name and access password), the gateway that connects your DOM Roq® to the WLAN and a power supply for the gate- way. DOM Roq® Smart Lock... -
Page 56: Completion And Testing After Mounting And Setup
If the motor unit does not unlock the door or does not unlock it completely, please repeat the steps from the end position setting. If this is not successful either, please contact DOM support on our website or a DOM specialist dealer. -
Page 57: Internet Gateway And Online Connection
DOM Roq® Fig. 51: Gateway The Internet gateway is the online connection for your DOMRoq® motor unit with the home WLAN, so that you can control your DOM Roq® motor unit at any time and no matter where you are. -
Page 58: Mounting And Connection Of Pin Code Reader (Chip Reader) With Dom Roq
DOM Roq® Mounting and Connection of Pin Code Reader (Chip Reader) with DOM Roq® Mounting and Connection of Pin Code Reader (Chip Reader) with DOM Roq® Adding a Pin Code Reader. Attention! Connect the Pin Code Reader to DOMRoq®. In order to use the Pin Code Reader and create transponders, it is essential that the DOMRoq®... - Page 59 DOM Roq® Mounting and Connection of Pin Code Reader (Chip Reader) with DOM Roq® DOM Roq® Fig. 54: Mounting Instructions Pin Code Reader Hole 3 Hole 2 Outlet Hole for Screw Head Hole 1 (anchor hole) 2. Draw the hole pattern (as shown in Fig. 54) at the point where the chip reader should be attached.
- Page 60 DOM Roq® Mounting and Connection of Pin Code Reader (Chip Reader) with DOM Roq® DOM Roq® Fig. 55: Mounting Instructions Pin Code Reader 11. Insert the supplied batteries into the battery compartment of the chip reader, observ- ing the correct polarity.
- Page 61 DOM Roq® Mounting and Connection of Pin Code Reader (Chip Reader) with DOM Roq® DOM Roq® Fig. 57: Mounting Instructions Pin Code Reader 16. Press (within the 30 seconds pairing mode of the Pin Code Reader) the push button of the motor unit for 3 seconds to enter the pairing mode of the motor unit.
-
Page 62: Add Transponder Or Pin Code To Pin Code Reader
DOMRoq® is connected to the internet and the gateway. When adding a (first) additional transponder, proceed as follows: DOM Roq® Fig. 59: Coupling 1. Press the push button on the motor unit for 3 seconds to enter pairing mode. (A) 2. -
Page 63: Charge Battery Pack
Note! Before using the battery pack for the first time, charge it to 100 %. Charg- ing takes approx. 8 hours (when the battery pack is completely discharged). DOM Roq® Fig. 60: Charging the Battery Pack 1. Two battery warning levels are displayed on the LED display ( ) of the motor unit and in the app. - Page 64 Charge Battery Pack 2. Remove the battery pack from the motor unit. DOM Roq® Fig. 61: Removing the Battery Pack 3. To do this, pull the latch of the battery pack slightly in the direction of the arrow (see Fig. 61). ( Attention! After unlocking, you must hold the battery pack and remove it downwards.
-
Page 65: Dismounting Motor Unit
20 mm. After that you can move the motor unit freely. Dismount this part with care. DOM accepts no liability for damage caused by improper dismounting. 3. Remove the motor unit. ( Make sure that the motor unit is removed in a horizontal direction so that the detents and the cardan coupling are not damaged. -
Page 66: Laser Sensor
Laser Sensor Laser Sensor DOM Roq® Fig. 63: Laser Sensor Area Due to the laser, the door open / closed status can be queried at any time. When the door is closed and vibrations / shocks occur, as well as when the door is open and... - Page 67 DOM Roq® Laser Sensor The DOM Roq® delivery package contains a paper template which, when inserted into the "light shaft" of the laser, indicates which point / surface the laser will hit. If there is a reflective/absorbent surface or glass, the functionality of the laser may be dis- turbed.
- Page 68 / is inserted. If these points do not lead to success, please contact the DOM support on our website or the specialised trade.
-
Page 69: Technical Data
30 m (without obstacles) Bluetooth range 10 m (without obstacles) Energy connection Power plug Dimensions (HxWxD) 60 x 71.5 x 62 mm Maintenance Refresh the lubrication of the locking cylinders at regular intervals with the DOM Service Pen. DOM Roq® Smart Lock... -
Page 70: Storage And Care
Disposal Storage and Care If you store the DOM locking cylinders or individual components for a longer period of time before assembly or after use, store the parts in a dry and dust-free place. Attention! Material damage due to the use of unsuitable lubricants. Lubricate and maintain the key side of the locking cylinders at regular intervals using only the DOM Service Pen. - Page 71 This documentation may not be reproduced, in whole or in part, without the prior written con- sent of DOM SECURITY. F-75017 Paris, in whole or in part, without the prior written consent of DOM SECURITY. transmitted, reproduced or translated in any form or by any means.
Need help?
Do you have a question about the Roq and is the answer not in the manual?
Questions and answers