Table of Contents
Advertisement
Quick Links
Advertisement
Table of Contents

Related Manuals for Bosch WGG444E0ID


Summary of Contents for Bosch WGG444E0ID
- Page 1 Washing machine WGG444E0ID [en] User manual and installation instructions...
- Page 2 Your new washing machine Note/tip Information about the optimum use of You have chosen a Bosch washing the appliance/any other useful machine. information. Please take a few minutes to read and 1. 2. 3. / a) b) c) become familiar with the advantages of your washing machine.
-
Page 3: Table Of Contents
Contents e n I n s t r u c t i o n M a n u a l a n d I n s t a l l a t i o n I n s t r u c t i o n s Intended use. -
Page 4: Intended Use
Intended use Cleaning the measuring aid A for Intended use liquid detergent ....38 Drain pump is blocked ..39 This appliance is intended for private The drain hose at the siphon is ■... -
Page 5: Safety Instructions
Safety instructions Do not allow children to Safety instructions ■ clean or maintain this appliance unsupervised. T he following safety information Keep children under 3 years S a f e t y i n s t r u c t i o n s and warnings are provided to ■... -
Page 6: Installation
Safety instructions Warning Installation Risk of suffocation! Warning If allowed to play with the Risk of electric shock/fire/ packaging/plastic film or material damage/damage to packing components, children the appliance! may become caught in these or If the appliance is not installed pull them over their heads and properly, this may lead to a suffocate. - Page 7 Safety instructions If using a residual current Warning ■ circuit breaker, only use one Risk of injury/material that bears the following damage/damage to the mark: z. The presence of appliance! this mark is the only way to The appliance may vibrate or ■...
-
Page 8: Operation
Safety instructions If the hoses and mains The appliance is secured for ■ ■ cables are not correctly transportation by transport routed, they may constitute a locking devices. If the tripping hazard, which may transport locking devices are result in injury. not removed before the Route hoses and cables appliance is operated, this... - Page 9 Safety instructions Warning Warning Risk of poisoning! Eye/skin irritation! Poisonous fumes may be given Detergent and care products off by cleaning agents that may spray out if the detergent contain solvents, e.g. cleaning drawer is opened while the solvent. appliance is in operation. Do not use cleaning agents that Rinse eyes/skin thoroughly if contain solvents.
-
Page 10: Cleaning/Maintenance
Safety instructions Cleaning/Maintenance Warning Risk of poisoning! Warning Poisonous fumes may be given Risk of death! off by cleaning agents that The appliance is powered by contain solvents, e.g. cleaning electricity. There is a risk of solvent. electric shock if you come into Do not use cleaning agents that contact with live components. -
Page 11: Environmental Protection
Environmental protection Caution! Environmental Material damage/damage to protection the appliance Cleaning agents and agents for P ackaging/used appliance pretreating laundry (e.g. stain E n v i r o n m e n t a l p r o t e c t i o n removers, prewash sprays, etc.) Dispose of packaging in an environmentally-responsible... -
Page 12: Tips On Economical Use
Positioning and connecting Tips on economical use Positioning and connecting Always fill the appliance with the ■ maximum amount of laundry for each programme. S tandard accessories Wash normally soiled laundry P o s i t i o n i n g a n d c o n n e c t i n g ■... -
Page 13: Safety Instructions
Positioning and connecting When the appliance is lifted by its Mains lead ■ protruding parts (e.g. the appliance Bag: door), the components may break Installation and operating ■ off and cause injuries. instructions Do not lift the appliance by Customer Service location protruding parts. -
Page 14: Installation On A Base Or A Wooden Joist Floor
Positioning and connecting Installation on a base or a Removing the transport locks wooden joist floor Caution! Damage to the appliance Caution! The appliance is secured for Damage to the appliance ■ transportation using transport locks. The appliance may "wander" and tip/ If the transport locks are not topple from the base when spinning. - Page 15 Positioning and connecting Unscrew and remove all four Lock the covers firmly in place by transport brace screws. applying pressure to the snap-in hooks. a) Remove the mains cable from the holders. b) Remove the sleeves. Fit the covers.
-
Page 16: Hose And Cable Lengths
Positioning and connecting Hose and cable lengths Connection on right side Connection on left side ( ~ 85 cm 0 ~ 190 cm ( ~ 130 cm 0 ~ 150 cm 8 ~ 135 cm 8 ~ 90 cm @ 0 cm ~ 100 cm @ 0 cm ~ 100 cm If the supply hose is too short for Note:... -
Page 17: Water Outlet
Positioning and connecting Do not bend, squash, modify or cut – Model: Aqua-Stop ■ through the water supply hose (otherwise its strength is no longer guaranteed). Only tighten the screw connections ■ by hand. If the screw connections are tightened too much with a tool (pliers), the thread may be damaged. - Page 18 Positioning and connecting Caution! Drainage into a washbasin ■ Secure the outlet hose so that it Damage to the appliance/fabrics cannot slip out. If the end of the drain hose is immersed Elbow available from after-sales in the drained water, water may be service: sucked back into the appliance and Individual part number 00655300...
-
Page 19: Alignment
Positioning and connecting Alignment Tighten the lock nut against the housing. Level the appliance using a spirit level. In doing so, hold the foot tight and do not adjust its height. Incorrect levelling may result in intense The lock nuts on all four appliance noise, vibrations and "wandering". -
Page 20: Before Washing For The First Time
Positioning and connecting No multiple plugs/couplings or When the programme ends, turn the ■ extension cables are used. programme selector to Off. If an earth-leakage circuit breaker is Your appliance is now ready for use. ■ used, only a type which displays this symbol is used: z. - Page 21 Positioning and connecting c) Clip the hoses securely in the holders. Insert all four sleeves. Before switching on the appliance again: Notes The transport braces must be ■ removed. ~ "Removing the transport locks" on page 14 Pour approx. 1 litre of water into ■...
-
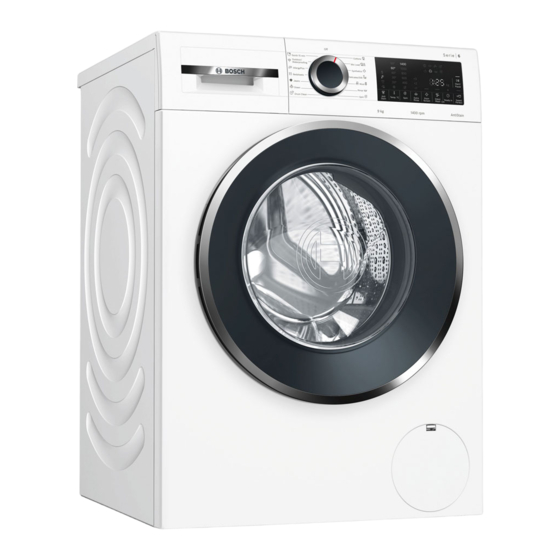
Page 22: Getting To Know The Appliance
Getting to know the appliance Getting to know the appliance A ppliance G e t t i n g t o k n o w t h e a p p l i a n c e Detergent drawer Control panel Loading door Service flap... -
Page 23: Control Panel
Getting to know the appliance Control panel Programme default settings can be changed. Overview of all programme default settings ~ Page 30 Additional programme settings can be selected. Overview of all additional programme settings ~ Page 31 Start/Pause A button for starting, interrupting, (e.g. -
Page 24: Display Panel
Getting to know the appliance Display panel Additional programme settings Programme default settings Display Setting Anti Stain °/¶/y/¸ Display Setting Description +1/+2/+3 Extra Rinse — - 90° Temperature Temperature that Disinfectant can be set in °C ç Silent Wash — = cold SpeedPerfect 2 - 1400* Spin speed Spin speed in rpm... -
Page 25: Laundry
Laundry Sorting laundry Laundry Sort your laundry according to the care P rotecting your laundry and instructions and manufacturer's L a u n d r y appliance information on the care labels, depending on: Caution! Type of fabric/fibre ■ Damage to the appliance/textiles Colour ■... -
Page 26: Starching
Laundry Starching Laundry should not be treated Note: with fabric softener. Switch on the appliance. Select the à Rinse programme. Measure starch into dispenser I in accordance with the manufacturer's instructions (clean first if necessary). Touch the Start/Pause A button. Dyeing/bleaching Dye should only be used in normal household quantities. -
Page 27: Overview Of Programmes
Overview of programmes Overview of programmes S electable programme O v e r v i e w o f p r o g r a m m e s Programme/Type of washing Options/Information Name of the programme Max. load as kg depending on the model and the pro- Brief explanation of the programme and for which fabrics it is gramme... - Page 28 Overview of programmes Programme/Type of washing Options/Information “ Delicates/Silk 2.0 kg For delicate, washable fabrics, e.g. made of silk, satin, synthetic — - 40 °C fibres or blends (e.g. silk blouses, silk scarves). 2 - 800 rpm x Anti Stain, Ï Extra Rinse, S Silent Wash possible W Wool p...
- Page 29 Overview of programmes Programme/Type of washing Options/Information t Down 2.0 kg Appliance-washable fabrics stuffed with down, such as pillows — - 60 °C and duvets; also suitable for items stuffed with synthetic fibres 400 - 1000 rpm Ï Extra Rinse not possible h Jeans 4.0 kg...
-
Page 30: Programme Default Settings
Programme default settings Programme/Type of washing Options/Information - Quick 15 min 2.0 kg Extra-short programme of approx. 15 minutes, suitable for — - 40 °C small items of lightly soiled laundry. 400 - 1000 rpm Ï Extra Rinse, S Silent Wash possible Depending on the model and the programme. -
Page 31: Additional Programme
Additional programme settings Select the Start/Pause A button. x Anti Stain The programme starts. The selected number of hours (e.g. Types of stain that can be selected: 8h) is shown in the display panel ° and counts down until the Blood ¶... -
Page 32: Ç Disinfectant
Operating the appliance ç Disinfectant Notes Never switch on a damaged ■ For washing with special disinfectants in appliance! order to kill bacteria and thereby meet Inform customer service! ■ high standards of hygiene. Insert mains plug. Add disinfectant to dispenser I. Note: Warning Risk of death from electric shock! -
Page 33: Placing Laundry Into The Drum
Operating the appliance The programme default settings for the Measure and add detergent selected programme alternately appear and care products in the display panel: The maximum load and Caution! ■ the duration of the programme and Damage to the appliance ■... -
Page 34: Starting The Programme
Operating the appliance Pour in detergent and/or cleaning Pull out the detergent drawer. Insert product. the liquid detergent container into dispenser II for main wash. Dispenser I Detergent for pretreat and Pour liquid detergent into liquid clothing disinfectant. (only for detergent container and do not the appliance with exceed the Maximum mark. -
Page 35: Adding/Removing Laundry
Operating the appliance E flashes: If the programme and And touch the Start/Pause A ■ programme settings are adjusted button again. The new programme while childproof lock is activated. starts from the beginning. When the programme ends, End Note: Cancel the programme is displayed. -
Page 36: Appliance Settings
Appliance settings Wipe the rubber seal dry. Activate setting mode: ■ Set the programme selector to position 1. The appliance is switched Touch and hold the 0 Spin button and, at the same time, turn the programme selector clockwise to position 2. -
Page 37: Sensors
Sensors Appliance housing/control Sensors panel U nbalanced load detection Remove the detergent residue S e n s o r s ■ system immediately. Wipe the housing and the control ■ The automatic unbalanced load panel with a soft, damp cloth. detection system detects imbalances Do not use abrasive cloths, sponges ■... -
Page 38: Emptying The Detergent Draw, Cleaning The Detergent Drawer And Its Housing
Cleaning and maintenance Emptying the detergent draw, Fit the insert and lock it in place (push the cylinder onto the guide cleaning the detergent drawer pin). and its housing If the appliance contains detergent or fabric softener residues: Pull out the detergent drawer. Press down the insert and fully remove the drawer. -
Page 39: Drain Pump Is Blocked
Cleaning and maintenance Clean the measuring aid and cover Open the service flap. with water and brush. Take the drain hose out of the Install the cover back to the retainer. measuring aid. Pay attention to the Remove the sealing cap and pour assemble mark, and press the cover the water out into a suitable until click sounds. -
Page 40: The Drain Hose At The Siphon Is Blocked
Cleaning and maintenance Refit and screw on the pump cover. Clean the drain hose and siphon The handle must be in a vertical connecting piece. position. Re-attach the drain hose and secure Close the service flap. the connection point using the hose clamp. - Page 41 Cleaning and maintenance Clean the filters: Disconnect the hose from the rear of the appliance. Use pliers to remove the filter. Clean the filter with a small brush. Connect the hose and check for leaks.
-
Page 42: Faults And What To Do About Them
Faults and what to do about them Open the service flap. Faults and what to do about them E mergency release F a u l t s a n d w h a t t o d o a b o u t t h e m E.g. -
Page 43: Information On The Display Panel
Faults and what to do about them Information on the display panel Display Cause/Remedy Flashes fast + signal: The door was opened and the water level is too high. Õ ■ Close the door, continue the programme with Start/Pause A button or select 0 Spin. -
Page 44: Faults And What To Do About Them
Faults and what to do about them Faults and what to do about them Faults Cause/Remedy Water is leaking from the Attach the drain hose correctly or replace it. ■ appliance. Tighten the screw fitting on the supply hose. ■ The door cannot be The temperature in drum is too high to open the door. - Page 45 Faults and what to do about them Faults Cause/Remedy Water is not visible in the Not a fault – the water is below the visible area. drum. The wrong detergent/fab- Empty the dispenser(s), clean it/them and pour in the correct product. ric softener has been ~ "Emptying the detergent draw, cleaning the detergent drawer and its hous- poured into the dis-...
-
Page 46: After-Sales Service
After-sales service Faults Cause/Remedy Odours, stain formation in Run the Û Drum Clean 90°C programme without laundry. the appliance. Add washing powder or a detergent containing bleach. Note: To prevent foaming, only use half the amount of detergent recommend- ed by the detergent manufacturer. Do not use detergents designed for woollens or delicates. -
Page 47: Technical Data
Technical data Technical data Aqua-Stop warranty D imensions: O nly for appliances with Aqua-Stop T e c h n i c a l d a t a A q u a - S t o p w a r r a n t y 84,8 cm x 59,8 cm x 59,0 cm In addition to warranty claims against (height x width x depth) - Page 48 Expert advice for your Bosch home appliances, help with problems or a repair from Bosch experts. Find out everything about the many ways Bosch can support you: www.bosch-home.com/service Contact data of all countries are listed in the attached service direct- ory.
Need help?
Do you have a question about the WGG444E0ID and is the answer not in the manual?
Questions and answers