Table of Contents
Advertisement
Quick Links
Advertisement
Table of Contents

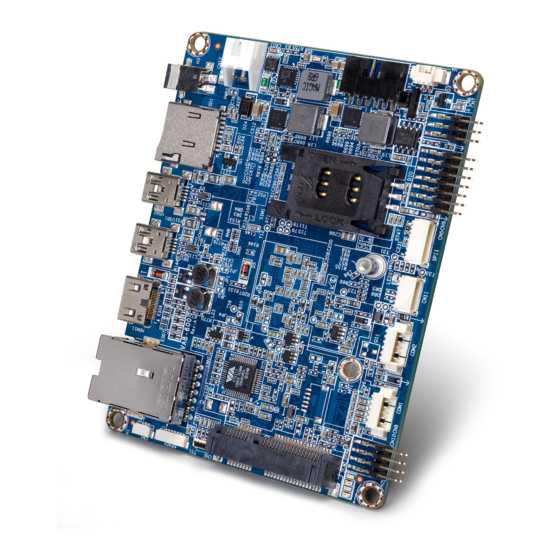
Related Manuals for VIA Technologies VAB-600


Summary of Contents for VIA Technologies VAB-600
- Page 1 QUICK START GUIDE VAB-600 Linux BSP v1.2.1 100-05202016-113800...
- Page 2 The information and product specifications within this document are subject to change at any time, without notice and without obligation to notify any person of such change. VIA Technologies, Inc. reserves the right the make changes to the products described in this manual at any time without prior notice.
- Page 3 VAB-600 Linux BSP v1.2.1 Quick Start Guide Revision History Version Date Remarks 1.00 5/19/2016 Initial release...
-
Page 4: Table Of Contents
VAB-600 Linux BSP v1.2.1 Quick Start Guide Table of Contents 1. Introduction ..........................1 1.1. Package Contents..........................1 1.1.1. BSP Folder Contents ..........................1 1.1.2. Document Folder Contents ........................1 1.1.3. EVK Folder Contents ..........................1 1.2. Version Information and Supported Features ................2 2. -
Page 5: Introduction
VAB-600 board using Debian Linux. VAB-600_Linux_EVK_v1.2.1_Image_Installation_Guide_v1.00_20160519.pdf: The Image Installation Guide explains how to boot the Linux EVK system image on the VAB-600 board in order to begin evaluating the platform. VAB-600_Linux_EVK_CL_v1.2.1_Image_Installation_Guide_v1.00_20160519.pdf: The Image Installation Guide explains how to boot the Linux EVK command line system image on the VAB-600 board in order to begin evaluating the platform. -
Page 6: Version Information And Supported Features
VAB-600 Linux BSP v1.2.1 Quick Start Guide VAB600-Debian7.0-Multimedia-v1.0.3.tgz: contains the multimedia package for the Gstreamer 0.10.35 environment and ffmpeg plugin. 1.2. Version Information and Supported Features U-Boot version: 1.1.4 Kernel version: 3.0.8 Evaluation image: Debian Wheezy 7.0 ... -
Page 7: Image Development
VAB-600_Linux_EVK_CL_v1.2.1.zip (command line only) and copy the bspinst folder and scriptcmd file onto the Micro SD card. Insert the prepared Micro SD card into the VAB-600, connect an HDMI display, and power on the device to initiate the update process. - Page 8 VAB-600 Linux BSP v1.2.1 Quick Start Guide To begin setting up the U-Boot parameters, connect the host machine and the VAB-600 board through the debug COM1 port. Use a serial port communication program such as Minicom or GtkTerm to connect to the debug console. There you will be able to see the U-Boot boot log and adjust settings in the U-Boot console.
-
Page 9: Graphical Environment Installation
This section guides you through adding a graphical environment to the command line version of Debian. 3.1. Installing the Window Manager Plug-in the ethernet cable into the VAB-600 board, and then enter the following command to get the DHCP IP in order to activate the internet connection. $ sudo dhclient eth0 Next, update the source list. -
Page 10: Build Environment Setup
VAB-600 Linux BSP v1.2.1 Quick Start Guide 4. Build Environment Setup This section guides you through setting up the build environment for development. All instructions are based on Ubuntu 12.04 x64 or higher versions. 4.1. Setting Up the Cross-Compiling Environment Make sure that the host machine is connected to the network and run the packages update. -
Page 11: Image Build
VAB-600 Linux BSP v1.2.1 Quick Start Guide 5. Image Build 5.1. Building the U-Boot Binary This section describes how to build the U-Boot image from the source code. Extract the U-Boot source. $ tar –xzvf uboot.130522_Display_Support_v0.05.tgz Type the following command in order to use the default configurations. -
Page 12: Building The Emio-1533 Usb Wi-Fi Module Driver
Type the following command in order to use the default configurations. $ cd vt9271-202/build $ make When the process is completed, the vt9271.ko kernel module will be stored in the vt9271- 202/output/ directory. Copy this file to the /lib/modules folder on the VAB-600 system for EMIO-1533 USB Wi-Fi module support. -
Page 13: Hardware Functions
Connect your display to the VAB-600 board through the Mini HDMI connector. U-Boot: Connect the VAB-600 board and the host machine through the debug COM1 port. Debug COM1 port diagram Please note that the system will automatically detect the EDID information and set the monitor default resolution. -
Page 14: Lvds (Acmepointtp070C01)
Both the U-Boot and Xorg need to be modified in order for the LVDS panel to display correctly. Connection: Connect the LVDS panel to the VAB-600 through the LVDS connector on the VAB-600-D card. U-Boot: Connect the VAB-600 and the host machine through the debug COM1 port. Use the following command to update the U-Boot parameters. -
Page 15: Dual Channel Lvds (Auo G220Svn01.0)
Connect the dual channel LVDS panel to the VAB-600 board through the LVDS connector on the VAB-600-D card. U-Boot: Connect the VAB-600 board and the host machine through the debug COM1 port. Use the following command to update U-boot parameters. WMT # setenv wmt.display.param 2:0:24:1680:1050:60... -
Page 16: Configuring The Emio-2550 Minipcie Mobile Broadband Module
The EMIO-2550 miniPCIe Mobile Broadband module supports 3G and GPS functions. The first step to enable these functions is to insert the EMIO-2550 module and an active SIM card into the VAB-600. Then connect the VAB-600 to the internet through LAN port, and power it on. -
Page 17: Enabling Gps
VAB-600 Linux BSP v1.2.1 Quick Start Guide After the connection is created, click on the “Network Manager” icon again and select the connection you just created. The successful connection looks like this: Successful connection screen 6.2.2. Enabling GPS Use a serial port communication program such as Minicom or GtkTerm to configure the GPS function using the serial port setup configuration. -
Page 18: Setting The Watchdog Timer
It will show how many seconds are left before the system reboots. 6.4. Programming the GPIO This section describes how to use the GPIO on the VAB-600. GPIO uses pin 5 to pin 12 of CN9 pin header. The onboard pin header and pinout are shown below. - Page 19 VAB-600 Linux BSP v1.2.1 Quick Start Guide Use the devmem2 command to read/write the GPIO registers. $ sudo devmem2 <address> <type> <data> <address> : physical address of the register <type> : data type to be read/written, [b]yte and [h]alfword(2 byte) <data>...
-
Page 20: Configuring Rtc Wake-Up
VAB-600 Linux BSP v1.2.1 Quick Start Guide 6.5. Configuring RTC Wake-Up RTC wake-up is enabled by the IDT1337G chip to support auto power-on function. The IDT1337G chip is controlled by the I C0 bus of VAB-600. The first step is to make sure the RTC time is consistent with the system time. To read the RTC time, use the following command: $ sudo i2cdump –f –y –r 0-6 0 0x68... -
Page 21: Spi Rom Backup And Recovery
VAB-600 Linux BSP v1.2.1 Quick Start Guide 7. SPI ROM Backup and Recovery On the VAB-600 board, the SPI Flash ROM contains the U-Boot bootloader and its settings. If the ROM contents become corrupted due to a failure during a firmware update, or are flashed with a non-functional U-Boot binary during development, the board may become non-bootable. -
Page 22: Software Information
Use either the file you just backed up (refer to the previous section), or the default SPI ROM image that is included in the VAB-600 BSP/EVK. The file name of the default image is SF_BOOTROM.bin, which can be found in the bspinst folder inside the VAB-600_Linux_EVK_v1.2.1.zip file. - Page 23 VAB-600 Linux BSP v1.2.1 Quick Start Guide The MAC address can be found on the sticker located on the top of the Ethernet connector. Ethernet MAC address sticker...
Need help?
Do you have a question about the VAB-600 and is the answer not in the manual?
Questions and answers