
Related Manuals for AE Bath Dorothy

Summary of Contents for AE Bath Dorothy
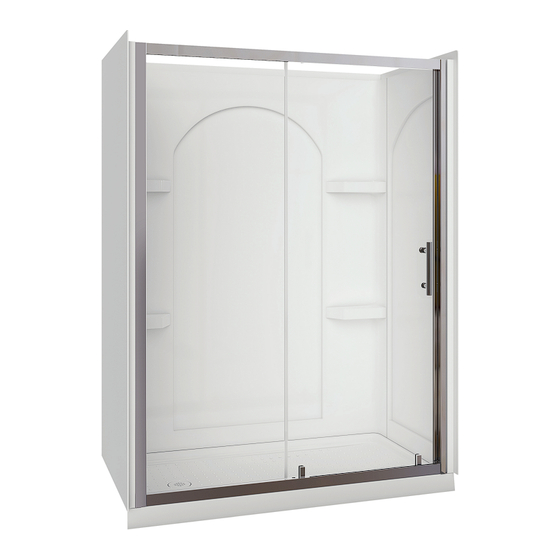
- Page 1 INSTALLATION GUIDE GUIDE D’INSTALLATION GUÍA DE INSTALACIÓN SHOWER KIT Dorothy Appollo Marina KIT DE DOUCHE KIT DE DUCHA SK-1116-KIT 2022-02-21...
-
Page 2: Important Notes
TO GET STARTED POUR COMMENCER PARA COMENZAR Before you begin, read all instructions Avant débuter travaux, Leer todas instrucciones carefully. lisez attentivement les instructions cuidadosamente antes de empezar. d’installation. Consult local building codes to ensure Consultar los códigos locales para that installation complies with standards Consultez le code du bâtiment de votre asegurarse de que la instalación cumpla... - Page 3 TOOLS OUTILS HERRAMIENTAS NEEDED REQUIS NECESARIAS (not included) (non inclus) (no incluidas) Masonry drill bits | Forets de maçonnerie | Brocas de masonería Drill bits | Forets | Brocas Utility Knife | Couteau à lame rétractable | Navaja multiusos Cutting pliers | Pince Coupante | Alicate Pencil | Crayon | Lápiz Adjustable Wrench | Clé...
- Page 4 PART LIST LISTE DE PIÈCES LISTA DE PIEZAS Fixed panel extrusion (Item2), fixed Extrusion de panneau fixe (Item2) et La extrusión del panel fijo (artículo 2) y la panel water proof strip (Item3) and fixed moulure de scellement du panneau fixe moldura de sellado del panel fijo (artículo panel (Item4) are pre-installed together (Item3) et panneau fixe (Item4) sont...
- Page 5 PART LIST LISTE DE PIÈCES LISTA DE PIEZAS Item DESCRIPTION QTY. Wall jamb / Montant mural / Batiente para pared Fixed panel extrusion / Extrusion de panneau fixe / Extrusión de panel fijo Fixed panel water proof strip / Moulure de scellement du panneau fixe / Tira impermeable para panel fijo Fixed panel / Panneau fixe / Panel fijo Fixed panel clip / Pince de panneau fixe / Clip de panel fijo...
- Page 6 PREPARATION PRÉPARATION PREPARACIÓN Record your model number below for Consigner le numéro de modèle cidessous Anote abajo su número de modelo para future reference: pour toute référence ultérieure: referencia futura: Observe all local building and plumbing Respecter tous les codes de bâtiment et de Cumpla todos los códigos locales de codes.
-
Page 7: Installation
INSTALLATION INSTALLATION INSTALACIÓN Construct a plumb stud alcove if not already Construisez une alcôve de montants Construir un nicho de montantes a plomo in place. d'aplomb si elle n'est pas déjà en place. si no lo hay ya. Install the rough plumbing in the structure Installer la plomberie brute dans la structure Instalar la plomería en bruto en la estruc- previously built... - Page 8 Install the drain into the shower base. Installez le drain dans la base de la Instale el desagüe en la base de la ducha. douche. Staple the felt pad, not provided, to the Agrafer le tapis en feutre, non fournie, sur Engrape el protector de fieltro, no se subfloor so it will contact all support feet.
- Page 9 Without a pad, we recommend the basin S'il n'y a pas de tapis, nous recomman- Sin el protector, se recomienda que el area be set in 1" (25 mm) to 2" (51 mm) dons de poser la surface de la cuve dans área del fondo se coloque sobre una capa of mortar cement.
- Page 10 Drill holes through the edge of the base Percez des trous sur le rebord de la base Taladrar orificios a través de la orilla de la into the wood of the accompanying vis-à-vis les montant de bois avec la base sobre la madera de la estructura structure using a countersink bit with a perçeuse munie d’une mèche à...
- Page 11 Apply a drop of silicone in the holes for Appliquez une goutte de silicone dans les Aplique una gota de silicona en los the screws. Screw the base into place trous pour les vis. Vissez la base en place agujeros para los tornillos. Atornille la using screws (21) and a screwdriver.
- Page 12 Wall Set: Install the back wall. Insert the Ensemble de paroi murale: Poser la paroi Juego de paredes: Instale la pared tabs into the slots. arrière. Insérer les languettes dans les fentes. posterior. Inserte las lengüetas en las ranuras. Measure, mark, and drill the faucet holes in Mesurer, marquer et percer les orifices de Mida, marque y taladre los orificios para the drain end wall.
- Page 13 Apply an L-shaped bead of silicone sealant Appliquez un cordon de mastic silicone en Aplique un cordón de silicona en forma at each outside corner of base. forme de L à chaque coin extérieur de la de L en cada esquina exterior de la base. base.
- Page 14 Using the pre-drilled holes as guide. Drill the À l’aide d’un foret légèrement plus grand que Utilice los orificios perforados como guía. matching wall using a drillbit slightly bigger la vis mécanique (15) percez le mur non Taladre la pared correspondiente usando than the mechanical screw (15).
- Page 15 Starting at the bottom, install screws (21) En commençant par le bas, poser des vis Comenzando en la parte de inferior, through the dimples to secure the flanges (21) à travers les alvéoles pour fixer les instale tornillos ( 2 1 ) a través de las to the studs.
- Page 16 Cover the framing with water-resistant Couvrir l'ossature de panneau mural hydro- Cubra la estructura de postes de madera wallboard. fuge. con el panel de yeso resistente al agua. Install the finished wall material. Installer le matériau de la finition murale. Instale el material de acabado de pared.
- Page 17 Apply 100% silicone sealant where the unit Appliquer du mastic 100% silicone aux Aplique sellador 100% de silicona donde contacts the finished wall. points de contact avec le mur fini. la unidad hace contacto con la pared. SHOWER ENCLOSURE INSTALLATION INSTALLATION D'UNE CABINE DE DOUCHE INSTALACIÓN DUCHA CUBIERTA...
- Page 18 Using mounting screws(22) attach A l'aide de vis de montage (22), Con los tornillos de montaje FIG. 1. FIG. 1. FIG. 1. the top and bottom rails(13) to the 2 fixez les rails supérieurs et inférieurs (13) aux (22), fije los ríles superior e inferior (13) a extrusions (2&...
- Page 19 FIG. 2. FIG. 2. FIG. 2. - Installez les clips du panneau fixe sur le - Instale los clips del panel fijo en el panel - Install fixed panel clips to the fixed panneau fixe (surligné en jaune). fijo (resaltado en amarillo). panel.(highlighted in yellow).
- Page 20 Place the wall jambs onto the Placez les montants du mur sur Coloque las jambas de la pared FIG. 3. FIG. 3. FIG. 3. enclosure and place enclosure in appropri- l'enceinte et placez l'enceinte à l'endroit en el cerramiento y coloque el cerra- ate place inside the alcove on the base.
-
Page 21: Warranty
WARRANTY GARANTIE GARANTÍA A&E Shower & Bath inc. (˝A&E˝) offre la A&E Shower and Baths inc. (de ahora en garan�e limitée suivante sur ses produits. Ce�e each of its products. This warranty extends only garan�e s’applique uniquement au propriétaire limitada explícita para cada uno de sus to the original owner/end-user for personal original pour une u�lisa�on domes�que. -
Page 22: Maintenance
MANTENIMIENTO MAINTENANCE ENTRETIEN Cuidado diario Daily care Entretien quotidien Limpiar con una toalla suave después Wipe with a soft towel after each use. Après chaque utilisation, essuyez avec de cada uso. Utilizar detergente suave Use mild dishwashing detergent to keep un chiffon doux.
Need help?
Do you have a question about the Dorothy and is the answer not in the manual?
Questions and answers