Table of Contents
Advertisement
Quick Links
Advertisement
Table of Contents

Related Manuals for aquatherm AT075


Summary of Contents for aquatherm AT075
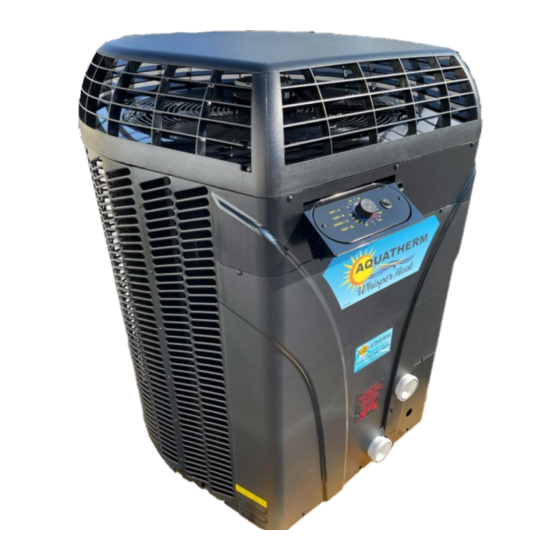
- Page 1 Installation Manual Dial Display Important Read this document before operating / installing this product For additional product manuals and operation / installation procedures, please visit http://www.aquathermheatpumps.com/ LTM1061 REV A - (project rel 8.00)
-
Page 3: Table Of Contents
Table of Contents Contacts Safety 1 - Installation 1.1 Positioning Equipment 1.2 Plumbing 1.2.a Plumbing Requirements 1.2.b Maintaining Ability to Winterize 1.2.c Water Connections to Heat Pump 1.2.d In-Line Chlorine Feeders 1.2.e Water Flow Rates 1.3 Electrical 1.3.a Electrical Requirements 1.3.b Incoming Power Access Holes 1.3.c Access Panels 1.3.d Verifying Transformer Setting (Select Units) -
Page 4: Contacts
Repair and service of heat pump must be performed by an authorized service center. Warranties may be voided if the equipment has been improperly installed, maintained or serviced. If service is deemed necessary, please contact Aquatherm. SAFETY SIGNALS Throughout this document, safety signals have been placed where particular attention is required. - Page 5 Failure to heed the following may result in injury or death. WARNING Installation and repairs must be performed by a qualified technician. The heat pump contains refrigerant under pressure. Repairs to the refrigerant circuit must not be attempted by untrained and/or unqualified individuals. Service must be performed only by qualified HVAC technicians. Recover refrigerant before opening the system.
-
Page 6: Installation
Heat Pumps require unobstructed airflow for proper operation. Heat Pumps should never be installed indoors or in a location where airflow is restricted. If an indoor installation is being considered, the installer and dealer are strongly urged to contact the Aquatherm Application Department, or a local Professional Engineer prior to proceeding. -
Page 7: Plumbing
The shipping brackets used to secure the heat pump to the pallet are approved mounting (hurricane) brackets. They should be used to anchor the heat pump to the pad. If needed, contact Aquatherm to obtain anchoring kit information. Please have the heat pump model number and serial number when requesting support. -
Page 8: Water Connections To Heat Pump
Do not use glue on the threaded portion of the equipment’s unions. A glued-in-place union will prevent the equipment from being properly winterized. (Aquatherm AT075) (Aquatherm AT115, AT130 and AT150) 1.2.d In-Line Chlorine Feeders Place in-line chlorinators downstream from the heat pump and as low in elevation as possible. -
Page 9: Water Flow Rates
Water flow exceeding maximum flow rates will negatively affect the total pool filtration performance and may damage the heat pump. This will not be covered under the equipment warranty. FLOW RATES MODEL MINIMUM MAXIMUM AT075 20 GPM (75.7 L/min) 45 GPM (170 L/min) AT115 30 GPM (113.6 L/min) 70 GPM (265 L/min) AT130 30 GPM (113.6 L/min) -
Page 10: Electrical
Never mount power-disconnects directly to the heat pump. In sizing power wiring, be especially aware of up-sizing requirements necessary due to wiring distances. Always satisfy applicable codes and standards. Aquatherm heat pumps are designed to use copper conductors, only. Do not use aluminum wire. Standards Standards... -
Page 11: Incoming Power Access Holes
(208 to 230 Volts) 200 Volts 253 Volts Single Phase 60 hertz B Voltage (208 to 230 Volts) 200 Volts 253 Volts Three Phase 60 hertz 1.3.b Incoming Power Access Holes Aquatherm AT075 Aquatherm AT115, AT130, AT150 Page - 8... -
Page 12: Access Panels
Follow all National Electric Codes (NEC) and/or State and Local guidelines. (Aquatherm AT075) (Aquatherm AT115, AT130 and AT150) 1.3.d Verifying Transformer Setting (Select Units) Transformer voltage must be confirmed and set correctly depending on the measured voltage found on the site. -
Page 13: Schematic Location
Schematics are located on the inside of the electrical panel. 1.4 Connecting an External Controller (Optional) To support a direct connection to an external controller, Aquatherm heat pumps are equipped with removable terminal blocks on the control board. The control board is located on the low-voltage side of the electrical enclosure. -
Page 14: Ws2 (2-Wire) Controllers (Pool-Spa)
1.4.b WS2 (2-WIRE) Controllers (Pool-Spa) Failure to heed the following may result in damage to equipment. NOTICE Confirm equipment connected to heat pump before selecting this option . All existing configurations will be cleared. 1. Deactivate power to heat pump. 2. -
Page 15: Appendix
Wait for water temperatures to stabilize. Then check the temperature again. Re-adjust the valve as needed. 11. Mark valves at these positions for future reference. HEAT EXCHANGER MODEL TEMPERATURE TYPE 2° to 5° F Tube-in-Tube AT075 (1.1° C to 2.8° C) Tube-in-Tube 3° to 6° F AT115 (1.7° C to 3.3° C) Page - 12... -
Page 16: Adjusting Water Pressure Switch (Select Units)
Temperature differences are based on pool water temperatures of 69° to 75° F. (20.5° to 23.8° C) For water temperatures outside this range, contact Aquatherm. See "Contacts" on page 1. 2.2 Adjusting Water Pressure Switch (Select Units) Adjust the water pressure switch when heat pump attempts to operate without water flow. -
Page 17: Clearances
Therefore a water flow switch must be used in place of a water pressure switch to determine if incoming water is being sent to the heat pump. 9. If the heat pump continues to operate without water flow, contact Aquatherm. 2.3 Clearances Proper air circulation is required for the heat pump to operate efficiently. -
Page 18: Dimensions
2.4 Dimensions (Aquatherm AT075) (Aquatherm AT115) Page - 15... -
Page 19: Identifying Model Specifications
(Aquatherm AT130, AT150) 2.5 Identifying Model Specifications 1. Find Data Plate - The data plate is usually posted on the Data Plate Example side of the equipment or the inside of the heat pump's access plate. 2. Find the model number on the data plate. The first letters and numbers indicate the model type. -
Page 20: Three-Phase Adjustment
3. When heat pump starts, disconnect power and verify off. Then confirm all line voltage connections are securely tightened. Reconnect power. If the heat pump does not start, contact Aquatherm for further assistance. See "Contacts" on page 1. 2.7 Weights NOTE: Specifications subject to change. -
Page 21: Plumbing Diagrams
The basic plumbing configurations for typical installations are shown. If the installation does not closely follow any of the supplied plumbing diagrams, Aquatherm Technical Support is available for installation advice and guidance. Confirm water provided to the heat pump is clean and filtered. - Page 22 Heat Pump with Spillover Spa (One filter Pump) Heat Pump with Spillover Spa (Two filter Pumps) Heat Pump with Solar Panels in Plumbing Circuit Page - 19...
-
Page 23: Initial Heating Recommendations
Heat Pump with Gas Heater backup Multiple Air Source Heat Pumps 2.9 Initial Heating Recommendations The following recommendations will reduce the amount of time required to heat a pool. If unsure of equipment heating capability, review equipment data plate. See "Identifying Model Specifications" on page 16. -
Page 24: Winterizing
2.10 Winterizing Failure to properly winterize the heat pump as needed may result in serious equipment damage. Failure to heed the following will result in injury or death. DANGER Deactivate power while routing wiring to control board. Follow all National Electric Codes (NEC) and/or State and Local guidelines. Failure to heed the following may result in injury or death. -
Page 25: Troubleshooting
Titanium Tube-in-Tube Exchanger 1. Disconnect the plumbing to the heat pump at connection unions (removal is counter- Titanium clockwise). Tube-in- 2. Allow water to drain completely from the heat pump. Expect to see a lot of water drain out at Tube first, and then a small amount to continue to drain out over a long period. -
Page 26: Fault Codes
A fault code indicates a specific issue or condition that will require action before the equipment can resume operating. Please perform the following troubleshooting. If the issue reoccurs, please contact Aquatherm. See "Contacts" on page 1. Failure to heed the following may result in injury or death. WARNING Repairs must not be attempted by untrained or unqualified individuals. - Page 27 FAULT LED is blinking 1 time ISSUE The refrigerant system’s high-pressure or low-pressure switch is showing as open. RESOLUTION Determine if an insufficient amount of water is being supplied to the equipment. 1. Confirm the filter pump is on. 2. If a multiple-speed filter pump is being used, run filter pump at a higher speed. Do not exceed maximum flow rate for the model.
-
Page 28: Issues And Resolutions
Service by unauthorized personnel will void the factory warranty. Please perform the following troubleshooting. For further assistance, please contact Aquatherm. See "Contacts" on page 1. Display Panel Not Responding 1. If the heat pump is controlled be an external controller, confirm the external controller settings. See "Operating Heat Pump (With an External Controller)". - Page 29 Heat Pump's Tripping Breaker 1. Have an electrician confirm breakers are in good condition and properly sized for the heat pump. 2. If a fault occurs immediately when the compressor starts, a qualified technician should evaluate the system. Heat Pump Won’t Shut Off 1.
Need help?
Do you have a question about the AT075 and is the answer not in the manual?
Questions and answers