Advertisement
Quick Links
Advertisement

Subscribe to Our Youtube Channel
Related Manuals for GRE KITPROV818


Summary of Contents for GRE KITPROV818
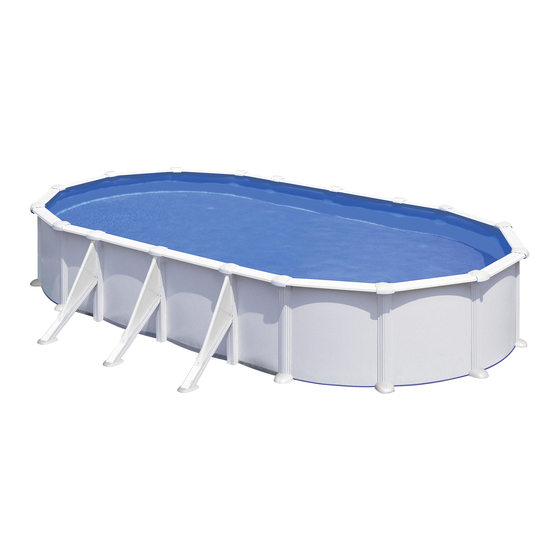
- Page 1 A S S E M B L Y I N S T R U C T I O N S Steel wall swimming pool. Before starting with the assembly, read carefully the instruction manuals of every components of the kit. Keep this instructions for future reference.
- Page 2 03 - 04 05 - 07 Preparation Safety of the site. precautions. 08 - 13 14 - 27 Components. Installation. 28 - 29 Maintenance Accessories. and use. Guarantee. Save this page for future claims and / or returns...
-
Page 3: Safety Precautions
safety precautions Safety precautions. 3,5 m minimum... - Page 4 assembly instructions Safety precautions. Safety equipment Carefully read, understand, and follow all information in this user manual before installing and using the → It is recommended to keep rescue equipment (e.g. swimming pool. a ring buoy) by the pool. WARNING These warnings, instructions, and safety guidelines →...
- Page 5 preparation of the site Preparation of the site. 3,5 m minimum Installation site Recommendations for choosing the → Do not install under power lines. best Our pools are designed to be installed → Protected from the wind and free from location for your pool directly on the ground and for outdoor trees since the pollen and leaves can...
- Page 6 assembly instructions Necessary tools (not included) Required surface Mark the installation area: Once the location area is chosen (which A-B=B-C have to be perfectly levelled), we’ll pro- ceed at the marking. You ‘ve got 2 options for that: 10,00 x 5,50 10,20 x 7,50 9,93 m.
- Page 7 preparation of the site Necessary tools (not included) Levelling: When levelling the ground, always remove material f rom the top of the slope rather than filling in the bottom: this will ensure greater ground stability and firmness. Always remove all grass, roots, stones, etc.
- Page 8 assembly instructions Components. In order to avoid any possible injury all Draw and clasify all components included be- fore assembly. swimming pool walking entrance must be regulary checked. It’s time to assemble the ladder and the pump, follow the respective instructions. Kits with missing parts will be covered by the warranty only if reported to the after-sales service with- in 15 days as from the date of purchase of the...
- Page 9 components Picture 1 PSP & PSO 120 - 132 cm Picture 2 TPL & TP PSP & PSO 132 cm Important. Please, pay attention to the joint protectors coming with your pool when you take out and classify its components: →...
- Page 10 assembly instructions Components. 120 cm 10,00 9,15 8,00 7,30 6,10 5,00 L LINER TPVCP PIPC TPVC 5,50 m 4,70 m 4,70 m 3,75 m 3,75 m 3,00 m PROTECTOR PC-BAG ( KITENV ) ( KITENV ) ( KITENV ) PLUGS ( KITENV ) ( KITENV ) ( KITENV )
- Page 11 components 9,15 8,00 7,30 6,10 5,00 10,00 x 5,50 m 4,70 m 4,70 m 3,75 m 3,75 m 3,00 m PLAYA ZC PLAYA ZC PLY ZC PLAYA ZR PLY ZR...
- Page 12 assembly instructions Components. 132 cm L LINER PIPC 9,15 8,00 7,30 6,10 5,00 PC-BAG PC-BAG PC-BAG 10,00 x 5,50 m 4,70 m 4,70 m 3,75 m 3,75 m 3,00 m PLAYA S = 705 mm M = 1095 mm X = 820 mm I = 1145 mm L = 1330 mm (large mm)
- Page 13 components 9,15 8,00 7,30 6,10 5,00 10,00 x 5,50 m 4,70 m 4,70 m 3,75 m 3,75 m 3,00 m TPL & TP T P L PLY ZR PLAYA ZC PLY ZC...
-
Page 14: Installation
assembly instructions Installation. 2. When closing the pool plate (CH) us- It is essential to follow these three steps to achieve a correct assembly: ing the screws (TC), make sure the screw heads are facing inwards and the wash- Important: The liner used in the 1. - Page 15 installation Installation of the swimming pool: We recommend that this is done by two or more adults and on a day without wind. For your safety, it is very important to wear gloves while assembling the pool. Each strut has 4 drop-forged parts (PE) riv- eted to it which must be fitted with the tabs upwards.
- Page 16 assembly instructions PIPC BOTTOM SECTION PIECES ( PI ) for oval swimming distances of the PU parts starting from point C. This pools. will facilitate the following steps for positioning the PV (H=132 cm) 1000 x 550 cm: 8 PI + 8 PU NOTE: These curved SECTION PIECES ARE FOR THE vertical profiles (p.18) BOTTOMS of OVAL SWIMMING POOLS.
- Page 17 installation...
- Page 18 assembly instructions FITTING THE UPRIGHT SUPPORTS IN THE STRAIGHT PART: 1000 x 550 cm= 8 x (PV2 & PTM) 915 x 470 cm = 8 x (PV2 & PTM) 800 x 470 cm = 6 x (PV2 & PTM) T2 x 4 730 x 375 cm = 6 x (PV2 &...
- Page 19 installation * Important! Before assembly, deburring, using both sides in the straight part using a joining-piece a file and sandpaper, the edge of the closing (PU1) to stop it from falling. Fit the wall plating all wall (CH). around the pool and screw the ends together, ensuring that the screw heads face inwards and FITTING THE WALL PLATING: Fit the wall plating the washers and blind nuts outwards.
- Page 20 assembly instructions PROTECTIVE PVC STRIPS (POOL INTERIOR hold with adhesive tape so that they cover the Place the protective blanket or mat inside the LINING): metal brackets that are inside the pool in the pool, eliminating all folds, adjusting and cutting straight area.
- Page 21 installation UNFOLDING THE PVC LINER: 1. Start at one of the straight parts. 2. Position the other half, i.e. the straight part opposite. 3. Continue Stretch and extend the liner (L) in the shade so that from one of the ends on the straight part up to the it recovers its texture at least 2 hours before it is to be middle of a semi-circumference.
- Page 22 assembly instructions 4.10 Hang the liner sides from the pool walls using the flexible PVC flap (SF). As you hang the lin- er in place, secure it provisionally with clothes- pegs or with the top PVC section-pieces (without f itting them fully into place and with a 5 cm gap between them).
- Page 23 installation 4.12 * Important! Before assembly, deburring, half-circle is completed. Join the section-pieces joining-piece all around the pool. Fill the pool to using a file and sandpaper, the end of each together and check by looking at the ribbing a depth of 2 cm of water and extend the liner edge.
- Page 24 assembly instructions 4.14 * Important! Before assembly, deburring, using a f ile and sandpaper, the ends of each edge. PLACING THE FLEXIBLE JOINT PROTECTORS (EM only for pools of 120 cm): The flexible joint protectors are f itted to the joints between the trim pieces.
- Page 25 installation 4.15 JOINT PROTECTORS: TPL and TP. the 2 strim pieces. Then, it has to be tightened (only for pools of 132 cm) to the front side of the pool, fixing the TPL verge to the PU1 hole. Now, fix TP to TPL by the lower These pieces are to be fitted joining and protect- side using a screw T1 to join them.
- Page 26 assembly instructions 4.16 FITTING THE RETURN VALVE (V): valve hole (check the liner is clean before filling truding part of the liner. (IMPELLER NOZZLE: V) the pool). Mark the position of the hole on the Fit the other seal (J) and the other friction ring This valve is located at the bottom of the pool liner with a felt pen and make a cross-shaped (F) and tighten firmly with the nut (T).
- Page 27 installation 4.18 FITTING THE SKIMMER trusions). Place the basket FRAME (M): (O) into the skimmer and the skimmer body cover (TS). FINISH FILLING THE POOL Ensure that all holes are lined up properly (seal to wall plate UP TO HALFWAY UP THE perforation to skimmer).
-
Page 28: Maintenance
assembly instructions Maintenance and use. → The pool water level must always be especially for children. at least 15 cm from the edge of the → The use of a pool kit involves respecting upper edge of the same. safety instructions defined in the main- →... - Page 29 maintenance and use WINTER-SEASON: CHIMICAL MEASURES: Please read carefully the chemical product manufacturer instructions. A) If you choose not to dismount the pool: WARNING: Keep chemical products in a clean, dry and out of children place. Important: 1- Clean the liner bottom and sides with a non-abrasive product. 2- Treat the water with a chemical product for wintering.
-
Page 30: Water Treatment
assembly instructions Accessories. HEATING SYSTEMS CLEANERS HEAT PUMPS FLOOR TAPESTRY WATER TREATMENT ISOTHERMIC COVERS WINTER COVERS COVER ROLLER FOR ABOVE SOLAR SHOWERS IMPORTANT: you can view the entire range of products on our site: www.grepool.com... -
Page 31: Guarantee Card
GRE oers the buyer -in addition to the rights of guarantee from tal of 4 years, exclusively regarding the metallic parts of the pool the seller that correspond by law and without limiting them- structure. - Page 32 M A N U F A C T U R A S G R E S . A . Aritz Bidea, 57 BELAKO INDUSTRIALDEA, APARTADO 69, 48.100 - MUNGUIA (VIZCAYA) ESPAÑA. www.grepool.com Nº GUARANTIE We reserve the right to change all or part of the articles or contents of this document, without prior notice 02.01.23...
Need help?
Do you have a question about the KITPROV818 and is the answer not in the manual?
Questions and answers