
Related Manuals for Planar Clarity Matrix G3


Summary of Contents for Planar Clarity Matrix G3
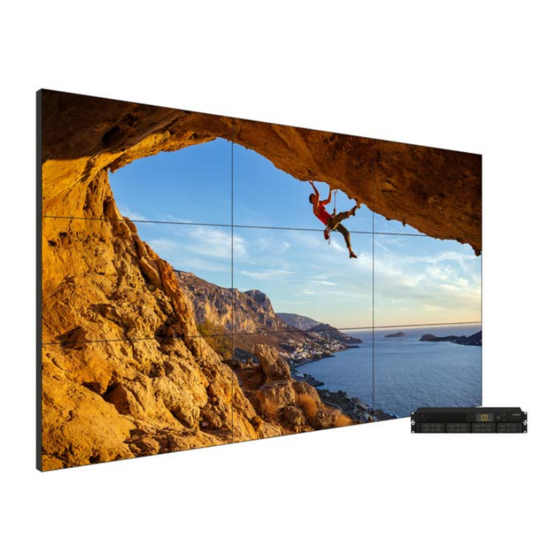
- Page 1 Installation Guide Clarity Matrix G3 LCD Video Wall System Clarity Matrix G3 LCD Video Wall System Installation Guide Page | 1 020-1339-00H...
- Page 2 Planar employees. When you purchase a Planar product, you get more than a display, you get the service and support you need to maximize your investment. To find the latest warranty and service information regarding your Planar product, please visit http://www.planar.com/support/...
-
Page 3: Table Of Contents
Optional Planar-Supplied Accessories ........ - Page 4 Commonly Used Planar Big Picture Plus resolutions ........
- Page 5 Frame Compensation ............... . . 135 Clarity Matrix G3 LCD Video Wall System Installation Guide...
- Page 6 Connecting Cables ................181 Clarity Matrix G3 LCD Video Wall System Installation Guide...
- Page 7 ................... . 194 Clarity Matrix G3 LCD Video Wall System Installation Guide...
-
Page 8: Introduction
298MP. The sources can be displayed across discrete panel boundaries, resulting in a highly configurable compact system. All products come in a standard aspect ratio of 1.77 (16:9). The Clarity Matrix G3 can be installed with the minimum install depth of 3.6 inches (91mm). -
Page 9: Safety Information
Safety Information Safety Information The Clarity Matrix G3 LCD Video Wall System was designed with safety in mind. By not heeding the safety warnings and cautions, injury may occur. There are safety warnings on stickers in various places in and on the display. - Page 10 Refer all servicing to qualified service personnel. Servicing is required when any of the Clarity Matrix G3 LCD Video Wall System products have been damaged in any way, such as the AC power cord or plug is damaged, liquid has been spilled or objects have fallen into a product, the products have been exposed to rain or moisture, do not operate normally or have been dropped.
-
Page 11: Important Waste Disposal Information
For more information about the proper disposal of electronic waste, please contact the local authority, the household waste disposal service, or the seller from which the product was purchased. Clarity Matrix G3 LCD Video Wall System Installation Guide Page | 11 020-1339-00H... -
Page 12: Recommended Usage
• To use the power on/off scheduling feature within the system software. Note: For optimal performance, we suggest turning off the power to the Clarity Matrix G3 LCD panels for four hours per day. Clarity Matrix G3 LCD Video Wall System Installation Guide... -
Page 13: Normal Use Thermal Guidelines
Cooling may be done behind the displays and depending on the wall configuration, it may be helpful to place air ducts (AC) at every third display tall. Clarity Matrix G3 LCD Video Wall System Installation Guide Page | 13 020-1339-00H... -
Page 14: Safe Handling
Light leakage caused by bent chassis Mullion peeling away from bezel (ERO units only) Screen bleeding caused by chipped LCD Silicone pulling out of seams (ERO units only) Clarity Matrix G3 LCD Video Wall System Installation Guide Page | 14 020-1339-00H... - Page 15 LCD panel on ground or lean against surfaces. DO NOT place LCD panel in horizontal position on any surface (including tables). DO NOT place or lean any object against the LCD panel. Clarity Matrix G3 LCD Video Wall System Installation Guide Page | 15 020-1339-00H...
-
Page 16: System Architecture
System Architecture System Architecture Clarity Matrix G3 LCD Video Wall System has four main electronic components: • Planar EasyAxis Mount System (EMS) • LCD Display (LCD) • Planar Remote Power Supply (RPS) • Planar Video Controller (VC) The LCD display has an interface board, which connects to a remote power supply and a video controller. - Page 17 • The total number of panels supported for any independent system is 72 FHD panels. Video walls consisting of more than these limits should be divided into multiple systems with each having its own master component. Clarity Matrix G3 LCD Video Wall System Installation Guide Page | 17 020-1339-00H...
- Page 18 (200ft). Contact Planar for suggestions regarding applications beyond 60m (200ft). Note: When not using Planar supplied CAT cable and terminations, be sure to use shielded connectors and properly terminate on both ends. Note: Use of jumpers between cables is highly discouraged as this will degrade the signal between equipment, resulting in poor performance or failure over otherwise acceptable distances between equipment.
- Page 19 System Architecture The following example shows the connections for a basic Clarity Matrix G3 LCD video wall. The Clarity Matrix G3 can be ordered as either landscape or portrait. For customers wanting to use a third-party VESA mount, Clarity Matrix G3 models can be configured without the Planar EasyAxis mount and includes a VESA standard hole pattern.
-
Page 20: Lcd Displays
LCD Displays LCD Displays The Clarity Matrix G3 LCD display is composed of an LCD without a cosmetic enclosure but with a mechanical subframe for mounting. It incorporates a simple electronic interface board designed to distribute power, video and control signals to the LCD, keeping depth, weight, heat and points of potential failure to a minimum. -
Page 21: Planar Easyaxis Mounting System
Planar EasyAxis Mounting System Planar EasyAxis Mounting System The Planar EasyAxis mounting system is included with most models and are used to secure the Clarity Matrix G3 LCD displays to a structure. Follow these instructions carefully. Keep in mind the following general installation guidelines: •... -
Page 22: Lcd Mounting Structure
Planar EasyAxis Mounting System LCD Mounting Structure The Planar EasyAxis mounting system simplifies the task of installing and aligning the LCD displays while allowing for efficient in-wall service. Planar EasyAxis is designed to be attached to a wall, used with optional free-standing bases, or secured overhead. - Page 23 Note: This image is an example of a 2x2 portrait mount configuration. Planar EasyAxis mounts are designed to facilitate the thinnest profile LCD video wall while maintaining precise alignment. The combination of the mount plus the Clarity Matrix G3 LCD display’s blade-style design results in video walls that can measure 3.6 inches (91mm) in depth, screen to wall.
-
Page 24: Rack Equipment And Components
To reduce heat issues and to make servicing of the video wall easier, there are two main Clarity Matrix G3 components that are separate from the LCD display itself. The video controller and remote power supplies can be mounted in an equipment rack that is typically located away from the video wall itself. - Page 25 2 additional video controllers depending on the model. Each video controller output is able to connect to a single FHD LCD at up to 200ft (60m) away using standard STP CAT6 cable. Clarity Matrix G3 LCD Video Wall System Installation Guide Page | 25 020-1339-00H...
- Page 26 4 HDMI 2.0 inputs with DiplayPort 1.2 loop signal loop between video controllers, 9 CAT6 FHD outputs up to 60m (200ft) capable of displaying single or multiple images over all connections. Clarity Matrix G3 LCD Video Wall System Installation Guide Page | 26 020-1339-00H...
-
Page 27: Planar Remote Power Supply
Rack Equipment and Components Planar Remote Power Supply The Planar Remote Power Supply (RPS) is a rack unit that can hold up to 4 remote power supply modules (RPSM). The remote power supply modules may be configured n+1 redundant and are hot swappable. - Page 28 Each main DC power output can power up to eight panels depending on equipment and distance to the equipment. Once the first panel is connected, the remaining are daisy chained to the calculated number of panels. Clarity Matrix G3 LCD Video Wall System Installation Guide Page | 28 020-1339-00H...
- Page 29 The remote power supply can be part of a larger system receiving commands over the system network connections. It may also be controlled via the serial connections, IR sensor or video controller front panel keypad. Clarity Matrix G3 LCD Video Wall System Installation Guide Page | 29 020-1339-00H...
-
Page 30: Installing A Clarity Matrix G3 Lcd Video Wall System
Installing a Clarity Matrix G3 LCD Video Wall System This section explains how to install a Clarity Matrix G3 LCD Video Wall. We suggest that this entire section be read before attempting to install the wall. Before Beginning Make sure all the items in the following lists are present before unpacking and installing the Clarity Matrix G3 LCD Video Wall(s). - Page 31 Opening Matrix Packaging Carton 2 Remove packing straps. 3 Remove carton lid. 4 Remove side cardboard sleeves. Clarity Matrix G3 LCD Video Wall System Installation Guide Page | 31 020-1339-00H...
-
Page 32: In-Box Testing & Inspection
Carefully follow the testing and inspection steps below. Do not break the tamper seal until testing and inspection is successfully completed. If damage or failure is observed, contact Planar Technical Support immediately. 1 Carefully lift at the handles to move the... - Page 33 4 Connect DC Power to display as shown. Skip to step 12. Note: Use only the 2-pin DC connector. Keep the 4-pin DIN connector disconnected. Clarity Matrix G3 LCD Video Wall System Installation Guide Page | 33 020-1339-00H...
- Page 34 13 The display will continue to show a white test pattern when power is connected, until a VC is connected and recognized by the system. Note: The display will show a blue test image when it is disconnected from the VC and DC power is applied. Clarity Matrix G3 LCD Video Wall System Installation Guide Page | 34 020-1339-00H...
-
Page 35: Checking Shipment Equipment
17 Repeat this process for all LCD displays. Checking Shipment Equipment The Clarity Matrix G3 LCD Video Wall System is configured with several components. The number and type of individual components vary with each configured order. Components may include one or more of the following: •... -
Page 36: Video Controller Box
Power Connects the power cable (4ft) supply to the video controller. DisplayPort Loops input signal 1 per video cable (3ft) between video controller, controllers. configuration dependent Clarity Matrix G3 LCD Video Wall System Installation Guide Page | 36 020-1339-00H... - Page 37 HDBNC between video controller cable controllers. (0.3m) Note: It is highly recommended that the cable label maker be used to identify each cable before it is installed. Clarity Matrix G3 LCD Video Wall System Installation Guide Page | 37 020-1339-00H...
-
Page 38: Remote Power Supply Box
(3m) order, the cable will be for use in North America or Europe. If the installed outlet does not match the cable plug, consult a qualified electrician. Clarity Matrix G3 LCD Video Wall System Installation Guide Page | 38 020-1339-00H... -
Page 39: Lcd Display Box
32. LCD mount 1 or 2 per box depending on the order. When it is time to remove the LCD display, see "Safe Handling" on page 14. Clarity Matrix G3 LCD Video Wall System Installation Guide Page | 39 020-1339-00H... -
Page 40: Accessory Box(Es)
(These terminated cable are plenum rated.) Clarity Matrix G3 LCD Video Wall System Installation Guide Page | 40 020-1339-00H... -
Page 41: Accessory Kit
Picture Included Gloves Used to handle LCDs. 2 pairs Remote Control Note: To use the remote, it must be aimed at the IR Sensor, not the display. Clarity Matrix G3 LCD Video Wall System Installation Guide Page | 41 020-1339-00H... - Page 42 BNC to HDBNC for video (0.3m) customer-supplied sync controllers devices. Mini HDBNC Used to loop last video 1 per 16 cable (1m) controller in stack to first. video controllers Clarity Matrix G3 LCD Video Wall System Installation Guide Page | 42 020-1339-00H...
-
Page 43: Configured Accessory Box
Optional Planar-Supplied Accessories Make sure the following optional Planar-supplied items are available as needed to complete the installation: • Curved brackets • Wall adapter bracket (see "Wall Adapter Bracket" on page 189) • Floor stand •... -
Page 44: Tools/Equipment List
Other Things Possibly Needed • LCD screen cleaner or LCD wipes - available at most electronics stores • At least two capable people to lift LCD displays into place Clarity Matrix G3 LCD Video Wall System Installation Guide Page | 44 020-1339-00H... -
Page 45: Safe Handling Of The Lcd Modules
Do not lay the panel on its face or back. This may cause the glass to become dislodged from the bezel and make it susceptible to falling out. Clarity Matrix G3 LCD Video Wall System Installation Guide Page | 45... -
Page 46: Design Guide
149 for component weight(s). • Ventilation and cooling requirements: For passive cooling, we recommend a minimum of 200mm (8") of top and bottom clearance. Please consult Planar Sales for video walls that are more than eight LCD Displays high. It is very important that there is proper cooling and ventilation for the entire video wall and its remotely-located equipment. -
Page 47: Calculating Dc Power Requirements And Component Heat Load
When determining heat load, the best practice is to calculate that figure based on maximum power usage. Typical power usage factors in content and level of brightness at which the video wall is expected to run. Planar estimates typical power assuming 80% display brightness. The actual typical power may vary depending on the application. - Page 48 (cable length in feet) EQ. 1 Note: The cable resistance here is valid only using the 10AWG wire sourced through Planar. Anything beyond 200ft may require a reduction in the displays attached to maintain an acceptable V from the RPS to the video wall.
-
Page 49: Configuring Sources For Display
Configuring Sources for Display The Clarity Matrix G3 is a highly configurable system through the use of the WallDirector software to add, place and display sources on the video wall. However, it is important to understand how cabling of both displays and VCs can affect the physical limitations of the system. - Page 50 Multiple layouts of sources and outputs can be saved as presets within the software interface. This information is directly saved to the master control component of the system. Clarity Matrix G3 LCD Video Wall System Installation Guide Page | 50...
- Page 51 Planar Big Picture Plus Clarity Matrix G3 LCD Video Wall System Installation Guide Page | 51 020-1339-00H...
-
Page 52: Configuring High Resolution Inputs
High Resolution Setup The table below lists some of the commonly used Planar Big Picture Plus resolutions and shows the maximum refresh rate allowed to stay within the limits for HDMI and DisplayPort connections. -
Page 53: Zones
The first example is a traditional one-to-one display, where each input is routed to a corresponding panel. Each one of these images to be displayed is referred to as a zone. Clarity Matrix G3 LCD Video Wall System Installation Guide Page | 53 020-1339-00H... - Page 54 The second example shows how multiple sources can be assigned to multiple zones for display and that zones can be scaled to fit the end use requirement. Clarity Matrix G3 LCD Video Wall System Installation Guide Page | 54 020-1339-00H...
- Page 55 Note: This example has 9 zone/partial zones (4 for the red source, 2 for the green, 1 for the blue and 2 for the yellow). Clarity Matrix G3 LCD Video Wall System Installation Guide Page | 55 020-1339-00H...
- Page 56 If the number of panels supported by the video controller is less than the outputs it is still possible to use all 13 zones/partial zones such as in the two examples shown below. Clarity Matrix G3 LCD Video Wall System Installation Guide Page | 56 020-1339-00H...
- Page 57 If the application requires a greater ratio of inputs or zones to inputs than the standard VC9H-BP+, be sure to specify either the VC-HSL or use a video processor if necessary. Clarity Matrix G3 LCD Video Wall System Installation Guide Page | 57...
-
Page 58: Multiple Video Controllers
VC1 and VC4. Note: The DisplayPort loop out is capable of supporting up to a single 4K/60Hz signal and can be assigned to loop any input to the VC. Clarity Matrix G3 LCD Video Wall System Installation Guide Page | 58 020-1339-00H... - Page 59 This should always be used with a system using the High Speed Link. See "Genlock" on page 68. Clarity Matrix G3 LCD Video Wall System Installation Guide Page | 59...
- Page 60 13 zone/partial zone limit. Additionally, VC loops a media blue player signal back to VC so that source is available on both without the need for a distribution amplifier. Clarity Matrix G3 LCD Video Wall System Installation Guide Page | 60 020-1339-00H...
- Page 61 VCs and then split between multiple panels on each VC while being scaled with the green camera input. Note: Using a distribution amplifier may not have support for genlock standard performance. Clarity Matrix G3 LCD Video Wall System Installation Guide Page | 61 020-1339-00H...
-
Page 62: Native Resolutions
9 out VC is capable of outputting two 4K sources or single source with a multi-output PC. The same is true for 3840x2160 panels except only a single 4 out VC is required. Clarity Matrix G3 LCD Video Wall System Installation Guide Page | 62 020-1339-00H... - Page 63 VC outputs are properly synchronized. Note: 1920x1080 product is shown. 3840x2160 product uses two 4 out VCs. Clarity Matrix G3 LCD Video Wall System Installation Guide Page | 63 020-1339-00H...
-
Page 64: Standby Power Wiring
Standby Power Wiring Standby Power Wiring The Clarity Matrix G3 LCD Video Wall System is capable of two methods of enabling a standby power mode when not in use, ranging from 3W per RPS to 30W per panel. These are referred to as “Low Power” and “Fast Start,” respectively. To achieve the lowest standby power, the system requires a complete shutdown of all peripheral equipment powered by the RPS. - Page 65 IR sensor connected to the RPS near the wall so the control would always be active at that location. However, the time to live would still be delayed. Clarity Matrix G3 LCD Video Wall System Installation Guide Page | 65...
-
Page 66: Use Of A Network Switch
Use of a Network Switch Use of a Network Switch The rack components of the Clarity Matrix G3 system communicate with each other over an internal network connected through the LAN ports. Due to the nature of the physical connection of the ports on each piece of equipment is done in a serial manner if a piece of equipment fails, components down the chain will no longer have a communication path back to the master controller. - Page 67 If using a switch, be sure that only the WAN/LAN port is connected. Both ports being connected to the switch may result in data errors and/or poor performance. Clarity Matrix G3 LCD Video Wall System Installation Guide Page | 67...
-
Page 68: Genlock
Genlock The video controller comes with the genlock feature automatically enabled. This feature automatically chooses the source that may be set up as the Planar Big Picture Plus if that configuration is chosen, or the system automatically selects the optimum internal clock to synchronize each video controller. -
Page 69: Installation Checklist
Install the LCD mount brackets. Route cables from rack equipment to LCDs and route cables between LCDs. Install LCD modules. Use the software to configure the displays. Clarity Matrix G3 LCD Video Wall System Installation Guide Page | 69 020-1339-00H... -
Page 70: Component Connections
This ID can be changed after initialization or after full installation if required or desired. If there is no Clarity Matrix G3 LCD Video Wall System Installation Guide Page | 70... -
Page 71: Vc As Master
VC that is master. It is still important not to have two master components connected on the same internal network due to communication conflicts. When using a VC as master, there is a total connected panel limitation of 36. Clarity Matrix G3 LCD Video Wall System Installation Guide Page | 71 020-1339-00H... - Page 72 Component Connections When a VC is set as master, the Front Panel Info screen will change as shown below for ease of recognition. Clarity Matrix G3 LCD Video Wall System Installation Guide Page | 72 020-1339-00H...
-
Page 73: Connecting Sources
HDMI In connector that corresponds to the LCD connector where a source is to be displayed. If the plan is to use any form of the Planar Big Picture Plus, cable the Loop Out and Loop In connections as shown in "Configuring Sources for Display" on page 49. -
Page 74: Placing Rack Components
If the VC is master, skip to the next step. From the last RPS in this chain, connect the LAN port to the WAN/LAN port of a VC and follow the same looping scheme for successive VCs in the system. Clarity Matrix G3 LCD Video Wall System Installation Guide Page | 74 020-1339-00H... - Page 75 If the VC is to be the master, be sure that power is applied and configure the component. (See "VC as Master" on page 71.) See the WallDirector, RPS and Video Controller User Interface Guide for keypad use. RPS Rear Panel Clarity Matrix G3 LCD Video Wall System Installation Guide Page | 75 020-1339-00H...
- Page 76 Insert cables connected to the sources into the inputs of the VCs and loop the signal between them accordingly. Refer to the "Design Guide" on page 46 for help in making proper connections for desired results. Clarity Matrix G3 LCD Video Wall System Installation Guide Page | 76 020-1339-00H...
- Page 77 Placing Rack Components Depending on the equipment, the connections will look similar to the picture below. Clarity Matrix G3 LCD Video Wall System Installation Guide Page | 77 020-1339-00H...
-
Page 78: Wall Installation
• Standard installation - mounted to a wall (see "Mounting Brackets to a Wall" on page 80) • Column floor stand - maximum of 2.2m (7ft) without additional support • 2 x 2 free-standing mount (46L only) Clarity Matrix G3 LCD Video Wall System Installation Guide Page | 78 020-1339-00H... -
Page 79: Installing The Lcd Mount Structure
Installing the LCD Mount Structure Installing the LCD Mount Structure Planar EasyAxis mounts are designed to facilitate the thinnest profile LCD video wall. The combination of the mount plus the Clarity Matrix LCD module’s “blade” design results in video walls that can measure 3.6 inches installed depth, screen to wall. -
Page 80: Mounting Brackets To A Wall
A yellow finish indicates the bracket is meant for an ERO product. Horizontal bracket (portrait) Note: A yellow finish indicates the bracket is meant for an ERO product. Clarity Matrix G3 LCD Video Wall System Installation Guide Page | 80 020-1339-00H... - Page 81 Mounting Brackets to a Wall Vertical bracket Note: A yellow finish indicates the bracket is meant for ERO product. Wall stud adapter bracket (optional) Clarity Matrix G3 LCD Video Wall System Installation Guide Page | 81 020-1339-00H...
-
Page 82: Installing Brackets On The First Row Of A Fixed Wall
Then loosely attach the LCD mount. Using a level (a digital one is highly recommended), level the bracket monitoring the string or laser level at the bottom. Clarity Matrix G3 LCD Video Wall System Installation Guide Page | 82 020-1339-00H... - Page 83 Align the v-shaped notch on the LCD mount with the desired center of the LCD (this is done for the first bracket only). Note: The mount shown is for a Landscape installation. Clarity Matrix G3 LCD Video Wall System Installation Guide Page | 83 020-1339-00H...
- Page 84 Using a digital level, make sure the first row is level. All brackets in a row should be level with the bracket next to it within ±0.1°. Clarity Matrix G3 LCD Video Wall System Installation Guide Page | 84 020-1339-00H...
-
Page 85: Installing Brackets On Subsequent Rows
Starting again in the middle of the wall, install the LCD mount into the vertical brackets. Install the screws provided attaching the vertical spacers to the LCD mounts. Clarity Matrix G3 LCD Video Wall System Installation Guide Page | 85 020-1339-00H... - Page 86 Be sure that the mount is flat as the screws are tightened. If it is not, use shims near the mounting points. Using a digital level, make sure the row is level and the columns are plumb. Repeat steps for each row added. Clarity Matrix G3 LCD Video Wall System Installation Guide Page | 86 020-1339-00H...
-
Page 87: Routing Cables
It is recommended that 0.5m (2 ft) of cable be left beyond the LCD mounts to ease connection. The excess cable can be pulled back as the panels are put into place. Clarity Matrix G3 LCD Video Wall System Installation Guide Page | 87... - Page 88 It is also recommended that the data and power cables are kept separate during routing. Clarity Matrix G3 LCD Video Wall System Installation Guide Page | 88 020-1339-00H...
-
Page 89: Routing Power Cables
Note that the entry point for power from the RPS is in the center/bottom and the routing is generally outward and upward. Clarity Matrix G3 LCD Video Wall System Installation Guide Page | 89 020-1339-00H... - Page 90 If power cables built were not ordered from the factory, ensure that the pinout on each end of the cable is correct for polarity. Cables built incorrectly may result in display damage. Clarity Matrix G3 LCD Video Wall System Installation Guide Page | 90 020-1339-00H...
-
Page 91: Video Cable Routing
First, connect the RPS in a cascade manner and then connect the first VC to the LAN output of the last RPS in the cascade. Continue the cascade of the VCs like the RPS that had been connected previously. Clarity Matrix G3 LCD Video Wall System Installation Guide Page | 91 020-1339-00H... - Page 92 It is preferred that the communication ports of the master be used for control, however, any RPS in the local network chain can be used for this function. Clarity Matrix G3 LCD Video Wall System Installation Guide Page | 92...
-
Page 93: Display Connection
Additionally, data is sent back to the master detailing status and wall configuration. Clarity Matrix G3 LCD Video Wall System Installation Guide Page | 93 020-1339-00H... -
Page 94: Installation Considerations; Tips For Adjusting Walls
This will help minimize changes once the wall is fully installed. While the Planar EasyAxis mounts are designed to align the LCDs with one another, note that some LCDs may not match in overall size to the majority of LCDs. While most panels are the same size, there are some that can be larger or smaller by a minute amount. - Page 95 As with the mounts, LCDs should be installed in the middle of the wall first and then added outward from there. This enables use of the adjustments by splitting the tolerance build-up to the left and right. Clarity Matrix G3 LCD Video Wall System Installation Guide Page | 95 020-1339-00H...
-
Page 96: Installing The First Or Bottom Row
If the LCD needs to be rested against a surface, it should be rested face out and on the LCD edge that has the thinner bezel (LCD bottom surface). Clarity Matrix G3 LCD Video Wall System Installation Guide Page | 96... - Page 97 Installation Considerations; Tips for Adjusting Walls Correct position Incorrect position All for corners touching a solid surface Angle no more than 10° from vertical Never rest the LCD on a corner! Clarity Matrix G3 LCD Video Wall System Installation Guide Page | 97 020-1339-00H...
- Page 98 See "Routing Power Cables" on page 89. Note: Disconnecting power from a panel will disconnect power from any panels connected down the power chain. Clarity Matrix G3 LCD Video Wall System Installation Guide Page | 98 020-1339-00H...
- Page 99 A splash screen will briefly appear after the system has been initialized and then a white field will remain on until a source is assigned or the pattern is removed through the user interfaces. Clarity Matrix G3 LCD Video Wall System Installation Guide Page | 99 020-1339-00H...
- Page 100 Portrait installation - Slide down and into position Note: If the display is not seated properly, make sure the x-axis and z-axis adjusters are seated in the correct positions. (See steps of this section.) Clarity Matrix G3 LCD Video Wall System Installation Guide Page | 100 020-1339-00H...
- Page 101 This ID will change after the auto-layout procedure is completed. This will be done after the entire wall has been physically installed and connected. 1920x1080 Resolution Panels 3840x2160 Resolution Panels Clarity Matrix G3 LCD Video Wall System Installation Guide Page | 101 020-1339-00H...
- Page 102 ID of the missing panel. It will be assigned the next number based on the system recognition of equipment. This ID will be changed through the auto-layout process or can be done manually by the installer. Clarity Matrix G3 LCD Video Wall System Installation Guide Page | 102 020-1339-00H...
- Page 103 Each LCD will come from the factory in the nominal position. However, due to installation and manufacture tolerances, adjustments to the position may be required. Clarity Matrix G3 LCD Video Wall System Installation Guide Page | 103 020-1339-00H...
- Page 104 Bottom Z-axis adjuster Portrait installation - Top Z-axis adjuster There is a pair of Z-axis adjusters on each side. Clarity Matrix G3 LCD Video Wall System Installation Guide Page | 104 020-1339-00H...
- Page 105 Keep in mind if adjusted too far out of level, it can cause issues with the alignment of subsequent displays. Note: A slight waviness in the gap is typical. Clarity Matrix G3 LCD Video Wall System Installation Guide Page | 105 020-1339-00H...
-
Page 106: Installing Second And Subsequent Rows
The alignment of the bottom corners might need to be re-adjusted as each new display is installed in the row. Repeat steps of this section to install subsequent displays in this row. Clarity Matrix G3 LCD Video Wall System Installation Guide Page | 106 020-1339-00H... - Page 107 Installation Considerations; Tips for Adjusting Walls Once the wall is complete, the default panel IDs will look like the example below. Clarity Matrix G3 LCD Video Wall System Installation Guide Page | 107 020-1339-00H...
- Page 108 OSD and in WallDirector to determine where they physically are with respect to one another and create a virtual grid that matches what has been installed. See "Matrix Layout Menu" on page 117. Clarity Matrix G3 LCD Video Wall System Installation Guide Page | 108 020-1339-00H...
- Page 109 Any other panel can be fixed by using manual mode within the software to assign a display’s location. Changing this will override the position sensors data. Clarity Matrix G3 LCD Video Wall System Installation Guide Page | 109 020-1339-00H...
-
Page 110: Mounting The Ir Sensor
93 for a visual example of this connector location. Connection to the RPS is recommended for using the remote control if the low power mode will be used. See "Standby Power Wiring" on page 64. Clarity Matrix G3 LCD Video Wall System Installation Guide Page | 110 020-1339-00H... - Page 111 Verify the position sensors are working by the same method as described when installing the first row. The example below shows how IDs in the array may appear as displays are connected. Clarity Matrix G3 LCD Video Wall System Installation Guide Page | 111 020-1339-00H...
-
Page 112: Mounting The Ambient Light Sensor
For a properly setup system, the wall will increase or decrease it's brightness when the ambient light intensity changes. Clarity Matrix G3 LCD Video Wall System Installation Guide Page | 112 020-1339-00H... -
Page 113: Video Controller Front Panel
The LED will also blink to indicate if a firmware upgrade is in process or finished. See the WallDirector, RPS and Video Controller User Interface Guide for more information. Clarity Matrix G3 LCD Video Wall System Installation Guide Page | 113... -
Page 114: Configuring A Clarity Matrix G3 Lcd Video Wall
Wall Video Wall Settings Most video wall setup will be done through the Planar WallDirector software (see the WallDirector, RPS and Video Controller User Interface Guide), however, the OSD has much of the functionality required to do basic setup of displays and source routing. -
Page 115: Remote Definition
Remote Definition Remote Definition Below is a description of the basic functionality of the remote for use with the On Screen Display. Clarity Matrix G3 LCD Video Wall System Installation Guide Page | 115 020-1339-00H... -
Page 116: Firmware Update
Note: After connection of all equipment, It is recommended to update the firmware to the latest revision. The latest firmware is located on the Planar Portal website http://partners.planar.com/). For more information about the firmware features, read the readme files that comes with firmware package. -
Page 117: Matrix Layout Menu
In manual mode, the position data for these points will match as they correspond to the position sensor data. In WallDirector, the left menu bar will communicate the actual position as configured. All other information will use the as configured information. Clarity Matrix G3 LCD Video Wall System Installation Guide Page | 117 020-1339-00H... - Page 118 Additionally, in Default Layout, the Wall Width and Height may not match physically what is installed, but this will be corrected once Auto or Manual Layout is completed. Clarity Matrix G3 LCD Video Wall System Installation Guide Page | 118...
-
Page 119: Adjusting Color Balance
When a yellow car moves across a video array from one display to another, it should have the same color for the whole trip, not change from yellow to tan to orange. Clarity Matrix G3 LCD Video Wall System Installation Guide Page | 119... - Page 120 Color balance may be adjusted either through the WallDirector software (see the WallDirector, RPS and Video Controller User Interface Guide) or through the OSD as shown below. Clarity Matrix G3 LCD Video Wall System Installation Guide Page | 120 020-1339-00H...
- Page 121 Adjusting Color Balance Clarity Matrix G3 LCD Video Wall System Installation Guide Page | 121 020-1339-00H...
-
Page 122: Understanding Color Temperature
ESET TO ACTORY the original values can be recalled with the command. To start with ESET TO ATIVE the brightest possible display and do custom color balancing, use Clarity Matrix G3 LCD Video Wall System Installation Guide Page | 122 020-1339-00H... -
Page 123: Color Balancing Multiple Displays
Turn on all the displays in the array and let them warm up for at least 5 minutes. The backlights must be thoroughly warm before doing color balance. Clarity Matrix G3 LCD Video Wall System Installation Guide Page | 123... - Page 124 8. Note: For products that have Local Dimming available, uncheck this feature while color balancing. After color balancing is finished, re-enable this feature for best results. Clarity Matrix G3 LCD Video Wall System Installation Guide Page | 124 020-1339-00H...
- Page 125 Adjusting Color Balance COLOR BALANCE COLOR Open the menu by pressing the button on the remote or browse to in WallDirector. Clarity Matrix G3 LCD Video Wall System Installation Guide Page | 125 020-1339-00H...
- Page 126 Adjusting Color Balance Press the ** button or select “All” in WallDirector to control all displays. Clarity Matrix G3 LCD Video Wall System Installation Guide Page | 126 020-1339-00H...
- Page 127 To reset all displays to the factory default setting, highlight “Reset to Factory” and press ENTER Clarity Matrix G3 LCD Video Wall System Installation Guide Page | 127 020-1339-00H...
- Page 128 When the color point values are 100, the display is as bright as it can get. This step is adjusting for slight variations in backlight brightness. Clarity Matrix G3 LCD Video Wall System Installation Guide Page | 128 020-1339-00H...
- Page 129 If there is a need to start over, select R or R ESET TO ACTORY ESET TO ATIVE . (See Resetting Color Balance in the Note on page 122.) and press ENTER Clarity Matrix G3 LCD Video Wall System Installation Guide Page | 129 020-1339-00H...
-
Page 130: Tips For Color Balancing
• Color balance values are saved on the LCD Interface board, so they will be correct for the display even if it is moved to a different Video Controller output. Clarity Matrix G3 LCD Video Wall System Installation Guide Page | 130... -
Page 131: Basic Functionality
Basic Functionality Basic Functionality Below are some basic functions of the Clarity Matrix G3 system to help get started. For a full list and explanation of capabilities as well as how to access, see the WallDirector, RPS and Video Controller User Interface Guide or RPS and Video Controller RS232 User Guide. -
Page 132: Control Mode
Manual, the menu above will be displayed. When B ACKLIGHT ONTROL is Auto, the menu below will be displayed. Note: Auto Backlight Control works only when an Ambient Light sensor is installed. Clarity Matrix G3 LCD Video Wall System Installation Guide Page | 132 020-1339-00H... -
Page 133: Intensity
Reset the Backlight Control Mode to 'Auto' . The system will now change the intensity automatically based on the values provided. if these values need to be changed, repeat this procedure. Clarity Matrix G3 LCD Video Wall System Installation Guide Page | 133 020-1339-00H... -
Page 134: Controlling Edid Behavior
• The need for a non-standard resolution to accomplish mullion compensation without scaling the image. • The display is configured in a Planar Big Picture Plus, and it is desired to output one-to-one pixels. The standard EDID can’t accommodate all possible Planar Big Picture Plus combinations. -
Page 135: Frame Compensation
The image seen is partially obscured by the frames, but the mind will assemble the image and ignores the frames. Note: Frame Compensation is also known as mullion or bezel compensation. Clarity Matrix G3 LCD Video Wall System Installation Guide Page | 135 020-1339-00H... -
Page 136: Frame Height And Frame Width
If the installation leaves more space between the frames, increase these numbers until the image looks correct. Clarity Matrix G3 LCD Video Wall System Installation Guide Page | 136 020-1339-00H... -
Page 137: Wallsync
By the time the last row of pixels are displayed on the top display, the lower display has already displayed the adjacent corresponding data. The Clarity Matrix G3 enables a method where it automatically recognizes which is the even row display in an array and corrects that row(s). - Page 138 This results in the correct corresponding data between panels to be displayed at the same time, eliminating tearing or mis- alignment of the image. Clarity Matrix G3 LCD Video Wall System Installation Guide Page | 138 020-1339-00H...
- Page 139 WallSync To enable this feature, check the box in the OSD or WallDirector as shown below. Clarity Matrix G3 LCD Video Wall System Installation Guide Page | 139 020-1339-00H...
-
Page 140: System Status
LCD, video controller and the power supply. This can be a helpful troubleshooting tool if there are operational issues with one of the system components. Clarity Matrix G3 LCD Video Wall System Installation Guide Page | 140 020-1339-00H... -
Page 141: Presets (Slots)
WallDirector software. This is read only in the OSD. Recall Activates the selected preset. Save Saves the selected preset. Delete Deletes the selected preset. Clarity Matrix G3 LCD Video Wall System Installation Guide Page | 141 020-1339-00H... -
Page 142: Managing Presets Using The Walldirector
WallDirector automatically displays the status of components within the wall in the System Alerts window. To use, Email and SNMP each need to be set up before they can be effectively enabled. Clarity Matrix G3 LCD Video Wall System Installation Guide Page | 142 020-1339-00H... - Page 143 For instance, a WallDirector notification may display well in advance of an email to allow a person monitoring the system an opportunity to evaluate and correct a system issue. Clarity Matrix G3 LCD Video Wall System Installation Guide Page | 143 020-1339-00H...
- Page 144 To clear alerts from the log, click the Clear All Alerts and Messages button, or click the ‘X’ button to clear each individually. Clarity Matrix G3 LCD Video Wall System Installation Guide Page | 144...
-
Page 145: Scheduling
Fast Start power mode is considered 24 hours per day for both the RPS and the VC and Low Power mode is still considered 24 hours per day for an RPS. 24 hours per day will allow for an approximate 10 year lifecycle. Clarity Matrix G3 LCD Video Wall System Installation Guide Page | 145 020-1339-00H... -
Page 146: Mobile Device Access
Mobile Device Access Mobile Device Access Access to the video wall’s basic functions is available through any mobile device on the same network as the system. Clarity Matrix G3 LCD Video Wall System Installation Guide Page | 146 020-1339-00H... - Page 147 Click ON or OFF will place the system in the Standby Mode for the system. Selecting either ON or OFF or clicking anywhere off the window will remove the window from the screen. Clarity Matrix G3 LCD Video Wall System Installation Guide Page | 147 020-1339-00H...
- Page 148 When selecting the brightness button, a window with a slider to increase or decrease the brightness. The slider will adjust the brightness in increments of 10. Clicking anywhere off the slider will remove this window. Clarity Matrix G3 LCD Video Wall System Installation Guide Page | 148 020-1339-00H...
-
Page 149: Specifications
Landscape (only) +/- 10° Maximum stack height Unlimited (landscape/portrait) Unlimited landscape Rear clearance required None Aspect ratio 16:9 (landscape) 9:16 (portrait) 16:9 (landscape) Backlight life 50,000 (half brightness) Clarity Matrix G3 LCD Video Wall System Installation Guide Page | 149 020-1339-00H... - Page 150 Landscape or Portrait, Max vertical tilt of +/- 10° Maximum stack height Unlimited (landscape/portrait) Rear clearance required None Aspect ratio 16:9 (landscape) 9:16 (portrait) Backlight life 50,000 (half brightness) Clarity Matrix G3 LCD Video Wall System Installation Guide Page | 150 020-1339-00H...
- Page 151 200’/60m; (6561’/2km with STP CAT6a cable; extender extender) using single mode fiber Video Output Ports Height 1.7”/44mm Width 19”/483mm Rack mount Depth 10.2”/260mm No cables Weight 8lbs/3.6kg Clarity Matrix G3 LCD Video Wall System Installation Guide Page | 151 020-1339-00H...
- Page 152 LX/MX55M, MX/LX55X2 (Sequential) 800:1 1100:1 (Dynamic) 20000:1 30000:1 Brightness Uniformity Viewing Angle, horizontal & vertical unless otherwise noted below ±178° LX46U-3D (Vertical View Angle @ 20% Cross Talk) ±16° Clarity Matrix G3 LCD Video Wall System Installation Guide Page | 152 020-1339-00H...
- Page 153 Blue (x,y) 0.152, 0.060 White (x,y) 0.277, 0.294 LX46U-3D LCD module Red (x,y) 0.640, 0.330 Green (x,y) 0.300, 0.600 Blue (x,y) 0.150, 0.060 White (x,y) 0.275, 0.298 Clarity Matrix G3 LCD Video Wall System Installation Guide Page | 153 020-1339-00H...
- Page 154 MX55U, MX55X, LX55U, MX46U, 10,000K LX46U, LX55X, MX46X, LX46X MX55M, LX55M, MX55X2, LX55X2 9300K Number of colors 16.7M Native resolution (all 46” and 55” 1920 x 1080 pixels models) Clarity Matrix G3 LCD Video Wall System Installation Guide Page | 154 020-1339-00H...
- Page 155 No Fan Video Controller 45dBA Altitude (barometric pressure) 2km/6.7kft Video Controller 3km/10kft Humidity operating, LCD 80% R.H. 20% R.H. non-condensing operating, Video Controller 80% R.H. 20% R.H. Clarity Matrix G3 LCD Video Wall System Installation Guide Page | 155 020-1339-00H...
-
Page 156: Signal Compatibility
VESA DMT 1152x864 67.5 VESA DMT 1152x864 84.999 77.094 121.5 VESA DMT 1280x768 49.929 39.593 65.25 VESA CVT 1280x768 47.4 68.25 VESA DMT 1280x768 47.776 79.5 VESA CVT Clarity Matrix G3 LCD Video Wall System Installation Guide Page | 156 020-1339-00H... - Page 157 VESA CVT-R 1920x1200 49.932 61.816 158.25 VESA CVT 1920x1200 59.95 74.038 VESA CVT-R 2560x1440 88.79 241.5 VESA CVT-R 2560x1600 98.76 268.627 VESA CVT-R 3840x2160 52.438 209.75 VESA CVT-R Clarity Matrix G3 LCD Video Wall System Installation Guide Page | 157 020-1339-00H...
- Page 158 VESA CVT-R 1920x4320 109.28 227.29 VESA CVT-R 1920x4320 131.43 273.37 VESA CVT-R 1920x4320 221.1 459.88 VESA CVT-R 1920x4320 266.58 554.48 VESA CVT-R 3840x1080 26.38 105.5 VESA CVT-R Clarity Matrix G3 LCD Video Wall System Installation Guide Page | 158 020-1339-00H...
- Page 159 VESA CVT-R 5760x3240 81.95 485.14 VESA CVT-R 5760x3240 98.58 583.59 VESA CVT-R 7680x1080 26.38 206.78 VESA CVT-R 7680x1080 27.48 215.4 VESA CVT-R 7680x1080 32.97 258.48 VESA CVT-R Clarity Matrix G3 LCD Video Wall System Installation Guide Page | 159 020-1339-00H...
- Page 160 268.627 VESA CVT-R 3840x2160 52.438 209.75 VESA CVT-R 3840x2160 54.625 218.5 VESA CVT-R 3840x2160 65.688 262.75 VESA CVT-R 3840x2160 110.55 VESA CVT-R 3840x2160 133.32 533.25 VESA CVT-R Clarity Matrix G3 LCD Video Wall System Installation Guide Page | 160 020-1339-00H...
- Page 161 28.125 74.25 SMPTE 274M, CEA- 861-E 1080p 33.75 74.25 SMPTE 274M, CEA- 861-E 1080p 56.25 148.5 SMPTE 274M, CEA- 861-E 1080p 67.5 148.5 SMPTE 274M, CEA- 861-E Clarity Matrix G3 LCD Video Wall System Installation Guide Page | 161 020-1339-00H...
- Page 162 SMPTE ST 2084, HDMI 2.0b * 1080i motion adaptive resolution available on HDMI input 1 only. HDMI 2, 3, and 4 inputs support an enhanced BOB algorithm. Clarity Matrix G3 LCD Video Wall System Installation Guide Page | 162 020-1339-00H...
-
Page 163: Input Minimum Sync And Blanking Specifications
64 (tri-level sync) Sync front porch width 1% of HRes 1 line Note: The following illustration shows the timing characteristics for the Input Sync, Front Porch and Back Porch. Clarity Matrix G3 LCD Video Wall System Installation Guide Page | 163 020-1339-00H... -
Page 164: Remote Power Supply Operation And Features
• Each breaker is fixed at 25A. Loads for more than a few seconds beyond this point will trip the breaker. • Only Planar branded RPSMs are rated to work in this system. • Fans within the system are internally thermally controlled. The system has been designed to nominally run at 40dB or less at 25°C (77°F), 0m (0kft). -
Page 165: Removing Shipping Support
This must be removed prior to installation. To remove, pull the front of the remote power supply forward until it snaps free. This part may be discarded. Clarity Matrix G3 LCD Video Wall System Installation Guide Page | 165 020-1339-00H... -
Page 166: Removing The Cover
Loosen the two screws holding the cover in place approximately 8-10 turns. Pinch the screws in the direction indicated by the arrows while pulling the cover out the front of the unit. Clarity Matrix G3 LCD Video Wall System Installation Guide Page | 166 020-1339-00H... -
Page 167: Installing The Rspm
Push the spring latch on the front of the RPSM to release the vent door and open as far as it will go. Slide the RPSM into the slot until it will not move any further. Clarity Matrix G3 LCD Video Wall System Installation Guide Page | 167 020-1339-00H... - Page 168 Plug in AC power to each inlet associated with the RPSM that has been installed. Note: If redundancy is not part of the configuration, this AC inlet does not need an external connection. Clarity Matrix G3 LCD Video Wall System Installation Guide Page | 168 020-1339-00H...
- Page 169 See the picture below of the connector with arrow indicating where to press. Note: Orientation of the connector is latch down so it may be difficult to see. Clarity Matrix G3 LCD Video Wall System Installation Guide Page | 169 020-1339-00H...
-
Page 170: Firmware Update
Note: After connection of all equipment, It is recommended to update the firmware to the latest revision. The latest firmware is located on the Planar Portal website http://partners.planar.com/). For more information about the firmware features, read the readme file that comes with the firmware package. -
Page 171: Power Supply Control
Another way to control or monitor the power supply is through the serial communication using the commands listed in the RPS and Video Controller RS232 User Guide using the RS232, USB or Ethernet connections. Clarity Matrix G3 LCD Video Wall System Installation Guide Page | 171 020-1339-00H... -
Page 172: Power Supply Status Indicators
‘ON’ position. DC power not active on main power connection. Power draw on connection is greater than capability. Switch automatically switched to ‘OFF’ position. Clarity Matrix G3 LCD Video Wall System Installation Guide Page | 172 020-1339-00H... - Page 173 AC power applied and good. DC power output enabled DC power output enabled, service warning non- critical issue DC output disabled, thermal shutdown Fault condition, replace module Clarity Matrix G3 LCD Video Wall System Installation Guide Page | 173 020-1339-00H...
- Page 174 Operating Temperature See Chart Below Optimal 68°F/20°C Storage Temperature -5°F to 185°F, -20°C to 85°C 0-90% RH, non-condensing Operating Altitude See Chart Below Operating Humidity 0-80% RH Non-condensing Clarity Matrix G3 LCD Video Wall System Installation Guide Page | 174 020-1339-00H...
- Page 175 Power Supply Status Indicators Clarity Matrix G3 LCD Video Wall System Installation Guide Page | 175 020-1339-00H...
-
Page 176: Clarity Matrix Fiber Video Extension Guide
General and technical information regarding fiber optics can be found here: http://www.thefoa.org. For specific fiber termination details, please reference the information supplied by the termination kit and/or fiber cable manufacturer. Clarity Matrix G3 LCD Video Wall System Installation Guide Page | 176 020-1339-00H... -
Page 177: System Architecture
The Fiber Video Extension module is the main component of the Fiber Video Extension option. It works with the Video Controller to send images to the LCD modules. The following example shows the connections for a basic video wall. Clarity Matrix G3 LCD Video Wall System Installation Guide Page | 177 020-1339-00H... -
Page 178: Supported Fiber Cable Lengths
Power Brick. Note: For longer fiber lengths up to 10km, the installer must supply SFP+ 10G single-mode transceivers (in place of the Planar supplied 2km single mode transceivers) with compatible OS1/OS2 duplex single-mode cables. Fiber Video Extension Module – Front View Air intake –... -
Page 179: Installing The Fiber Video Extension
Video Extension module for USB devices located at the panel, such as a touch sensor. Power cable (4ft) Connects the power supply module to the video controller. Clarity Matrix G3 LCD Video Wall System Installation Guide Page | 179 020-1339-00H... -
Page 180: Optional Accessories
ST® compatible connectors. Includes precision flat cleaver, 1.25 and 2.50 mm VFL ferrule adapters and all required fiber preparation, cleaning tools and materials. • Wall Power Adapter. Used when unable to power from VC or RPS. Clarity Matrix G3 LCD Video Wall System Installation Guide Page | 180 020-1339-00H... -
Page 181: Connecting Cables
Insert the transceivers into the LCD Out connections. Remove the black cap from the end of each of the transceivers. Plug one end of the fiber optic cables into the transceivers. Clarity Matrix G3 LCD Video Wall System Installation Guide Page | 181 020-1339-00H... - Page 182 The Fiber option display does not have an LED indicator to determine if communication is working between the VC and the display. Communication to the fiber video extender box can be determined by the green light on the VC. Clarity Matrix G3 LCD Video Wall System Installation Guide Page | 182 020-1339-00H...
-
Page 183: Connecting The Usb Option
Connect the touch control PC to the Fiber Video Extension module via USB (shown below). Be sure the USB cable is connected to the same Fiber Video Extension module as in step 1. Fiber Video Extension Module Clarity Matrix G3 LCD Video Wall System Installation Guide Page | 183 020-1339-00H... -
Page 184: Specifications
Operating Temperature See Chart Below Optimal 68°F/20°C Storage Temperature -5°F to 185°F, -20°C to 85°C 0-90% RH, non-condensing Operating Altitude See Chart Below Operating Humidity 0-80% RH Non-condensing Clarity Matrix G3 LCD Video Wall System Installation Guide Page | 184 020-1339-00H... - Page 185 Specifications Clarity Matrix G3 LCD Video Wall System Installation Guide Page | 185 020-1339-00H...
-
Page 186: Clarity Matrix 3D
The Clarity Matrix 3D system uses three main components: the 3D Matrix video wall, passive 3D glasses, and a workstation with a graphics card that supports row interlaced content. The first two are provided by Planar. The workstation is supplied by the customer with an appropriate graphics card. See "Graphic Card/Workstation Requirements"... -
Page 187: Passive Glasses
The circular polarized passive glasses used with the Matrix 3D are less expensive, lighter weight, and don’t require batteries. Each Clarity Matrix 3D video wall comes equipped with four pairs of passive glasses. Planar also sells additional sets of glasses. Contact a sales representative for more information. Cleaning Passive Glasses It is recommended that a dry microfiber cloth be used to clean the passive glasses. -
Page 188: Source/Compatibility Requirements
First, choose the correct graphics card, and follow the recommendations from the graphic card manufacturer for which workstation to purchase. For assistance in selecting a graphics card and workstation, contact Planar’s Technical sales team for recommended solutions. Once the graphics card and workstation arrive, three things will need to be done: •... -
Page 189: Installing Optional Accessories
For each LCD module, the stud adapter bracket kit contains the following items: • 2 Adapter brackets • Four M6 nuts/washers Install the LCD mount on the adapter brackets. Clarity Matrix G3 LCD Video Wall System Installation Guide Page | 189 020-1339-00H... - Page 190 Wall Adapter Bracket Install an M6 washer/nut in each mount point of the LCD mount. Repeat steps for each LCD module that will be mounted to a wall. Clarity Matrix G3 LCD Video Wall System Installation Guide Page | 190 020-1339-00H...
-
Page 191: Cosmetic Trim
*For ERO, hold the trim about 1/8" (3mm) back from the front of the LCD. Clarity Matrix G3 LCD Video Wall System Installation Guide Page | 191 020-1339-00H... -
Page 192: Planar's Technical Support Website
2D drawings of system components and installation parameters. Downloading Additional Documentation For more technical information, visit https://partners.planar.com. This site is for verified partners and requires a username and password for access. Enter your login and password information. Navigate to the Clarity Matrix product page. -
Page 193: Information
Industry Canada (ICES-003): This Class A digital apparatus complies with Canadian ICES-003. Cet appareil numérique de la classe A est conforme à la norme NMB-003 du Canada. Any changes or modifications to the display not expressly approved by Planar could void the user's authority to operate this equipment. -
Page 194: Index
78 barometric pressure, 155 component baseline display, 129 heat load, 47 basic power requirements, 47 configuration, 114 configuration connections example, 19 basic steps, 114 before you begin Clarity Matrix G3 LCD Video Wall System Installation Guide Page | 194 020-1339-00H... - Page 195 NOT to handle the LCDs, 15 configuring, 52 installing first row, 96 hardware limitations, 52 installing subsequent rows, 106 setting up, 52 mounting structure, 22 Clarity Matrix G3 LCD Video Wall System Installation Guide Page | 195 020-1339-00H...
- Page 196 155 LCD module, 155 Video Controller, 155 optical specifications, 152 temperature optional accessories, 43 of LCD, 140 installing, 189 operating, 155 optional stud adapter bracket, 189 Clarity Matrix G3 LCD Video Wall System Installation Guide Page | 196 020-1339-00H...
- Page 197 94 before you build, 78 column base, 78 free-standing mount, 78 options, 78 standard, 78 warranty information, 2 white level, 123 white test pattern, 128 Clarity Matrix G3 LCD Video Wall System Installation Guide Page | 197 020-1339-00H...
Need help?
Do you have a question about the Clarity Matrix G3 and is the answer not in the manual?
Questions and answers