Table of Contents
Advertisement
Quick Links
Important
When wiring the temperature sensor please make sure that the coloured wires are wired up to the
•
correct terminals as follows: Red (+) to 4, Black (-) to 5 and Yellow (V) to 6.
Do not over load the device's output Relay. Its maximum values are: 220v, 10A, 2200 watts.
•
Care must always be taken when working with electricity.
•
Specifications
Humidity measuring range: 1% to 99%RH
Humidity controlling range: 10% to 99%RH
Power supply: 220V AC ± 10%/-15%
Relay Output Capacity: 10A, 220V AC MAX
Operating Environment Temperature: 0c-60c
Operating Relative humidity 20% to 85%
Resolution: 1%RH
Sensor Size (Approx): Cable Length 2 metre, Sensor Head 4.6 x 2.7 x 1.3 cm
Overview
The DHC-100+ works as either a humidifying or dehumidifying controller depending on how it is setup.
The unit will display the current humidity unless the user has entered one of the Parameter Menus to change
any of the settings.
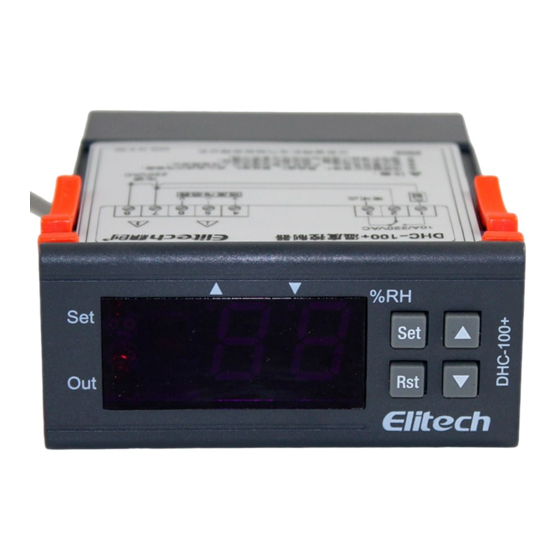
The following describes the diagram of the front panel pictured above.
Set Indicator: Will light when the user has entered one of the Parameter Menus.
•
Out indicator: Flashing = Time Delay is in force. Continuously Light = Output Relay is operating.
•
Increase & Decrease Indicator: This indicates which mode the unit is operating in. If the Decrease
•
Indicator is lit then the unit is working as a Dehumidify Unit or if the Increase Indicator is lit it would be
operating as a Humidifying unit.
Wiring
Please use the following wiring diagram to wire your devices for items that require 220v to 240v.
IT'S VERY IMPORTANT THAT THE SENSOR IS WIRED PROPERLY USING THE DIAGRAM BELOW
OTHERWISE THIS WILL DAMAGE THE SENSOR. Red (+) to 4, Black (-) to 5 and Yellow (V) to 6.
Please note that the Output Relay (1 & 2) only requires to cut the live (hot) wire when turning the connected
devices on and off. The Output Relay does not require a Neutral (Cold) wire.
When the Output Relay is not activated the terminals 2 & 3 are connected so that terminal no. 3 is live instead.
If an earth is required this should be wired up separately perhaps via a terminal block.
DHC-100+ Instructions
Product Size: 34.5 X 75 X 85.5mm
Installing Hole/Panel Cut Out Size: 29 X 70mm
Accuracy: ±5%RH (10%RH to 95%RH at 25c)
Sensor operation temperature range: -30c to 80c
Sensor Extended Stability:0.5%RH/yr
Power consumption: <3W
Front Panel Protection: IP54
Advertisement
Table of Contents

Related Manuals for Elitech DHC-100+


Summary of Contents for Elitech DHC-100+
- Page 1 DHC-100+ Instructions Important When wiring the temperature sensor please make sure that the coloured wires are wired up to the • correct terminals as follows: Red (+) to 4, Black (-) to 5 and Yellow (V) to 6. Do not over load the device’s output Relay. Its maximum values are: 220v, 10A, 2200 watts. •...
- Page 2 Operating Instructions Parameter Overview The 2 main settings on the unit are the Set Point and the Difference Parameters. Set Point: indicates what midway humidity level the unit is to achieve. Difference: The point away from the Set Point that the Output Relay should start or stop operating. The difference value is the top and bottom range that you wish the unit to try and maintain.
- Page 3 How to amend a Parameter Setting When you enter one of the Menus as described above you will be presented with the first setting to be updated. By pressing the UP and DOWN keys you can scroll through each one of the Parameter Setting Codes.
- Page 4 Sensor Attributes Explained (B1 to K2) Each DHC-100+ unit is pre set with the sensor that has been attached to it as each sensors attributes are individual to that sensor. This makes for a more accurate reading and allows users to replace the sensor with another compatible type in the future but still allows the DHC-100+ to remain accurate.
Need help?
Do you have a question about the DHC-100+ and is the answer not in the manual?
Questions and answers