Advertisement
Item # CL-FS-696-0/CL-FS-696-1/
CL-FS-696-2/CL-FS-696-3/CL-FS-696-4
Model # SP6960
USER MANUAL
QUESTIONS, PROBLEMS, MISSING PARTS?
BEFORE RETURNING TO THE STORE, CALL CUSTOMER SERVICE
8 A.M. - 5 P.M., CST, MONDAY - FRIDAY
THANK YOU
We appreciate the trust and confidence you have placed in Country Living
through the purchase of this electric fireplace
. We strive to
TM
continually create quality products designed to enhance your home. Visit us online to see our full line of products available for your home
improvement needs. Thank you for choosing Country Living !
TM
Advertisement

Related Manuals for Country Living SP6960

Summary of Contents for Country Living SP6960
- Page 1 BEFORE RETURNING TO THE STORE, CALL CUSTOMER SERVICE 8 A.M. - 5 P.M., CST, MONDAY - FRIDAY THANK YOU We appreciate the trust and confidence you have placed in Country Living through the purchase of this electric fireplace . We strive to continually create quality products designed to enhance your home.
-
Page 2: Table Of Contents
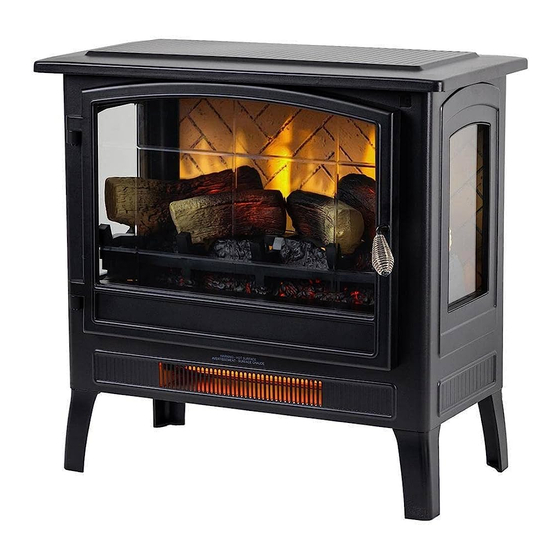
Table of Contents • GENERAL INFORMATION Package Contents • ASSEMBLY, WARRANTY & OPERATIONS Assembly Instructions 3 - 4 Safety Information 5 - 6 Warranty Operating Instructions 7 - 9 FCC/IC Information Care and Maintenance 10 - 11 Troubleshooting ATTENTION: Find the location for the electric stove that is protected from direct sunlight. •... - Page 3 Assembly Do not fully tighten screws during assembly. Only tighten when all parts are installed in place. Parts list Extra hardware is notated in ( ) . Stove Screw x 12+(1) Knob x 1 Assembly Part C Part B Part A...
- Page 4 Assembly(continued) Do not fully tighten screws during assembly. Only tighten when all parts are installed in place. Installation Part C Part D Part C Part D...
-
Page 5: Safety Information
Important Safety Instructions Please read and understand this entire manual before attempting to 15. This appliance has hot and arcing or sparking parts inside. assemble, operate or install the product. When using electrical appliances, basic precautions should always be used as a drying rack for clothing. Christmas stockings or decorations should not be hung on the unit. -
Page 6: Warranty
Important Safety Instructions (continued) ELECTRICAL CONNECTION □ A 15-amp, 120-volt, 60 Hz circuit with a properly grounded outlet is required. Prefe rably, cause the circuit breaker to trip or the fuse to blow when the heater is in operation. The stove. -
Page 7: Operating Instructions
Operation PRODUCT SPECIFICATIONS Voltage 120 VAC, 60 Hz Amps 11.7 amps Watts 1400 watts Power Heater temperature Display Timer Flame brightness Flame color Power Timer Heater temperature Flame brightness... - Page 8 Operation (continued) Power Button Flame Brightness Button □ This button controls the brightness of the flame effect with □ Press this button to control the main p ower (ON/OFF) settings at High, Medium, and Low. of the unit. □ Press the button to scroll through the flame brightness □...
-
Page 9: Fcc/Ic Information
Operation (continued) Timer Button □ The timer setting should be used to set the countdown for the unit’s main power. □ Press the Timer button to adjust the timer setting cycle from 0 hours (OFF) up to 9 hours (0H - 30min - 1H - 2H - 3H - 4H - 5H - 6H - 7H - 8H - 9H). -
Page 10: Care And Maintenance
Care and Maintenance □ Make sure the unit is turned OFF and is unplugged, and the heating elements of heater are cool whenever you are cleaning the heater. □ Clean the metal trim using a water-dampened soft, clean cloth. DO NOT use brass polish or household cleaners, as these products will damage the metal trim. - Page 11 Care and Maintenance (continued) Disposal of Used Batteries A battery may contain hazardous substances that could endanger the environment and human health. □ This symbol marked on the battery and/or packaging indicates that a used battery shall not be treated as municipal waste. Instead, it shall be left at the appropriate collection point for recycling.
-
Page 12: Troubleshooting
Troubleshooting Problem Possible cause Solution No power. Logs The unit does not have Check that unit is plugged into a standard 120 V do not glow. power. outlet. Then make sure power is set at “ON” position. E1 displayed on Unplug unit, wait 5-10 minutes, then the sensor will The overheat sensor has control panel with... - Page 13 Questions, problems, missing parts? Before returning to the store, call Customer Service 8 a.m. - 5 p.m., CST, Monday - Friday, 877-430-0703 EMAIL: resolutions@electricfireplacesdirect.com Retain this manual for future use.
Need help?
Do you have a question about the SP6960 and is the answer not in the manual?
Questions and answers
After power interruptions my model SP6964 will not turn on. Is there a fuse that could be replaced?