Table of Contents
Advertisement
Quick Links
Advertisement
Table of Contents

Related Manuals for Denver CAT-132


Summary of Contents for Denver CAT-132
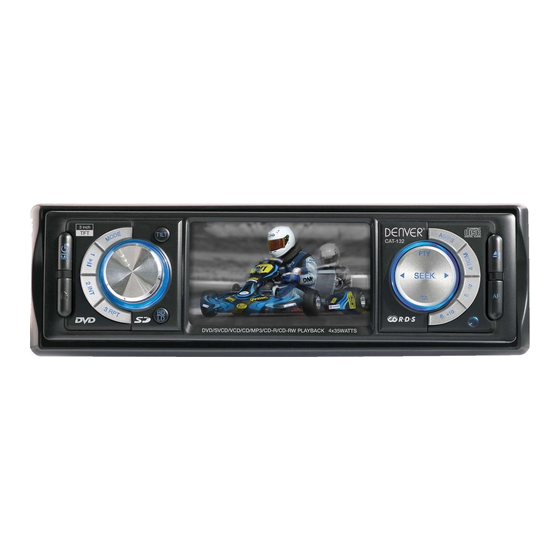
- Page 1 CAT-132 2 16 INSTRUCTION MANUAL Car Stereo DVD/SVCD/VCD/CD/MP3/MP4 Player with PLL FM Stereo Radio Radio Data System (1-3) (4-6) 3 Inch TFT-LCD Display SD/MMC Card Input Slide Down/Detachable Front Panel RESET...
-
Page 2: Before You Begin
BEFORE YOU BEGIN PRECAUTIONS: CAUTION: USE OF CONTROLS OR ADJUSTMENT OR PERFORMANCE OF PROCEDURES OTHER THAN THOSE SPECIFIED HEREIN MAY RESULT IN HAZARDOUS RADIATION EXPOSURE. THE USE OF OPTICAL INSTRUMENTS WITH THIS PRODUCT WILL INCREASE EYE HAZARD. • Keep this manual handy as a reference for operating procedures and precautions. • Always keep the volume low enough so you can hear sounds outside of the car. • Protect this product from moisture. -
Page 3: Installation
INSTALLATION PRECAUTIONS • Choose the mounting location carefully so that the unit will not interfere with the normal driving functions of the driver. • Avoid installing the unit where it would be subject to high temperatures, such as from direct sunlight or hot air from the heater, or where it would be subject to dust, dirt or excessive vibration. • Use only the supplied mounting hardware for a safe and secure installation. • Be sure to remove the front panel before installing the unit. NOTE : Inclination angle for car radio installation must not exceed 30˚ otherwise the front panel will not open. Release screw and bracket 182mm 53mm Bend these NOTE: Keep the release key in the safe place as you may need it in future to remove the unit from the car. claws, if necessay Detaching and attaching the front panel The front panel of this unit can be detached in order to prevent the unit from being stolen. FOLDING DOWN AND DETACHING/ATTACHING THE FRONT PANEL Before detaching the front panel, be sure to press the button (1) OFF first. Then press the button and detach the panel by pulling it towards you as illustrated. -
Page 4: To Support The Unit
TO SUPPORT THE UNIT 1. UNIT 2. RELEASE CASE 3. DASH BOARD Dashboard 4. HEX NUT 5. LOCK WASHER 6. PLAIN WASHER 7. CAR BODY 8. REAR SUPPORT STRAP 9. TAPPING SCREW 10. M5 X 15 HEX BOLT WIRE CONNECTION IN / OUT CONNECTOR Video Out (Yellow) : Yellow (Plug) DVD Audio Out (GRAY) Rear : White (L) Red (R) Connect to external A/V system to display Connect this wire to rear seat A/V monitor system to enjoy DVD movie Video In (Black) : Yellow (Plug) Connect to external Video equipment Audio Out (Front): White (L) Red (R) -
Page 5: Maintenance
DRIVING WITH VIDEO DISPLAY By following the installation below, video will always be shown on LCD screen no matter the car is in motion or not. Steps: Connect the GRAY wire to the WHITE wire. INSTALLING REAR CAMERA FOR PARKING/REVERSE MOTION You can install an separate camera at the car rear end so when doing parking or reverse motion, the unit will automatically switch the video to the rear camera to guide the driver. To rear camera video out To rear camera video out To reverse gear control switch To reverse gear control switch Steps: 1. Connect the Rear Camera IN plug to the rear camera’s video out plug. 2. C onnect the RED wire to “REVERSE” gear control switch. - Page 6 LOCATIONS OF PARTS (MAIN UNIT) 2 16 2 16 2 16 2 16 (1-3) (4-6) (1-3) (4-6) 1. POWER ON/OFF ( ) / MUTE 2. SELECT FUNCTION BUTTON 3. PRESET STATIONS (1,2,3,4,5,6) 4. ‘AF’ FUNCTION BUTTON (ALTERNATIVE FREQUENCIES) 5. ‘TA’ FUNCTION BUTTON (TRAFFIC ANNOUNCEMENT) 6. ‘PTY’ FUNCTION (PROGRAM TYPE) RESET 7. LOUDNESS BUTTON (LD) RESET 8. MODE BUTTON (MODE) (1-3) 9. BAND BUTTON (BD) (1-3) 10. CD TRACK / SEARCH BUTTON ( 11. AUTO SEEK TUNING ( 12. MUTE BUTTON (MU)
-
Page 7: Power On/Off
LOCATIONS OF PARTS (REMOTE CONTROL) 1. POWER ON/OFF 2. MODE 3. PLAY/PAUSE 4. TITLE 5. SELECT 6. SEEK+/SEEK- / CD TRACK/SEARCH Mode 7. VOL +/VOL- 8. GOTO Eject Dual Tilt Title 9. EJECT 10. AUDIO 11. ENTER Sub-T Setup Menu 12. NAVIGATION 13. AUTO SEEK / PRESET SCAN / REPEAT Enter Angle 14. RANDOM / BAND / LOUDNESS 15. DUAL... -
Page 8: General Operations
GENERAL OPERATIONS Turning the unit ON/OFF ( Press “ ” button to turn on unit. To turn off, press and hold the button again. Selecting a source (MODE) Press MODE repeatedly to switch between TUNER, AUX, SD/MMC and CD/DVD mode. Loading a Disc 1. Press EJ to open the front panel 2. Insert a disc into the disc loading slot Ejecting a Disc Press EJ button to eject disc Adjusting Volume • Head Unit: Rotate VOL knob right or left to increase or decrease volume. -
Page 9: Listening To Radio
LISTENING TO RADIO Band (BD) Pressing this key repeatedly will toggle cyclically between each band. FM1---FM2---FM3. LOCAL (Loc) Press Loc button on remote control and tuning search will stop only at strong stations. Stereo / Mono (ST) Press ST button on remote control to switch between stereo and mono sound for FM radio reception. When reception of an FM station is weak, listening quality can be improved by switching to mono sound. Automatic or Manual tuning (SEEK UP / SEEK DN) When pressed short, these keys are operated as MANUAL tuning mode. When pressed longer than 1 sec., they are operated as AUTOMATIC tuning mode. Auto Seek/Preset scan (AS/PS) Preset Scan (PS) - By pressing shortly, the radio plays each preset station for 5 seconds. Auto Seek (AS) - By pressing longer than 1 sec, auto seek is activated. The 6 strongest stations are preset and stored in the corresponding preset number. When Auto Seek operation is finished, the radio executes the preset scan. Storing and Recalling Frequencies If you press any of the NUMBER (1-6) you can easily store up to six broadcast frequencies for later recall with the touch... - Page 10 Tips: To select track 3, press 3. To select 13, press and hold 10+ follow by 3. To select 23, press and hold 10+ (2 times) follow by 3. Random Playback Press RDM during playback to play the tracks in random/shuffle order. Press it again to cancel. Stopping Playback 1. Press Stop on remote control during playback to stop playback. That position is stored in memory. 2. Press to continue. Playback starts from the position at which it was stopped. 3. To permanently stop playback, press Stop button twice.
-
Page 11: Playing Dvd/Video Cd/Mp4
Program Playback You can set which tracks to play according to your desired sequence using the PROG function. 1. Press and hold PROG button on the remote control. 2. Enter the track number besides the memory location. 3. When all tracks have been programmed, select PLAY and press Enter. Program playback will start. 4. To clear all program entries, press Prog and select CLEAR. 5. To stop program playback, press Stop button twice. SD/MMC Card Input 1. Power off head unit. 2. Press button to open the front panel. 3. Insert the SD/MMC card into the card slot (25). 4. Attach front panel back to the head unit. Turn on unit. Playback starts automatically. PLAYING DVD/VIDEO CD/MP4 Playback 1. Insert a disc. When the disc offers a menu, the menu is displayed. When a disc already inserted, press MODE to switch to disc mode. 2. On DVDs and video CDs with playback control (PBC), menu screens may appear automatically. If this happens, perform the operation described below to start playback. -
Page 12: Customizing Audio / Video Settings
Changing audio language during playback (Multi-audio) DVDs can provide audio playback with different languages and different systems (Dolby Digital, DTS etc.). With DVDs featuring multi-audio recordings, you can switch between languages/audio systems during playback. VCD can provide different audio languages usually divided into left and right channels. 1. To choose different audio, simply press Audio on the remote control repeatedly during playback. Note: With some DVDs, switching between languages/audio systems may only be possible using a menu display. You can also switch between languages/audio systems using SET-UP MENU. Changing the subtitle language during playback (Multi-subtitle) –... -
Page 13: Setting Up The Dvd Player
VIDEO SETUP 1. Press and hold VOL knob to enter VIDEO setup. Selected item will be highlighted. You can set BRIGHTNESS, CONTRAST, SATURATION, HUE, SHARPNESS. 2. Press button to select item. Rotate VOL knob to make adjustments. 3. Press and hold VOL knob to exit settings. Note: • N means Negative; P means Positive • Depending on model’s feature, some items may not show on screen. SETTING UP THE DVD PLAYER You can flexibly customize the unit to suit your preference. You can set the language and other video and audio settings so when playback starts it will always use your preferred settings. -
Page 14: Technical Specifications
All cities have established collection points, where electric and electronic equipment and batteries can either be submitted free of charge at recycling stations and other collection sites, or be collected from the households. Additional information is available at the technical department of your city. ALL RIGHTS RESERVED COPY RIGHT DENVER ELECTRONICS A/S E 13 024174 www.denver-electronics.com...
Need help?
Do you have a question about the CAT-132 and is the answer not in the manual?
Questions and answers