Table of Contents
Advertisement
Quick Links
Advertisement
Table of Contents

Subscribe to Our Youtube Channel
Related Manuals for Bosch HMG936A 1 Series


Summary of Contents for Bosch HMG936A 1 Series
- Page 1 Oven HMG936A.1 User manual and installation instructions [en]...
-
Page 2: Table Of Contents
en Safety Futher information and explanations are available on- line: Table of contents INSTALLATION INSTRUCTIONS ....... 42 29.1 General installation instructions....... 42 INFORMATION FOR USE 1 Safety Safety .............. 2 Preventing material damage ....... 6 Observe the following safety instructions. Environmental protection and saving en- 1.1 General information ergy ............... -
Page 3: Safety
Safety en When the cooking compartment is hot, any al- equate experience and/or knowledge, coholic vapours inside may catch fire. The ap- provided that they are supervised or have been instructed on how to use the appliance pliance door may spring open. Hot steam and jets of flame may escape. - Page 4 en Safety 1.5 Microwave WARNING ‒ Risk of electric shock! Incorrect repairs are dangerous. CAREFULLY READ THE IMPORTANT SAFETY ▶ Repairs to the appliance should only be INSTRUCTIONS AND KEEP THEM SAFE FOR FUTURE USE carried out by trained specialist staff. ▶ Only use genuine spare parts when repair- WARNING ‒ Risk of fire! ing the appliance.
- Page 5 Safety en sausages, may burst. Before heating, prick WARNING ‒ Risk of scalding! the peel or skin. There is a possibility of delayed boiling when Heat is not distributed evenly through baby a liquid is heated. This means that the liquid food. reaches the boiling temperature without the ▶...
-
Page 6: Preventing Material Damage
en Preventing material damage Never operate the appliance if the cooking Microwave energy will escape from appli- compartment door or the door seal is dam- ances that do not have any casing. aged. Microwave energy may escape. ▶ Never remove the casing. ▶... -
Page 7: Environmental Protection And Saving En- Ergy
Environmental protection and saving energy en Operating the appliance without food in the cooking If you prepare microwave popcorn at a microwave compartment may lead to overloading. power level that is too high, the door pane may crack Do not switch on the microwave unless there is food due to overloading. -
Page 8: Operating Modes
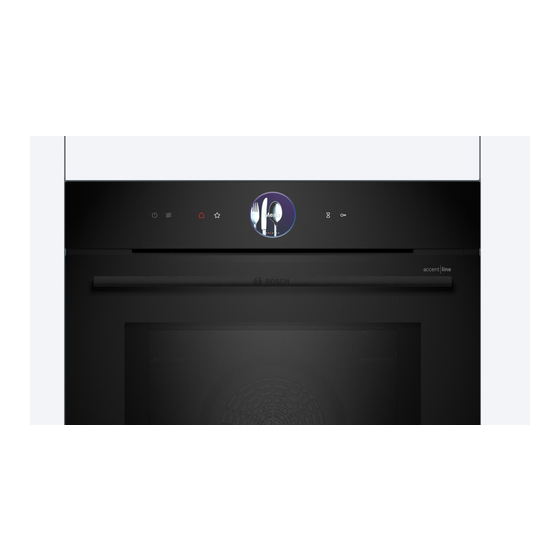
en Familiarising yourself with your appliance 4 Familiarising yourself with your appliance 4.1 Control panel 4.3 Display You can use the control panel to configure all functions The display is divided into different areas. of your appliance and to obtain information about the Digital setting ring operating status. - Page 9 Operating modes en Note: A blue marking "new" or a blue dot on a function When the appliance is in operation, the self-cleaning indicates that a new function, a new favourite or an up- surfaces absorb splashes from roasting or grilling and date was downloaded to your appliance using the break them down.
- Page 10 en Operating modes 5.1 Types of heating To ensure that you always find the right type of heating When you select a type of heating, the appliance sug- to cook your food, we explain the differences and ap- gests a suitable temperature or setting. You can use plications below.
-
Page 11: Accessories
Accessories en Note: Due to thermal inertia, the temperature that is 5.2 Temperature displayed may differ slightly from the actual temperat- With most types of heating , you can read the current ure inside the cooking compartment. temperature in the cooking compartment from ap- prox. 30 °C and the set temperature side-by-side on Residual heat indicator the display during heating, e.g. 120|210 °C. - Page 12 Turn the accessories so that the notch is at the your appliance in our brochures and online: rear and is facing downwards. www.bosch-home.com Insert the accessory between the two guide rods for Accessories vary from one appliance to another. When a shelf position.
-
Page 13: Before Using For The First Time
Before using for the first time en 7 Before using for the first time Configure the settings for initial start-up. Clean the ap- 7.2 Cleaning the appliance before using it pliance and accessories. for the first time Before using the appliance to cook food for the first 7.1 Performing initial start-up time, you must clean the cooking compartment and ac- After connecting the appliance to the power supply,... - Page 14 en Basic operation To change the setting values, use the digital setting Change the temperature with the setting ring. ring: To confirm the change, press on the display. Swipe over the setting ring clockwise or anti- a The change is applied. ‒...
-
Page 15: Rapid Heating
Rapid heating en 9 Rapid heating To save time, rapid heating can shorten the preheat- Set a suitable type of heating and a temperature of ing time for set temperatures over 100 °C. at least 100 °C. Rapid heating is possible for the following types of Rapid heating automatically switches off at temper- heating: atures of 200 °C and above. -
Page 16: Microwave
en Microwave If required, use to reset the setting value. 10.3 Setting the timer To confirm the set time, press on the display. The timer runs independently during the operation. You Press to start the operation. can set the timer for up to 24 hours. - Page 17 Microwave en You can switch off this automatic drying function in the Cookware when adding microwave to an operating basic settings. mode If you switch on the microwave for another operating → "Basic settings", Page 21 mode, metal is also an option, in addition to WARNING ‒ Risk of burns! microwave-safe cookware and accessories: At the highest settings in microwave only mode, the...
-
Page 18: Ventilation Function Crisp Finish
en Ventilation function "Crisp Finish" ¡ → "Preventing material damage", Page 6 a When the time has elapsed, a signal sounds. A noti- fication appears on the display confirming that the ¡ → "Microwave output settings", Page 11 operation has finished. ¡ → "Cookware and accessories with microwave", Once the cooking time has elapsed: Page 16 If required, you can select other settings and re-... -
Page 19: Dishes
Dishes en Press " Crisp Finish". a The operation continues without the ventilation func- a The symbol changes back to white. tion. 13 Dishes The "Dishes" operating mode helps you to use your ap- You can adjust the preset temperature and the cooking pliance to prepare different meals by selecting the op- time. - Page 20 en Favourites 13.4 Setting a dish a The appliance starts to heat and the time counts down. Press "Dishes" in the menu. a Once the dish is ready, a signal sounds. The appli- Press the required category. ance stops heating. Press the required food. Once the cooking time has elapsed: Press the required dish.
-
Page 21: Favourites
Childproof lock en 15 Childproof lock You can secure your appliance to prevent children a When the appliance is switched on, lights up. from accidentally switching it on or changing the set- When the appliance is switched off, does not light tings. -
Page 22: Home Connect
en Home Connect To exit the basic settings, use to go back to the Factory set- Selection main menu or switch off the appliance using . tings a The changes are saved. Factory set- ¡ Restore Note: Your changes to the basic settings will be re- tings tained even after a power failure. - Page 23 Home Connect en Basic setting Possible settings Explanation Home Connect as- Start the assistant You can connect your appliance to the Home Connect app via sistant Disconnect the Home Connect assistant. Note: If you are using the Home Connect assistant for the first time, only the "Start assistant"...
- Page 24 en Cleaning and servicing ¡ The current software and hardware version of your 17.6 Data protection appliance. Please see the information on data protection. ¡ Status of any previous reset to factory settings. The first time your appliance is registered on a home This initial registration prepares the Home Connect network connected to the Internet, your appliance will functions for use and is only required when you want to...
-
Page 25: Cleaning And Servicing
Cleaning and servicing en Area Suitable cleaning agents Information Stainless steel in- ¡ Stainless steel cleaner Discolouration can be removed using stainless steel cleaner. terior door frame Do not use stainless steel care products. Door handle ¡ Hot soapy water To avoid permanent stains, immediately remove any descaling agent that gets onto the surface. -
Page 26: Cleaning Aid
en Cleaning aid – From the glass cover on the oven lamp ATTENTION! This prevents stains that cannot be removed. If you do not clean the self-cleaning surfaces regularly, Remove any objects from the cooking compartment. they may become damaged. The cooking compartment must be empty. If dark stains are visible on the self-cleaning sur- ▶... -
Page 27: Drying
Drying en 20 Drying To prevent residual moisture, dry the cooking compart- To use the drying function, set "Drying function". ‒ ment following microwave-only operation and after us- → "Setting the drying process", Page 27 ing the cleaning aid. Setting the drying process ATTENTION! Requirement: → "Drying the cooking compartment", If there is water on the cooking compartment floor... - Page 28 en Rails Push the front pane to the appliance until the left- WARNING ‒ Risk of serious harm to health! and right-hand hook is opposite the support . If the screws are undone, the safety of the appliance can no longer be guaranteed.
-
Page 29: Troubleshooting
Troubleshooting en Hook the rear retainers with the hook into the top 22.2 Fitting the retainers hole and push them into the bottom hole . The retainers may fall out when you detach the rails. Note: The retainers at the front differ from those at the rear. 22.3 Attaching the rails Hook the rear shelf support into the retainers at the top and bottom... - Page 30 en Troubleshooting Fault Cause and troubleshooting The appliance is not Electronics fault working. Disconnect the appliance from the power supply for at least 30 seconds by switching off the fuse. Reset the basic settings to the factory settings. → "Basic settings", Page 21 "Sprache Deutsch"...
-
Page 31: Disposal
Next time, set lower or higher values. ▶ Tip: A lot of other information about the food preparation and corresponding adjustment values can be found in the Home Connect app or on our website www.bosch-home.com. 24 Disposal 24.1 Disposing of old appliance This appliance is labelled in accord- ance with European Directive Valuable raw materials can be reused by recycling. -
Page 32: Declaration Of Conformity
2014/53/EU. A detailed Declaration of Conformity can be found on- A detailed RED Declaration of Conformity can be found line at www.bosch-home.co.uk among the additional online at www.bosch-home.com among the additional documents on the product page for your appliance. - Page 33 How it works en ¡ The recommended settings for baking in combina- ¡ Roast pieces of a similar weight and thickness. The tion with the microwave mode are for metal baking grilled food will brown evenly and will remain succu- tins. lent and juicy.
- Page 34 en How it works ¡ Place the food to be grilled directly onto the wire ¡ For cereal products, e.g. rice, use deep cookware rack. with a lid. Cereal products foam a lot during cook- ¡ To catch any liquids that drip down, place the uni- ing.
- Page 35 How it works en Food Accessories/cook- Shelf pos- Type of Temperature in Microwave Cooking ware ition heating °C/grill setting power setting time in → Page 10 in W mins Fruit tart or cheesecake Springform cake 150-170 65-85 with shortcrust pastry tin, diameter 26 cm base Fruit tart or cheesecake Springform cake...
- Page 36 en How it works Food Accessories/cook- Shelf pos- Type of Temperature in Microwave Cooking ware ition heating °C/grill setting power setting time in → Page 10 in W mins Lasagne, frozen, Uncovered cook- 200-210 35-45 600-1000 g, 4-5 cm ware deep Potato gratin, raw in- Ovenproof dish ...
- Page 37 How it works en Food Accessories/cook- Shelf pos- Type of Temperature in Microwave Cooking ware ition heating °C/grill setting power setting time in → Page 10 in W mins Millet, whole, 250 g, + Covered cookware 1. 600 1. 8-10 600 ml water 2. 180 2.
- Page 38 en How it works Immediately place the meat into the pre-warmed 28.7 Special cooking methods and other cookware in the cooking compartment. applications To ensure that the temperature in the cooking com- Information and recommended settings for special partment remains constant, keep the cooking com- cooking methods and other applications, e.g.
- Page 39 How it works en Recommended settings for Air Fry Food Accessory/cook- Shelf pos- Type of Temperature in Microwave Cooking ware ition heating °C power setting time in → Page 10 in W mins Chips Universal pan 180-200 15-20 Potato pockets, filled Universal pan ...
- Page 40 en How it works ¡ Make sure that you do the following when you are WARNING ‒ Risk of scalding! warming up baby food: There is a possibility of delayed boiling when a liquid is – Place bottles on the wire rack without the teat or heated.
- Page 41 How it works en Keeping food warm ¡ To prevent the food from drying out, you can cover Tips for keeping food warm ¡ Do not keep food warming for longer than 2 hours. ¡ Using the "Keep warm" heating function prevents ¡...
-
Page 42: General Installation Instructions
en Installation instructions Grilling Recommended settings for grilling Food Accessories/cook- Shelf pos- Type of Temperature in Microwave Cooking ware ition heating °C/grill setting power setting time in → Page 10 in W mins Toasting bread Wire rack Do not preheat the appliance. Microwave cooking ¡... - Page 43 Installation instructions en ¡ Ventilation slots and intake openings must WARNING ‒ Risk of fire! not be covered. It is dangerous to use an extended power ¡ The safe operation of this appliance can cord and non-approved adapters. only be guaranteed if it has been installed ▶...
- Page 44 en Installation instructions ¡ Observe different national installation instructions for the hob. 29.4 Installation underneath a hob If the appliance is installed under a hob, the following The minimum worktop thickness a is based on the minimum dimensions must be adhered to (including required minimum clearance ...
- Page 45 Installation instructions en Electrically connecting an appliance without a 29.6 Corner installation protective contact plug Observe the installation dimensions and the installation Note: Only licensed specialists may connect the appli- instructions when installing in a corner. ance. Damage caused by incorrect connection is not covered under the warranty.
- Page 46 en Installation instructions For handleless kitchens with vertical bar handle strips: Attach a suitable filling piece in order to cover ‒ any sharp edges and to guarantee a safe install- ation. Pre-drill aluminium profiles to establish a screw ‒ connection ...
- Page 48 Expert advice for your Bosch home appliances, help with problems or a repair from Bosch experts. Find out everything about the many ways Bosch can support you: www.bosch-home.com/service Contact data of all countries are listed in the attached service directory.
Need help?
Do you have a question about the HMG936A 1 Series and is the answer not in the manual?
Questions and answers