Table of Contents
Advertisement
Quick Links
Advertisement
Table of Contents

Related Manuals for Bosch HMG8764 7 Series


Summary of Contents for Bosch HMG8764 7 Series
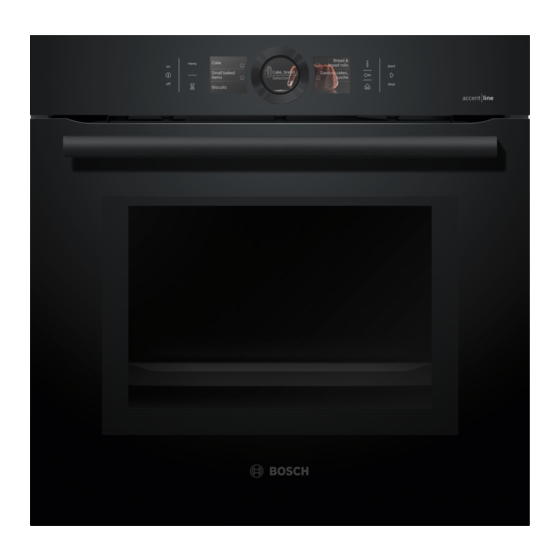
- Page 1 Oven HMG8764.7 User manual and installation instructions [en]...
-
Page 2: Table Of Contents
en Safety Futher information and explanations are available on- line: Table of contents INSTALLATION INSTRUCTIONS ....... 45 29.1 General installation instructions....... 45 INFORMATION FOR USE 1 Safety Safety .............. 2 Preventing material damage ....... 7 Observe the following safety instructions. Environmental protection and saving en- 1.1 General information ergy ............... -
Page 3: Safety
Safety en When the cooking compartment is hot, any al- equate experience and/or knowledge, coholic vapours inside may catch fire. The ap- provided that they are supervised or have been instructed on how to use the appliance pliance door may spring open. Hot steam and jets of flame may escape. -
Page 4: Preventing Material Damage
en Safety Alcoholic vapours may catch fire in the hot WARNING ‒ Risk of suffocation! cooking compartment, and the appliance Children may put packaging material over door may spring open and may fall off. The their heads or wrap themselves up in it and door panels may shatter and fragment. - Page 5 Safety en Using the appliance for anything other than its WARNING ‒ Risk of explosion! intended purpose is dangerous. This is be- Liquids and other food may easily explode cause, for instance, overheated slippers, pil- when in containers that have been tightly lows filled with grain or cereal, sponges and sealed.
- Page 6 en Safety The outside of the appliance gets very hot WARNING ‒ Risk of electric shock! when the cleaning function is in progress. The appliance uses a high voltage. ▶ Never hang combustible objects, e.g. tea ▶ Never remove the casing. towels, on the door handle. WARNING ‒ Risk of serious harm to ▶...
- Page 7 Preventing material damage en 2 Preventing material damage Fruit juice dripping from the baking tray leaves stains 2.1 General that cannot be removed. ATTENTION! When baking very juicy fruit flans, do not pack too ▶ Alcoholic vapours may catch fire in the hot cooking much on the baking tray.
-
Page 8: Environmental Protection And Saving En- Ergy
en Environmental protection and saving energy Operating the appliance without food in the cooking If you prepare microwave popcorn at a microwave compartment may lead to overloading. power level that is too high, the door pane may crack Do not switch on the microwave unless there is food due to overloading. -
Page 9: Familiarising Yourself With Your Appliance
Familiarising yourself with your appliance en 4 Familiarising yourself with your appliance 4.1 Control panel Buttons The buttons on the left- and right-hand side of You can use the control panel to configure all functions the control panel have a pressure point. Press- of your appliance and to obtain information about the ing a button will execute its function. - Page 10 en Familiarising yourself with your appliance ¡ Position indicator 4.5 Control ring If you change a value, the display ring shows you You can use the control ring to change the setting val- where you are in the selection list. The display ring ues that are shown in the display and scroll in the may be continuous or divided into segments de- touch displays.
- Page 11 Operating modes en You can remove the rails, e.g. for cleaning. For most operating modes, the lighting is switched on during operation. The lighting switches off again when → "Rails", Page 31 the operation ends. Cooling fan The cooling fan switches on and off depending on the appliance's temperature.
- Page 12 en Operating modes Symbol Type of heating Temperature What it's used for and how it works range Possible additional options Hot air eco 30–275 °C Cook selected dishes gently on one level without preheating. The fan distributes the heat from the ring-shaped heating element in the back wall evenly around the cooking compartment.
-
Page 13: Accessories
Accessories en 6 Accessories Use original accessories. These have been made espe- The accessories supplied may differ depending on the cially for your appliance. appliance model. Note: Accessories may become deformed if they get hot. Deformation has no effect on function. As the ac- cessory cools down, it will regain its original shape. -
Page 14: Before Using For The First Time
Switch your appliance off when you are not using it. ▶ The appliance will switch itself off automatically if it is a The Bosch logo appears in the display. The types of not used for a certain period of time. heating then appear. -
Page 15: Rapid Heating
Rapid heating en Press the type of heating that you want to use. a The time or residual heat indicator appears in the If you cannot see the type of heating in the touch display. displays, use the control ring to scroll though the se- lection list. -
Page 16: Time-Setting Options
en Time-setting options Press to start. Place the food in the cooking compartment. a Rapid heating starts. Cancelling rapid heating a When rapid heating has come to an end, an audible Press "Rapid heating". ▶ signal sounds. The text field shows "Off". a The text field shows "Off". -
Page 17: Microwave
Microwave en 10.4 Setting the end time a Once the start time has been reached, the appli- ance starts to heat up and the cooking time starts You can delay the time at which cooking is due to fin- counting down. ish by up to 23 hours and 59 minutes. a When the time has elapsed, a signal sounds. - Page 18 en Microwave You can switch off this drying function in the basic Cookware and ac- Information settings. cessories → "Basic settings", Page 24 Metal cookware and Metal can be used with Micro- bakeware Combi. WARNING ‒ Risk of burns! Note: Metal must be kept at At the highest settings in microwave only mode, the least 2 cm from the cooking drying function will automatically switch on an addi- compartment walls and the in-...
- Page 19 Meat probe en Possible microwave power settings are: When the food is ready, press to switch the ‒ ¡ 90 watts appliance off. ¡ 180 watts Changing the temperature ¡ 360 watts Once the MicroCombi operation has started, you can Setting MicroCombi change the temperature directly.
- Page 20 en Meat probe Press the type of heating that you want to use. Thick Insert the meat probe diagonally into the a The cooking compartment temperature is high- pieces meat from above, pushing it in as far as lighted in white. of meat possible.
- Page 21 Assist en 12.4 Forecast for the duration of the Beef Core temperature operation in °C Tenderloin or sirloin, rare 45 - 52 If your appliance is connected to Home Connect, the Tenderloin or sirloin, medium rare 55 - 62 appliance can forecast the expected duration of the baking or roasting process.
-
Page 22: Meat Probe
en Assist Recommended settings Category Foods For the recommended settings, the optimum type of Fish. Fish heating is preset. The display shows the type of heat- Side dishes, Vegetables ing. vegetables Potatoes You can adjust the preset temperature and the cooking Rice time. -
Page 23: Childproof Lock
Childproof lock en 13.5 Adjusting the dish a If your appliance is connected to Home Connect, the forecast cooking time is displayed in baking Your appliance offers you a wide range of different sensor mode. dishes. You can use the control ring to scroll through → "Forecast for the duration of the operation", the various selection lists. -
Page 24: Sabbath Mode
en Sabbath mode 15 Sabbath mode You can set a cooking time of up to 74 hours using Press "Sabbath mode". Sabbath mode. You can use top/bottom heating to If you cannot see the type of heating in the touch keep food warm between 85 °C and 140 °C during displays, use the control ring to scroll though the se- this time without having to switch the appliance on or lection list. - Page 25 Home Connect en Note: Your changes to the basic settings will be re- 16.3 Setting the time tained even after a power failure. Requirement: The appliance is switched on. Discarding changes to the basic settings Press . Press and use "Do not save" to confirm. Press "Basic settings".
- Page 26 en Home Connect Basic setting Possible settings Explanation Remote control When this function is deactivated, all you can do is view the appliance's operating status in the app. When this function is activated, you can remotely start and control the appliance. Appliance information The display shows information about the network or the appli- ...
-
Page 27: Cleaning And Servicing
Cleaning and servicing en 18 Cleaning and servicing Do not use cleaning products with a high alcohol To keep your appliance working efficiently for a long ▶ content. time, it is important to clean and maintain it carefully. Do not use hard scouring pads or cleaning ▶... - Page 28 en Cleaning function "Pyrolytic self-cleaning" Cooking compartment Area Suitable cleaning agents Information Enamel surfaces ¡ Hot soapy water Soak any heavily soiled areas and use a brush or steel wool. Leave the appliance door open to dry the cooking compartment ¡ Vinegar water after cleaning it.
- Page 29 Cleaning function "Pyrolytic self-cleaning" en 19.1 Preparing the appliance for the WARNING ‒ Risk of burns! cleaning function The cooking compartment gets very hot when the cleaning function is in progress. To achieve a good cleaning result and prevent dam- Never open the appliance door. ▶...
-
Page 30: Cleaning Assistance
en Cleaning assistance Note: While the cleaning function is running, the frame on the inside of the appliance door becomes discol- oured. This discolouration does not compromise the functionality of the appliance. Use stainless steel cleaner to remove the discolouration. 20 Cleaning assistance The cleaning assistance is a quick alternative for occa- a The appliance starts to heat and the cooking time sionally cleaning the cooking compartment. -
Page 31: Rails
Rails en 22 Rails To thoroughly clean the rails and the cooking compart- Hook the front retainers in at the bottom and ment, or to replace the rails, you can remove the rails. straighten them . 22.1 Detaching the rails WARNING ‒ Risk of burns! The shelf supports get very hot Never touch the shelf supports when hot. - Page 32 en Appliance door 23 Appliance door To clean the appliance door thoroughly, you can disas- Press the intermediate pane against the appliance semble the appliance door. with one hand while pushing the left- and right-hand retainers upwards. Do not detach the retainers ...
- Page 33 Troubleshooting en Insert the intermediate pane into the retainer at Push the front pane in at the bottom until you the bottom and push it in firmly at the top. hear it click into place. Push the left- and right-hand retainer ...
-
Page 34: Appliance Door
en Troubleshooting Fault Cause and troubleshooting "Sprache Deutsch" There has been a power cut. appears in the dis- Implement the settings for the initial configuration. ▶ play. – Language – Clock The operation does Different causes are possible. not start or is inter- Check any notifications that appear in the display. -
Page 35: Disposal
Setting values, e.g. temperature or cooking time, depend on the recipe, quantity and food. Next time, set lower or higher values. ▶ Tip: A lot of information about the food preparation and corresponding setting values can be found on our website www.bosch-home.com. 25 Disposal 25.1 Disposing of old appliance This appliance is labelled in accord- ance with European Directive Valuable raw materials can be reused by recycling. -
Page 36: Declaration Of Conformity
2014/53/EU. A detailed Declaration of Conformity can be found on- A detailed RED Declaration of Conformity can be found line at www.bosch-home.co.uk among the additional online at www.bosch-home.com among the additional documents on the product page for your appliance. - Page 37 How it works en ¡ If you do not have any suitable cookware, you can Baking on two or more levels Shelf position use the universal pan. 3 levels ¡ Baking tray Roasting in covered cookware ¡ Universal pan ¡ Use a suitable lid that seals well. ¡...
- Page 38 en How it works ¡ For cereal products, e.g. rice, use deep cookware ¡ After cooking, leave the food to rest for 2-3 minutes. with a lid. Cereal products foam a lot during cook- ing. Add liquid in accordance with the instructions 28.5 Cooking frozen products and information provided in the recommended set- ¡...
- Page 39 How it works en Food Accessory/cook- Shelf pos- Heating Temperature in Microwave Cooking ware ition function °C power setting time in → Page 11 in W mins Biscuits, 3 levels 1 pcs 5+3+1 140–160 15–30 Universal pan 2 pcs Baking tray Bread, without a tin, 750 Universal pan ...
- Page 40 en How it works Food Accessory/cook- Shelf pos- Heating Temperature in Microwave Cooking ware ition function °C power setting time in → Page 11 in W mins Fillet of beef, medium, Covered cookware 240 - 260 30 - 40 1 kg Pot-roasted beef, 1.5 kg Covered cookware ...
- Page 41 How it works en Recommended settings for desserts and compote Food Accessory/cook- Shelf pos- Heating Temperature in Microwave Cooking ware ition function °C power setting time in → Page 11 in W mins Blancmange made from Covered cookware 5 - 8 blancmange powder Yoghurt Individual moulds...
- Page 42 en How it works ¡ Stir or turn the food 1-2 times during defrosting. ¡ Once the food has defrosted, switch off the appli- ance and leave the food in the appliance for another Turn large items several times. Split the food into 10 to 30 minutes to allow the temperature to equal- smaller pieces as it defrosts.
- Page 43 How it works en Recommended settings for warming up food using the microwave mode Food Accessory/cook- Shelf pos- Heating Temperature in Microwave Cooking ware ition function °C power setting time in → Page 11 in W mins Drinks, warming up, Uncovered cook- 1 - 3 200 ml ware...
- Page 44 en How it works Recommended settings for baking Food Accessory/cookware Shelf posi- Heating Temperature in °C Cooking time tion function in mins → Page 11 Viennese whirls Baking tray 140–150 25–40 Viennese whirls Baking tray 140–150 25–40 Viennese whirls, 2 levels Universal pan ...
-
Page 45: 29.1 General Installation Instructions
Installation instructions en Recommended settings for microwave cooking Food Accessories/cook- Shelf posi- Heating Microwave power Cooking time ware tion function setting in W in mins → Page 11 Egg wash Uncovered cookware 2 1. 360 1. 20 2. 180 2. 20–25 Sponge Uncovered cookware 2 ... - Page 46 en Installation instructions ATTENTION! Carrying the appliance by the door handle could break it. The door handle cannot sup- port the weight of the appliance. ▶ Do not carry or hold the appliance by the door handle. 29.2 Appliance dimensions You will find the dimensions of the appliance here ¡...
- Page 47 Installation instructions en 29.4 Installation underneath a hob If the appliance is installed under a hob, the following The minimum worktop thickness a is based on the minimum dimensions must be adhered to (including required minimum clearance . substructure, if applicable).
- Page 48 en Installation instructions An isolating switch must be integrated into the perman- 29.6 Corner installation ent electrical installation according to the installation Observe the installation dimensions and the installation regulations. instructions when installing in a corner. Identify the phase and neutral conductors in the socket.
- Page 49 Installation instructions en For handleless kitchens with vertical bar handle strips: Attach a suitable filling piece in order to cover ‒ any sharp edges and to guarantee a safe install- ation. Pre-drill aluminium profiles to establish a screw ‒ connection ...
- Page 52 Expert advice for your Bosch home appliances, help with problems or a repair from Bosch experts. Find out everything about the many ways Bosch can support you: www.bosch-home.com/service Contact data of all countries are listed in the attached service directory.
Need help?
Do you have a question about the HMG8764 7 Series and is the answer not in the manual?
Questions and answers